Dairy-Free Pumpkin Pie
Posted Oct 18, 2018, Updated Oct 08, 2022
This post may contain affiliate links. Please read our disclosure policy.
This Homemade Dairy-Free Pumpkin Pie recipe is seriously delicious! This coconut milk pumpkin pie is creamy, perfectly sweet and loaded with cozy fall spices – a must-make Thanksgiving dessert.

This is the best pumpkin pie recipe you will ever eat, and it just so happens to be dairy-free!
Even better, you won’t find any processed ingredients (like sweetened condensed milk) in this from-scratch dairy-free pumpkin pie recipe!
The holidays can be tough for people who can’t eat dairy. Every creamy dreamy casserole and dessert is loaded with the white stuff – milk, half and half, cream, butter, etc.
And while some of us can throw caution to the wind and splurge one (or two) days out of the year, others who are severely allergic to dairy have to be vigilant , especially during the holidays.
Well, this recipe will make all your dairy-free pumpkin pie dreams come true. (Also check out this healthy sweet potato casserole, vegan pumpkin cheesecake and these cute mini vegan pumpkin pies)!

Dairy-free pumpkin pie: Ingredients & substitutions
- Coconut milk:
- Dairy-full substitution: If you do not have a problem eating dairy, this pie is also delicious when coconut milk is substituted for whole milk or half and half!
- Dairy-free substitution: You can substitute coconut milk with dairy-free creamer (unsweetened). I do not recommend using almond milk because it is much thinner and less rich than coconut milk.
- Vegan butter:
- Dairy-free substitution: If you don’t have access to vegan butter, substitute it with vegetable shortening.
- Dairy-full substitution: Again , if you do not need to avoid dairy, regular butter can be used in place of vegan butter!
- All-purpose flour: for a gluten-free pie crust, substitute an all-purpose gluten-free flour for the regular all-purpose flour!
- Pumpkin puree. Please make sure to use pumpkin puree (not pumpkin pie filling)! You can use either a 15 oz can of pumpkin puree or about 2 cups of homemade pumpkin puree. If using homemade, I recommend straining it in a coffee filter over a fine mesh strainer to remove any excess water.
- Pumpkin Pie Spice. Use store bought or make your own with this recipe: homemade pumpkin pie spice.
As always, this pie is best when following the recipe exactly as it’s written!

How to make Dairy-Free Pumpkin Pie
Let’s start by breaking down how to make this coconut milk pumpkin pie recipe step-by-step! This dairy-free pumpkin pie is made completely from scratch, but don’t let that intimidate you! It’s super easy and is ready to toss into the oven in no time!
Make the Dairy-Free Pie Crust
When baking any pie recipe with homemade pie crust, it’s important to start by making the pie crust first, because it needs to chill. Here are a few notes about making a perfect pie crust (see this comprehensive post on making the best homemade pie crust – just use dairy-free ingredients. It also includes my list of pie-crust making tools)
Use cold ingredients. Prepare ice water by measuring out cold water and tossing an ice cube (or two) in it. Chop up the vegan butter and put it in the freezer while you measure out the rest of the ingredients. Those little pockets of vegan butter make the crust extra flaky and delicious.
Use a food processor. you can do it by hand and use a pastry cutter, but a food processor makes the process so easy. The only thing to note here is that you will want to add all of the ingredients (including water) before processing, because you do not want ot over-process the pie crust.

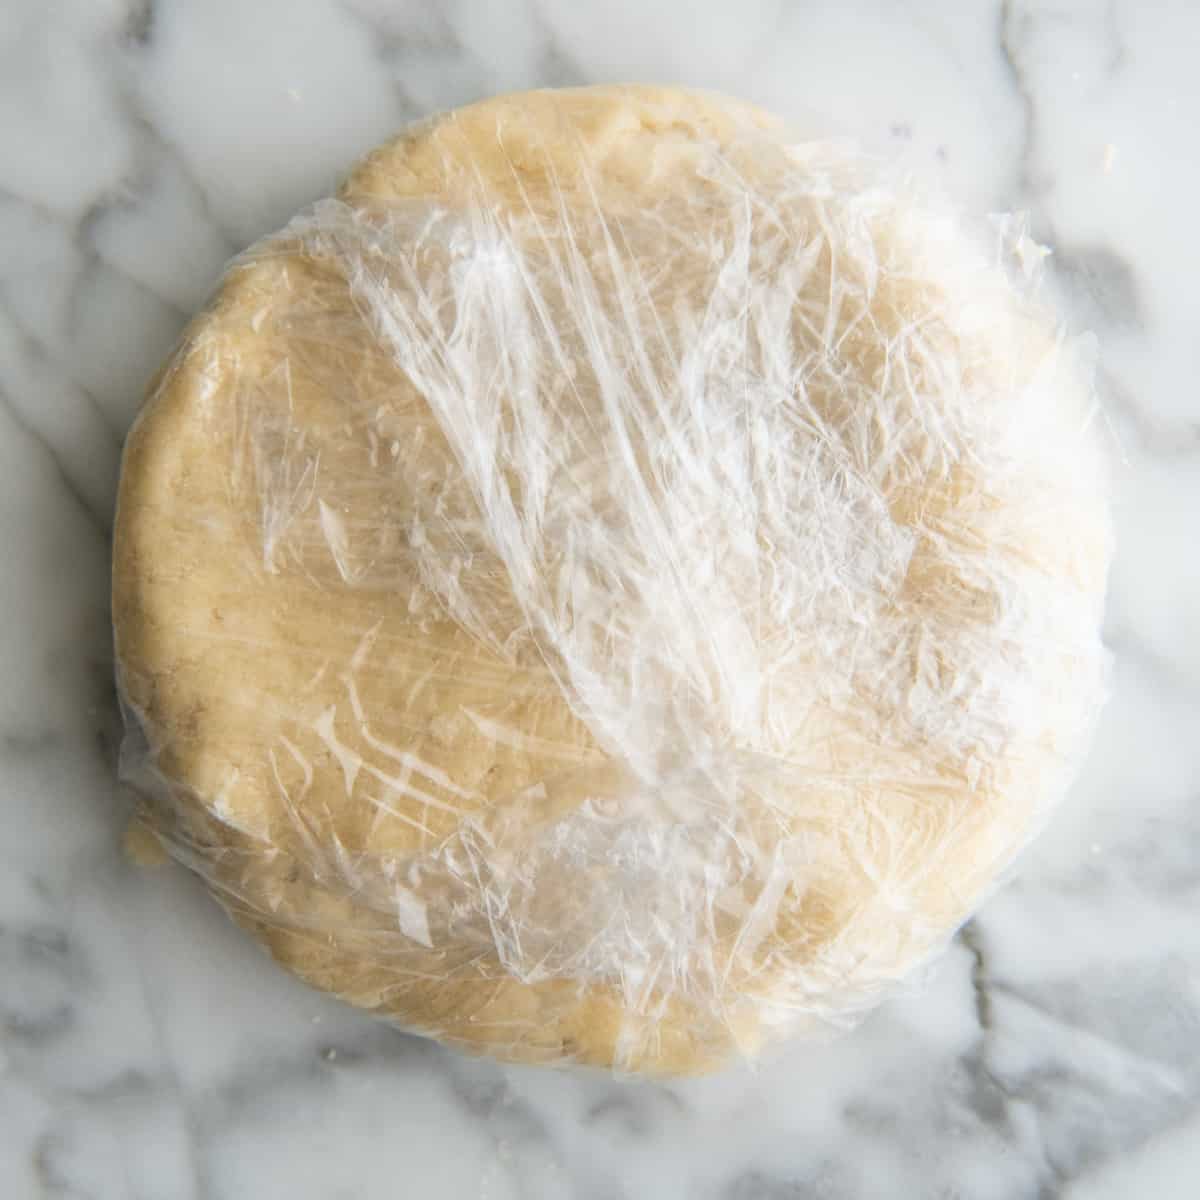
Form a circle by hand. Once the crust ingredients form a ball in the food processor (see below), remove them and combine the rest by hand. Shape it into a relatively thin, flat circle and wrap with plastic wrap. This will make rolling a breeze.

Chill. once the crust is wrapped in plastic wrap, put it in the refrigerator to chill for at least 1 hour, or overnight. If chilling overnight I recommend putting it in another airtight container like a plastic bag or Tupperware.
Roll the pie crust
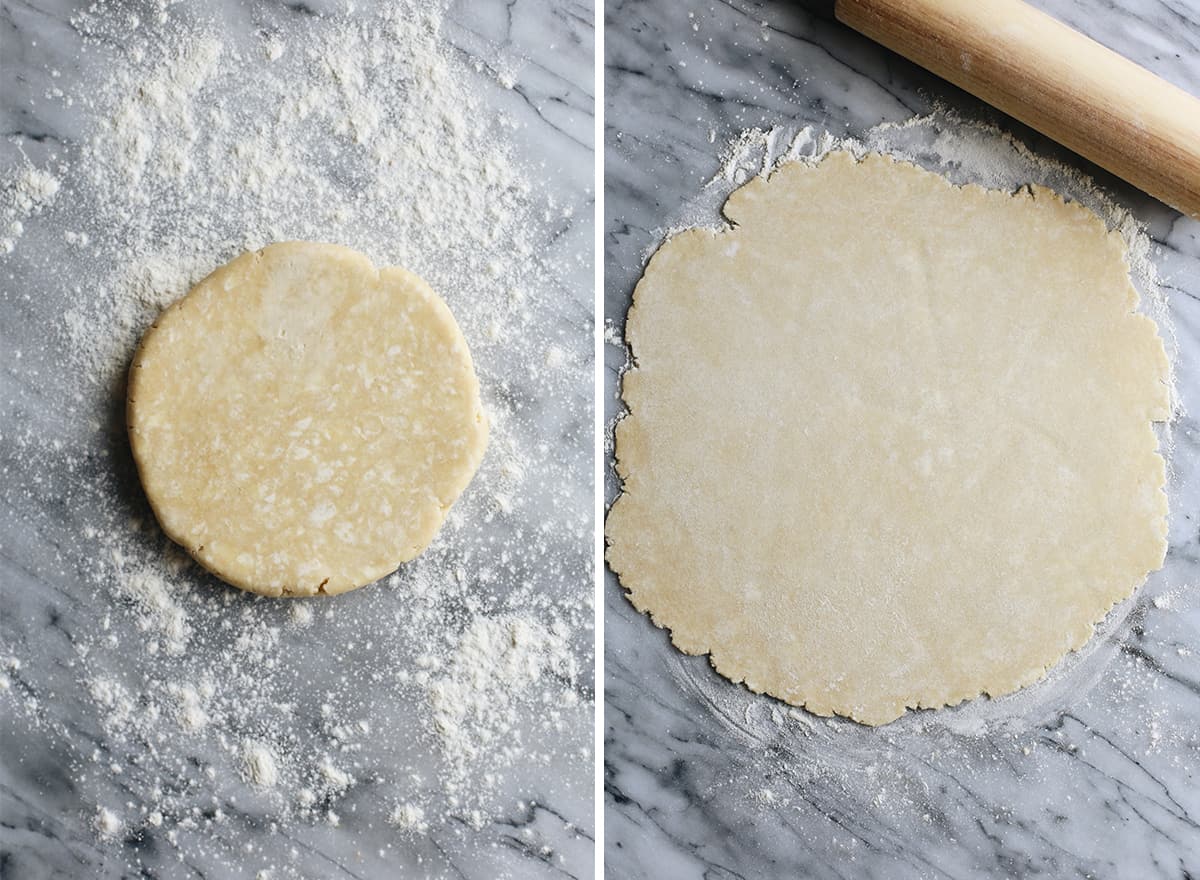
After the crust has chilled for at least one hour, pull it out and put it on a well-floured surface. Here are a few tips to make rolling easier:
Use a heavy rolling pin to roll out the crust! I have had this marble rolling pin for 11 years and couldn’t live without it. It applies the perfect amount of pressure to the chilled crust to make it roll easily.
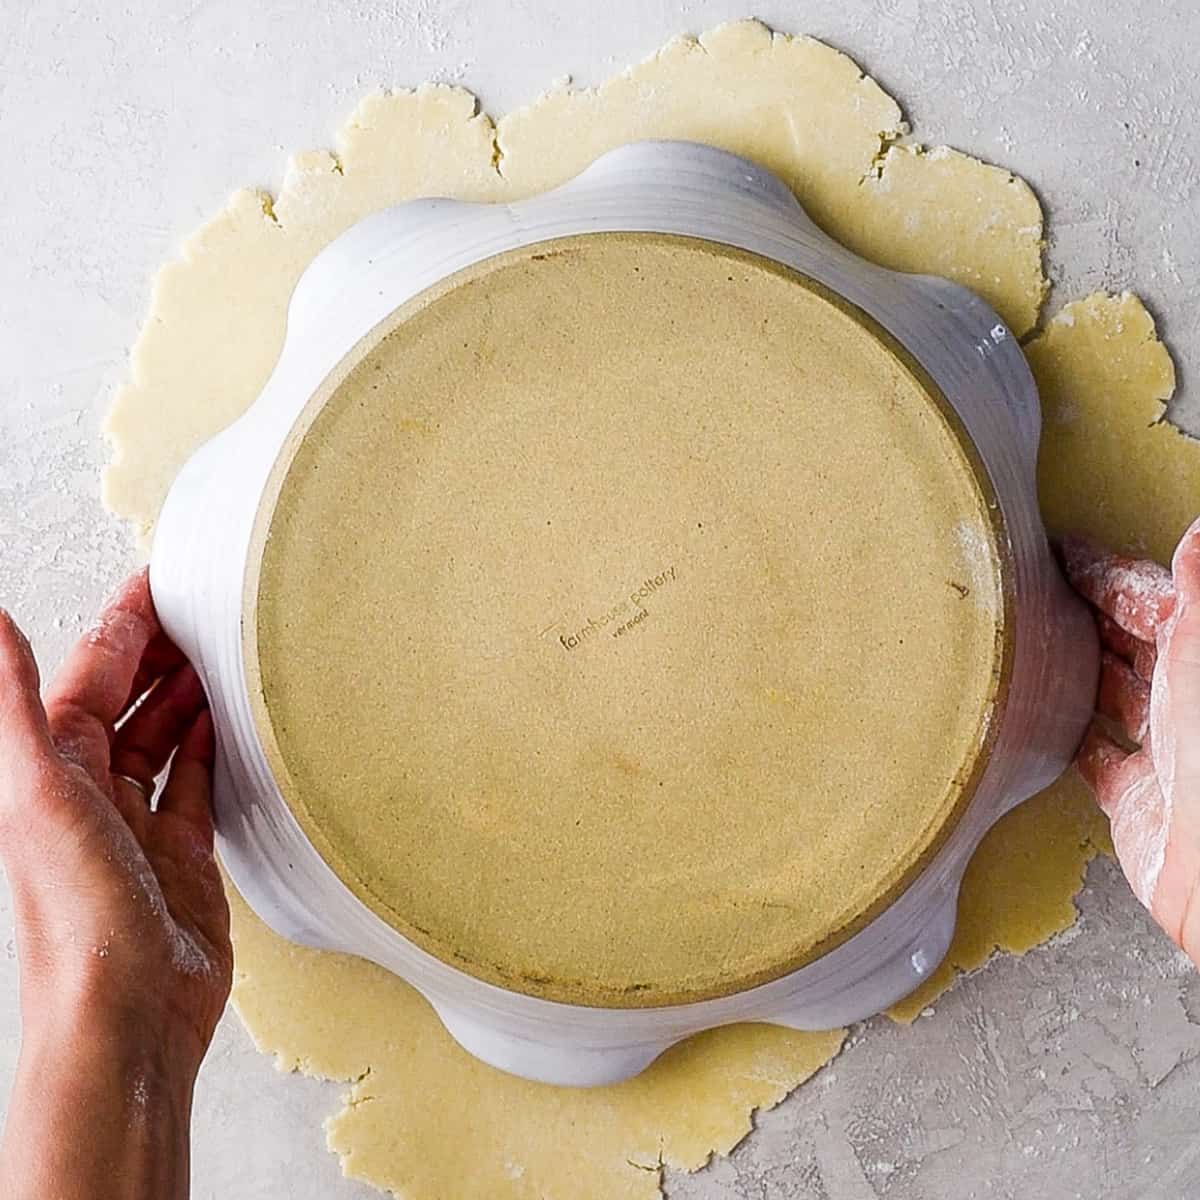
Measure the crust with the pie plate. As you see in the photo below, after I roll the crust out I like to be certain it will fit in my pie plate. So I recommend holding the pie plate over the crust circle just to be sure that it will fit. There needs to be a little extra dough overhang so that you can make a nice crust edge.
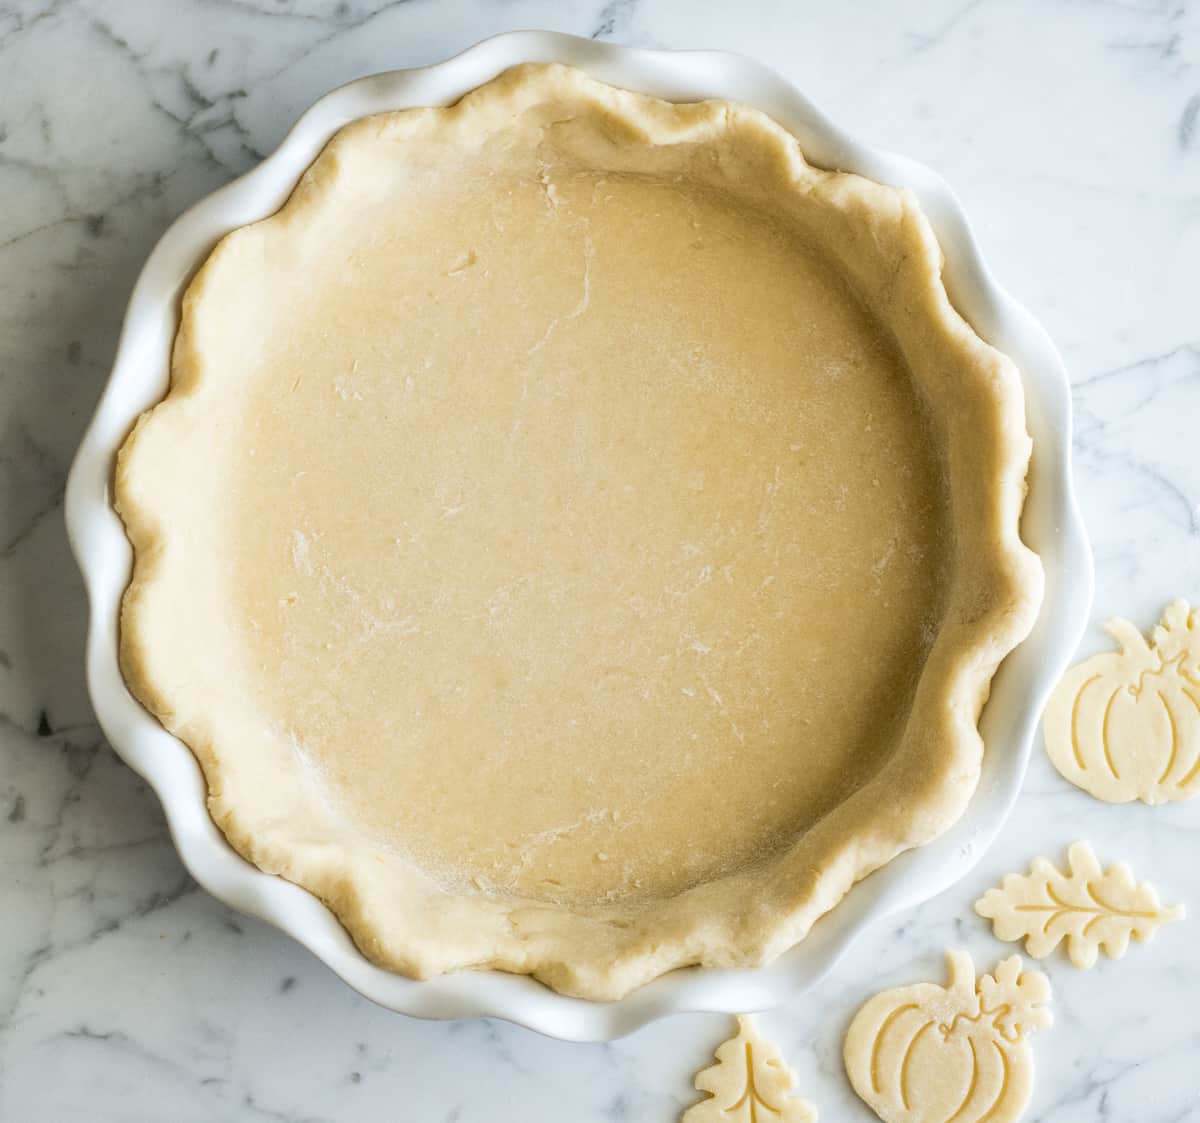
Pinch the edges. Start by folding the crust and making a nice edge around the pie dish. Then, use your thumb and pointer finger to pinch the edges of the crust and make a nice design.
Chill again (if the filling isn’t made). Next, it’s time to make the dairy-free pumpkin pie filling, and while that is happening wrap the crust in plastic wrap and return it to the refrigerator. If you already have the filling made before the crust is rolled, then you do not need to chill the crust again.
Make the Dairy-free pumpkin pie filling
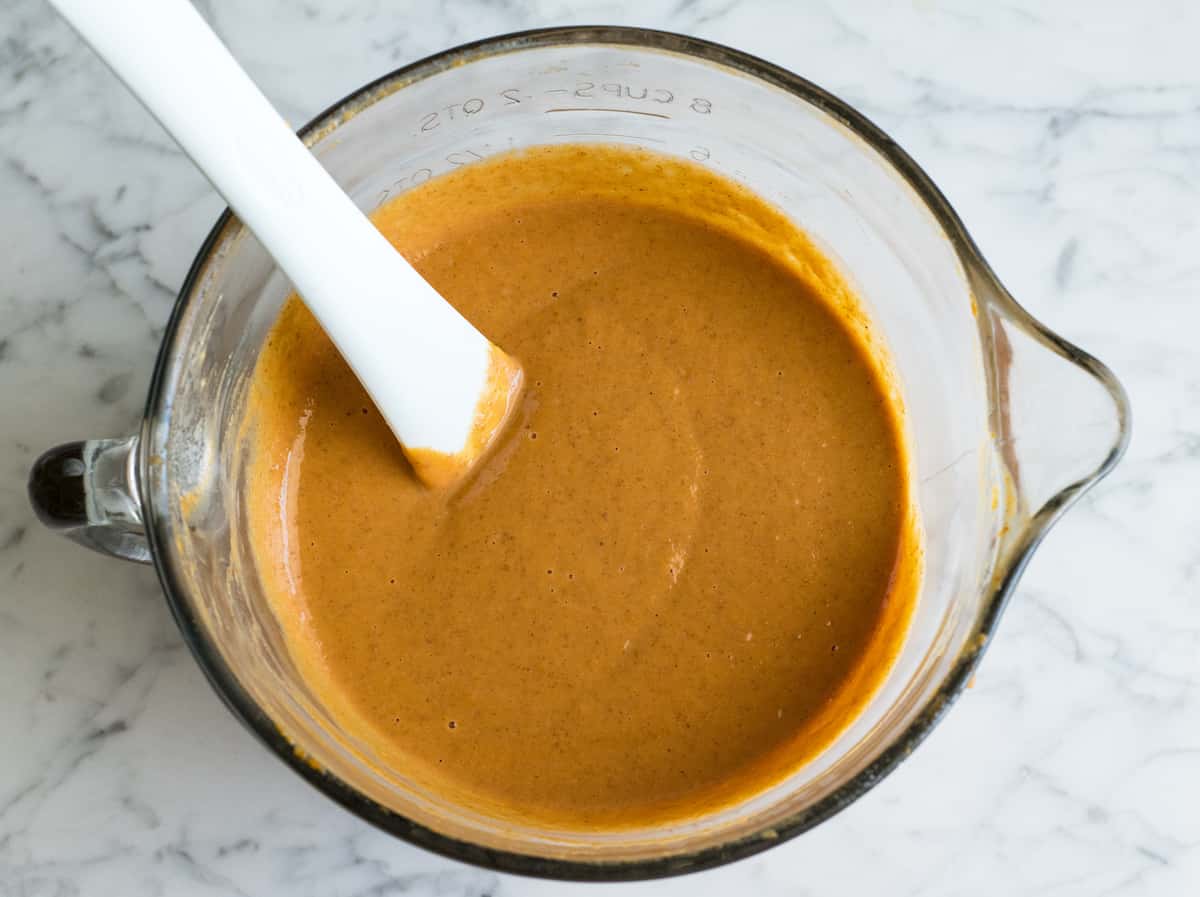
This part is very easy. The filling is made in just one bowl with a whisk! There really aren’t any specific tips I can give you to make this process go more smoothly, except that you should definitely mix the wet ingredients together first, and then add the dry!
I do recommend using a wire whisk to make this dairy-free pumpkin pie filling to ensure that there are no lumps of brown sugar or spices left in the batter!
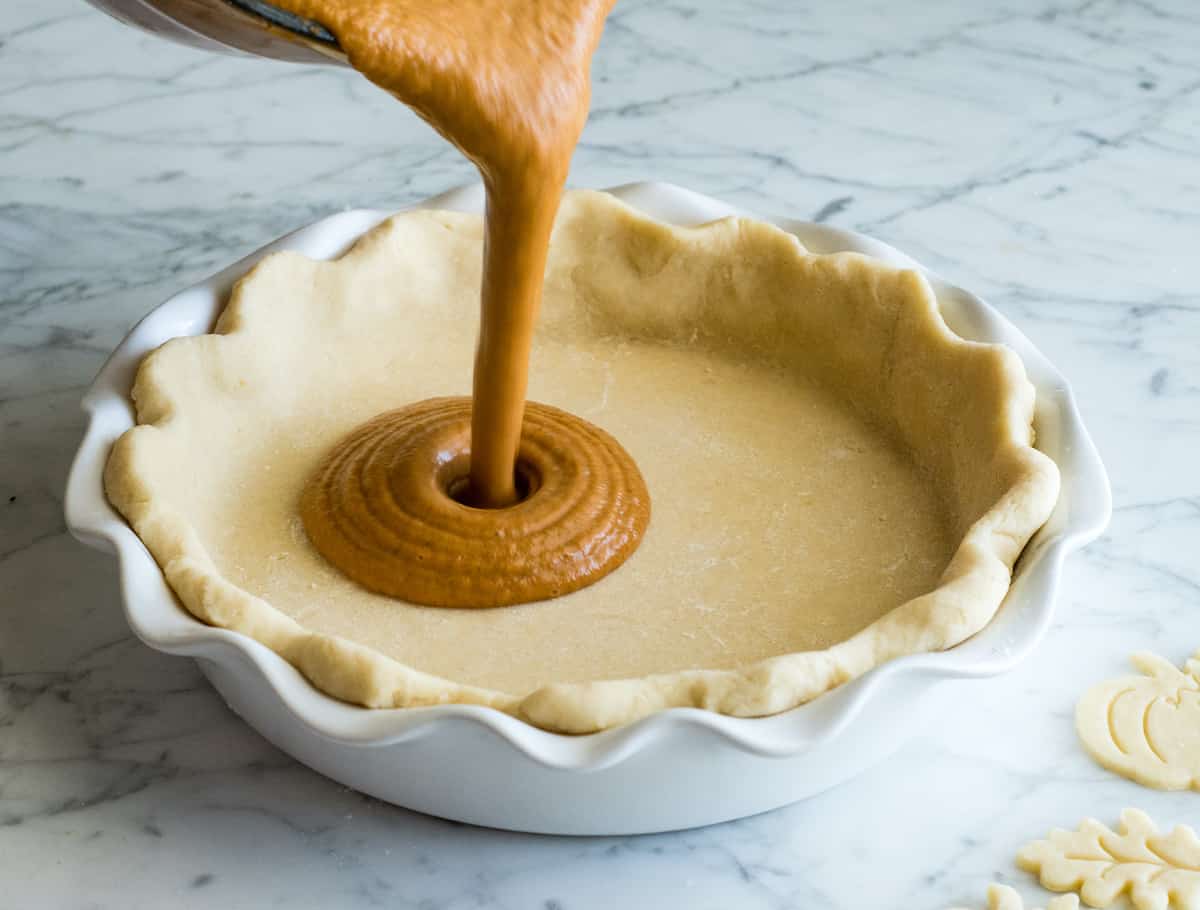
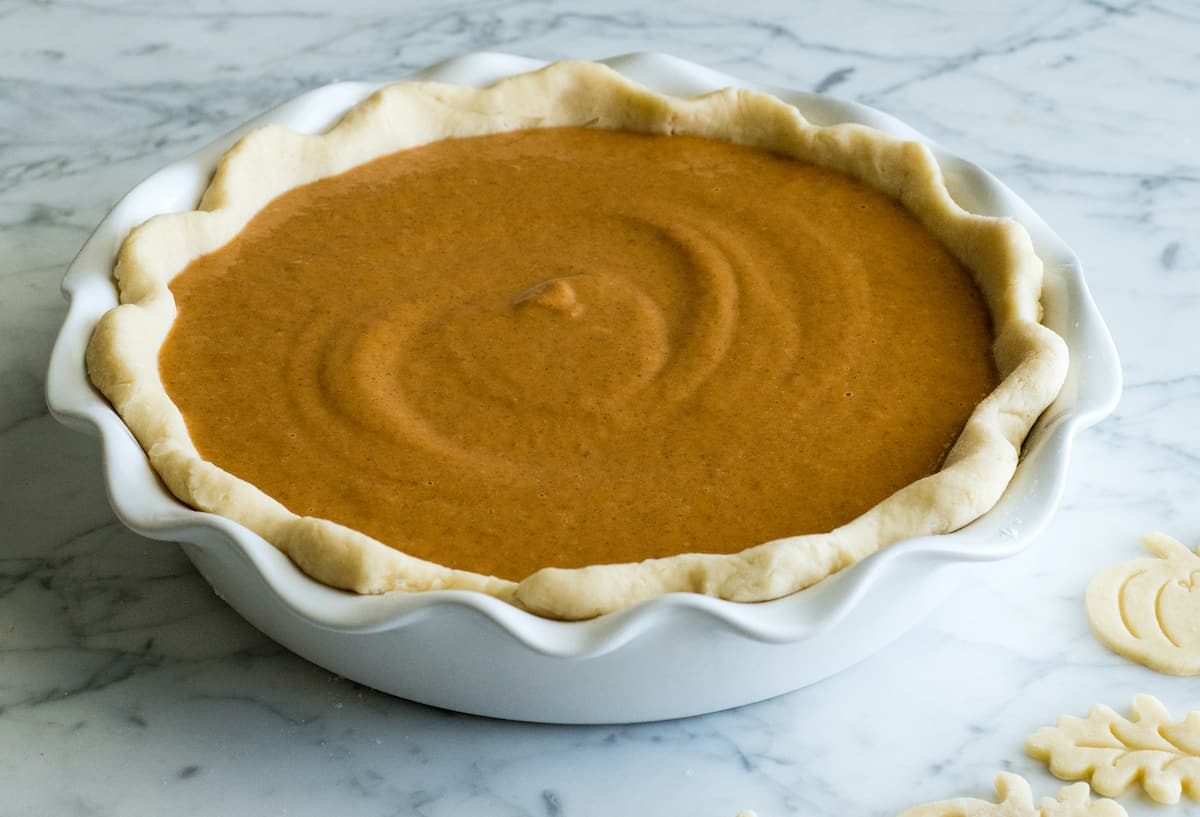
Bake
Once the filling is made, remove the crust from the refrigerator, pour it in and bake. I highly recommend using a pie crust shield, or a piece of tin foil that you cut to fit the edges of the pie. Otherwise the crust on the edges will almost definitely burn before the filling is cooked!
Let it cool
This coconut milk pumpkin pie needs to cool for at least two hours (preferably longer). If you like to serve your pumpkin pie cold, then after an hour or so, transfer the pie on a wire cooling rack to the refrigerator.
Serve
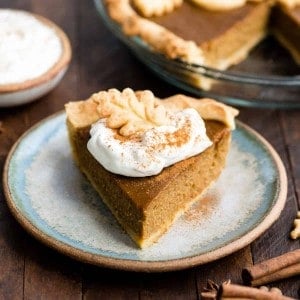
I recommend serving this dairy-free pumpkin pie with some dairy-free whipped cream, whipped topping, or vanilla ice cream. I added a sprinkle of pumpkin pie spice on top and a little pie crust cutout for fun!

Store
Store any leftover pie in an airtight container int he refrigerator for 5-7 days.
Freeze
This pie freezes really well! There are 2 ways to freeze this recipe:
1. Freeze the entire pie. Simply bake and chill the pie, then wrap it tightly with plastic wrap and foil and freeze for up to 2 months. Thaw in the refrigerator overnight before cutting and serving.
2. Freeze individual slices. If you have a few leftover slices you want to freeze, place them on a baking sheet and put them in the freezer to flash-freeze them. Then, once they’re frozen, wrap them in plastic wrap and store in an airtight container for up to 2 months. Thaw in the refrigerator for about 6 hours.

Recipe FAQs
Some people may be concerned that the coconut milk will cause this dairy-free pumpkin pie to taste like coconut…but that is not the case! Most recently, I served this pie to 8 adults and 4 kids and no one suspected a thing.
Even my husband, who has a serious super-taster gene for coconut (I am not joking it’s insane) couldn’t taste a hint of coconut flavor! There are a few ways you can adapt this pie…
I recommend serving this dairy-free pumpkin pie with some dairy-free whipped cream, whipped topping, or vanilla ice cream. I added a sprinkle of pumpkin pie spice on top and a little pie crust cutout for fun!

If you make and love our recipes, it would mean so much to me if you would leave a comment and rating! And don’t forget to follow along with us on Instagram, Pinterest, Facebook, and Youtube – be sure to tag @joyfoodsunshine and use the hashtag #joyfoodsunshine so we can see your creations!
Dairy-Free Pumpkin Pie
Equipment
Ingredients
Filling:
- 3 large eggs
- 15 oz can pumpkin puree (or 2 cups fresh pumpkin puree)
- 1 cup full fat coconut milk*
- 1 tsp vanilla extract
- ¾ cup light brown sugar
- ½ tsp sea salt
- 1 tsp ground cinnamon
- 1 ½ tsp pumpkin pie spice
Pie Crust:
- 1 ¼ cups all-purpose flour
- ½ tsp sea salt
- 1 TBS granulated sugar
- ½ cup earth balance vegan butter sticks chilled, and cut into 1 inch pieces**
- ¼ cup ice cold water
Instructions
Make the pie Crust:
- Place the flour, salt, and sugar in a food processor fitted with an “S” blade and pulse to combine.
- Add the vegan butter and cold water and process until the mixture resembles a coarse meal, begins to stick together, and holds together when pinched.
- Remove dough from processor (will be crumbly) and form into a ball.
- Wrap in plastic wrap and refrigerate for at least 60 minutes or overnight
Make the filling:
- In a large bowl, beat the eggs.
- Whisk in the pumpkin, coconut milk and vanilla extract until combined.
- Add sugar, salt, cinnamon and pumpkin pie spice and mix until completely combined.
Putting it together
- Preheat your oven to 425 degrees F.
- Lightly grease a pie plate and set aside.
- Roll out your pie dough on a well-floured surface (pastry cloth) to fit the size of your pie plate.
- Carefully transfer the dough to the pie plate and shape the crust how you want it to look.
- Pour the filling into the unbaked pie crust and cover the crust with a pastry shield
- Bake for 15 minutes at 425 degrees F.
- Reduce the temperature to 350 degrees F and continue to bake for 50 to 60 minutes, or until a knife inserted comes out clean. It may be a bit wobbly still, but it will firm-up as it cools.
- Allow the pie to cool on a wire rack for 2 hours (Be patient! This is important). Serve or refrigerate until ready to serve.
Video
Notes
Dairy-free pumpkin pie: substitutions
- Coconut milk: You can substitute coconut milk with dairy-free creamer (unsweetened). I do not recommend using almond milk because it is much thinner and less rich than coconut milk.
- Vegan butter: If you don’t have access to vegan butter, substitute it with vegetable shortening.
- All-purpose flour: for a gluten-free pie crust, substitute an all-purpose gluten-free flour for the regular all-purpose flour!
- Pumpkin Pie Spice. Use store bought or make your own!
- 1 ½ tsp cinnamon
- ½ tsp nutmeg
- ½ tsp cloves
- ½ tsp allspice
Store
Store any leftover pie in an airtight container int he refrigerator for 5-7 days.Freeze
This pie freezes really well! There are 2 ways to freeze this recipe: 1. Freeze the entire pie. Simply bake and chill the pie, then wrap it tightly with plastic wrap and foil and freeze for up to 2 months. Thaw in the refrigerator overnight before cutting and serving.2. Freeze individual slices. If you have a few leftover slices you want to freeze, place them on a baking sheet and put them in the freezer to flash-freeze them. Then, once they’re frozen, wrap them in plastic wrap and store in an airtight container for up to 2 months. Thaw in the refrigerator for about 6 hours.
Nutrition
Nutrition information is automatically calculated, so should only be used as an approximation.
What can I make with pumpkin?
I have lots of delicious ideas for you if you’re looking to make something with pumpkin, besides this dairy-free pumpkin pie of course!
- Make a loaf of the BEST pumpkin bread ever!
- This pumpkin pie is the BEST and it’s made completely from scratch.
- Pumpkin baked oatmeal is one of our favorite fall breakfasts!
- Baked pumpkin donuts are another yummy breakfast for special days!
- This no-bake vegan pumpkin cheesecake is great if you have people in your family with food allergies! Also this paleo pumpkin bread, these paleo pumpkin muffins, and these mini vegan pumpkin pies!
- Make a batch of this pumpkin coffee creamer. It’s healthy and delicious!
This post contains affiliate links, which means that if you purchase a product through a link you clicked on here, I receive a portion of the sale. Thank you for supporting JoyFoodSunshine!

I am going to try this recipe for my grandson who cannot tolerate dairy. We have a lot of food intolerance so I make my pumpkin pie without a crust. It would be so appreciated if you added the cooking time and temperature for those of us who need to go crustless. I put a 5 star rating because the ingredients for this recipe I already have on hand.
Our niece brought this for Thanksgiving and it was amazing. I’m making it today with a nut crust and brown Swerve to make it more diabetic friendly. I’m hoping it’ll be just as amazing!
Can I use granulated sugar instead of light brown sugar for the filling??
Yes!
We made this once and it was a huge hit! Now I’m about to make it again but can’t remember – do you leave the crust shield on the whole baking time? Or just for the first 15 min. Thanks!
Delicious. I used coconut cream because I wanted to add more calories! Yummy!
After trying a different dairy-free pumpkin pie recipe each year for years, we found this one, and it is THE BEST! I couldn’t taste the coconut milk, but it certainly made the difference between good (the others) and awesome (this one). See if you don’t think so too!