Homemade Caramel Recipe
Posted Sep 28, 2022, Updated Feb 07, 2025
This post may contain affiliate links. Please read our disclosure policy.
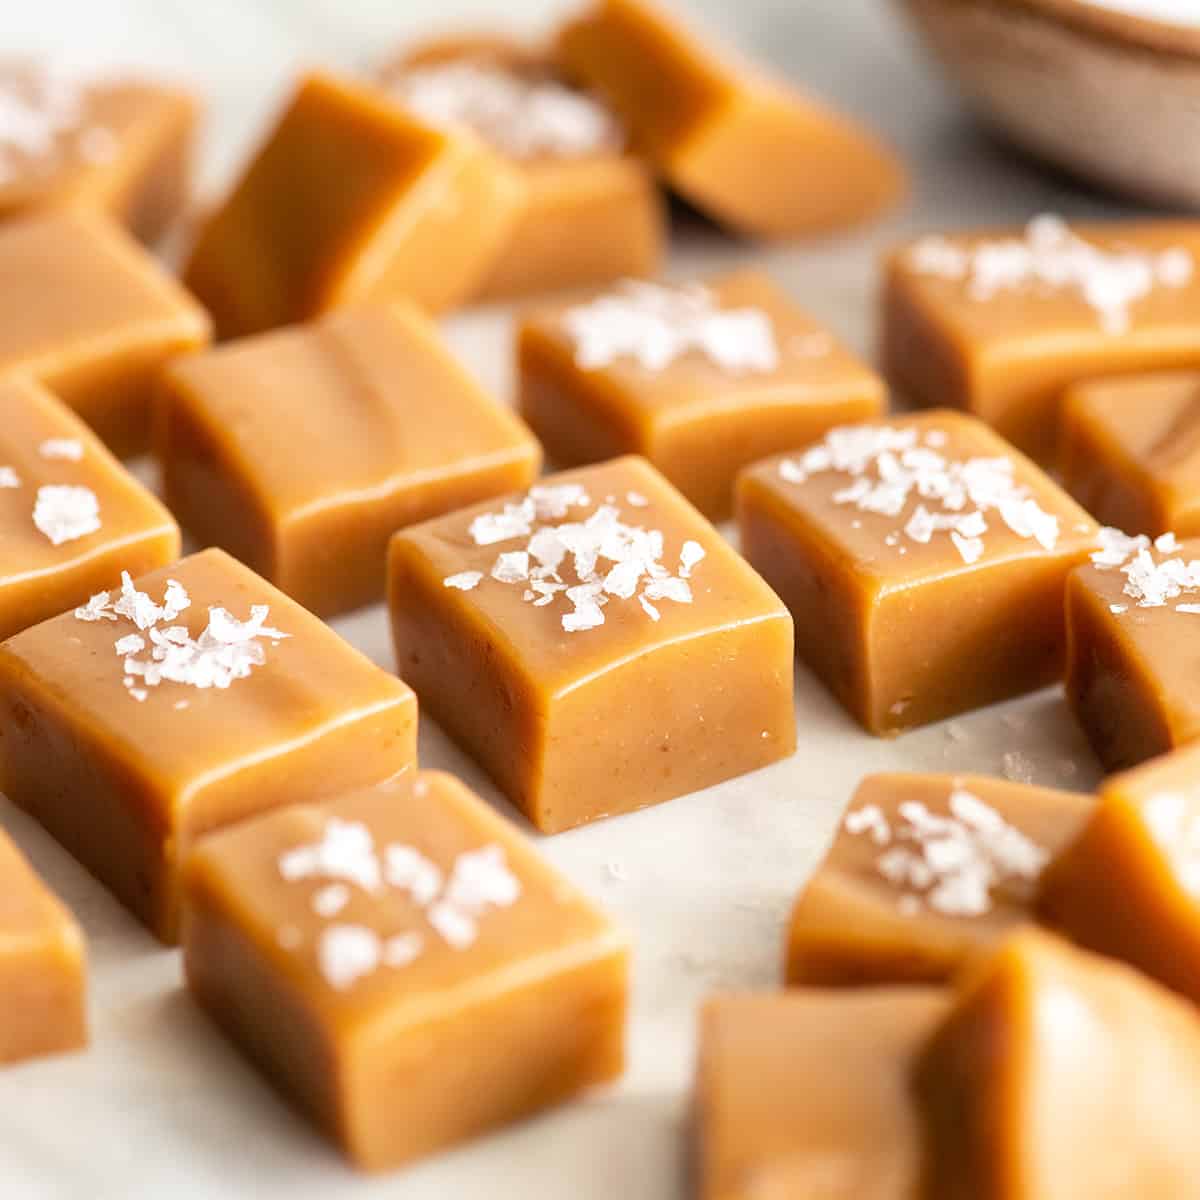
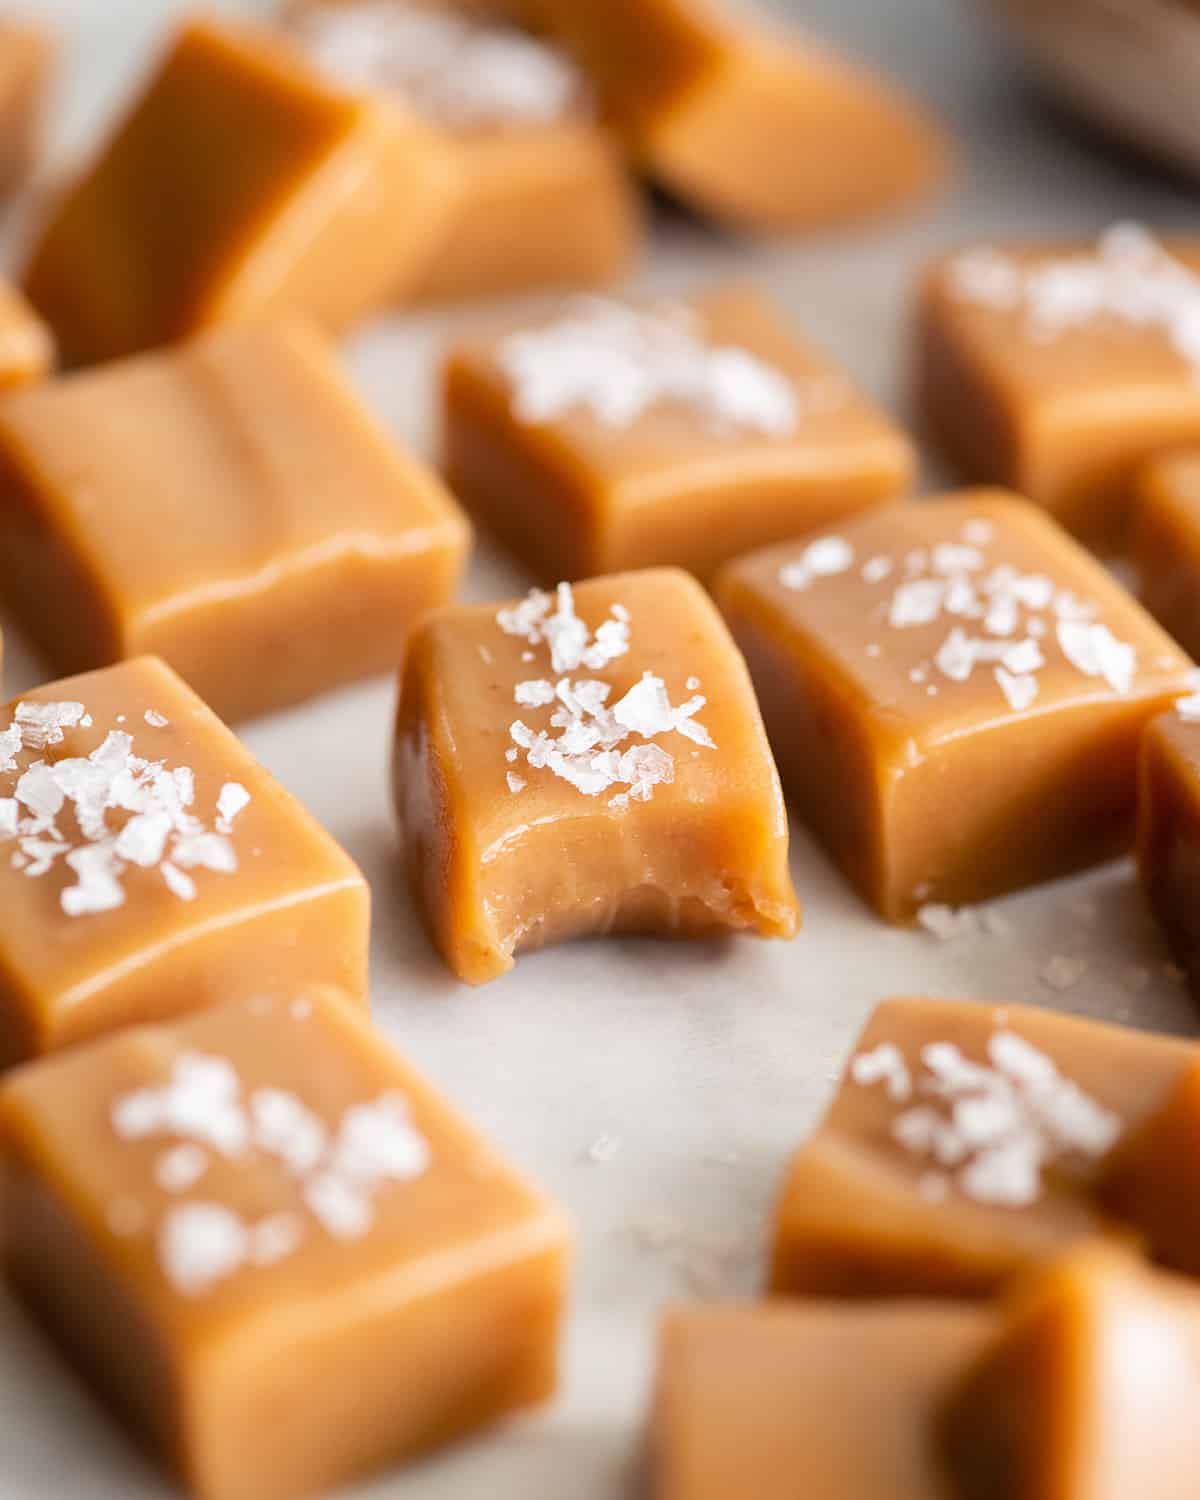
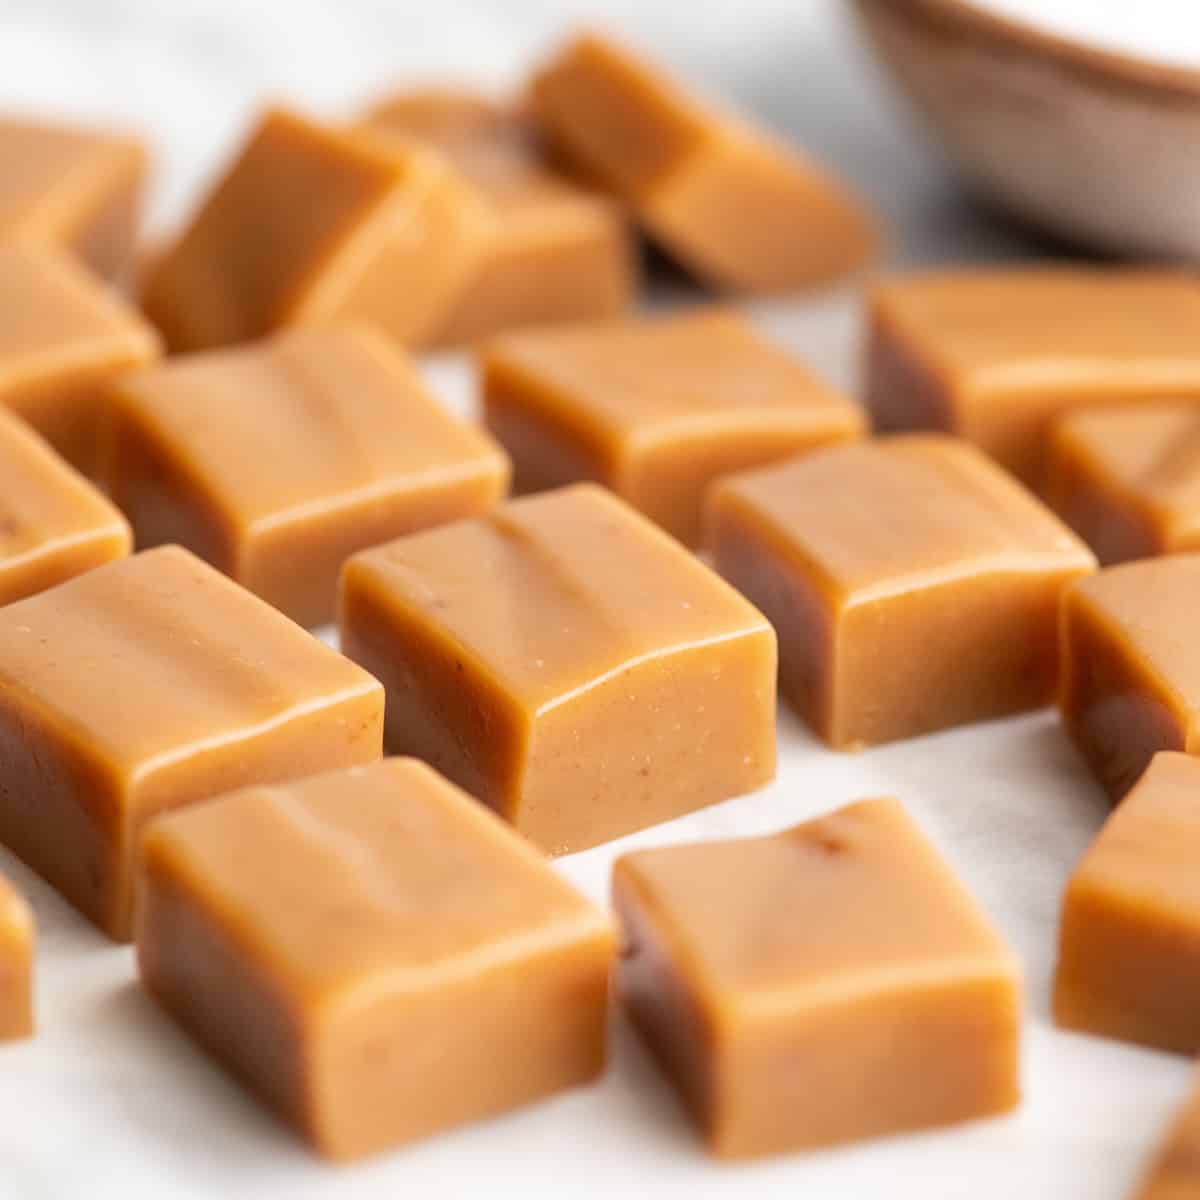
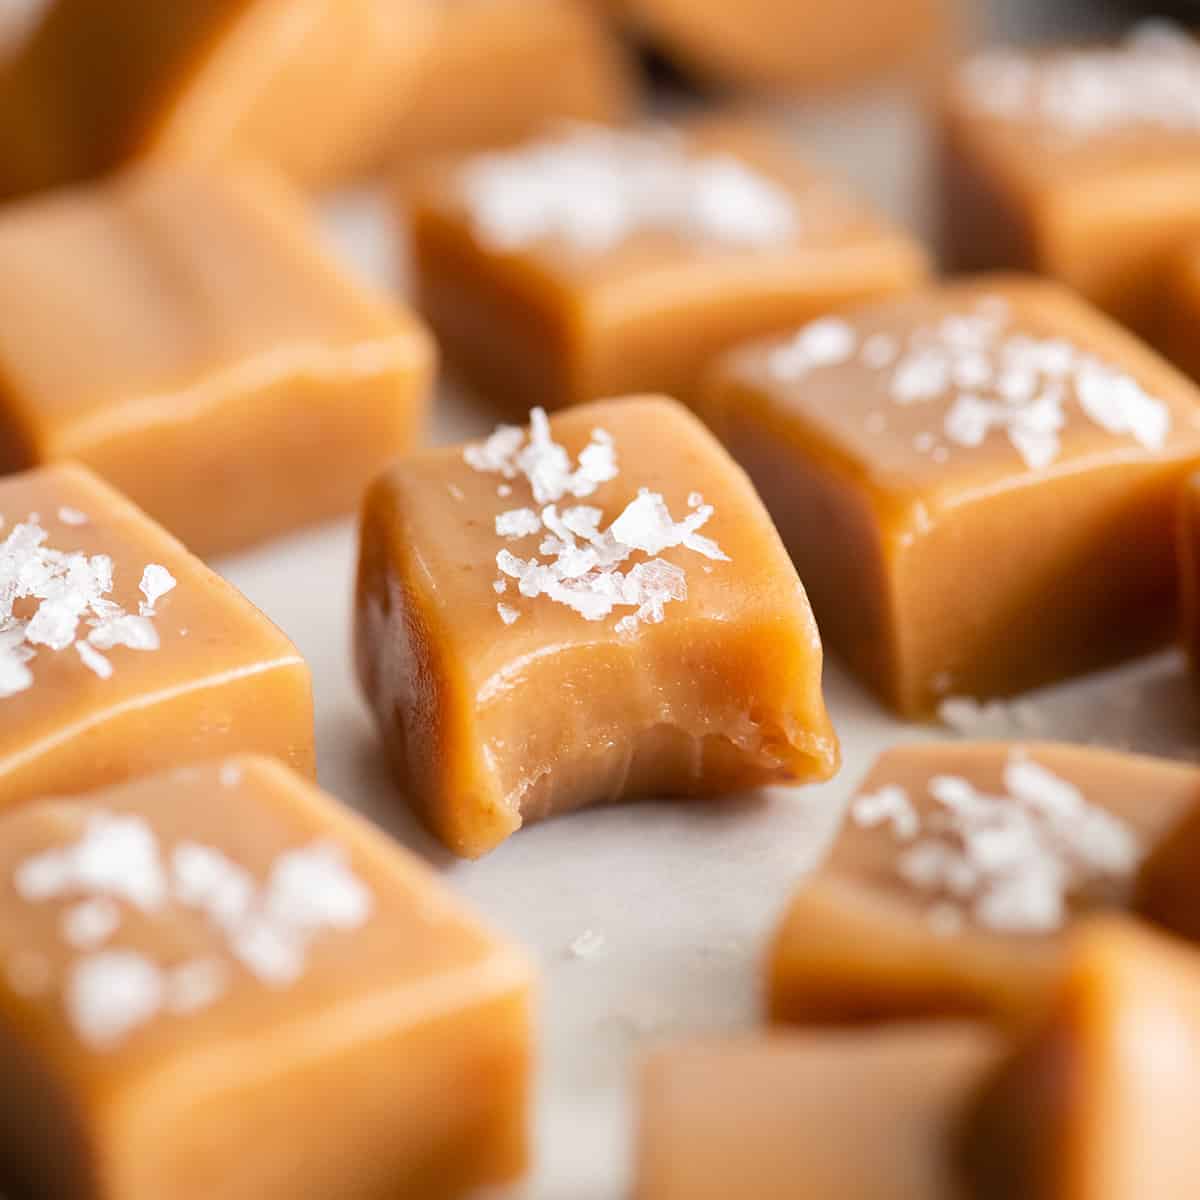
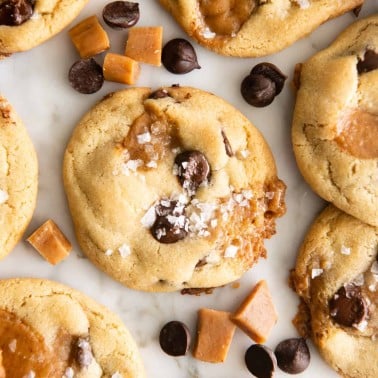
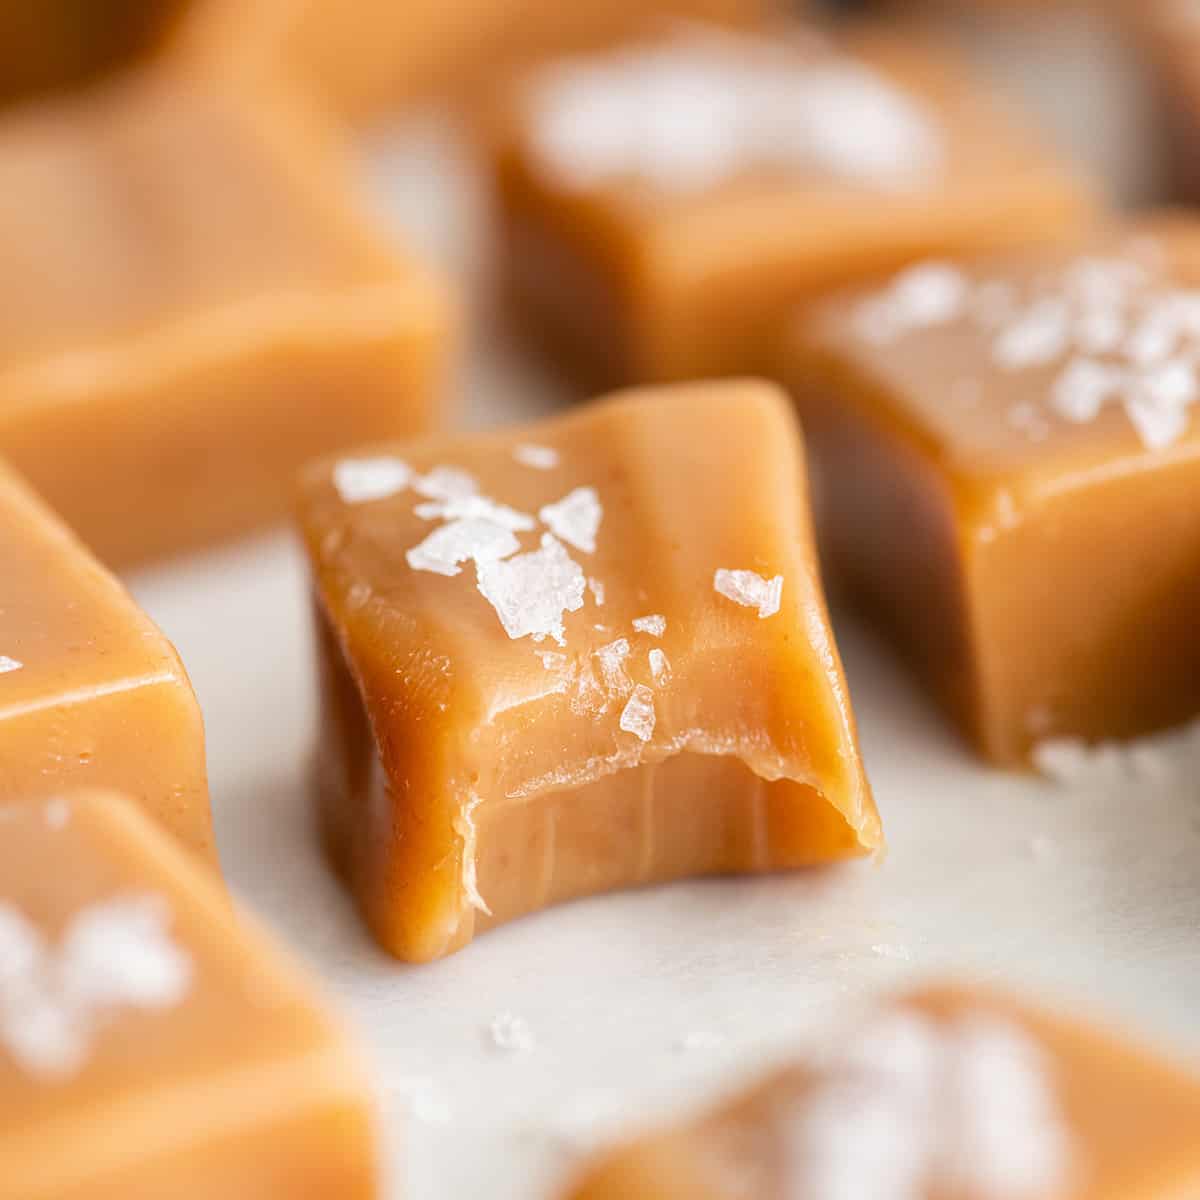
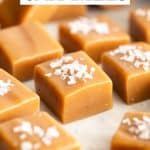
This homemade caramel recipe makes the best caramels with only 7 ingredients! Homemade caramels are soft & buttery, melt-in-your-mouth delicious, and are a perfect gift for friends and neighbors.
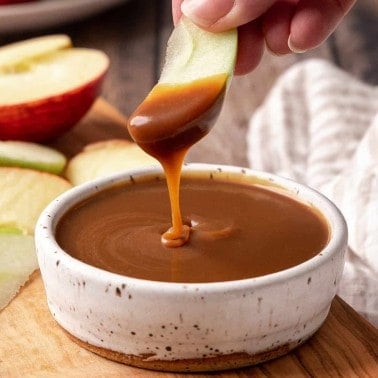
Homemade caramels are a great gift to give during the holidays and taste so much better than store-bought candies (also try this caramel sauce)!
Made with 7 ingredients, this homemade caramel recipe is a must-make! They are buttery-soft, melt in your mouth delicious and do not stick to your teeth!
Since homemade caramels aren’t the easiest candy to make (just like chocolate fudge), I’ve included all of our tips and tricks as well as troubleshooting suggestions and a video so you can learn how to make caramel like a pro!
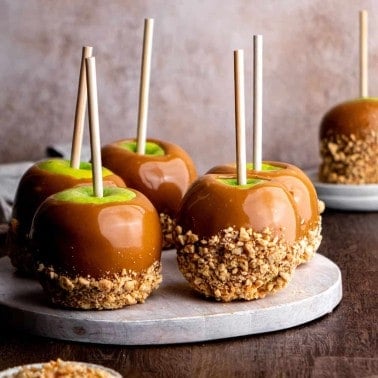
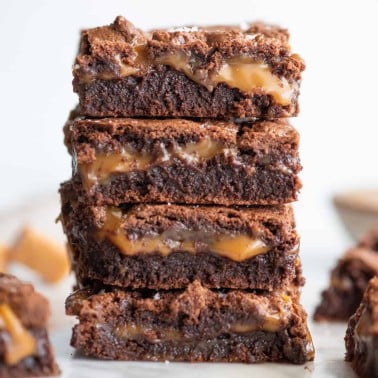
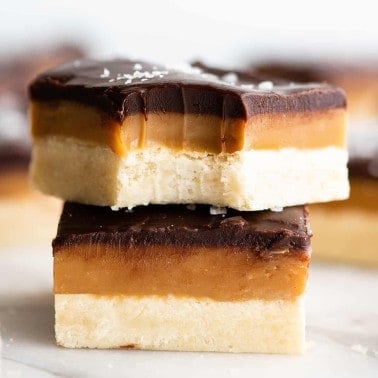
Use leftover caramels in your favorite recipes like caramel brownies, carmelitas, and caramel cookies!
Homemade Caramel Recipe: Ingredients & Substitutions
I recommend making these homemade caramels exactly as written, here are a few notes on the ingredients.
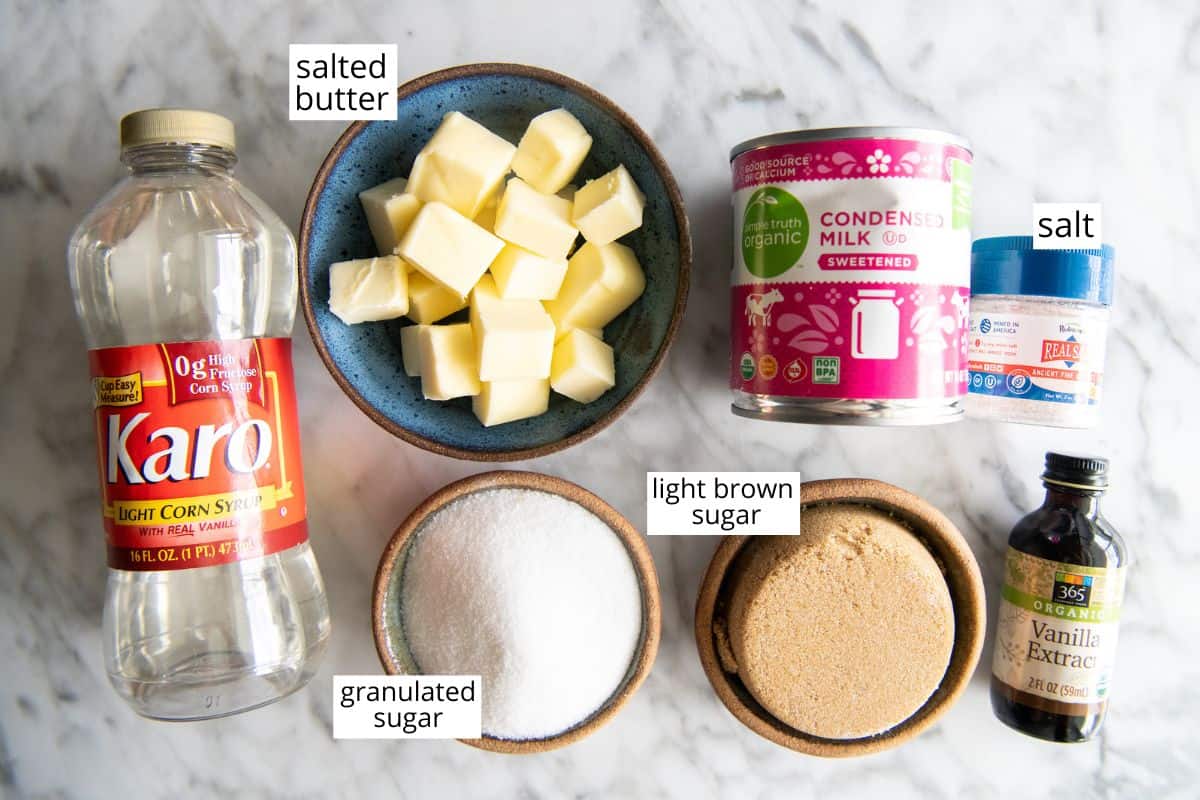
- Salted butter. I always use salted butter (plus additional sea salt) when making caramel because it helps stabilize the candy mixture so the butter doesn’t separate. I don’t recommend making substitutions.
- Light brown sugar. Dark brown sugar can be used in place of light for a caramel with a more pronounced molasses taste.
- Granulated sugar. you can use all light brown sugar if you prefer.
- Corn Syrup. I have not tried substitutes for the corn syrup, although I have heard of readers using honey with great results.
- Sweetened condensed milk. an important ingredient that I don’t recommend substituting.
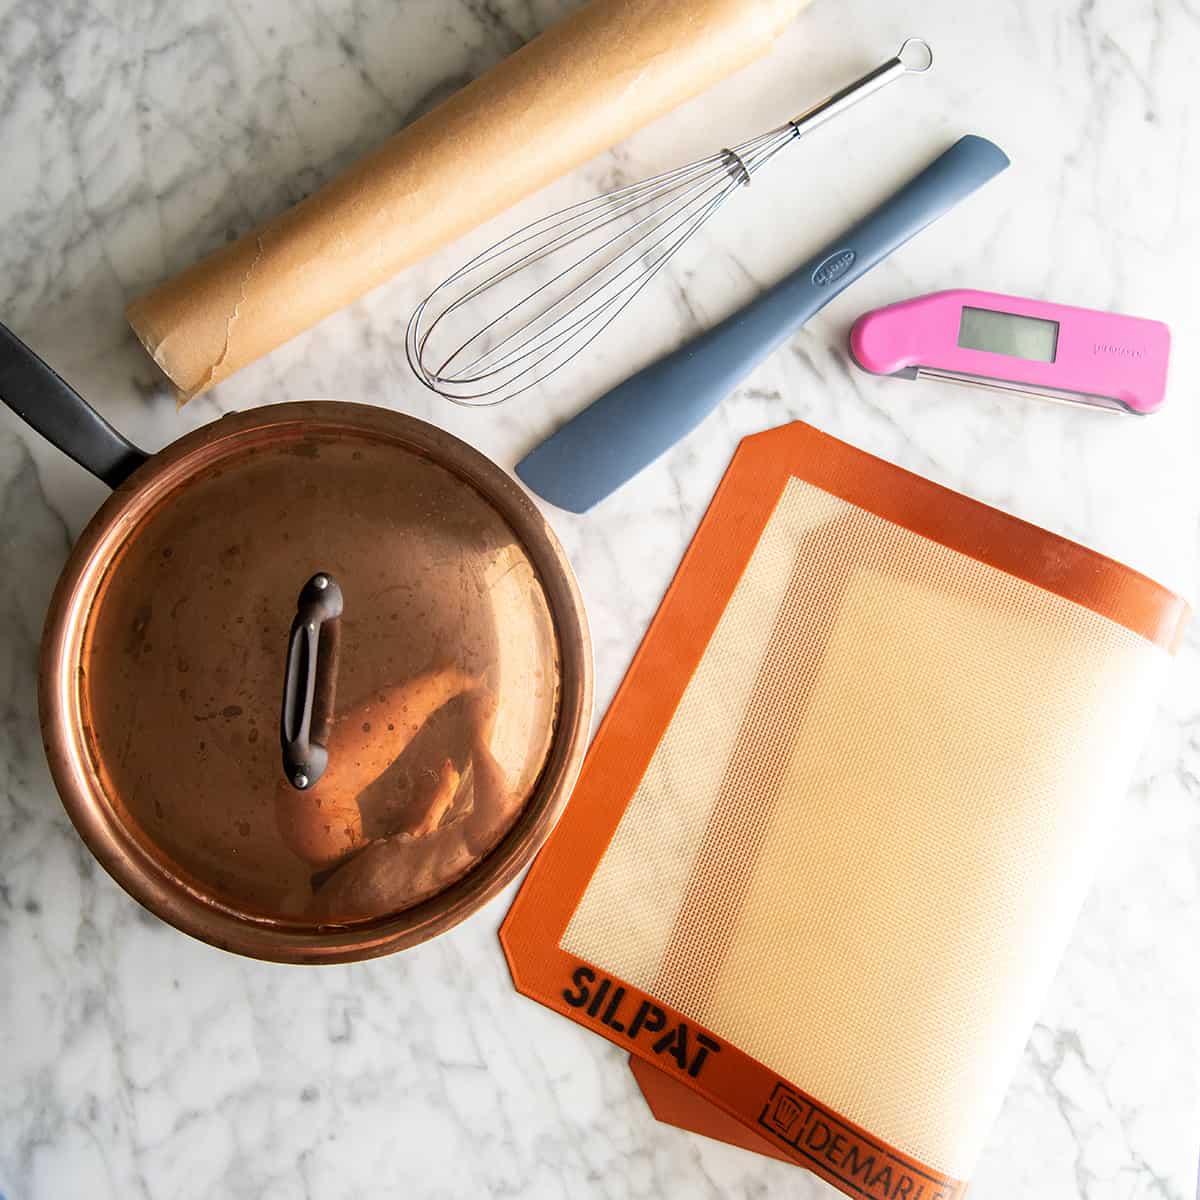
Equipment
There are a few key piece of kitchen gear you need to make this caramel recipe. Be sure to have everything you need laid out and ready to go before starting, because homemade caramels require your full attention.
- Tall, heavy bottomed pan. This is absolutely critical when making candy, especially caramel (or toffee). I suggest a thick pot like this one, it’s 2.5 mm thick on the bottom for even heating. If you really want to splurge you could get a copper version (I bought this and love it). If you use a pot that is too thin the caramel could burn and you will end up with flecks of crystalized sugar in the candy.
- Candy thermometer. Sure, you could do the ball test to determine if the caramel is done, but that is too subjective for my analytical mind – and I never make candy without a thermometer. I use a digital, instant read thermometer for all my candy making (and meat cooking) needs.
- Silicone spatula. The caramel needs to be stirred often, so you need a heat-proof utensil to make this recipe. I suggest a high-heat silicone spatula.
- Silicone baking mat. I bought one of these just to use to make candy. Caramel can stick to wax and parchment paper, so I suggest lining a baking sheet with a silicone baking mat to make homemade caramel.
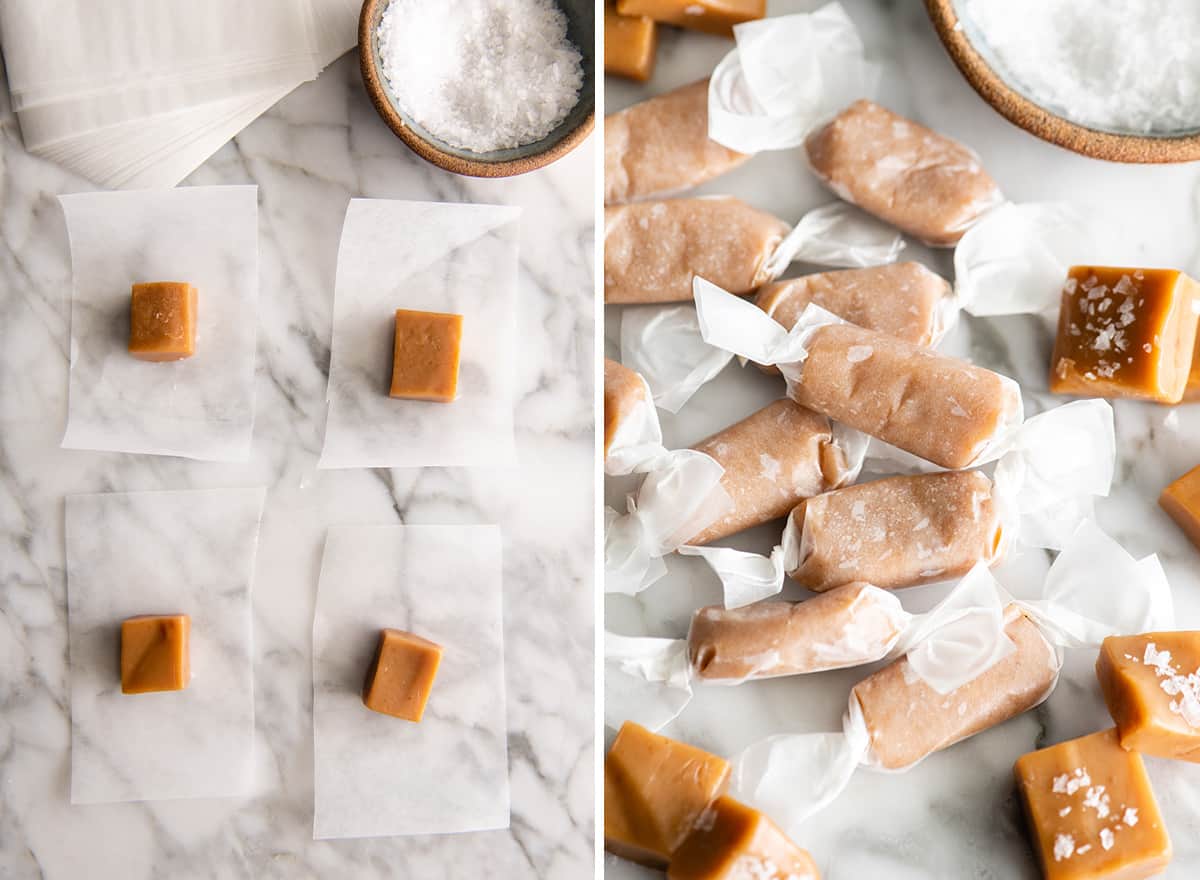
- Candy wrappers. If you plan on gifting these caramels, wrap them in candy wrappers!
How to make Caramel
To be totally transparent, it takes practice and precision to make caramel just right. So, I hope to help make it as easy as possible for you and remember, practice makes perfect!
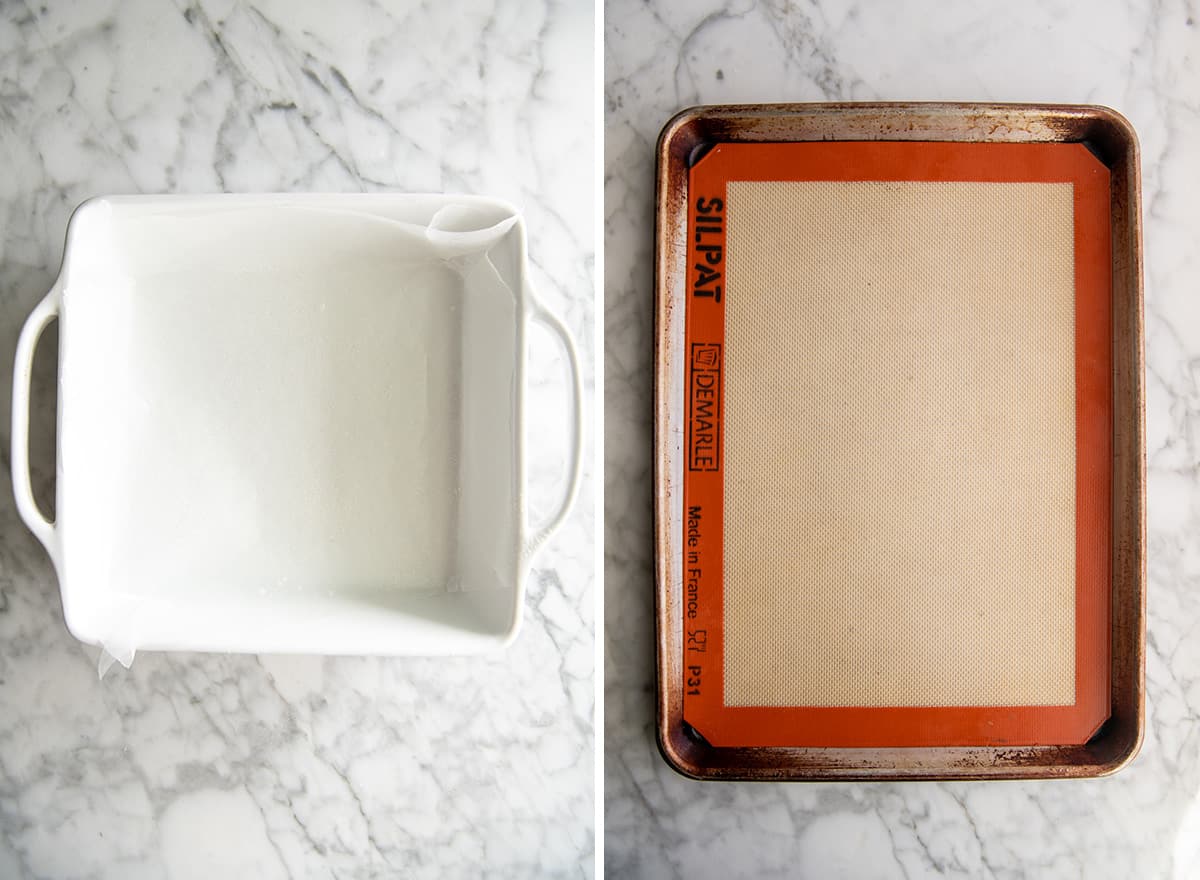
Begin by preparing the pan into which you will pour the caramel. There are a couple options here:
- Line a 9×9″ square baking dish with wax paper and heavily butter the paper. If you don’t grease the paper enough the caramel will stick to it.
- Line a 9×9″ baking dish with a silicone baking mat that fits in the bottom of the pan or line a larger baking sheet with a silicone baking mat. If using a larger baking mat you will not spread the caramel out on the entire thing.
- You can also use a 9×9″ silicone baking pan set on top of a baking sheet for easy removal. I still recommend lightly buttering the pan.
I prefer to use a silicone baking mat because it’s stick-proof. I actually purchased some 9×9″ square silicone baking mats to make caramel and other recipes.
Next, combine butter, corn syrup, condensed milk, brown sugar, granulated sugar and sea salt in a heavy-bottomed 4-quart (at least) saucepan. Whisk constantly until the butter is melted and the mixture is smooth.
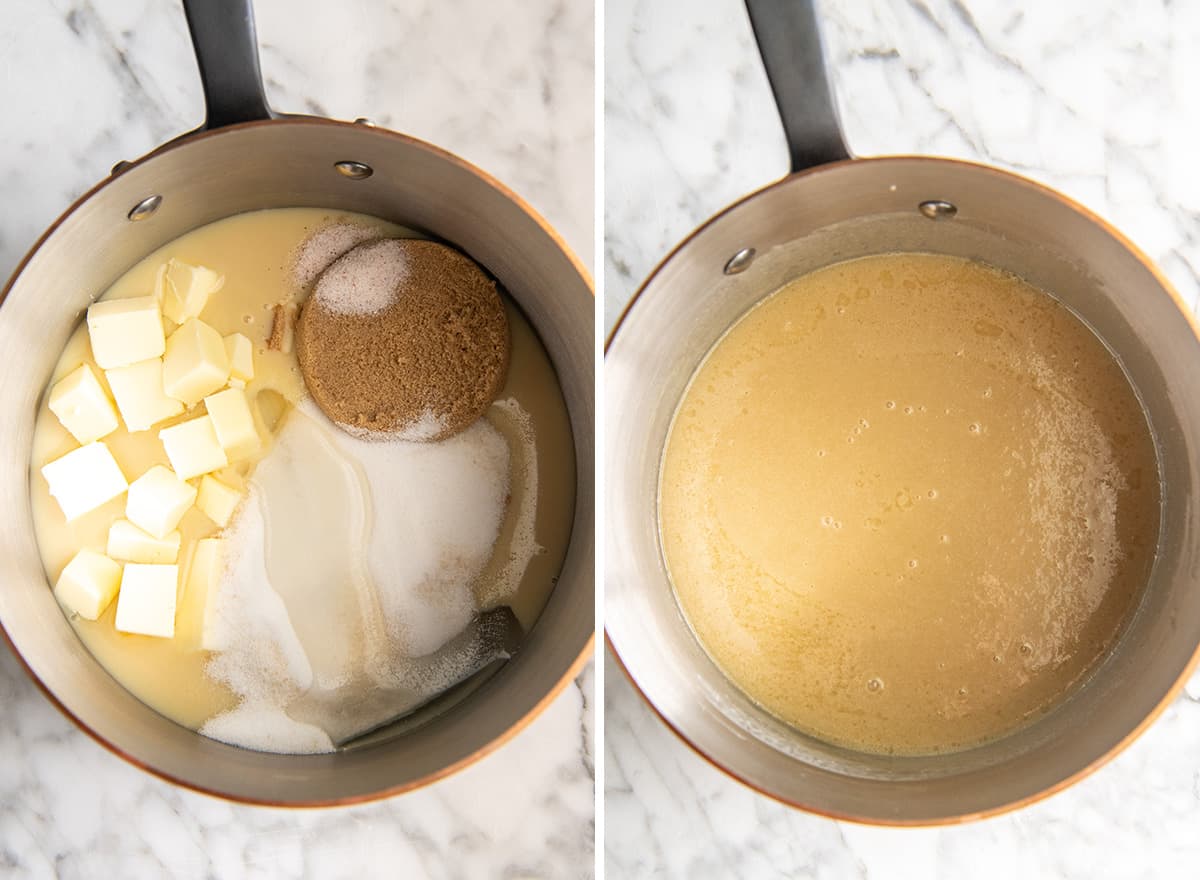
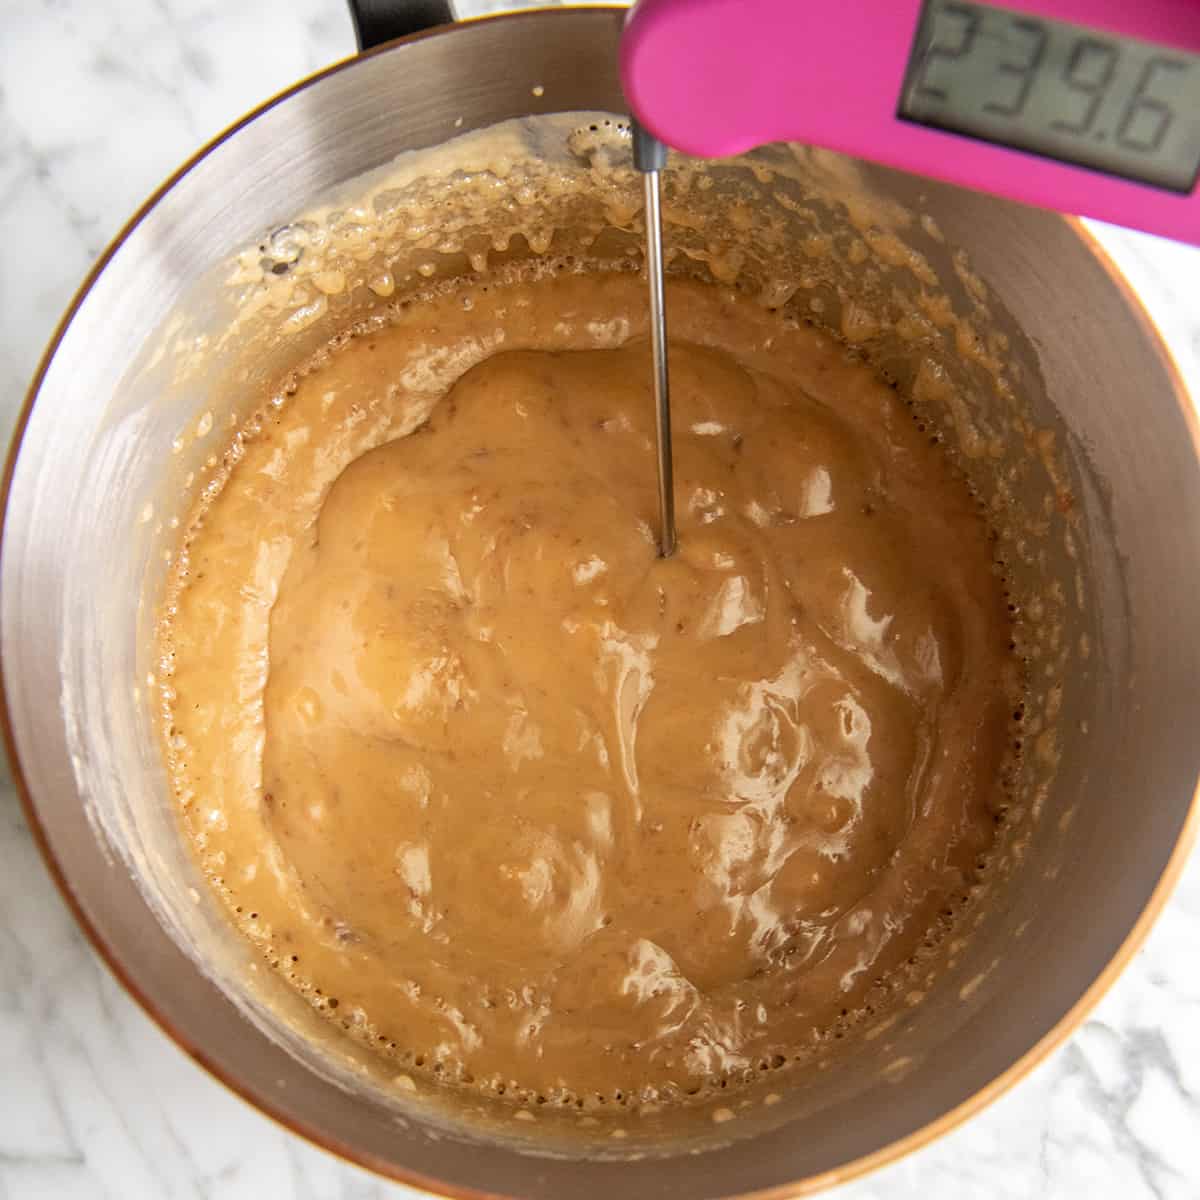
Cook over medium-low heat until the caramel reaches 240-245 degrees F on an instant-read thermometer, stirring every few minutes with a heatproof spatula or wooden spoon, making sure not to let any of the mixture on the bottom or sides burn or get too brown. This takes about 20 to 25 minutes. Do not rush it.
It’s very important not to use high heat when making caramel – it takes time and patience.
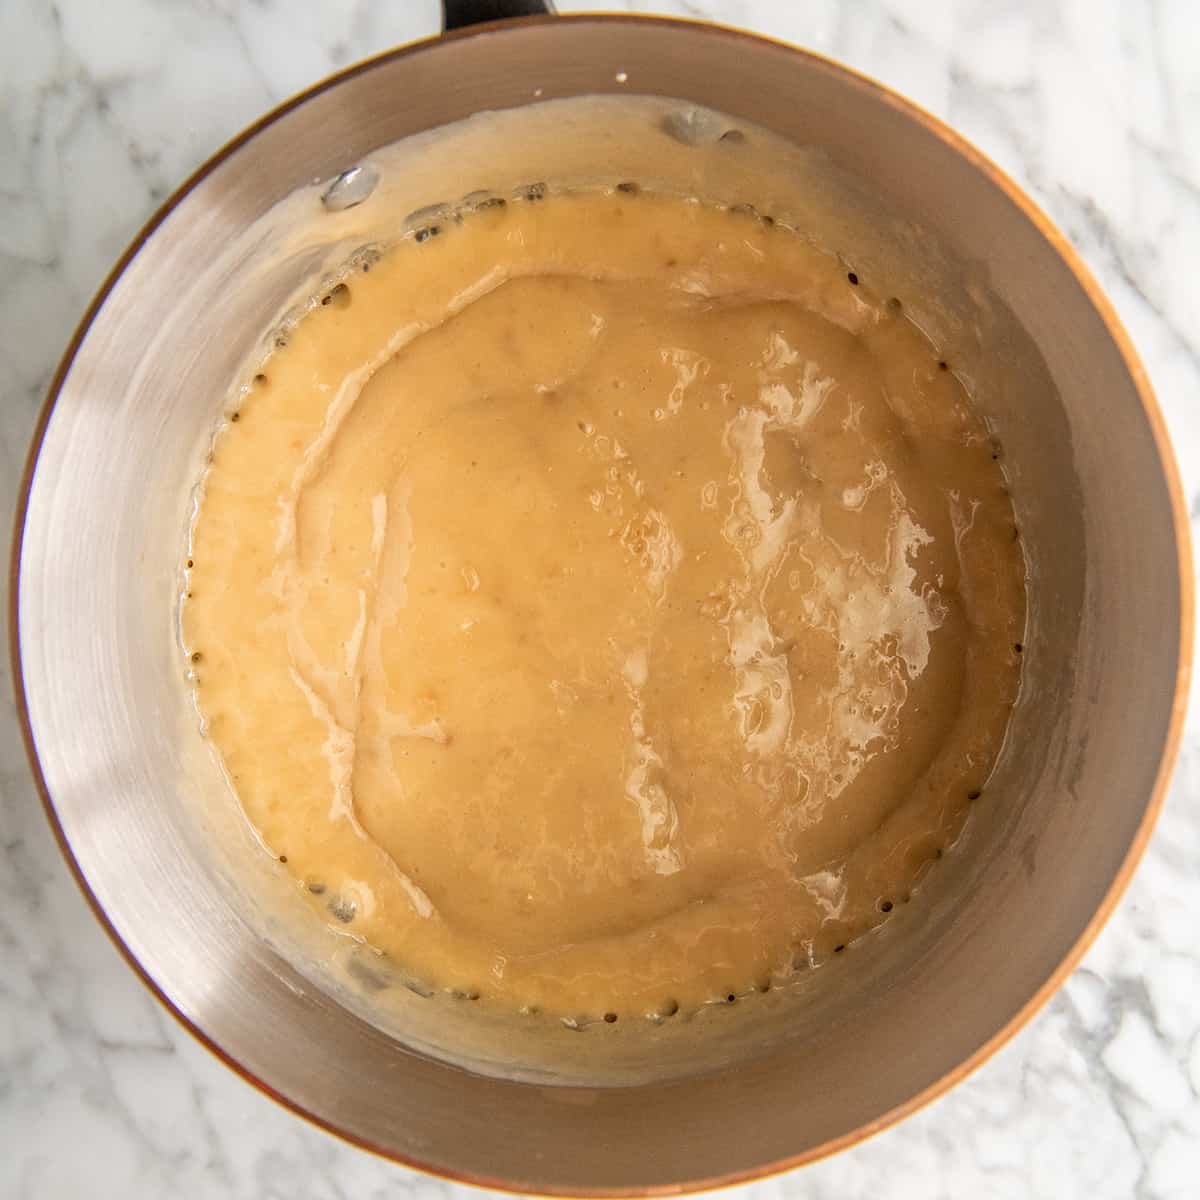
You will know you’re getting close when the caramel becomes slightly darker brown in color, thickens and pulls away from the sides of the saucepan as you stir. It will also remain solid when removed from the pot and left to cool or put in cold water.
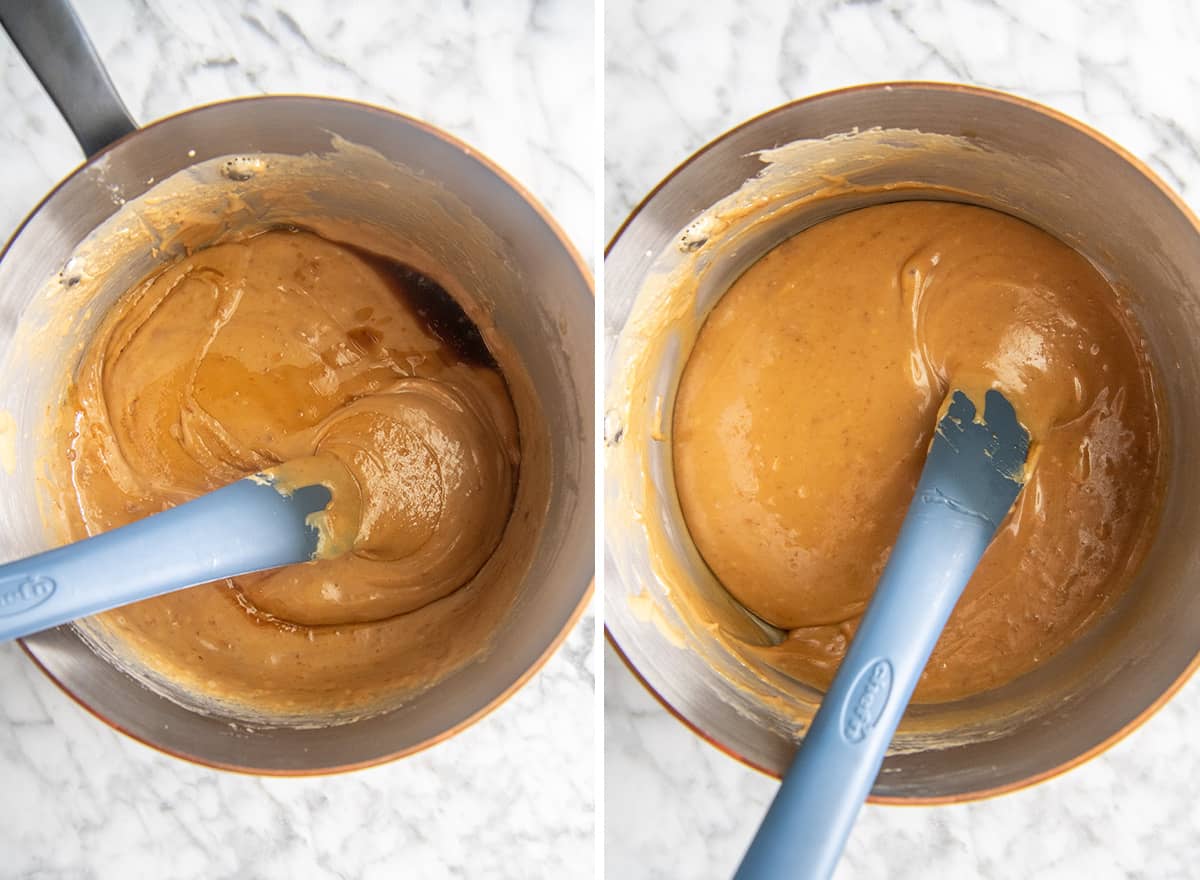
When the caramel is finished cooking, remove from heat, add vanilla and stir vigorously.
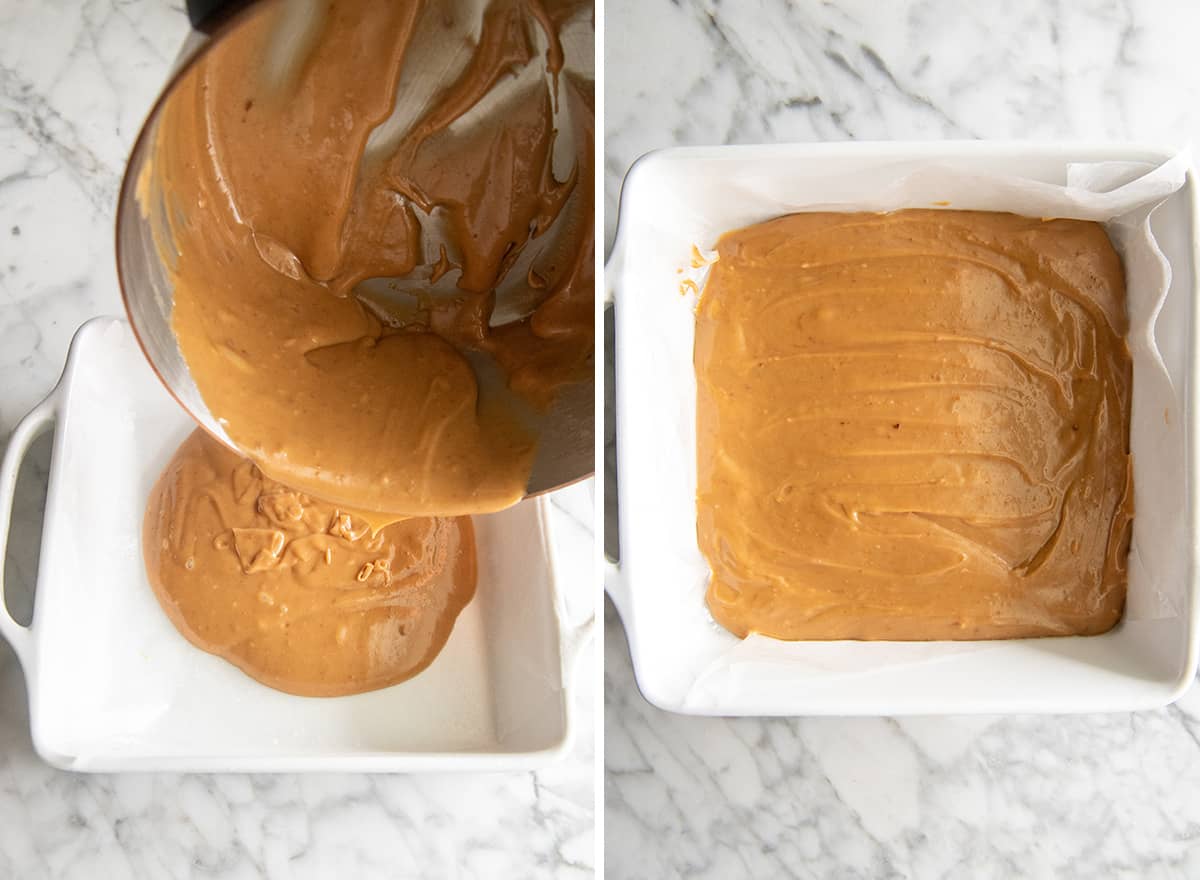
Next, pour the caramel into the prepared pan and spread it into an even layer.
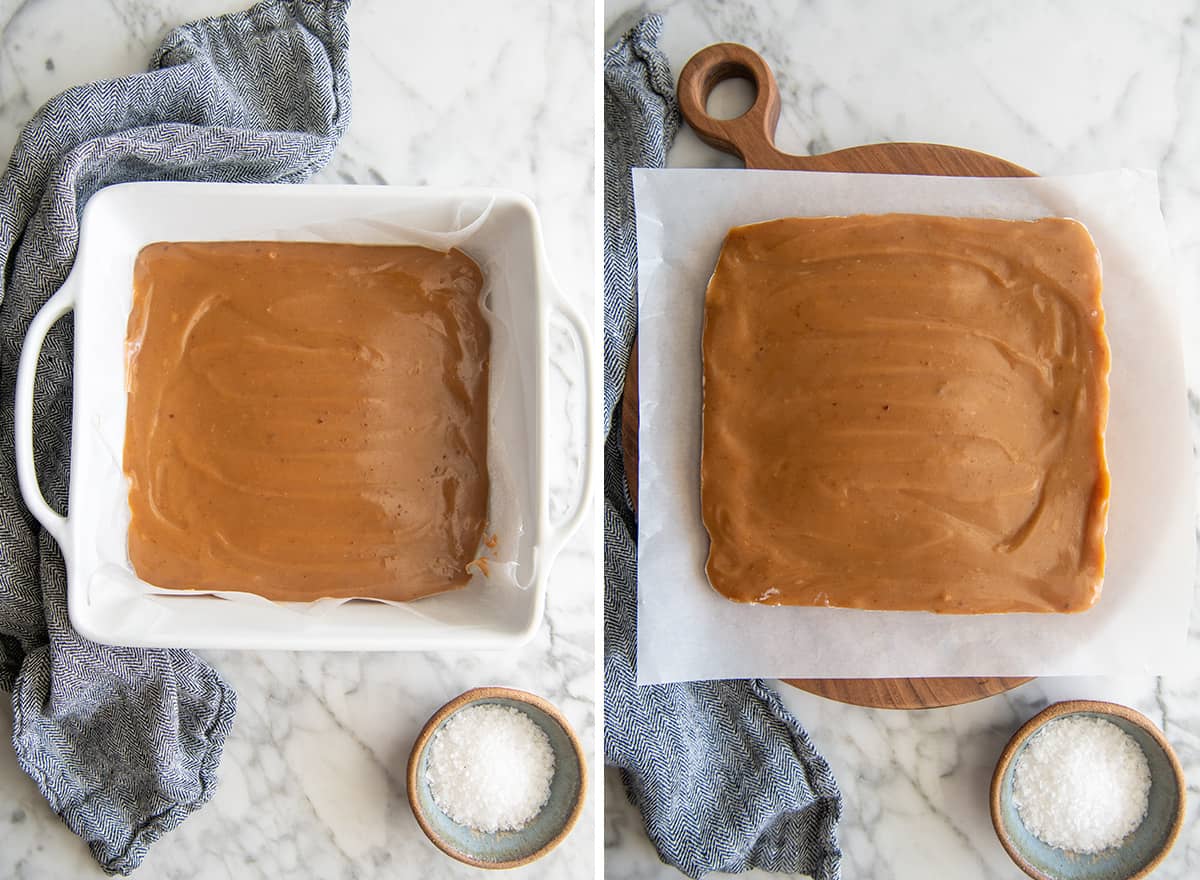
Then, chill the homemade caramel in the refrigerator until set (about 2 hours).
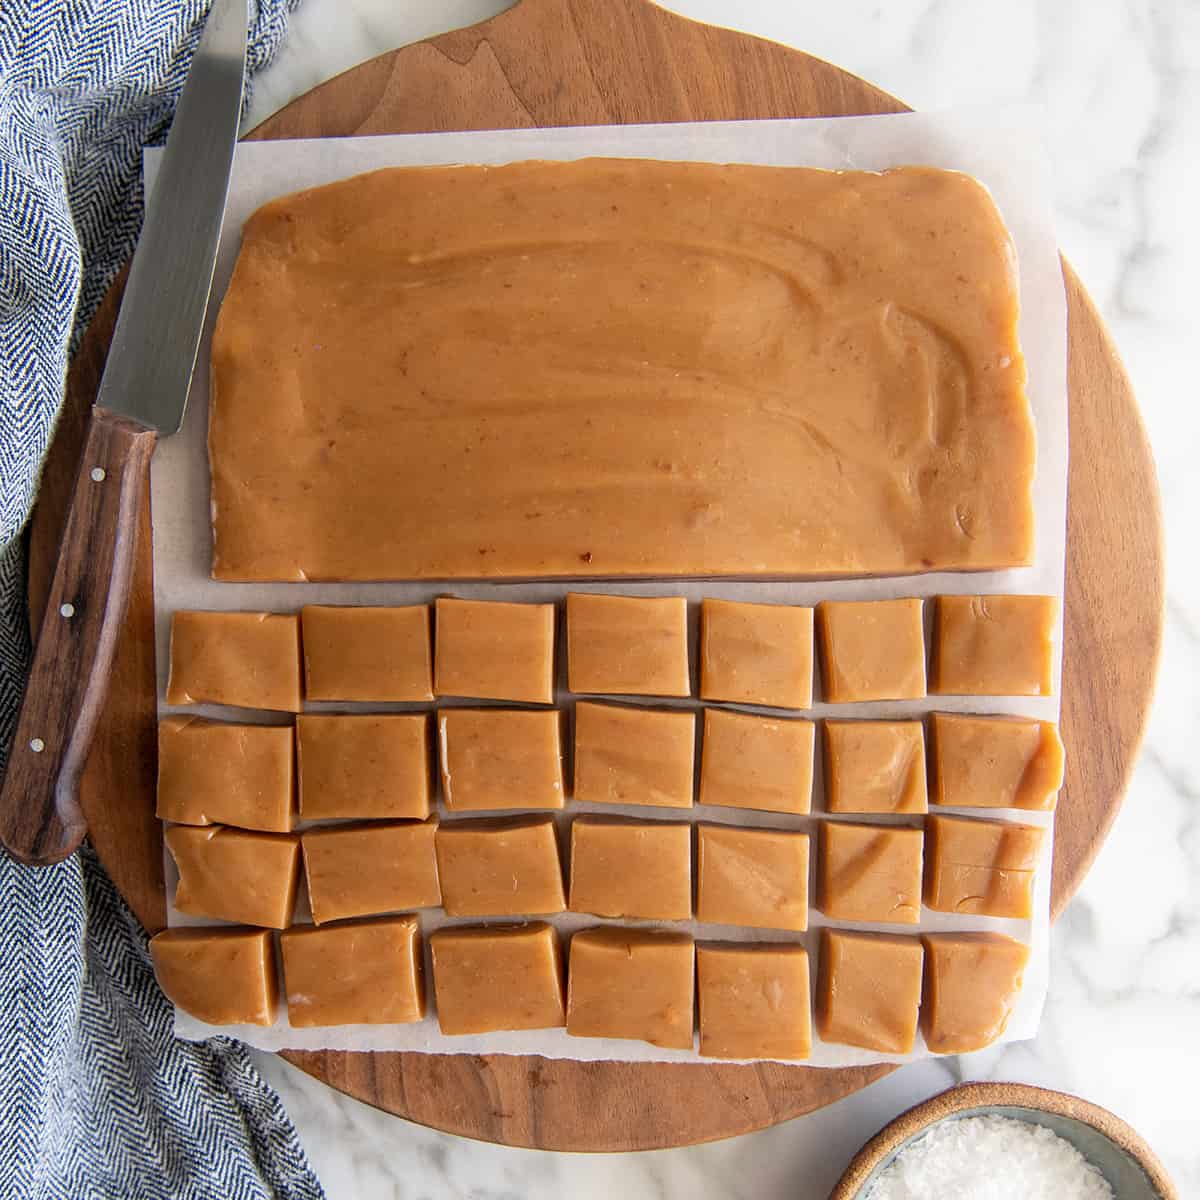
After the caramel is set, lift the it out of the pan, remove the wax paper or silicone baking mat, and put it on a cutting board.
Note: if the wax paper or parchment paper does stick to the caramel, you can use a hot, damp sponge and a metal pastry scraper to remove it.
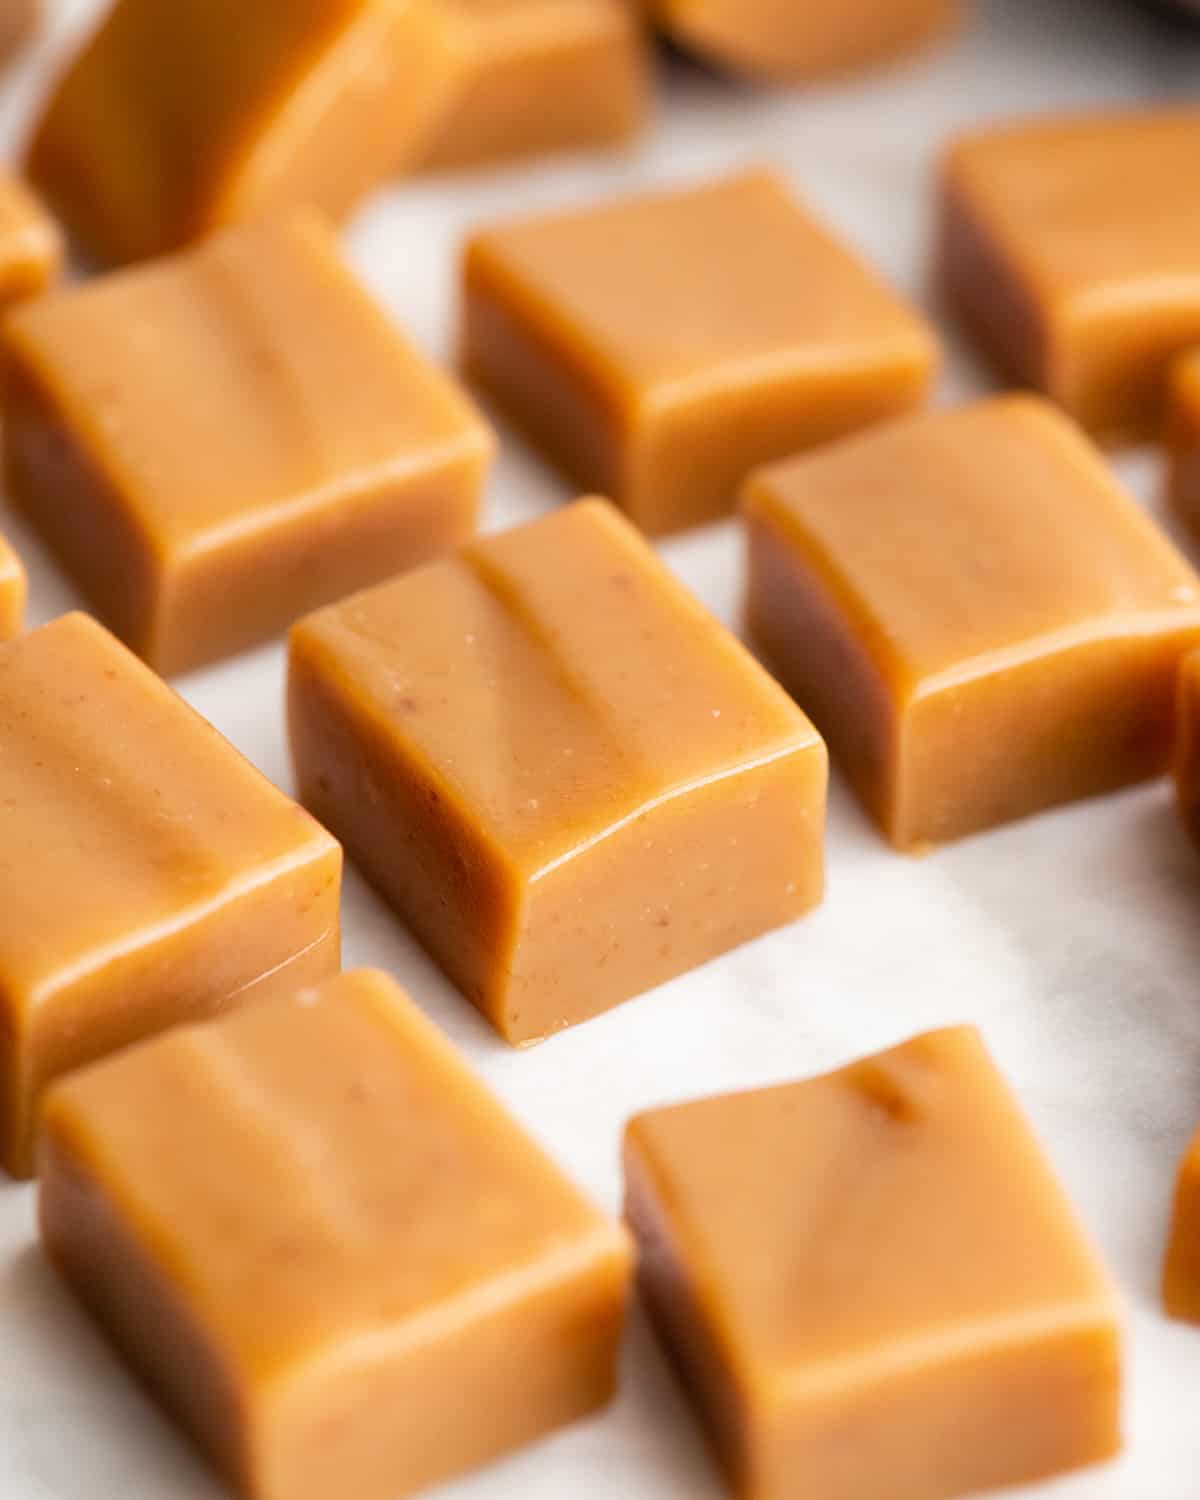
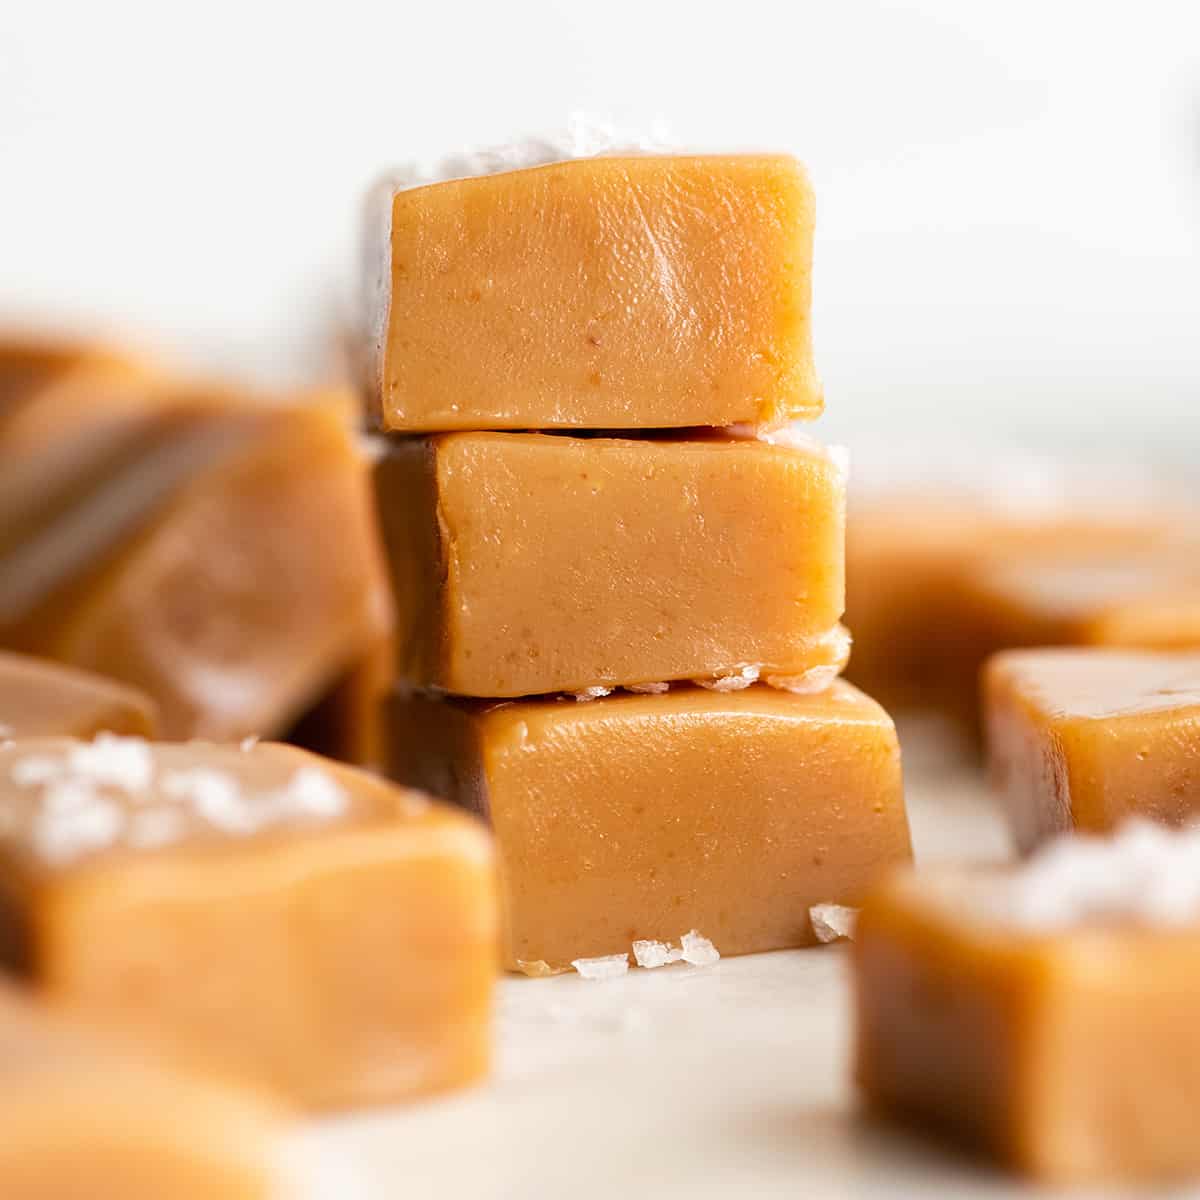
Then, cut the chilled caramel into 1” squares (or your desired size) using a sharp knife.
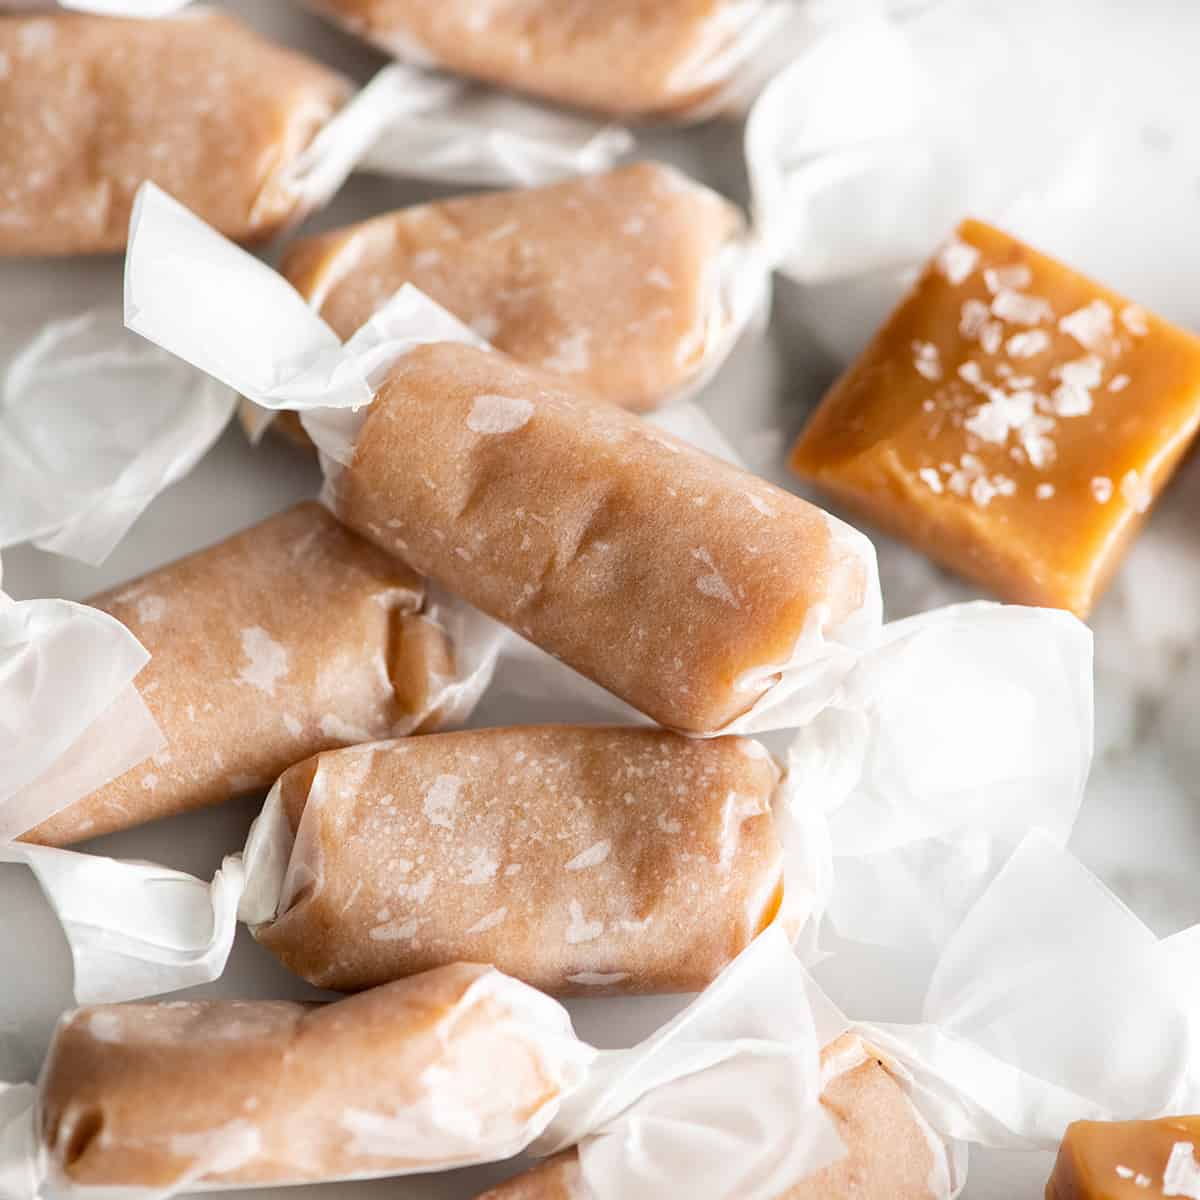
If desired, sprinkle sea salt on the tops of the caramels.
Then, wrap the homemade caramels in candy wrappers or parchment paper.
Store
Store these homemade caramels wrapped or unwrapped in an airtight container in the refrigerator or at room temperature for up to 3 weeks.
If storing in the refrigerator, I suggest removing the caramel 15-30 minutes before serving so it has time to soften.
Freeze
Freeze caramels for up to 2 months, individually wrapped in waxed paper in an airtight contianer.
Troubleshooting
I’ve run into two problems making homemade caramel, and here is how I’ve dealt with them:
- The butter separates during cooking – if this happens, remove the caramel from the heat and beat it vigorously with a wooden spoon or spatula. This happens when you use too high heat.
- The caramel has little crystalized bits in it. If this happens you are using a pan that isn’t thick enough on the bottom, which causes the sugar to burn and create flecks in the caramel. Use a thick-bottomed, heavy duty pan and this problem will disappear.
Mistakes to Avoid When Making Caramel
- Using a thin pot – it heats unevenly. Use a tall, heavy-bottomed pot.
- Using a dirty pot – I did this and got flecks in my caramel.
- Not using a candy thermometer.
- Cooking at too high heat If the temperature gets too hot and the caramel becomes too hard as it cools, you can put it back in the pan with a couple of tablespoons of cold water to try and save it.
Caramel recipes
Use the caramel in these delicious recipes!
Homemade Caramel Recipe FAQs
You have to be able to recognize the “soft ball” stage. Place a glass or bowl of cold water next to you as you make the caramel. You will know you reached the soft ball stage when the caramel starts turning darker brown, pulls away from the sides and forms a ball when put in cold water.
This homemade caramel lasts for up to 3 weeks when stored at room temperature, or 2 months in the freezer.
It’s not necessary, but does extend it’s shelf-life.
Yes, double the ingredients, cook the caramel in at least a 5-quart pot and use a 9×13″ pan to pour the caramel into.
If you make and love my recipes, it would mean so much to me if you would leave a comment and rating! And don’t forget to follow along on Instagram, Pinterest, Facebook, TikTok and Youtube – be sure to tag @joyfoodsunshine and use the hashtag #joyfoodsunshine so I can see your creations!

Homemade Caramel Recipe
Equipment
Ingredients
- ½ cup salted butter diced into cubes
- ½ cup light brown sugar
- ½ cup granulated sugar
- ¼ cup light corn syrup
- 14 ounces sweetened condensed milk
- ¼ teaspoon sea salt
- 1 teaspoon vanilla extract
Instructions
Lay Out Equipment
- Line a 9×9” baking pan with a silicone baking mat or heavily greased wax paper, set aside. Alternately, you can put a silicone baking mat on a larger baking sheet and note that you will not spread the caramel over the entire thing.
- Locate your instant read thermometer and have it close by.
Make the Caramel
- Combine butter, corn syrup, condensed milk, brown sugar, granulated sugar and sea salt in a heavy-bottomed 4-quart (at least) saucepan. Whisk constantly until the butter is melted and the mixture is smooth.
- Cook over medium-low heat until the caramel reaches 240-245 degrees F on an instant-read thermometer, stirring every few minutes with a heatproof spatula or wooden spoon, making sure not to let any of the mixture on the bottom or sides burn or get too brown. This takes about 20 to 25 minutes. Do not rush it.
- You will know you’re getting close when the caramel becomes slightly darker brown in color, thickens and pulls away from the sides of the saucepan as you stir. It will also remain solid when removed from the pot and left to cool or put in cold water.
- When the caramel is finished cooking, remove from heat, add vanilla and stir vigorously.
- Pour the caramel into the prepared pan.
- Chill in the refrigerator until set (about 2 hours).
- Then, lift the caramel out of the pan, remove the wax paper or silicone baking mat, and put it on a cutting board.
- Cut the chilled caramel into 1” squares (or your desired size) with a sharp knife.
- If desired, sprinkle sea salt on the tops of the caramels.
- Store cut caramels in an airtight container in the refrigerator, or wrap them in candy wrappers or parchment paper.
Video
Notes
- Salted butter. I always use salted butter (plus additional sea salt) when making caramel because it helps stabilize the candy mixture so the butter doesn’t separate. I don’t recommend making substitutions.
- Light brown sugar. Dark brown sugar can be used in place of light for a caramel with a more pronounced molasses taste.
- Granulated sugar. you can use all light brown sugar if you prefer.
- Corn Syrup. I have not tried substitutes for the corn syrup, although I have heard of readers using honey with great results.
- Sweetened condensed milk. an important ingredient that I don’t recommend substituting.
- Tall, heavy bottomed pan. This is absolutely critical when making caramel. I suggest a thick pot like this one or this one.
- Candy thermometer. . I use a digital, instant read thermometer for all my candy making (and meat cooking) needs.
- Silicone spatula. The caramel needs to be stirred often, so you need a heat-proof utensil to make this recipe. I suggest a high-heat silicone spatula.
- Candy wrappers. If you plan on gifting these caramels, wrap them in candy wrappers!
- Line a 9×9″ square baking dish with wax paper and heavily butter the paper. If you don’t grease the paper enough the caramel will stick to it.
- Line a 9×9″ baking dish with a silicone baking mat that fits in the bottom of the pan or line a larger baking sheet with a silicone baking mat. If using a larger baking mat you will not spread the caramel out on the entire thing.
- You can also use a 9×9″ silicone baking pan set on top of a baking sheet for easy removal. I still recommend lightly buttering the pan.
Nutrition
Nutrition information is automatically calculated, so should only be used as an approximation.
Made these today, they tasted amazing! The only problem I had was with the wax paper. It was stuck to the bottom of the caramel, which probably was my fault. I made sure to grease it, but I might have left it out too long before putting it in the fridge or I didn’t leave it in the fridge for long enough, could that be where I messed up?
Can I make these chocolate covered after letting them set in a mold?
Yes!
Can I pour the caramel into silicon molds as opposed to the recommended pan to make caramel candies molded in specific shapes?
Yes absolutely!
Absolutely delicious!! Best recipe I have tried!!
Awesome! This was a very easy recipe to follow. I love vanilla so I always double it 🙂 I wrapped them all and in a couple of days, they seemed to have a crust around the outside. Do you know where I went wrong?
I made these for the first time (last month) to add to my holiday cookie boxes and they were SO GOOD. I made a huge mistake and accidentally bought evaporated milk instead of condensed milk… So it took FOREVER to reduce down. HA! But once it did, and cooled, it was a total winner. I made truffles about a week later and used some of the leftover caramels in them. Yum!
Thanks for the recipe!
I’m impressed you persevere and still got it to work with evaporated milk! 😉
The is the best smoothest and creamiest Carmel. My first time making it,
This was my first attempt at making caramel. The recipe and the information were laid out so well that I decided to take a chance and add almonds and then add a layer of dark chocolate. It was a home run, thank you so much.