Cookie Dough Brownies
Posted Feb 11, 2026
This post may contain affiliate links. Please read our disclosure policy.
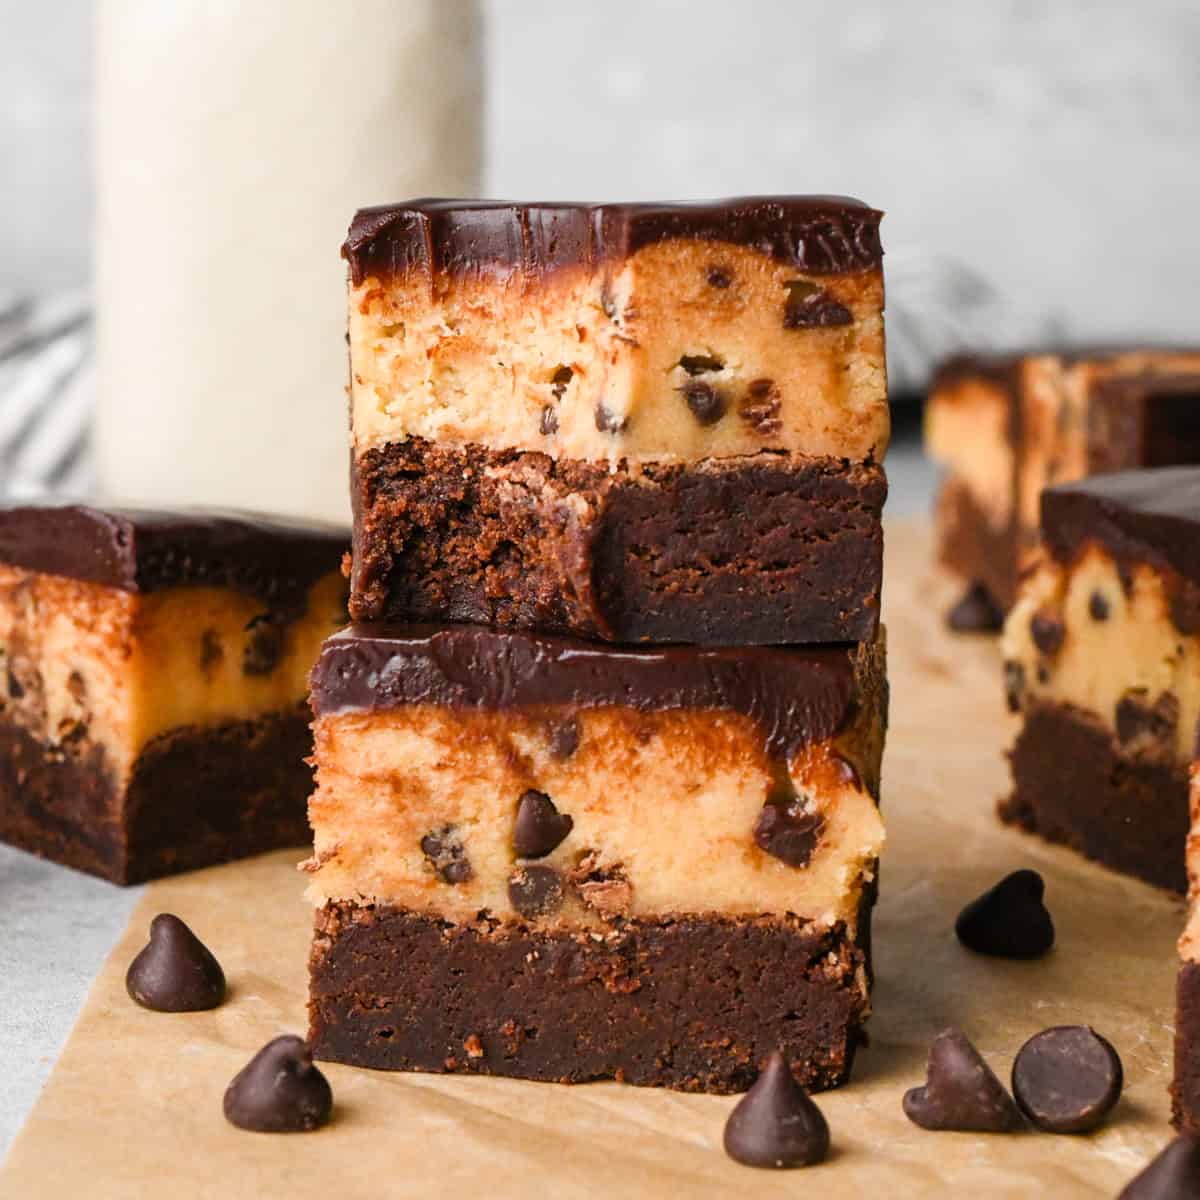
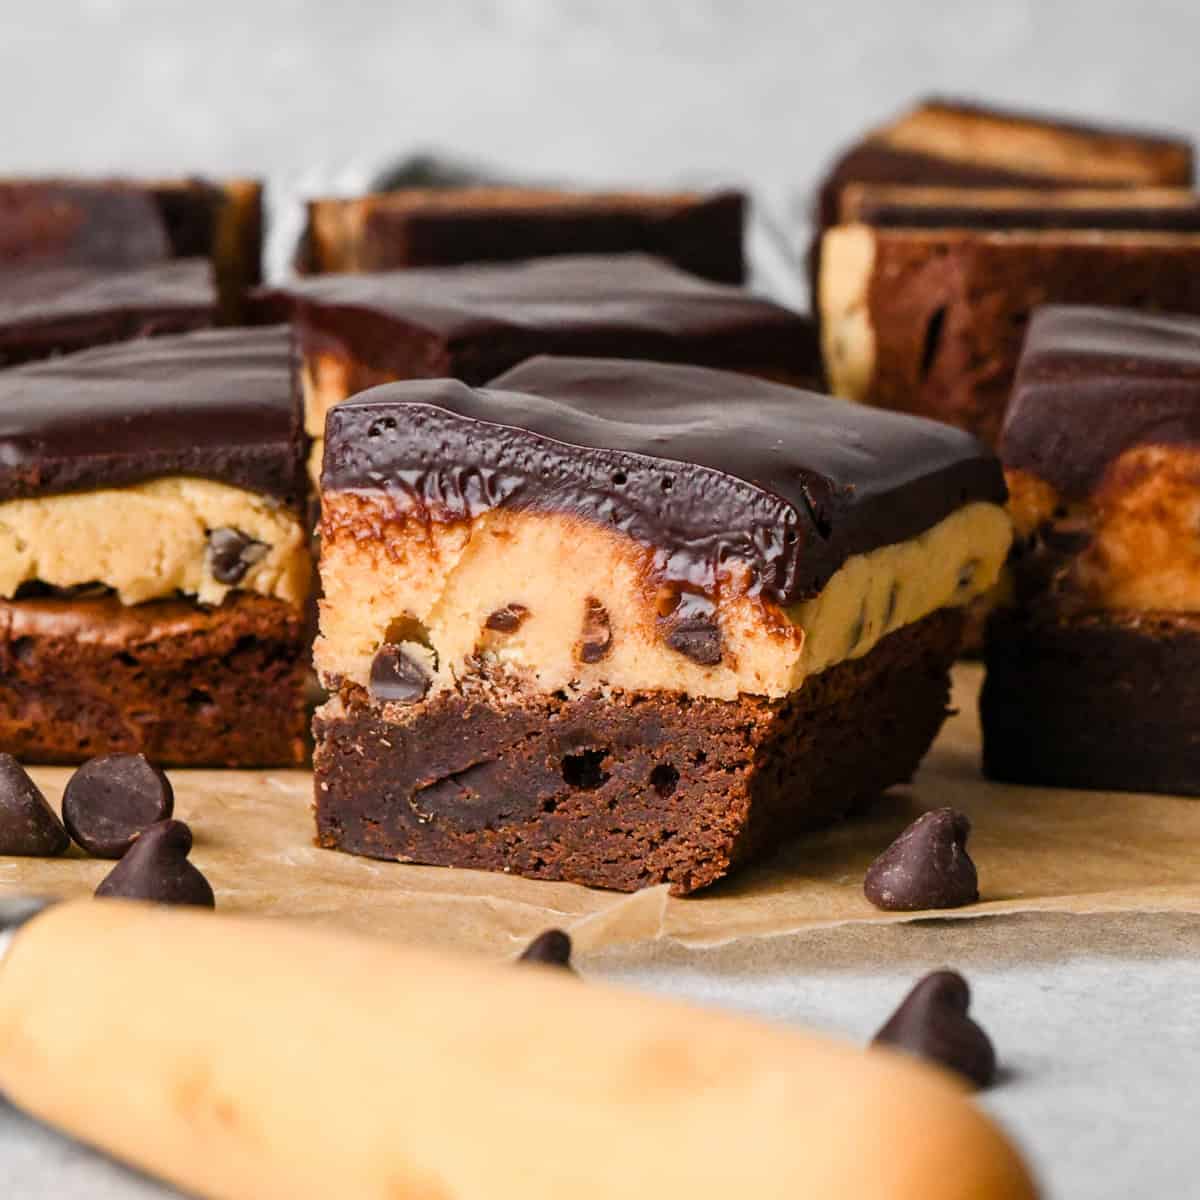
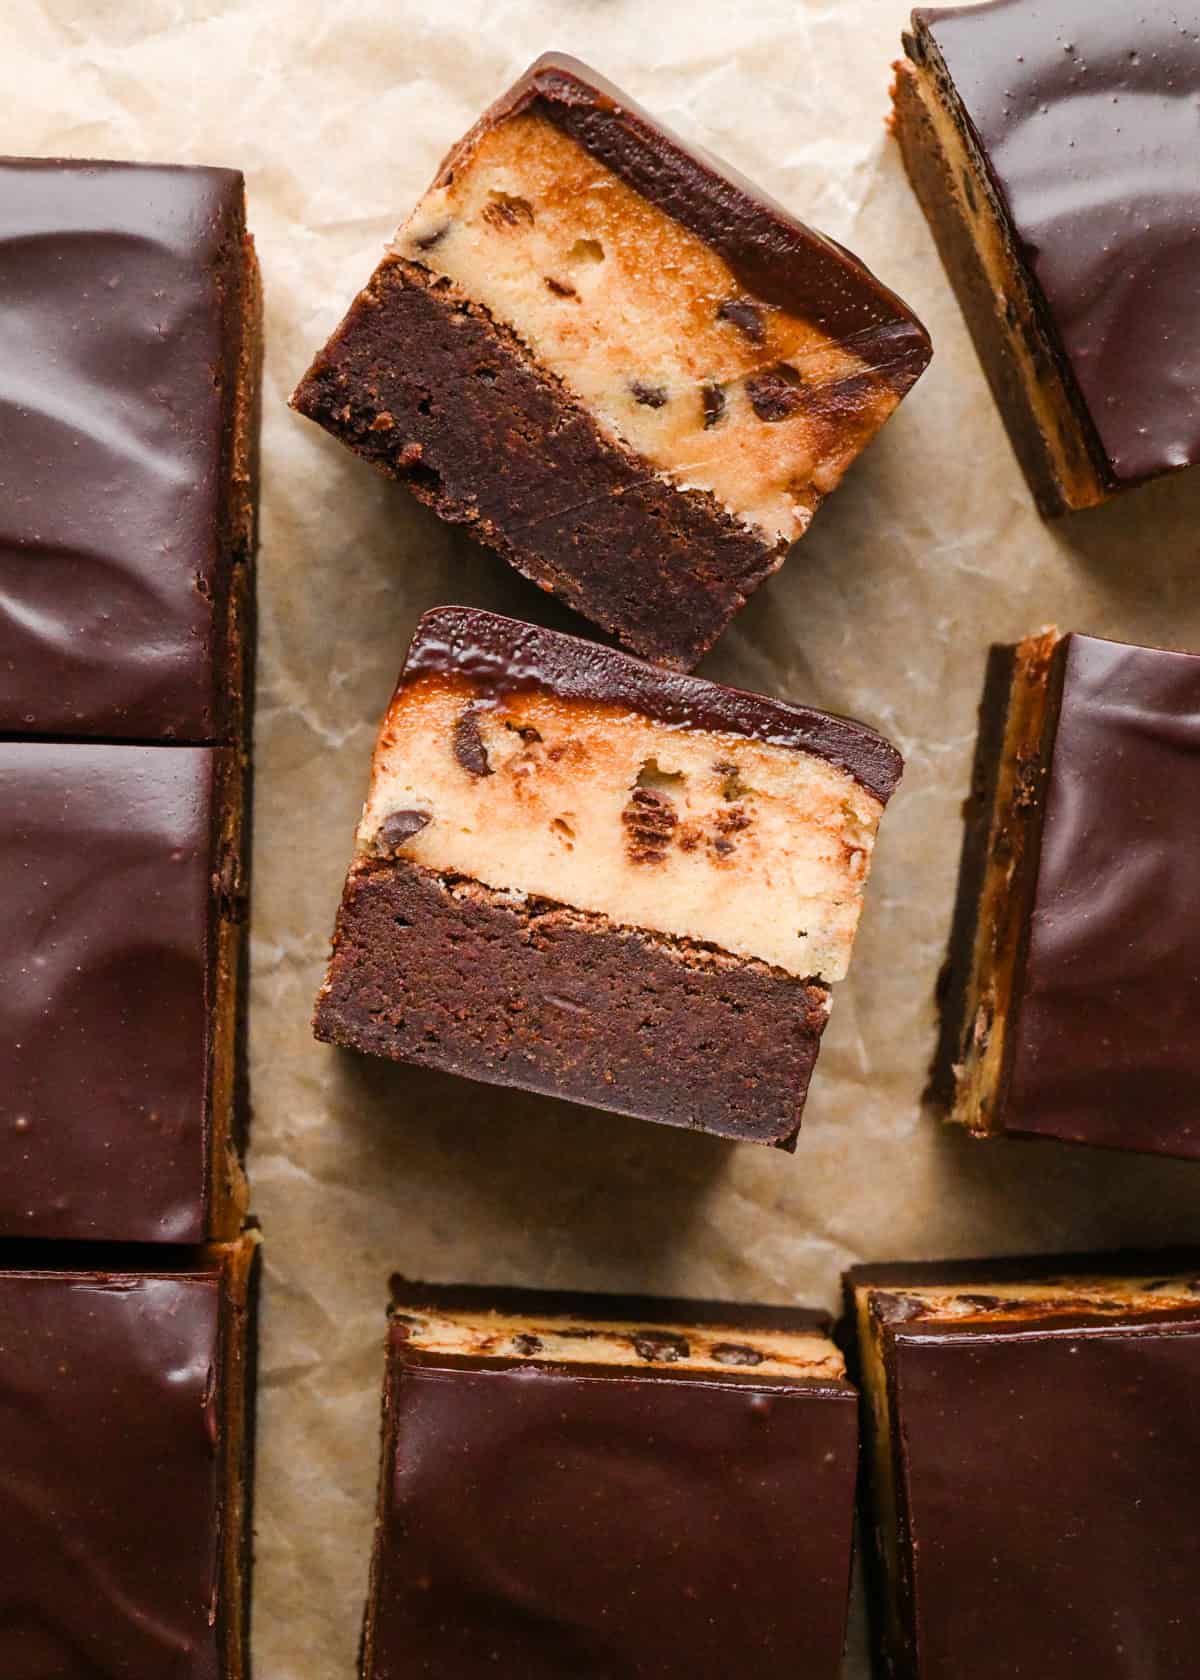
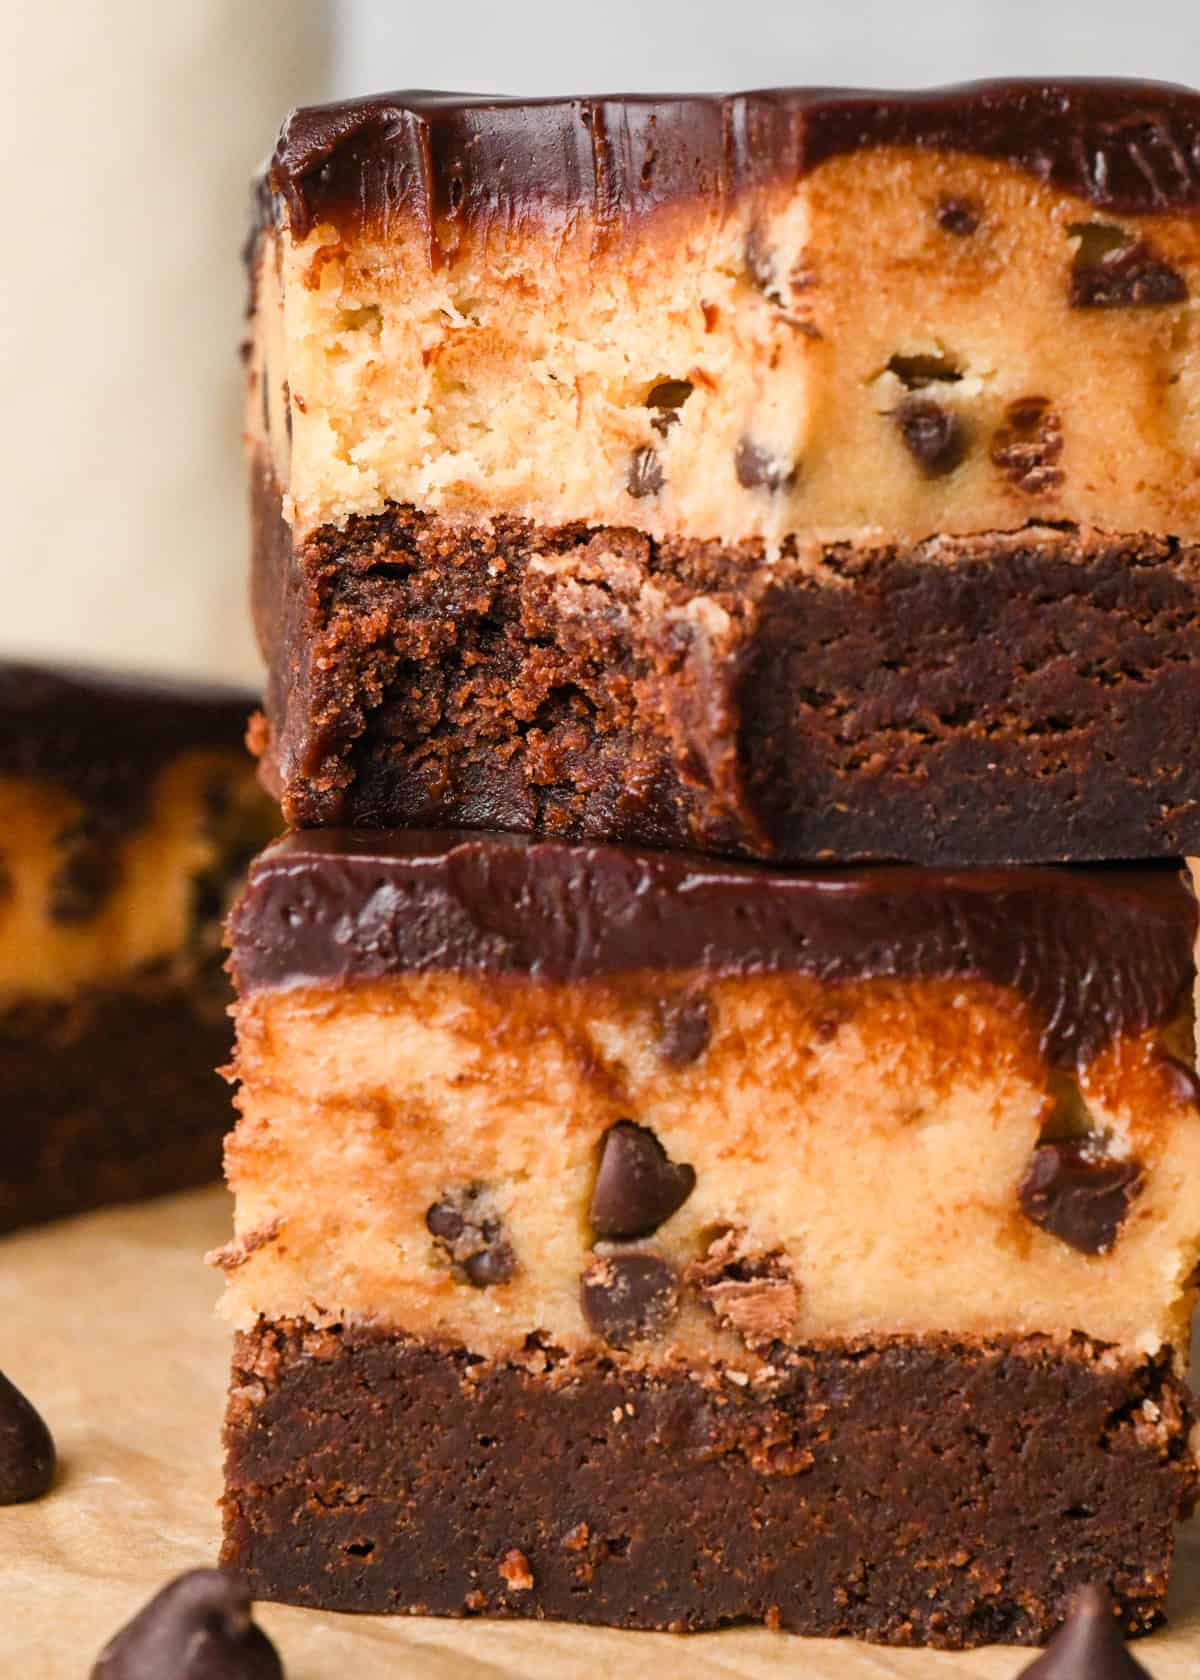
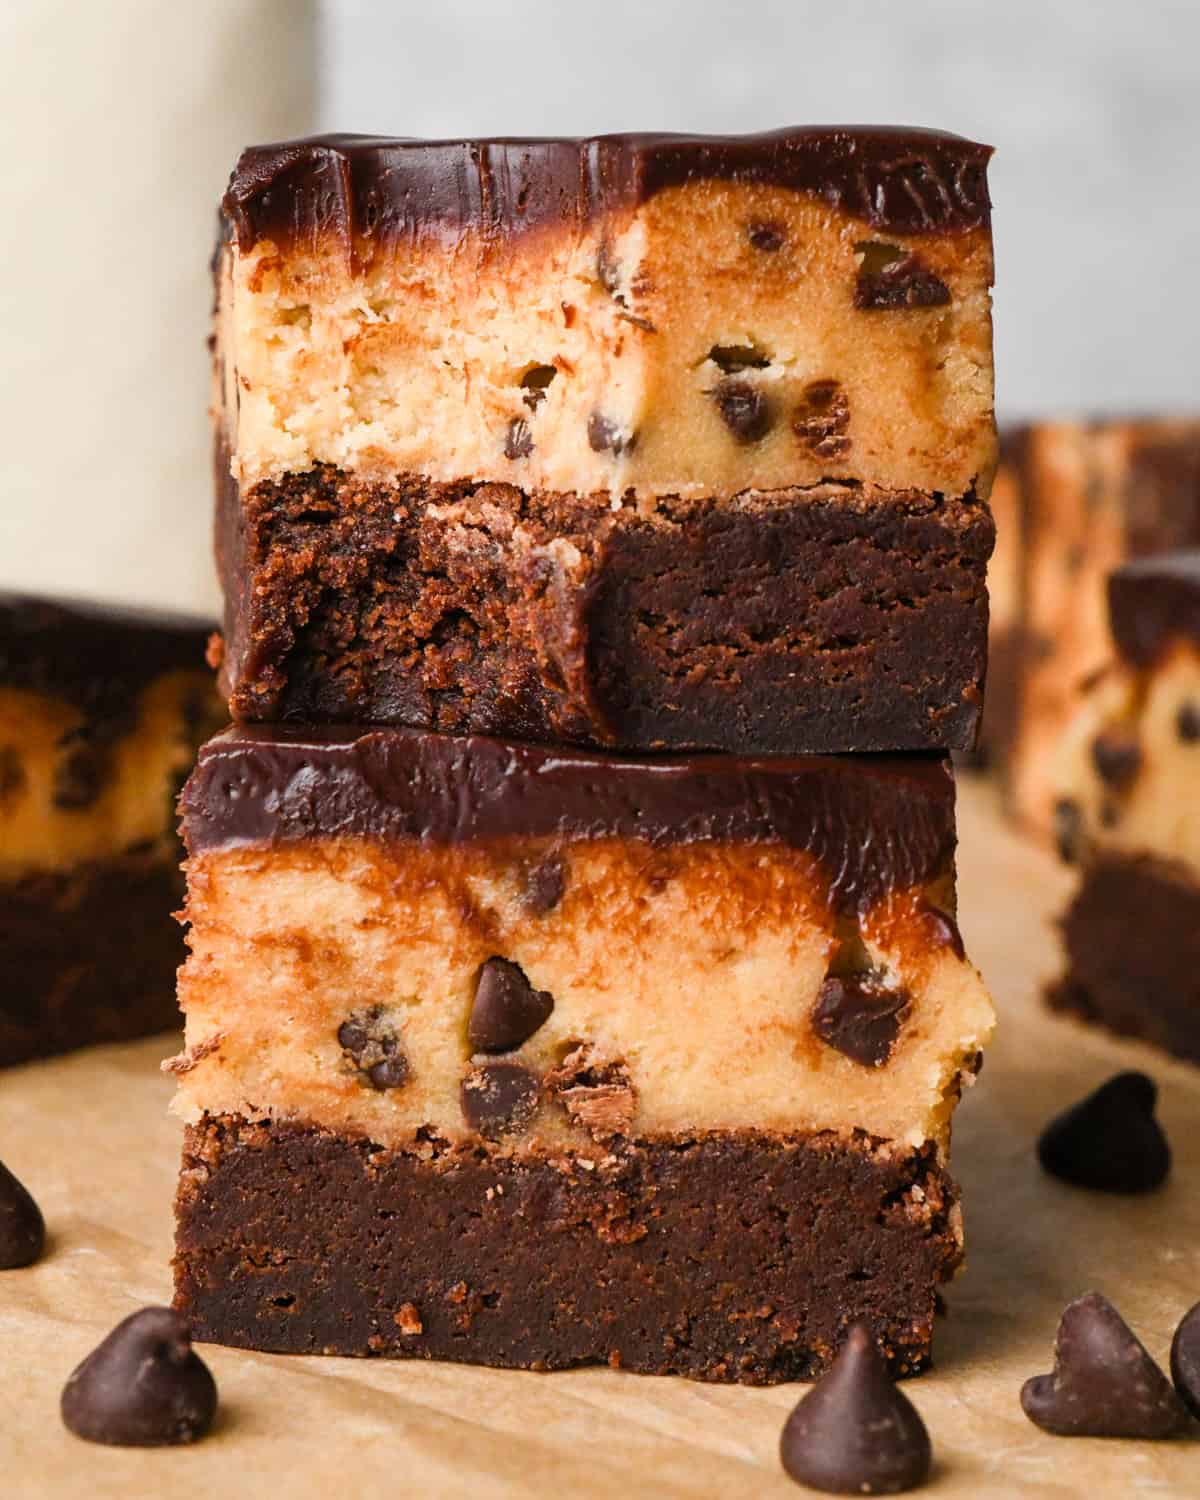
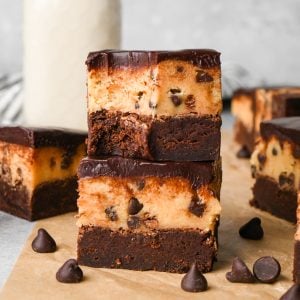
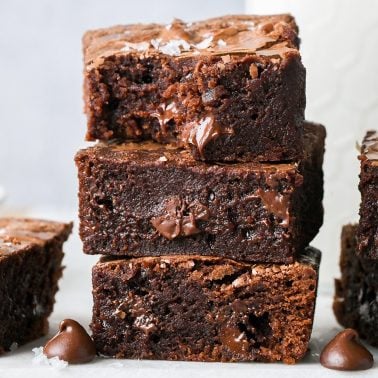
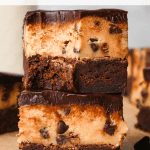
These cookie dough brownies are dessert heaven. A rich and fudgy brownie is topped with a thick layer of edible cookie dough and a luscious chocolate ganache. An easy, bakery-quality, from-scratch brownie recipe for serious dessert lovers!
Let me introduce you to your new favorite brownie recipe – cookie dough brownies.
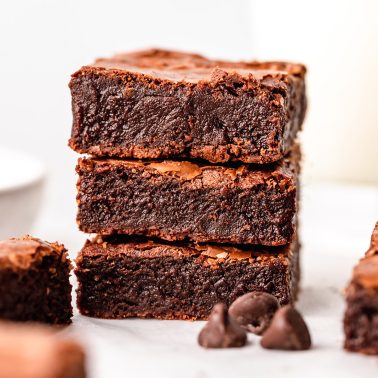
I’m not exaggerating when I say that of the thousands of recipes I have created, this is one of the very best. I took my favorite fudgy brownies and leveled them up by adding a layer of the most delicious edible cookie dough and a silky-smooth chocolate ganache. Every component is made from scratch, no boxes or mixes required!
The result is total dessert bliss. A brownie so good your taste buds won’t believe it.
Cookie Dough Brownies: Ingredients & Substitutions
Some ingredients are used in multiple components of the recipe, so I’ll share some substitutions that work across the board!
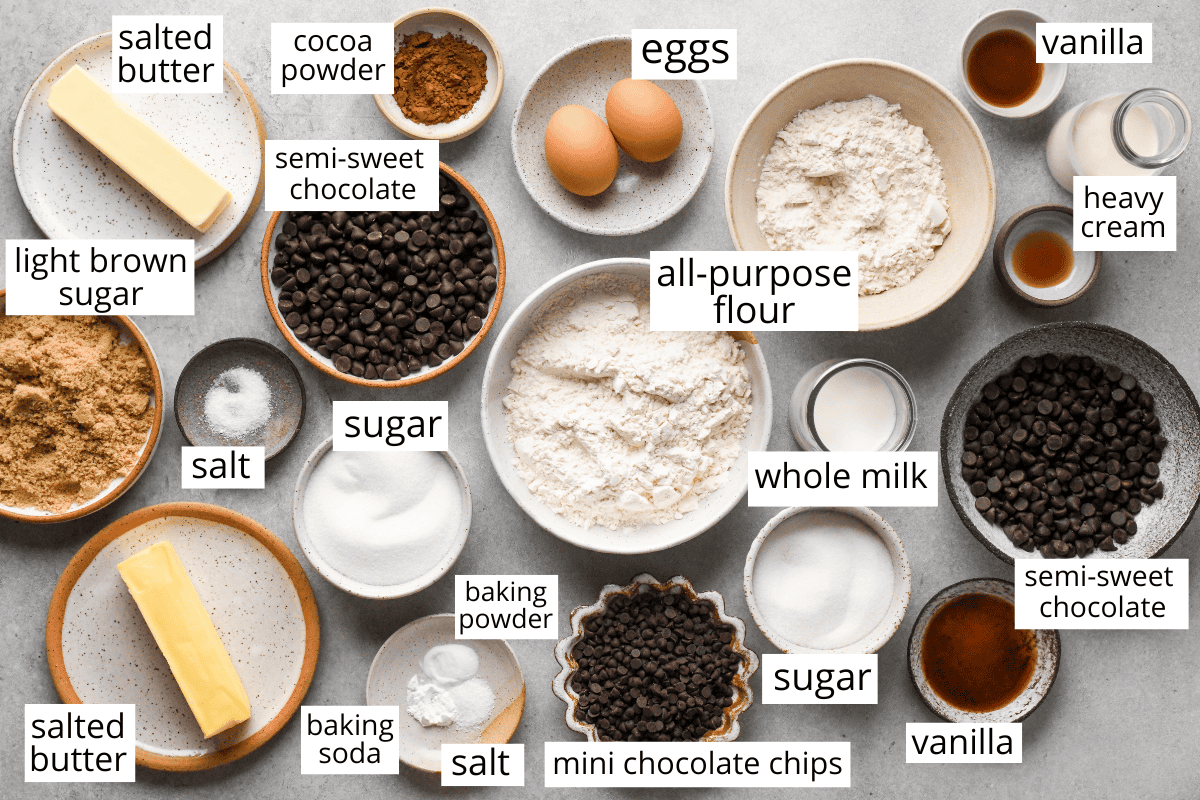
- Semisweet chocolate – for the brownies and ganache you can use chips, bars, discs, etc. because the chocolate is melted.
- Salted Butter. unsalted butter works great in this recipe too.
- All-purpose flour. To make this recipe gluten-free, use an all-purpose gluten-free baking flour.
- Whole milk. heavy cream works great in place of whole milk.
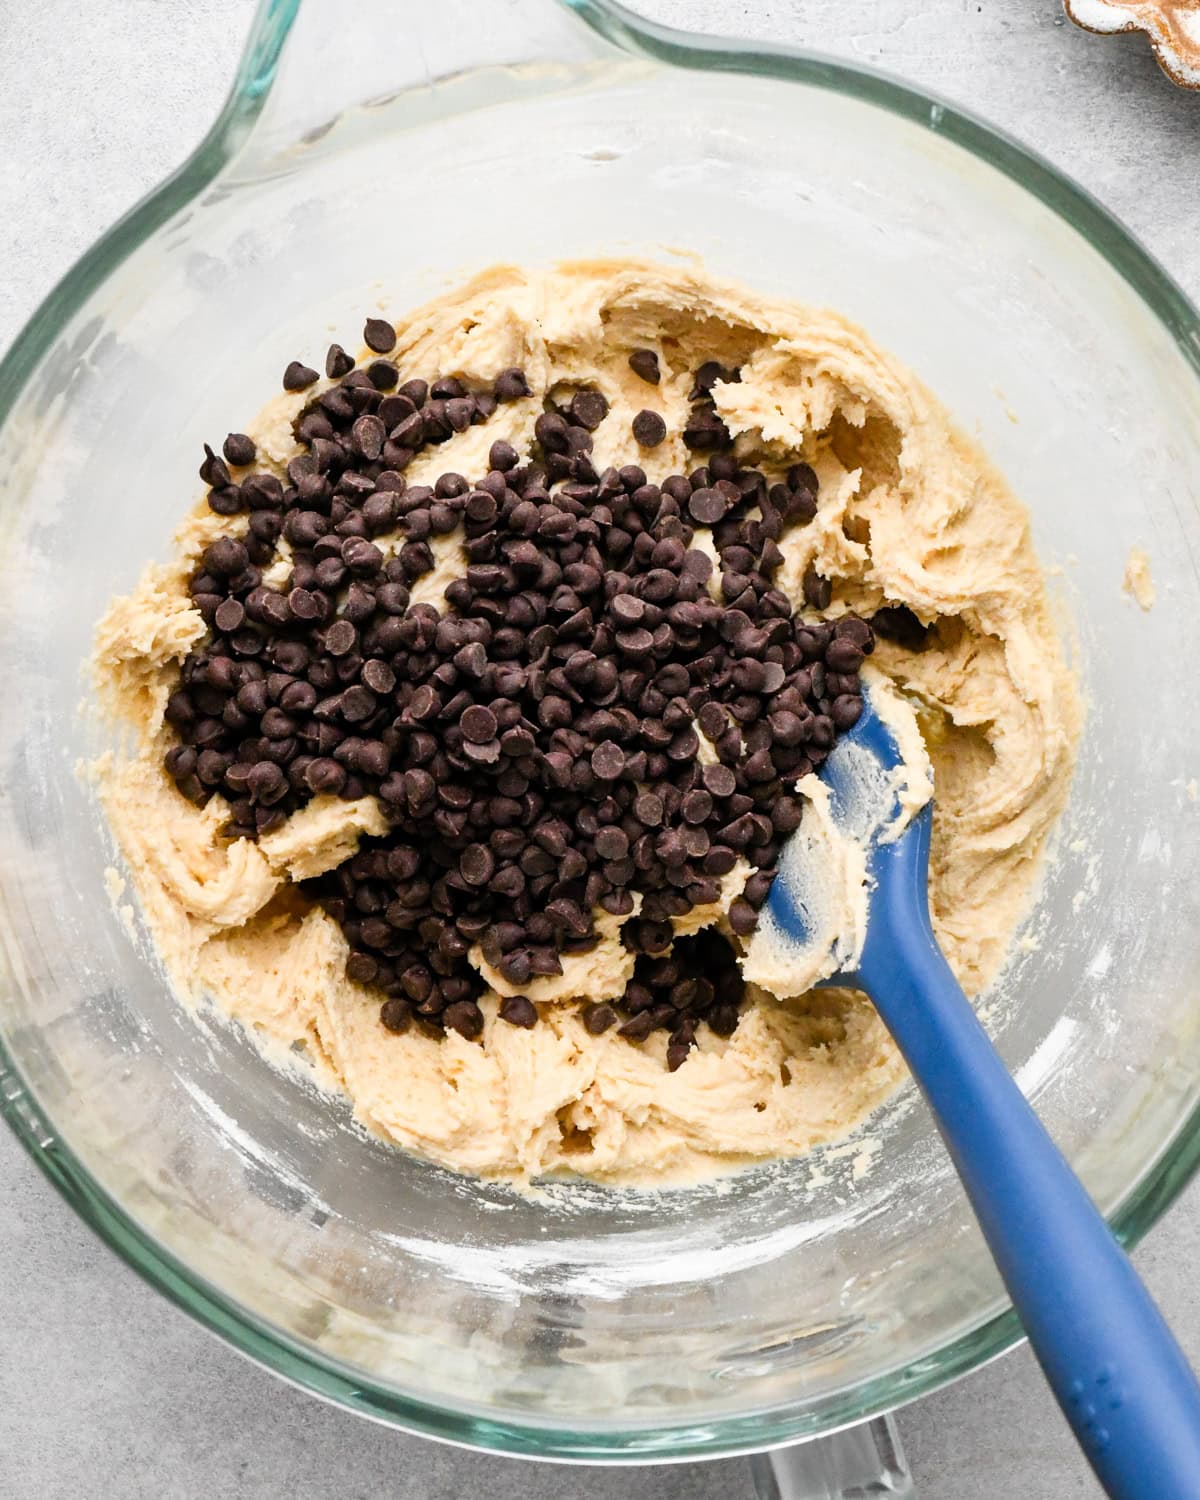
- Mini chocolate chips. These are in the cookie dough layer and I don’t recommend substitutions. Sure, regular size chips work fine – but the mini chips just work so much better.

How to Make Cookie Dough Brownies
Ok, so we are making three different components in this recipe – but each one is straightforward and I promise it’s worth it!
Make the Brownie Layer
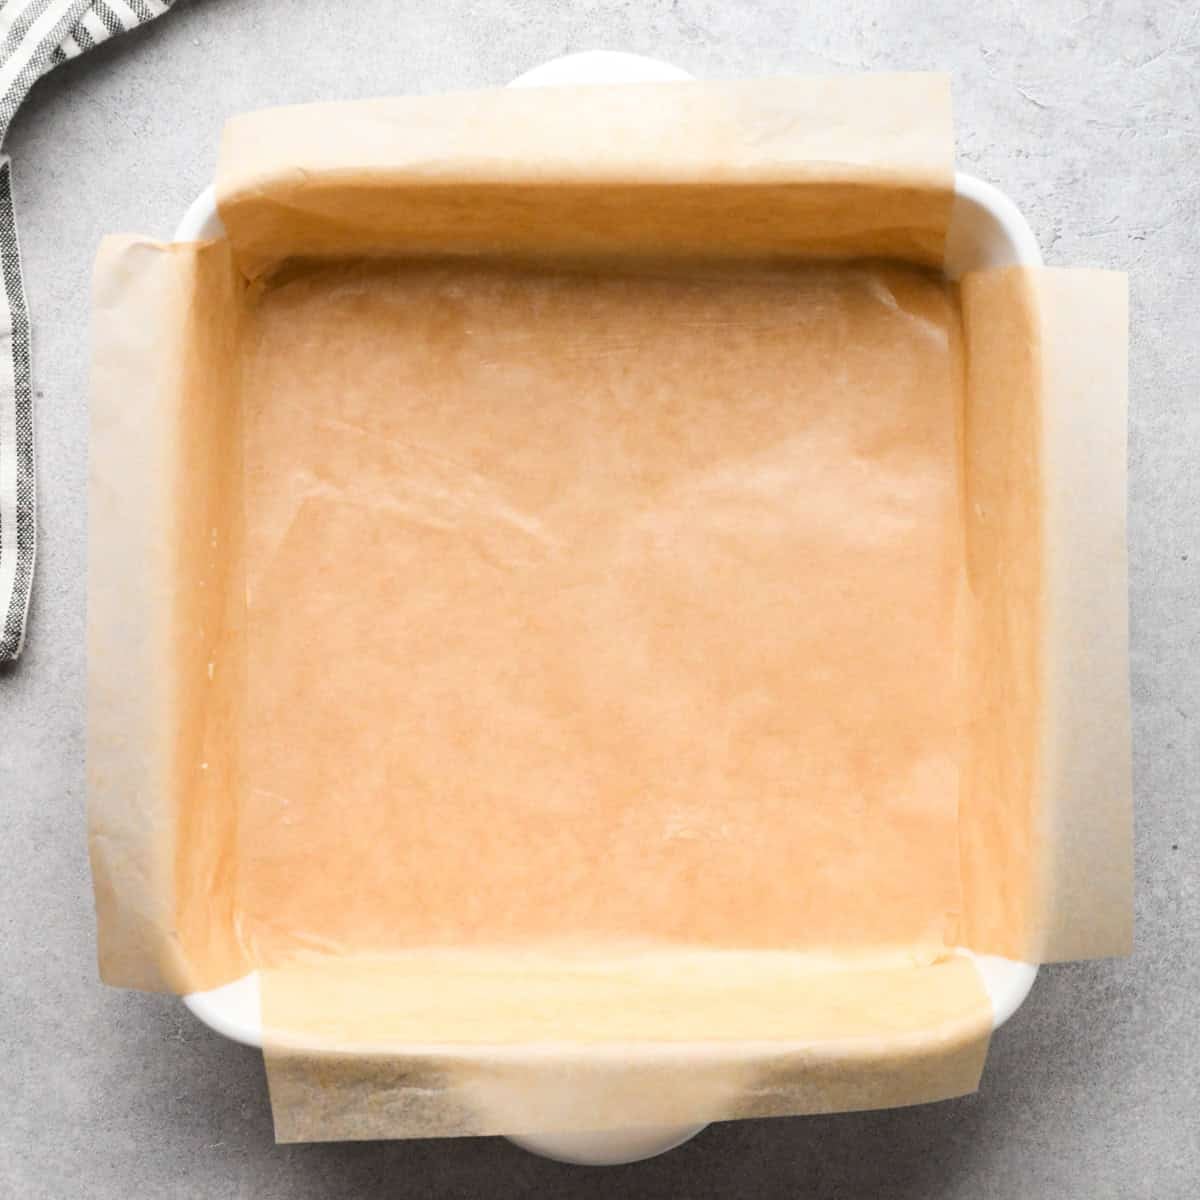
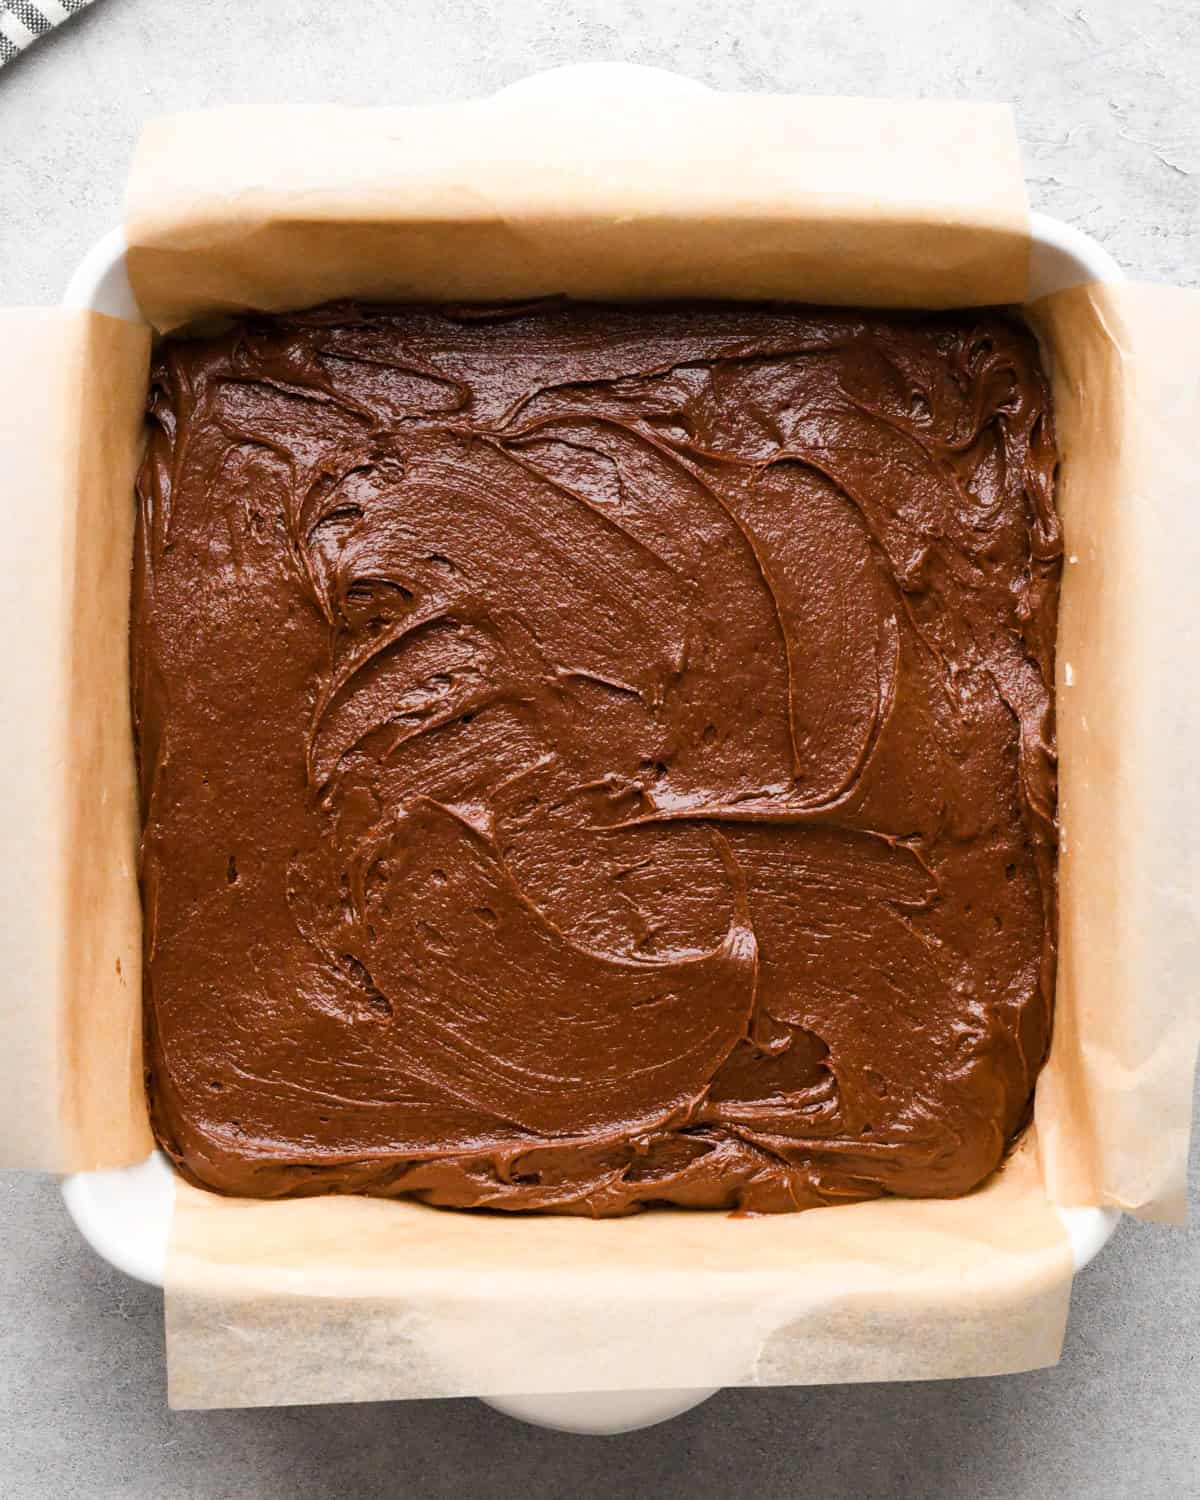
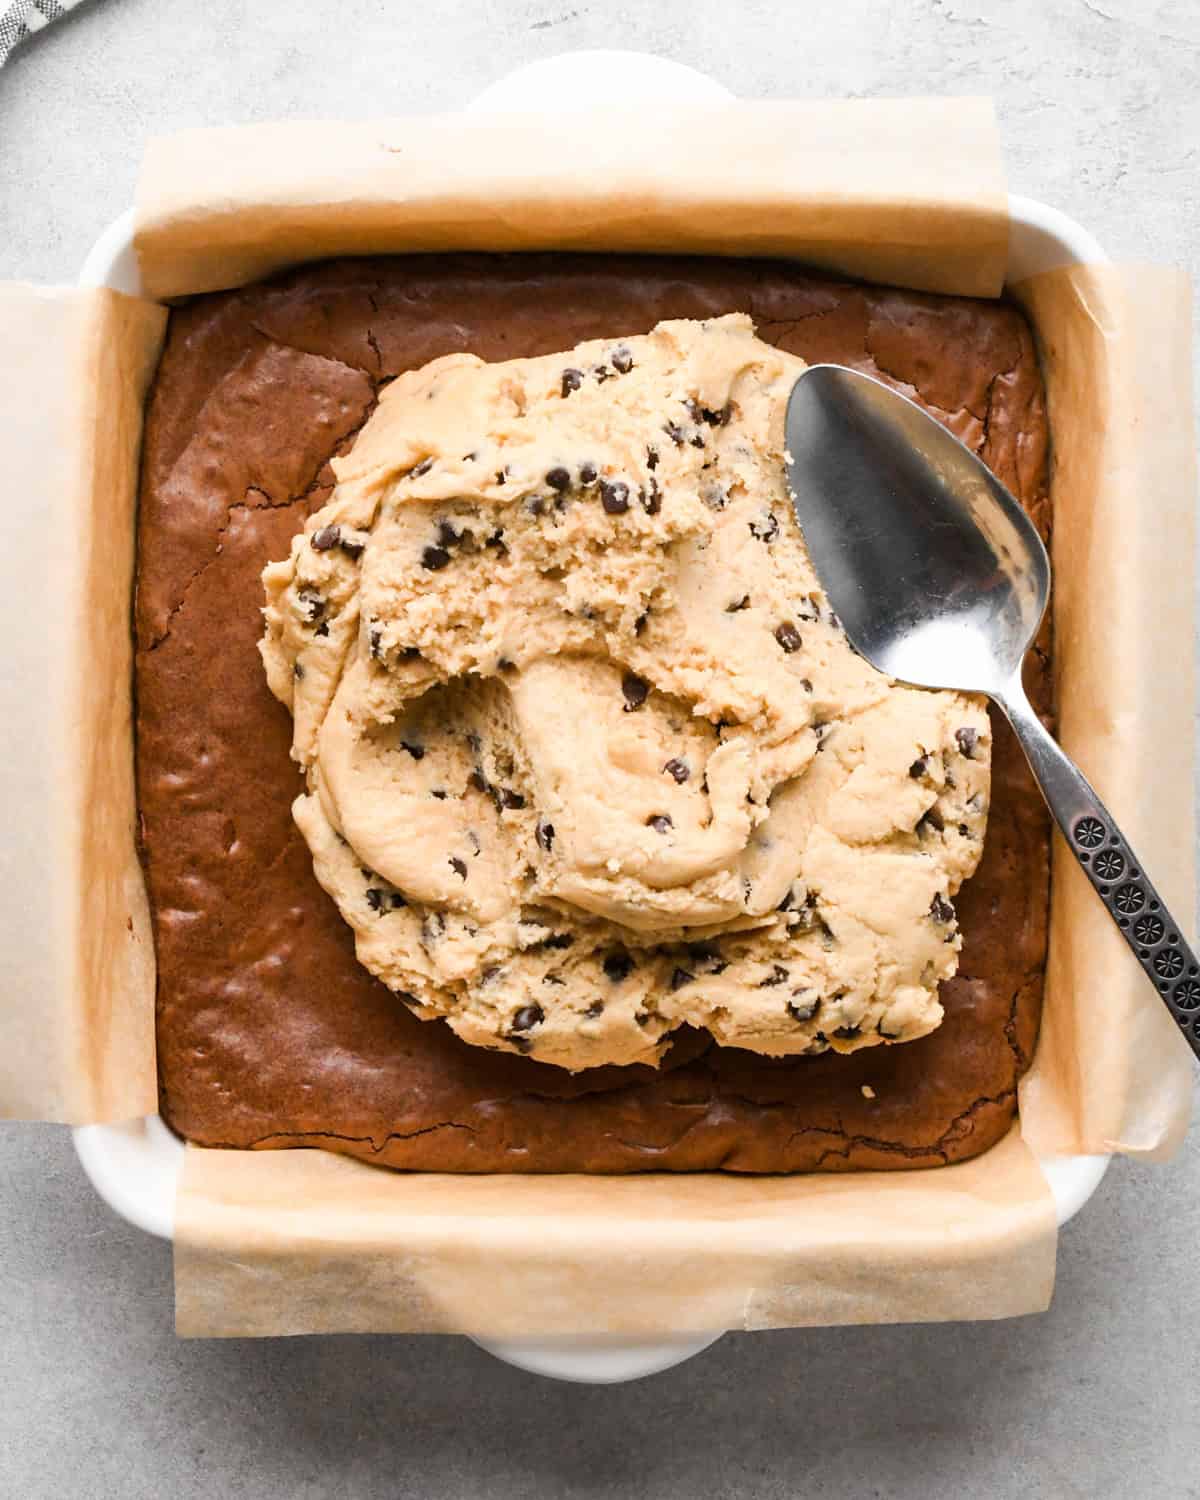
We start with the brownie layer because it has to cool before adding the other two layers. Begin by lining a 9×9″ baking dish with parchment paper. I like to cut “handles” in the paper on each side (see the photo below) so the brownies are easy to remove from the pan and slice after assembling.
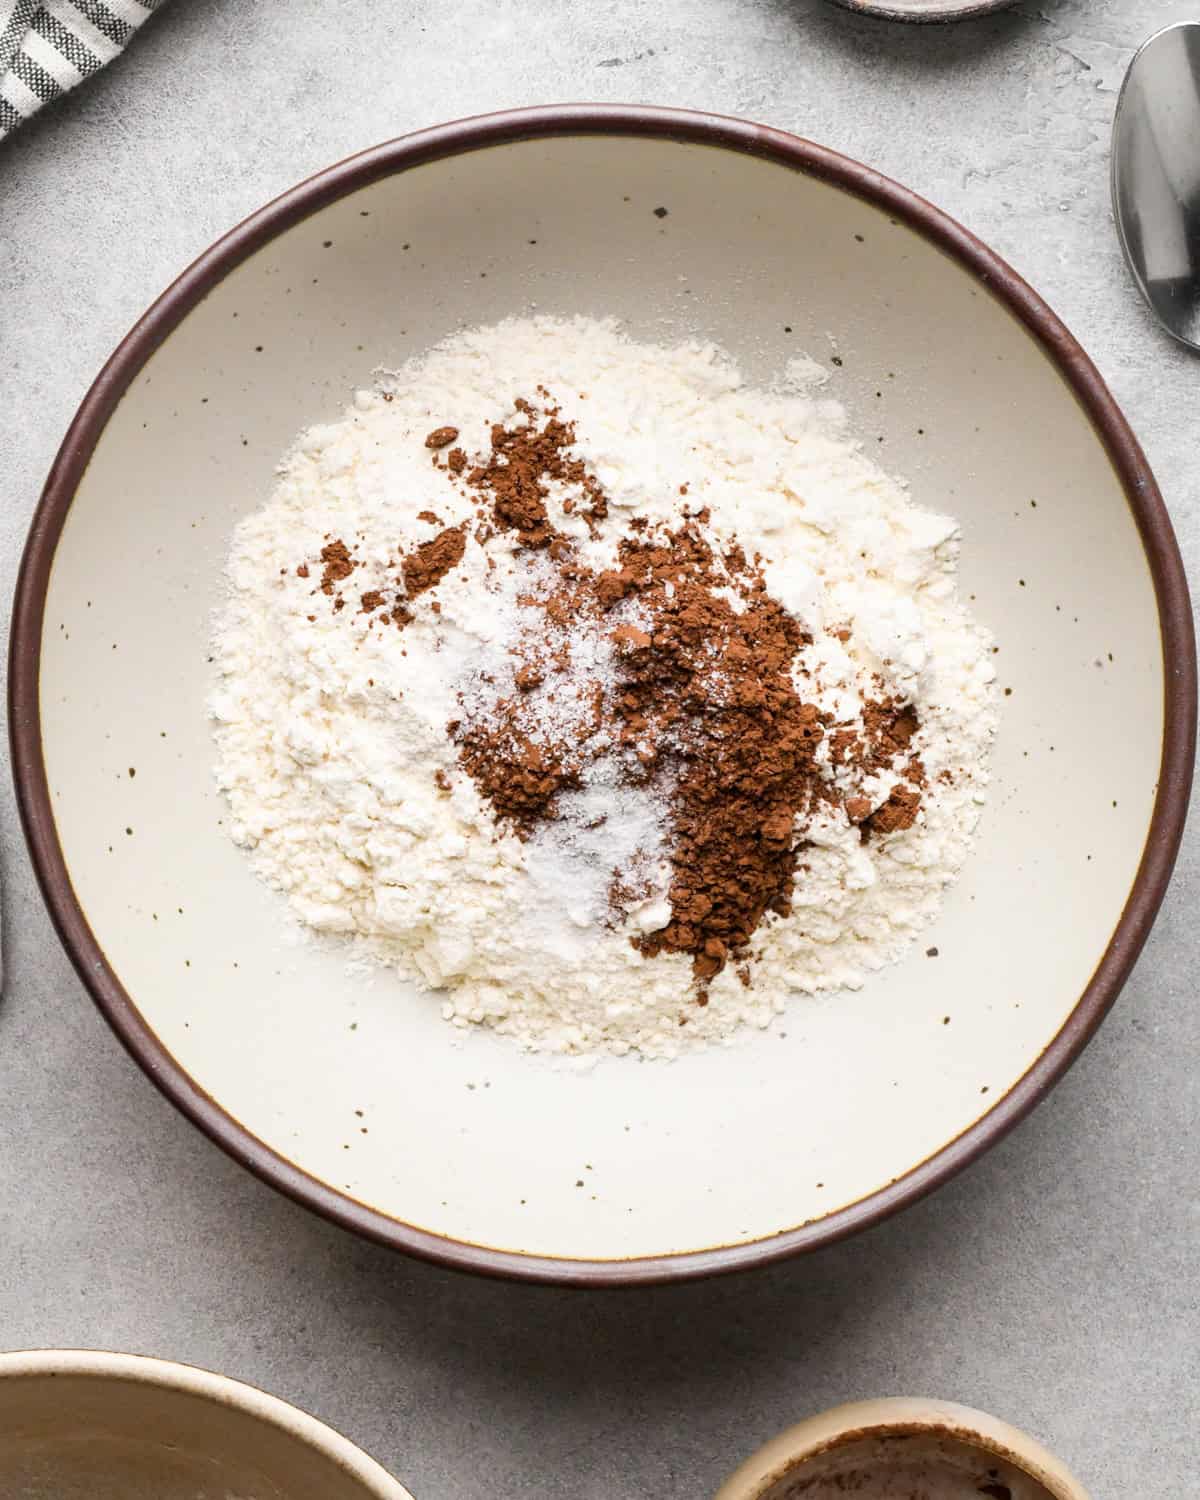
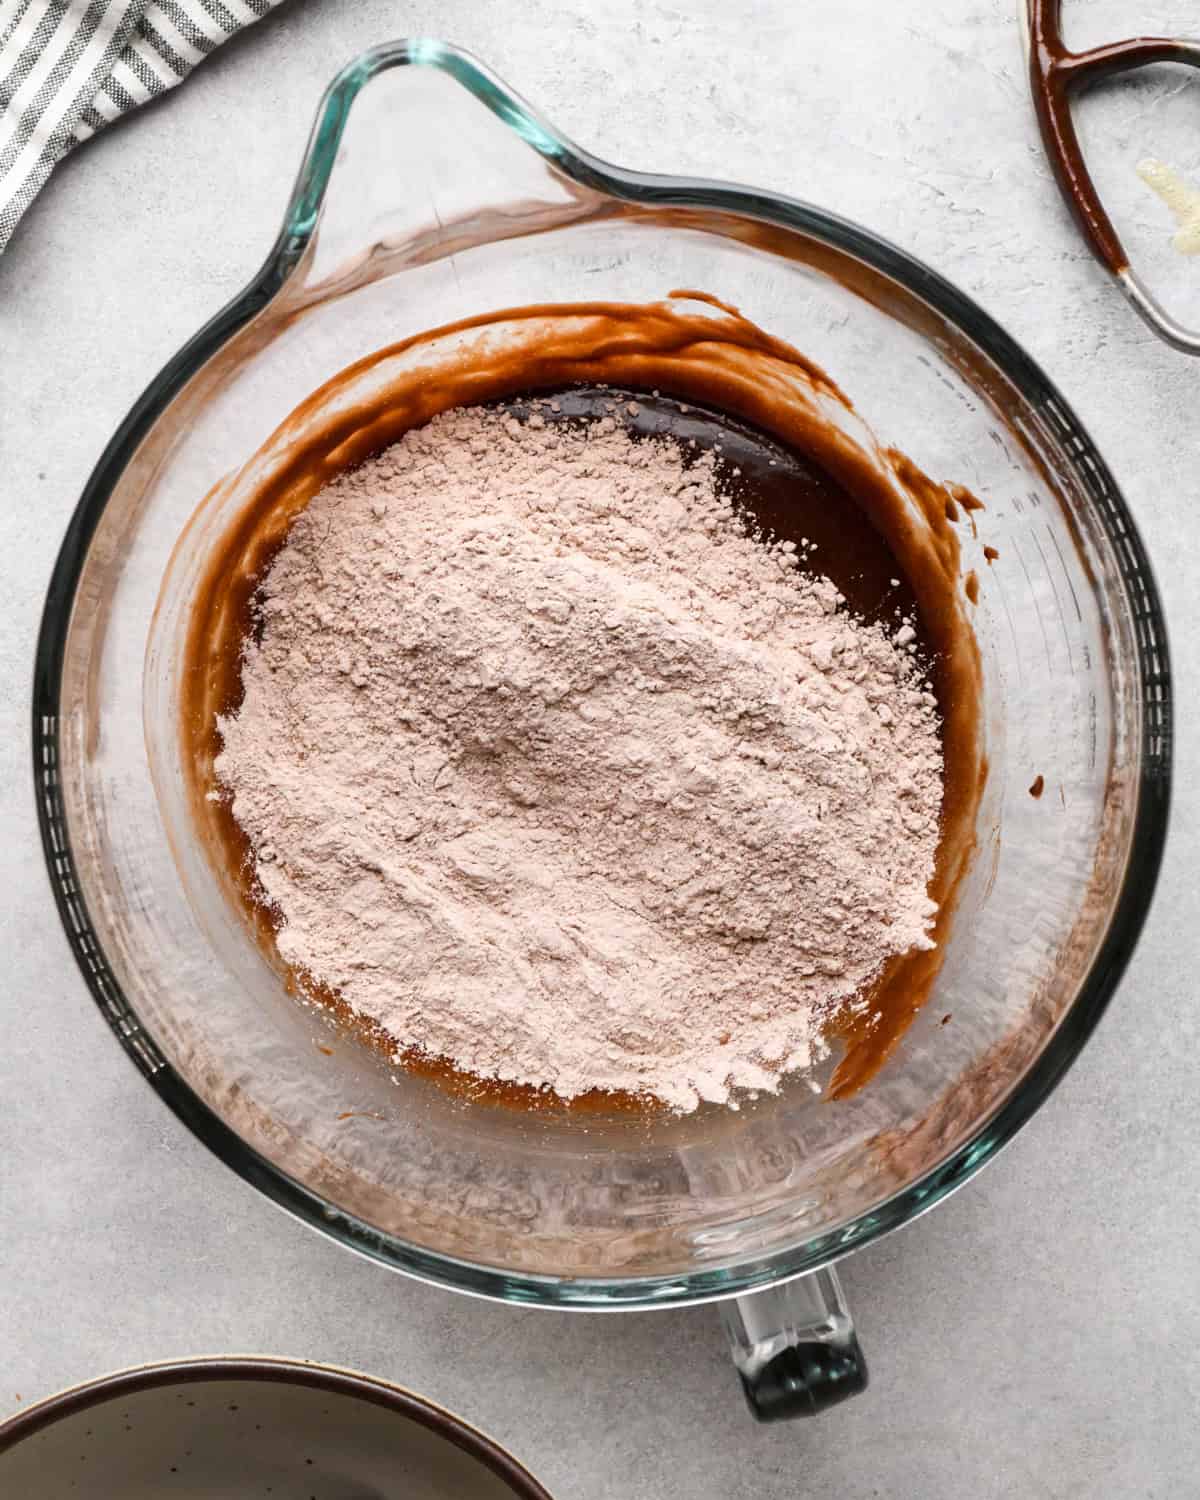
Then, combine the flour, cocoa powder and salt in a small bowl. Technically you could cut out this step and just add these ingredients to the wet mixture if you’d like.
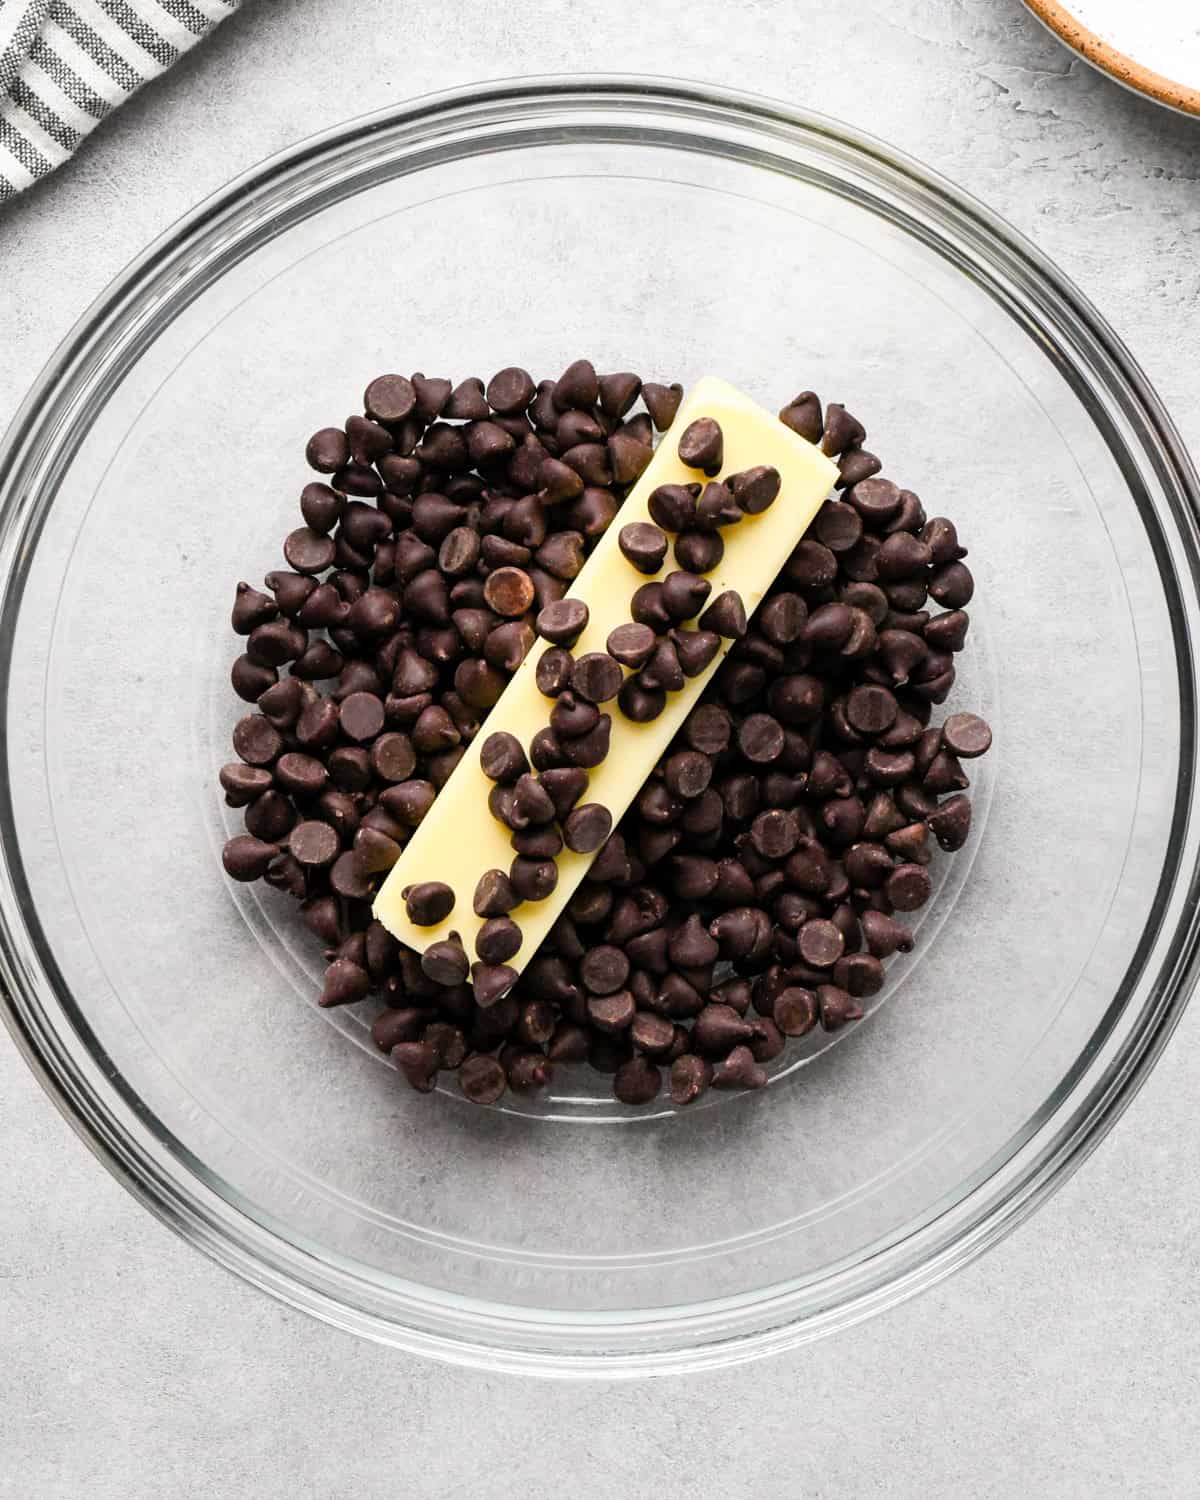
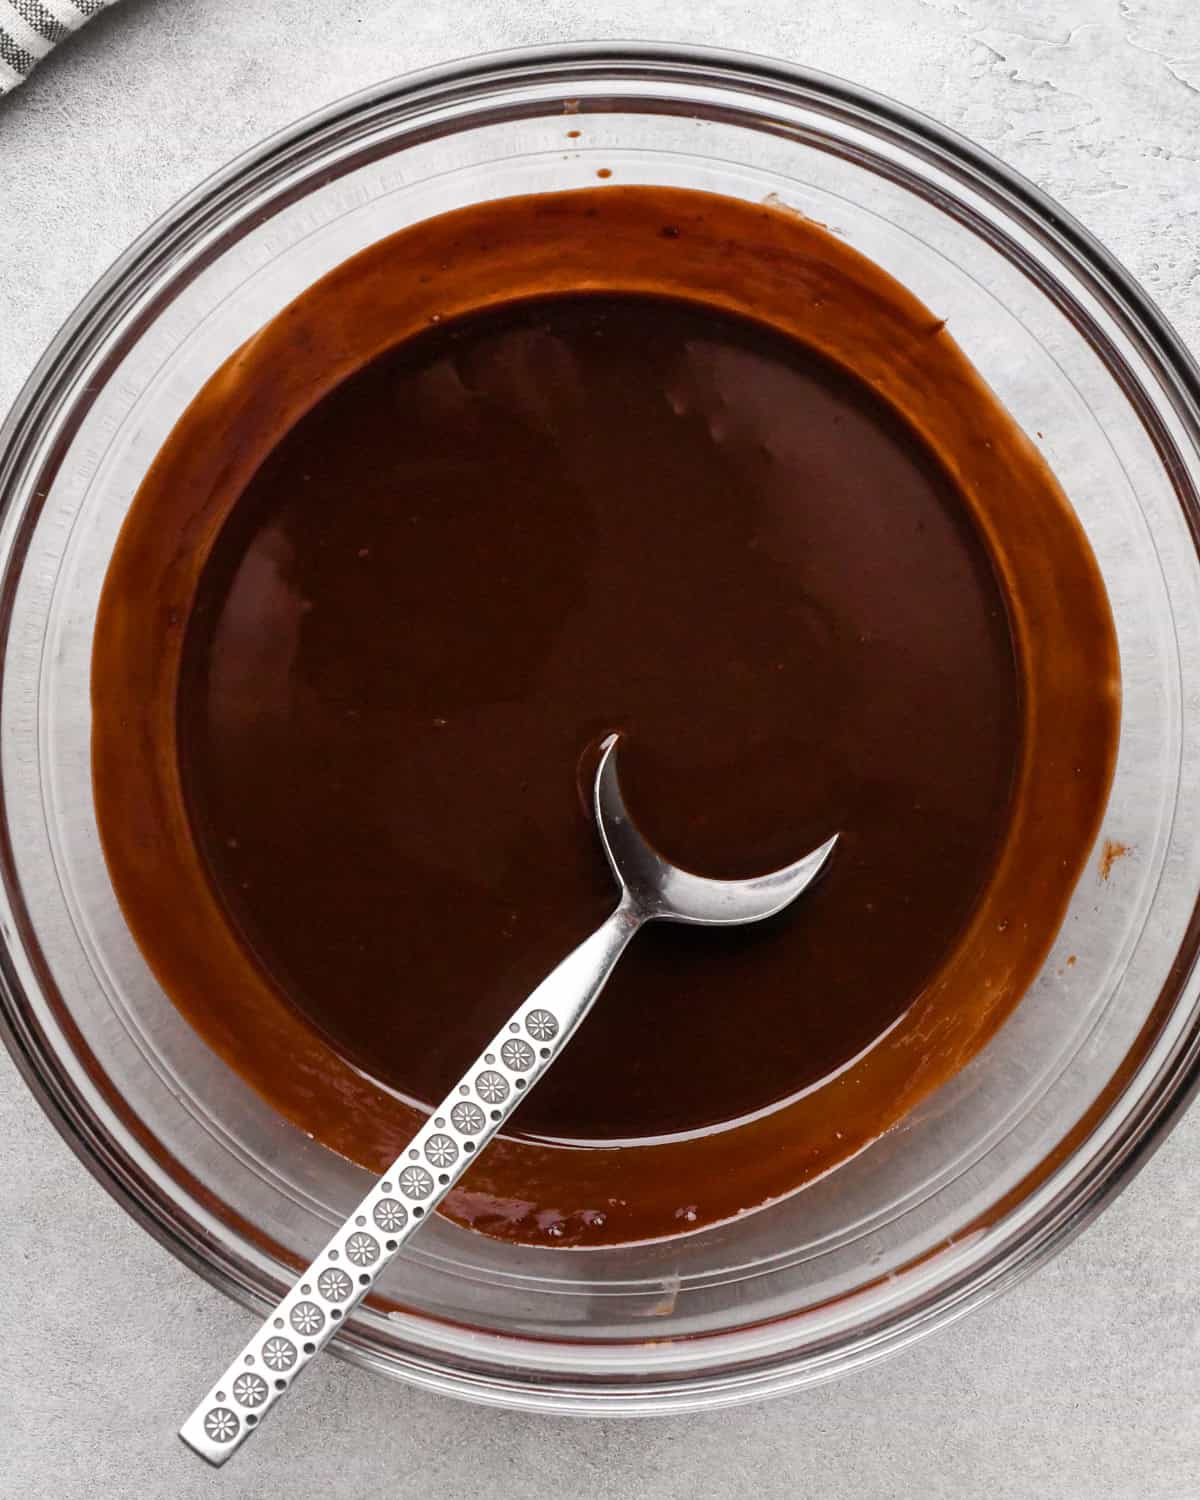
Then, melt the chocolate and butter together in the microwave or on the stovetop. Stir until it’s smooth and glossy then set it aside to cool slightly.
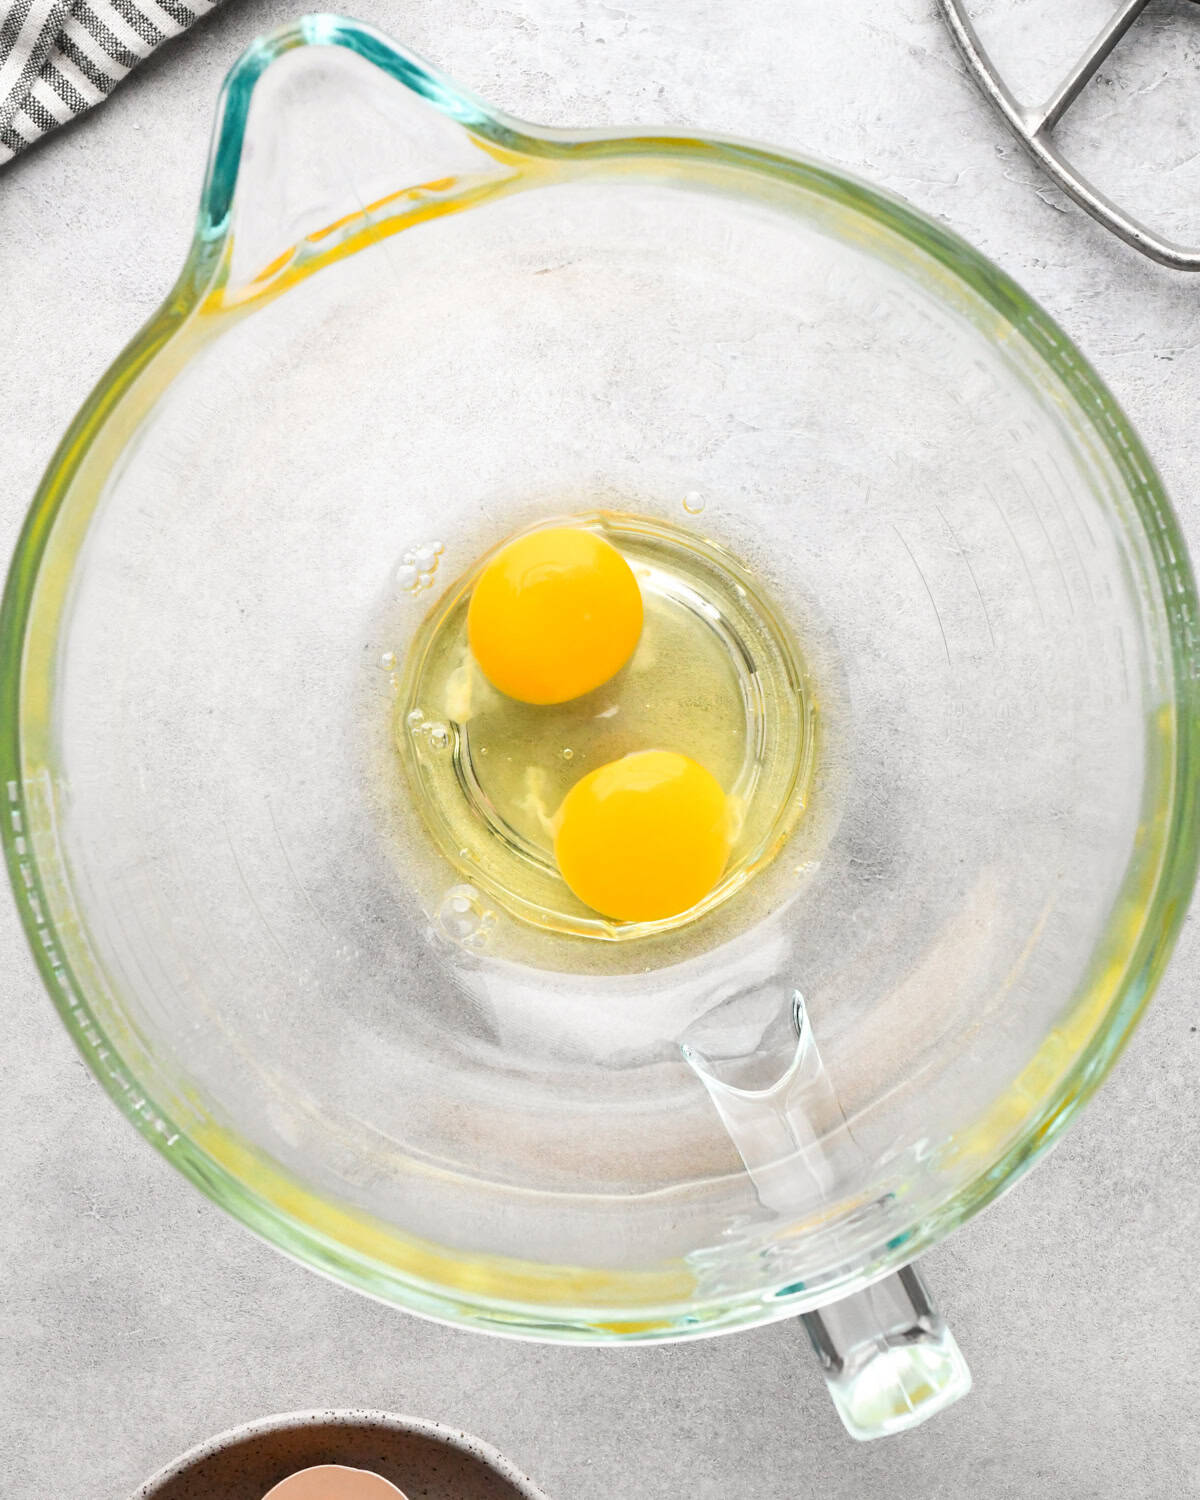
While the chocolate is cooling, beat the eggs on high speed for 1 minutes. Do not underestimate the importance of beating the ingredients thoroughly when you make brownies, it creates the shiny, crunchy top that makes brownies so good!
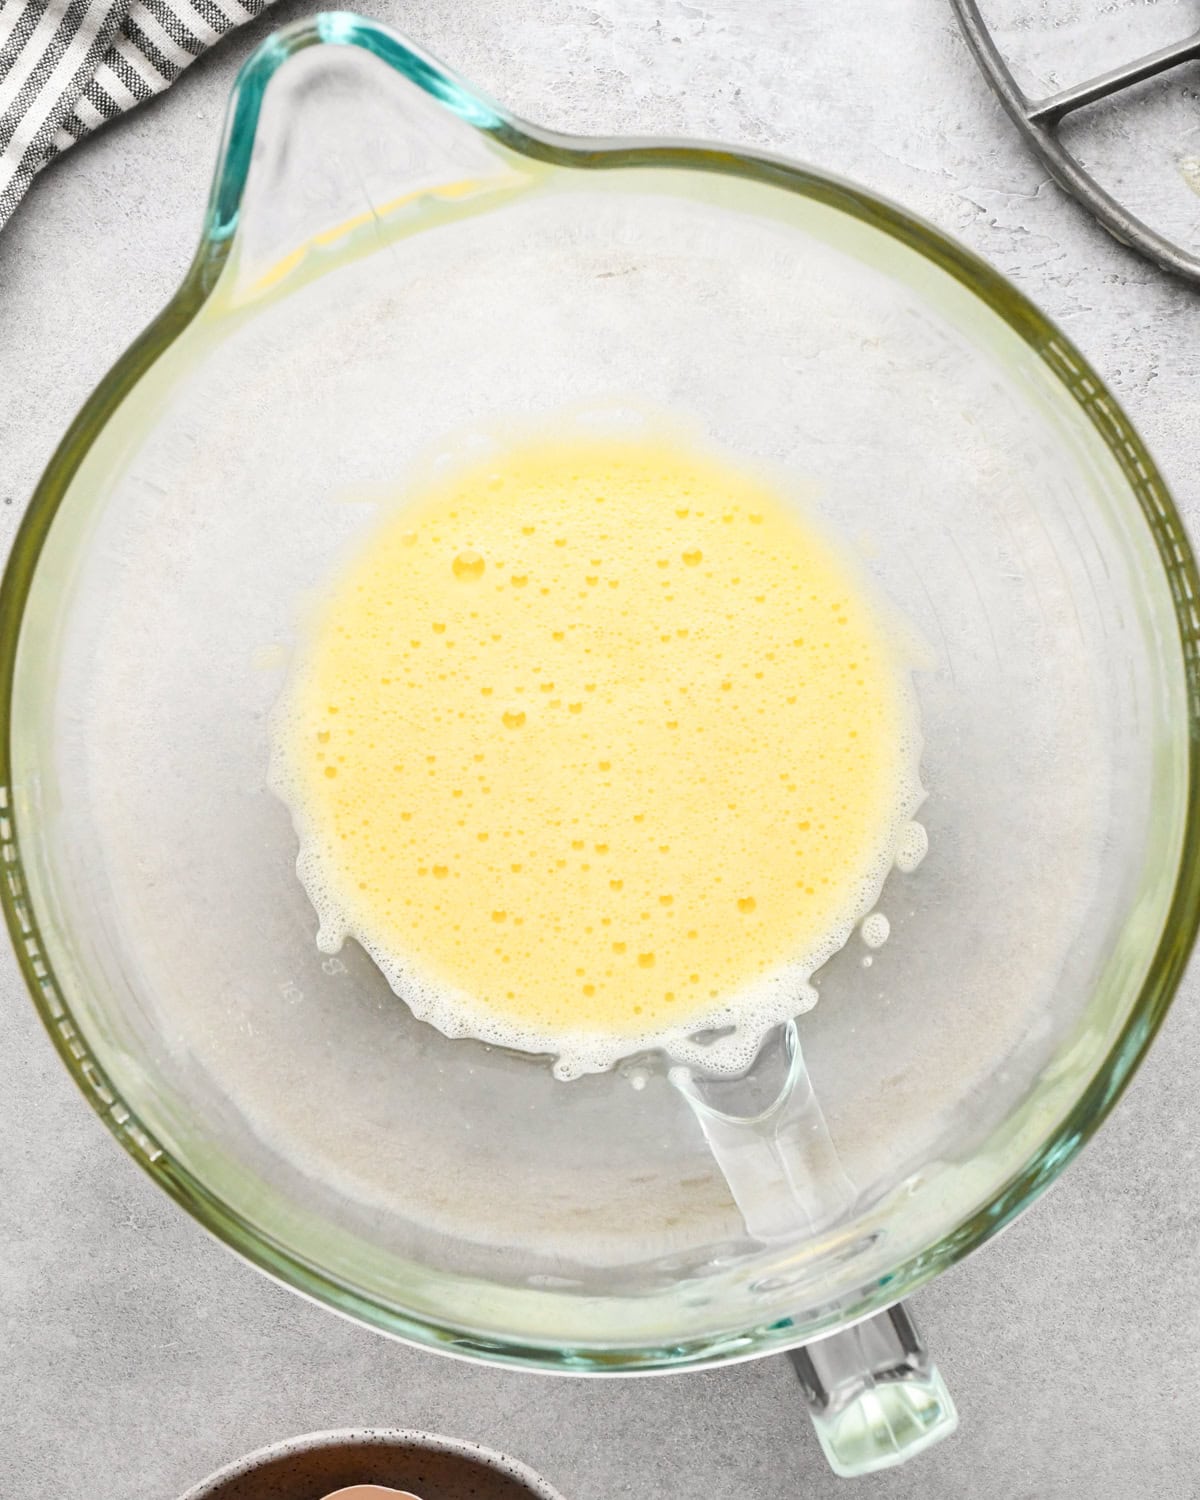
After 1 minute, add the granulated sugar and beat for an additional 1 minute – set a timer don’t guess!

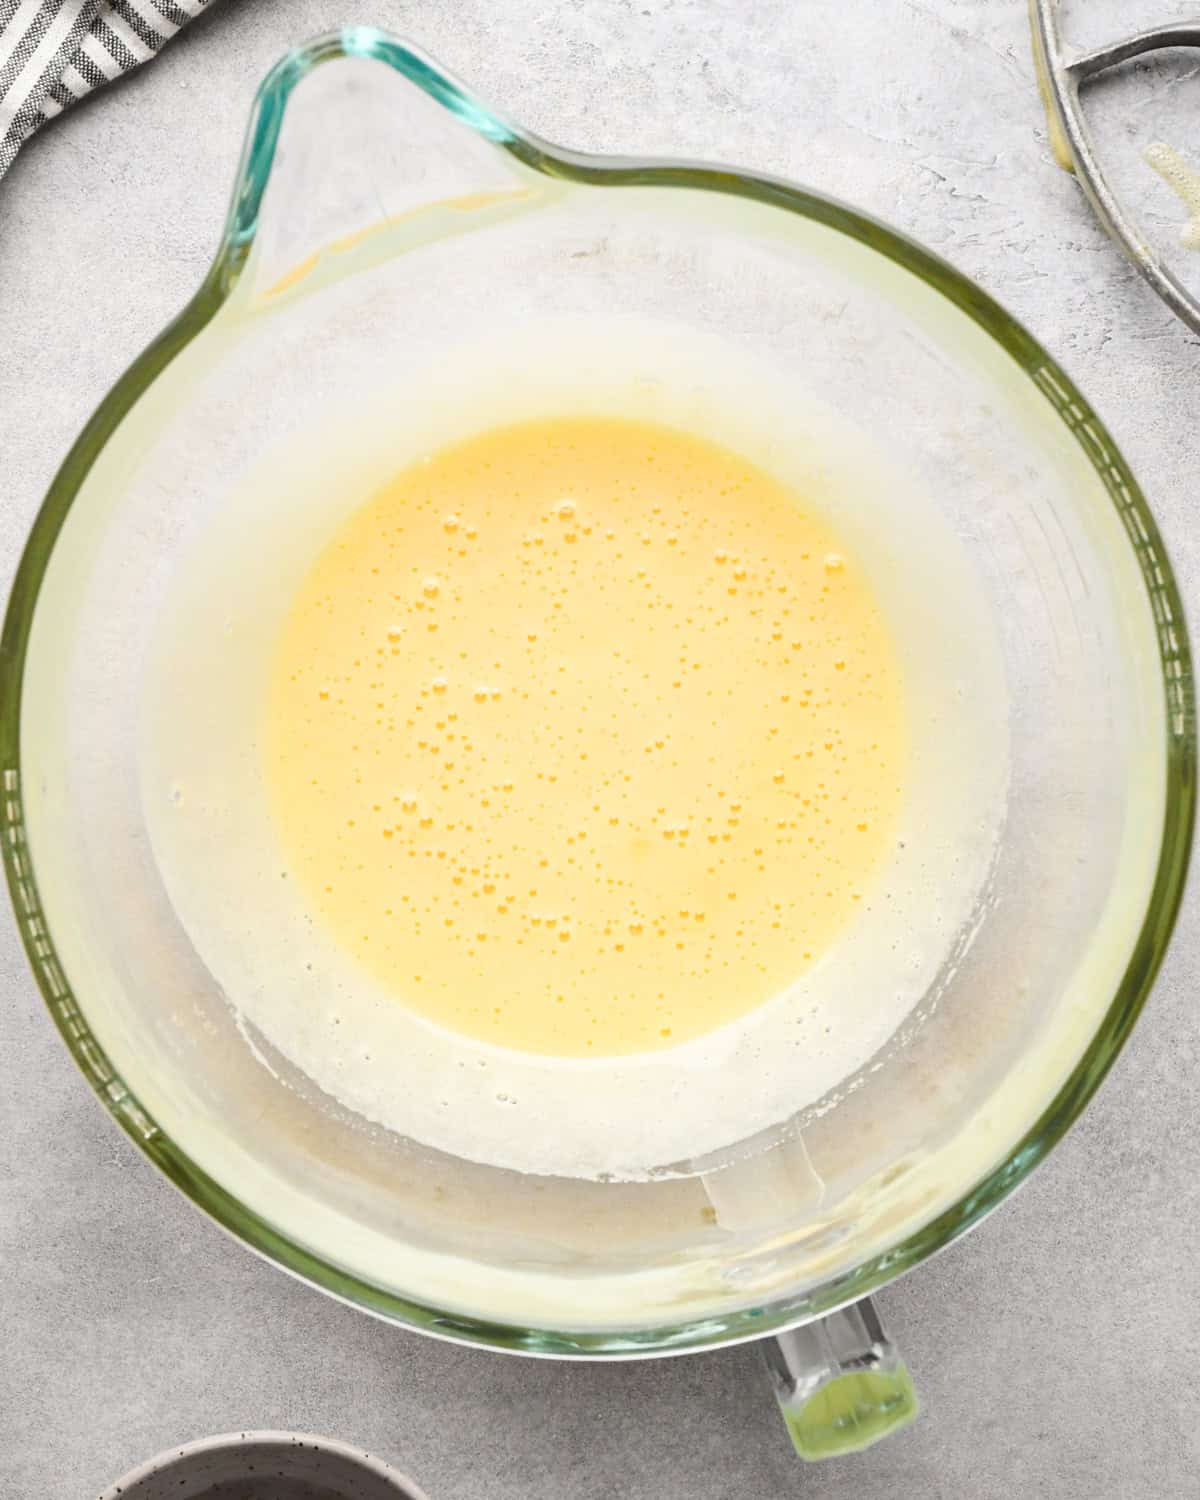
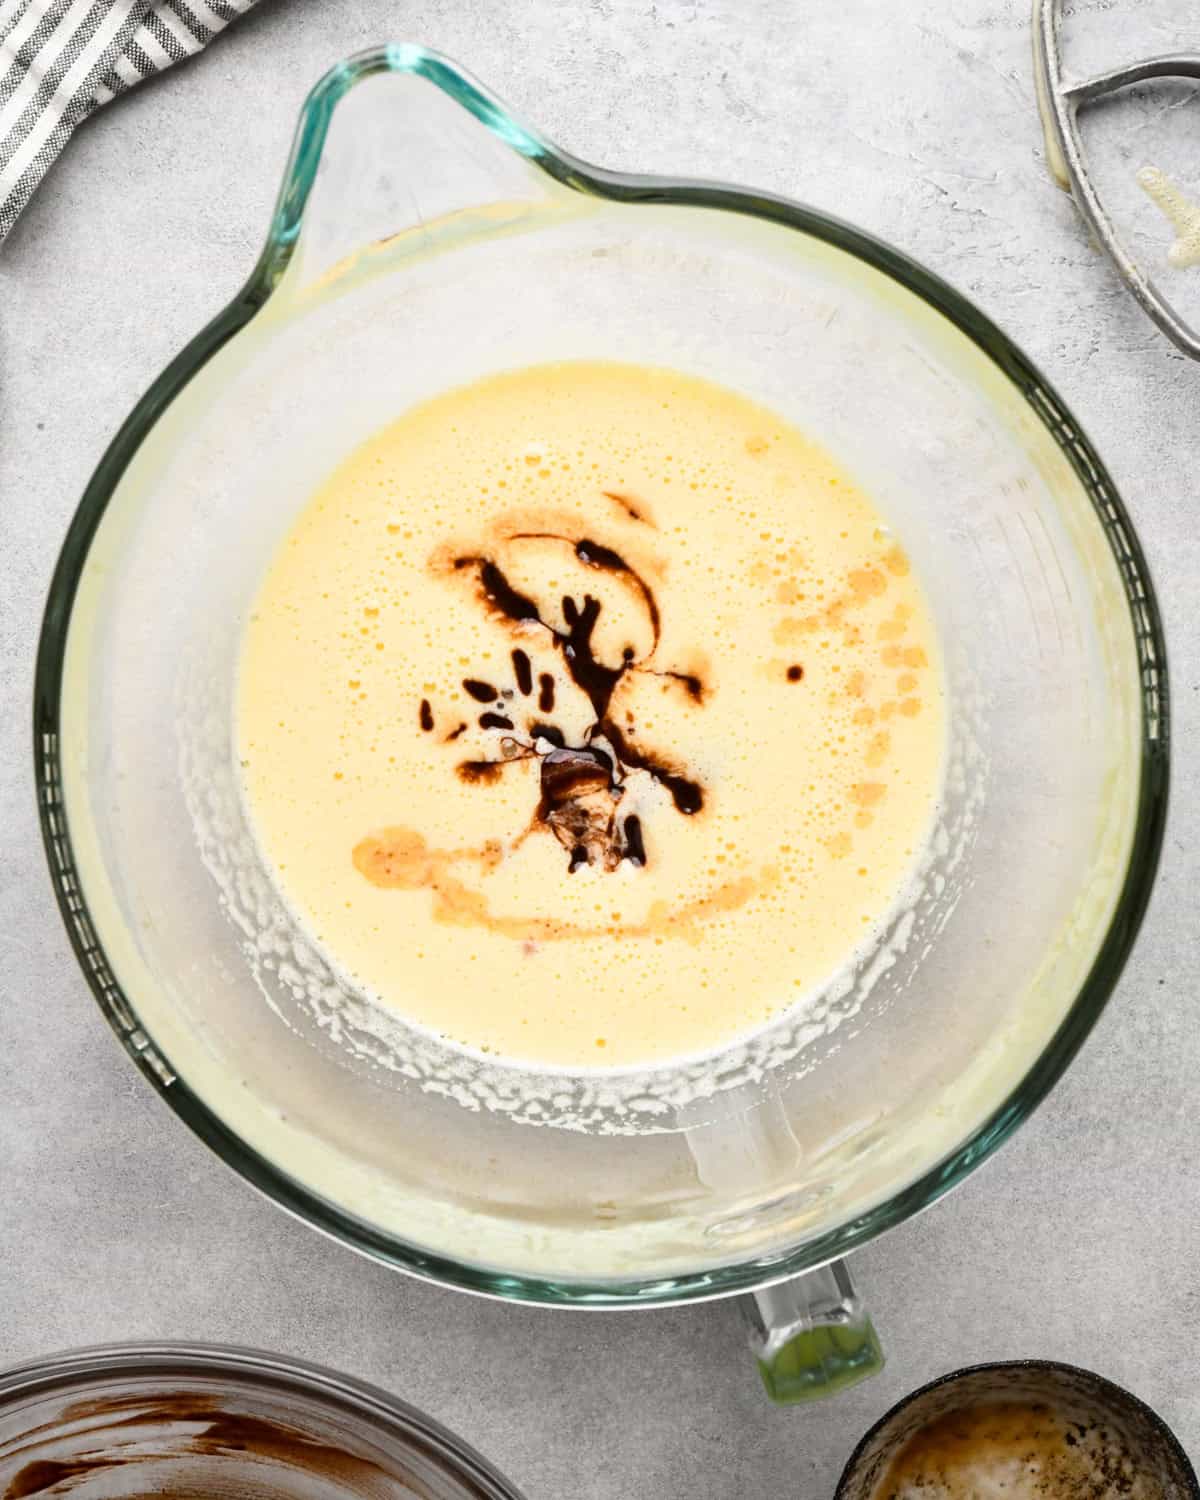
Then, add the melted chocolate and vanilla and beat on medium speed until smooth.
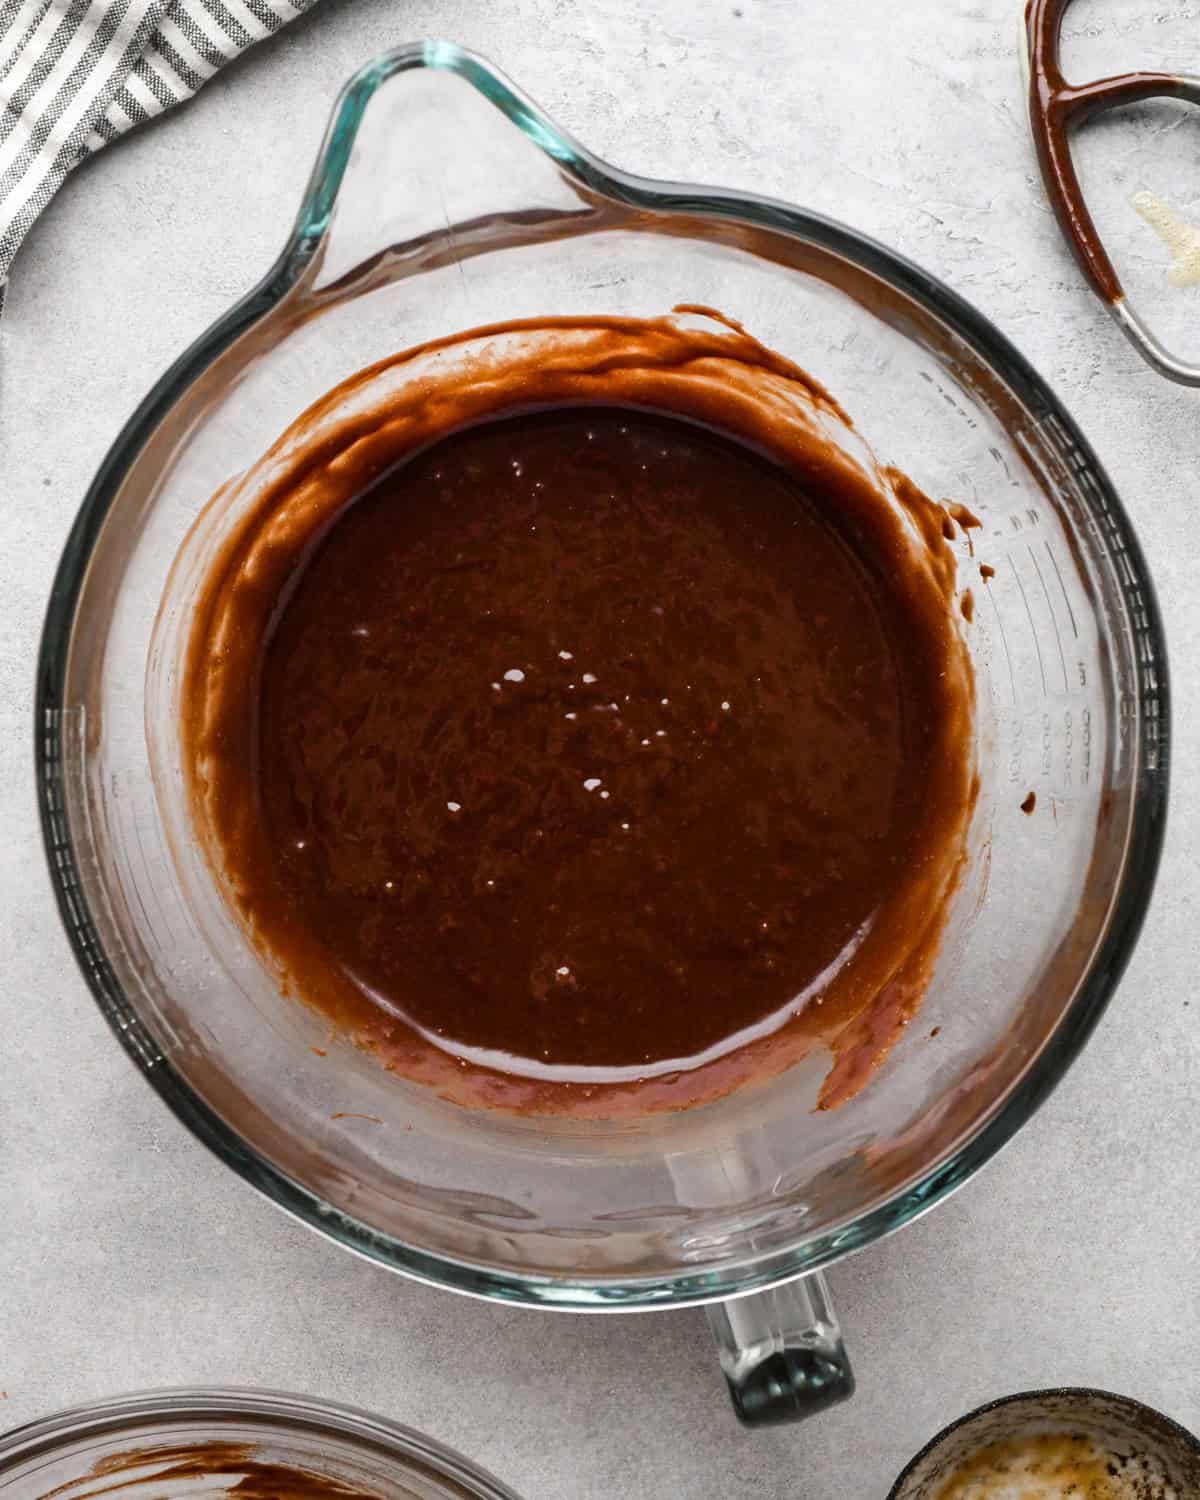
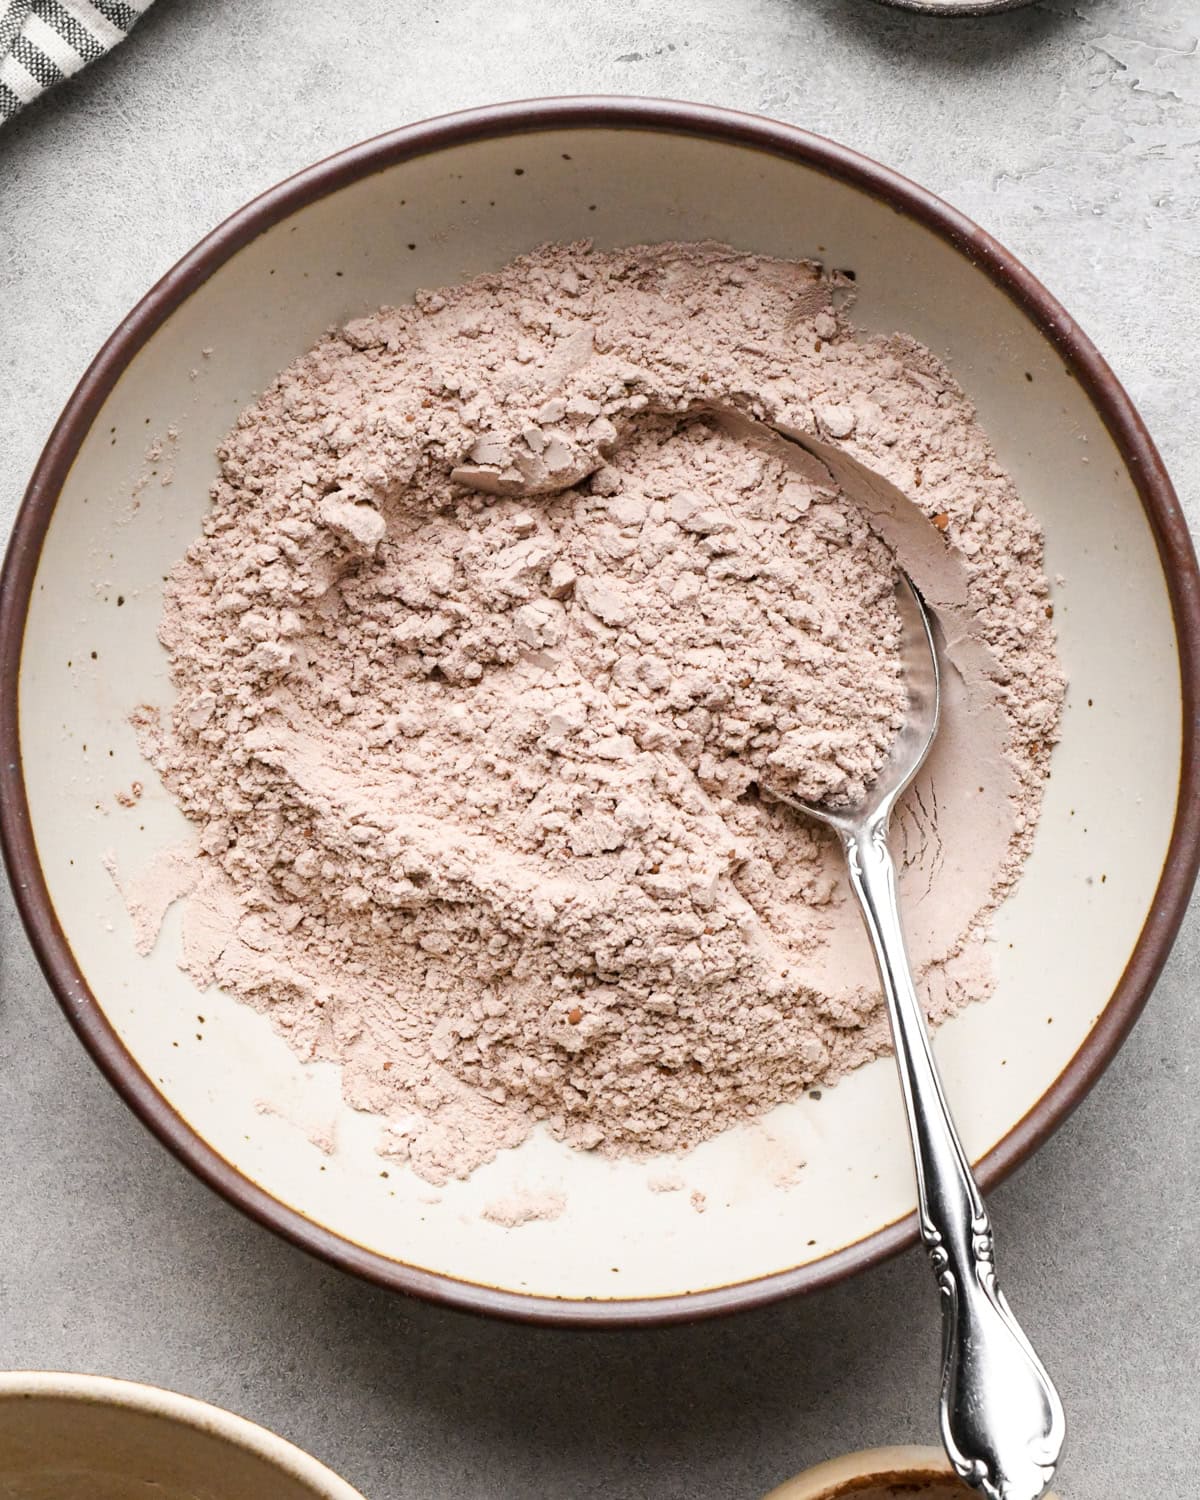
Next, add the dry ingredients and beat until fully incorporated.

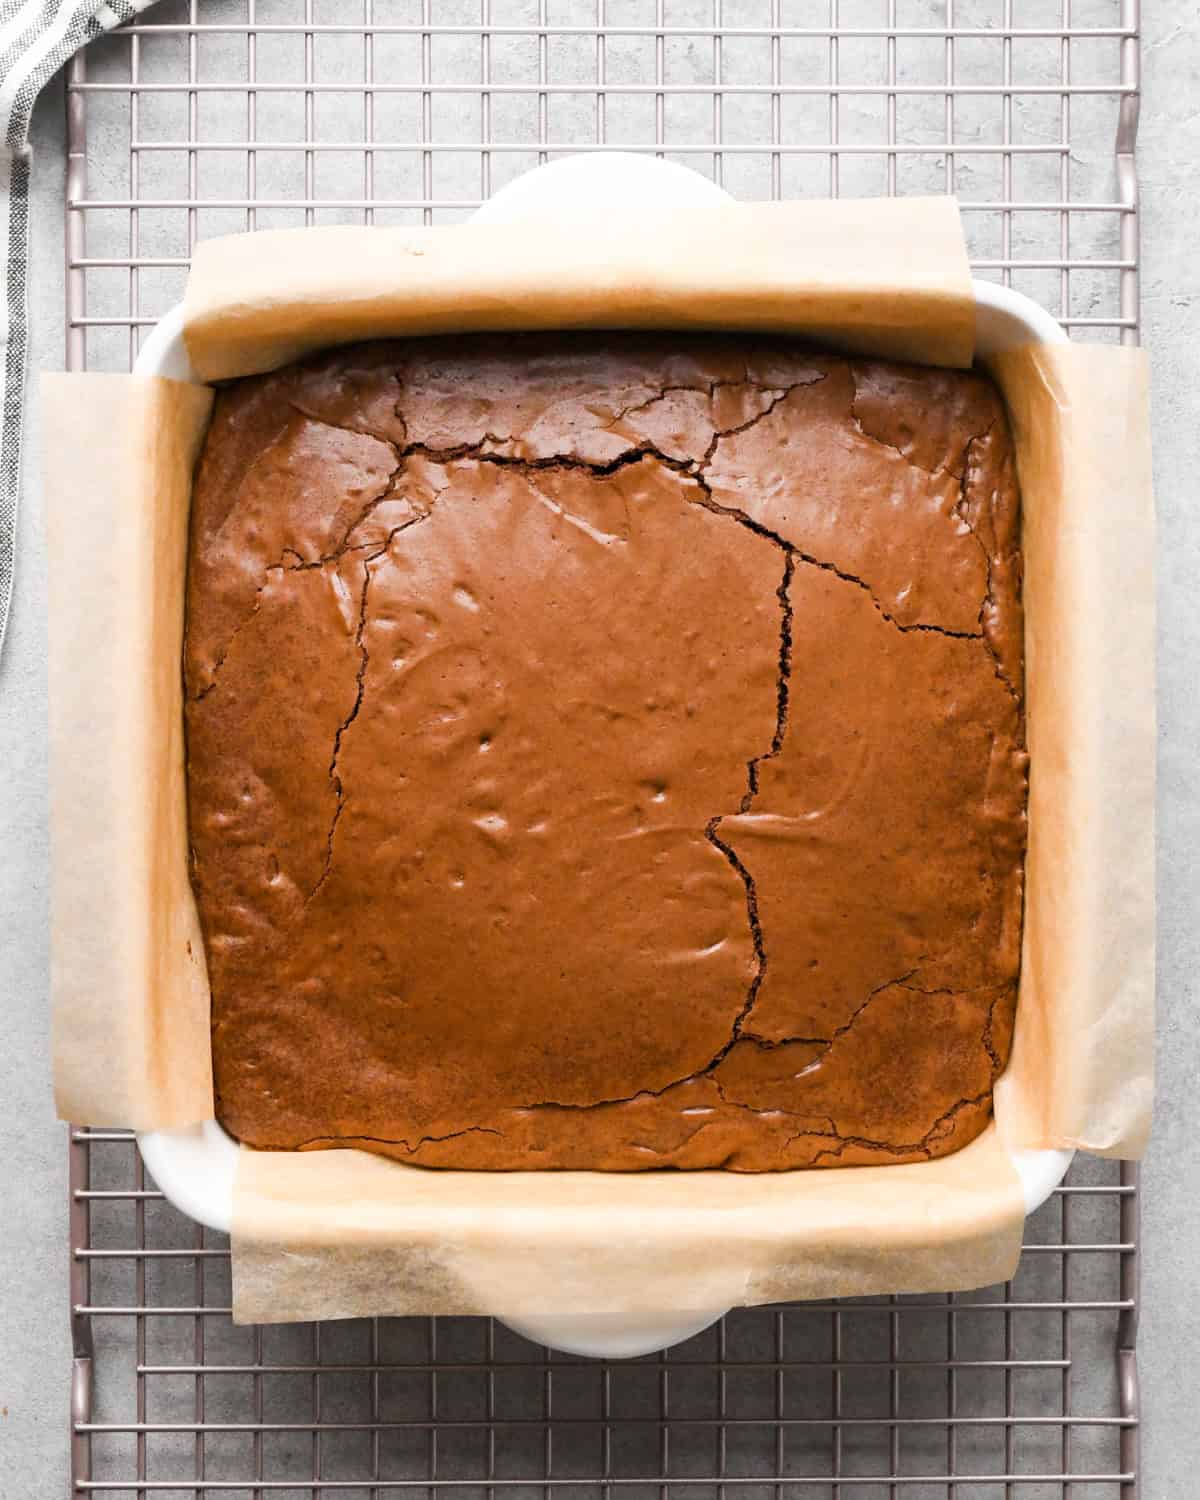
Spread the brownie batter evenly into the prepared baking sheet and bake the brownies for 25 to 30 minutes, or until the top is set and they are only slightly jiggly. Then let them cool completely on a wire cooling rack while you make the other two layers.
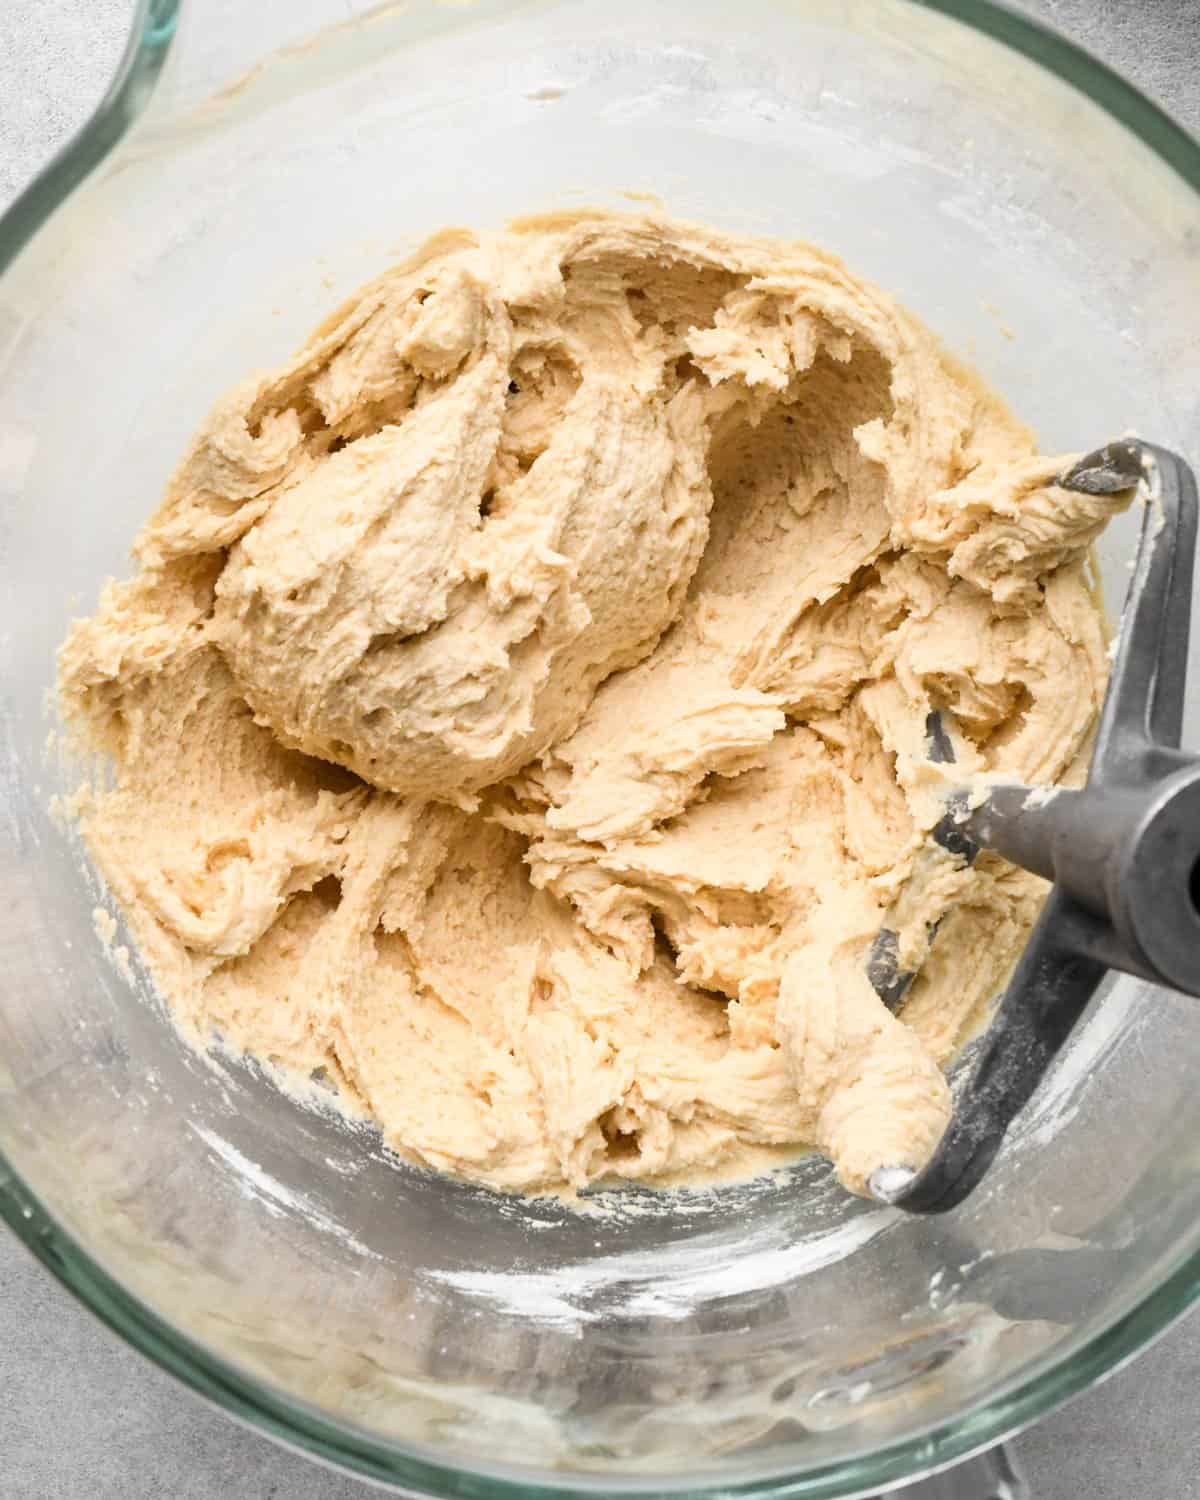
Make the Cookie Dough Layer
Once the brownies are cooled, it’s time to make the cookie dough layer. Note – if you’re worried about the flour – you can heat treat the flour by microwaving it for 1 minute, or until it reaches 160 degrees Fahrenheit (71 degrees Celsius) (see my edible cookie dough recipe for more information).
Begin by beating the butter and sugars together for one minute.

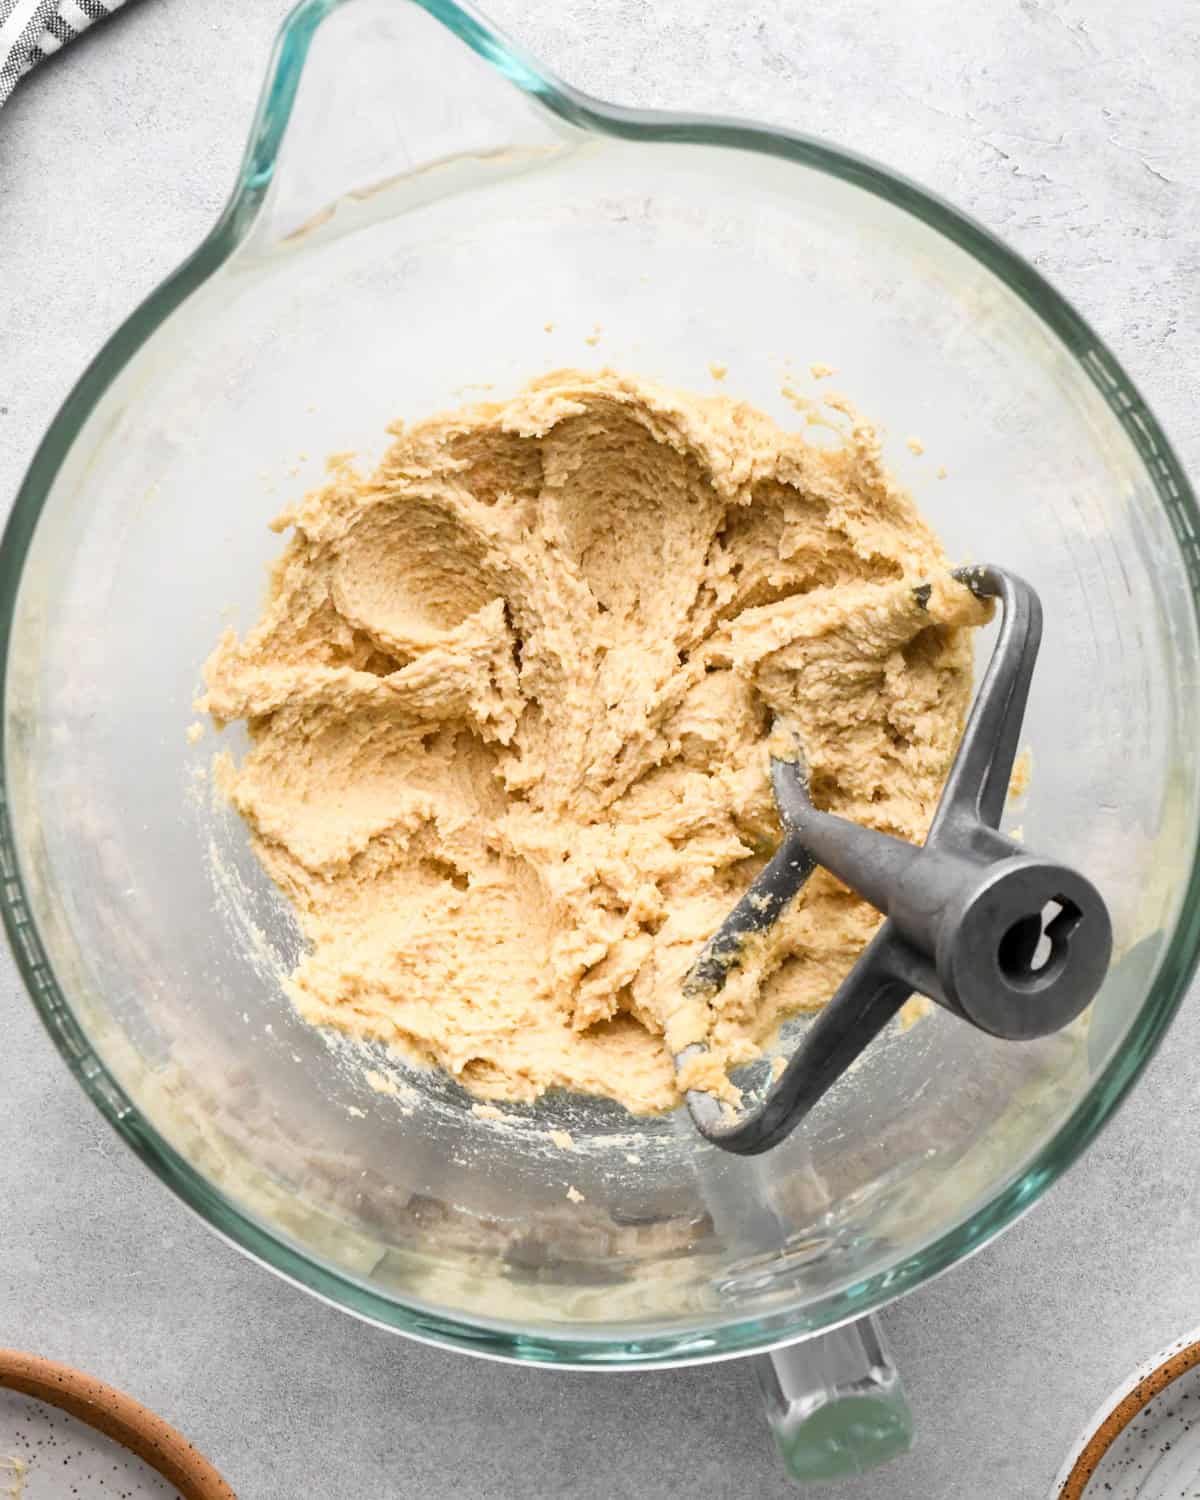
Then add the milk and vanilla and beat until combined.
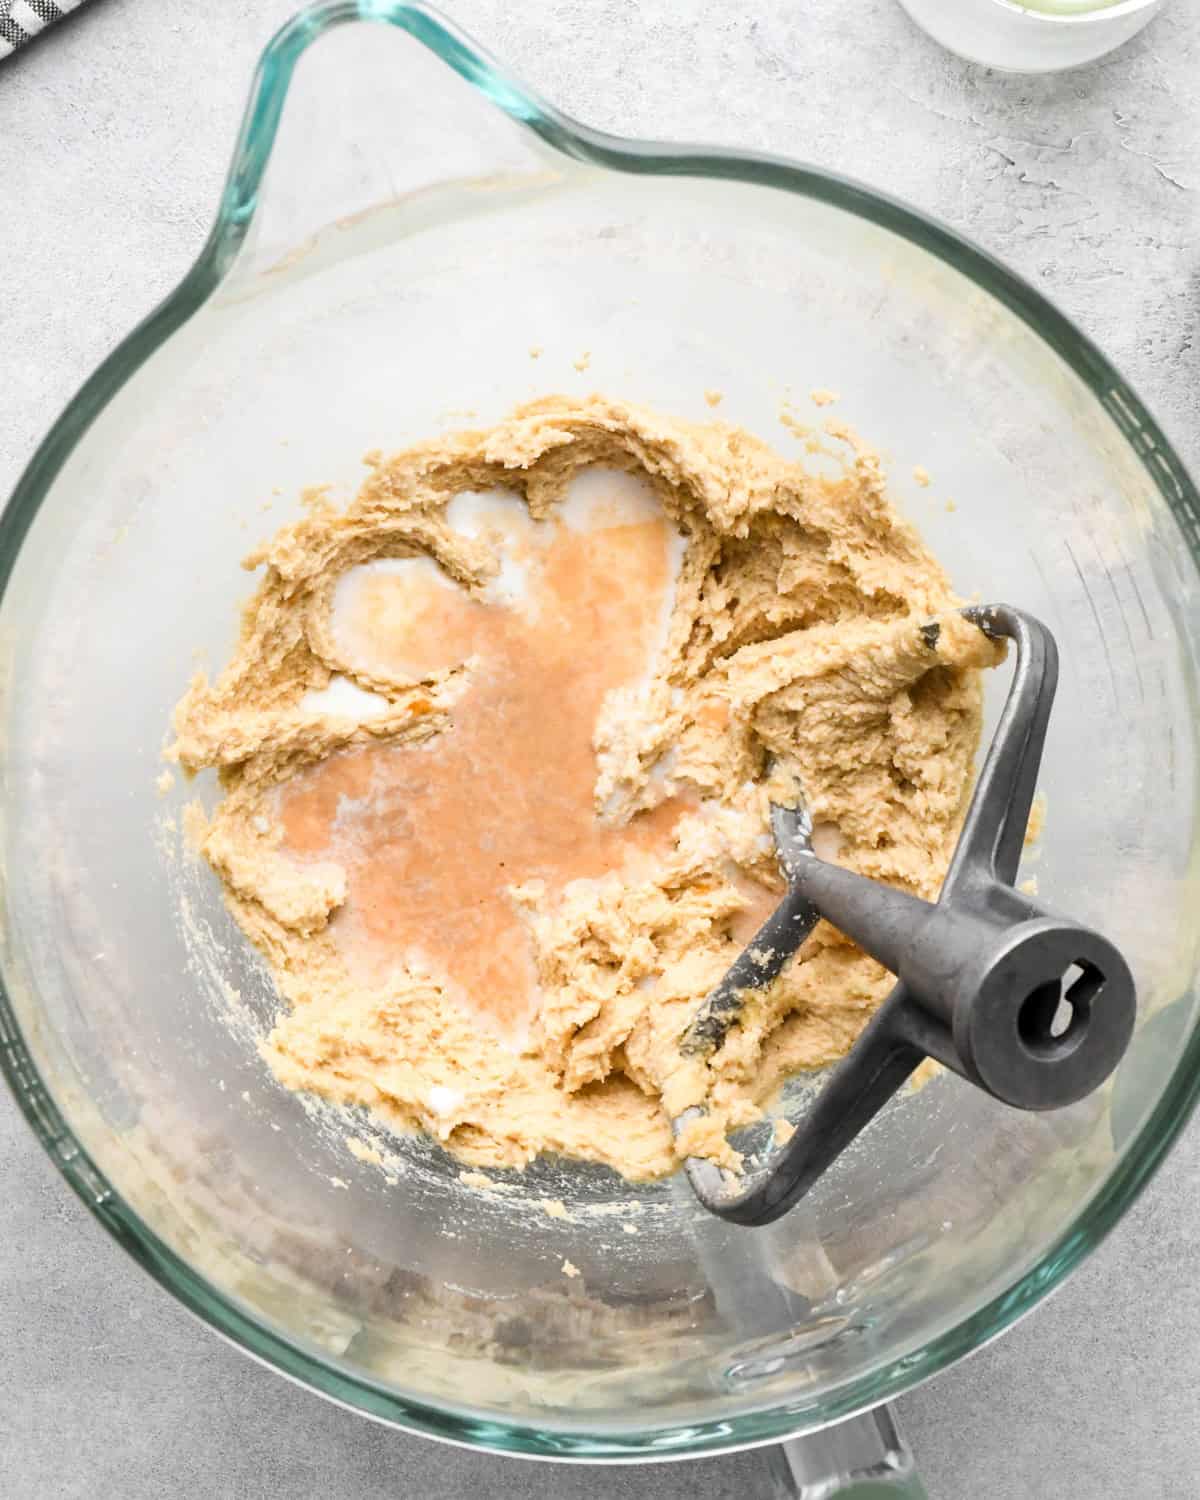
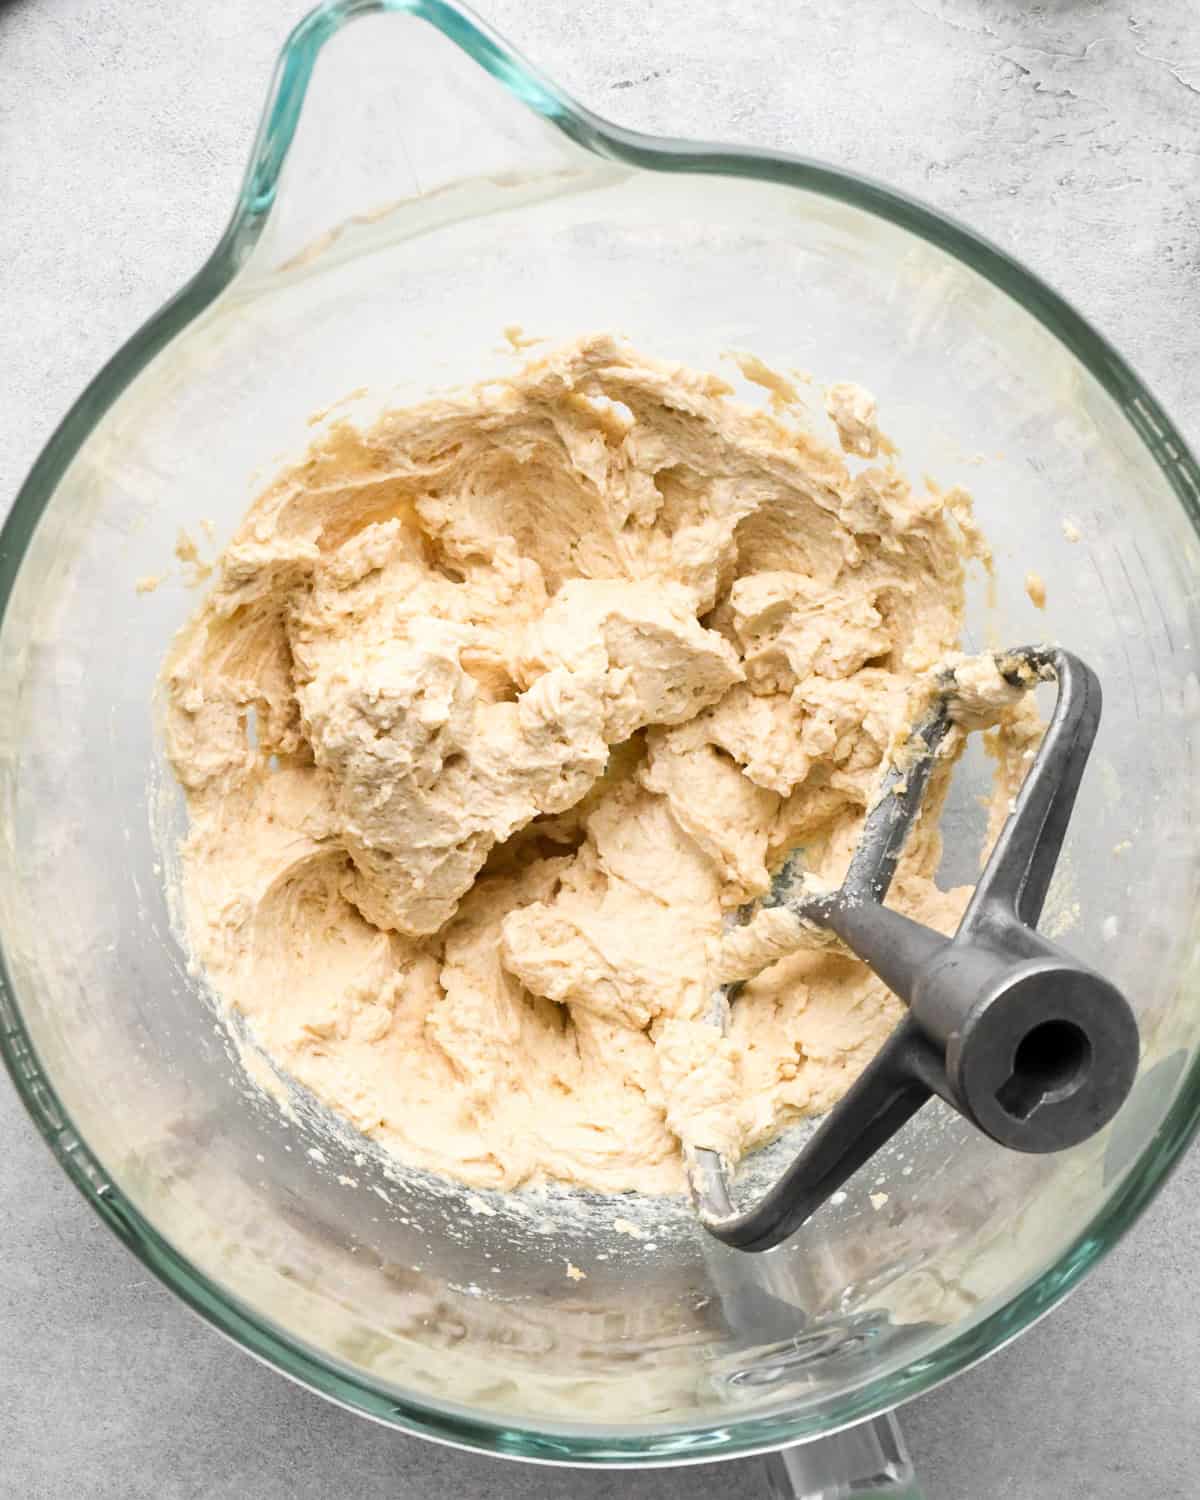
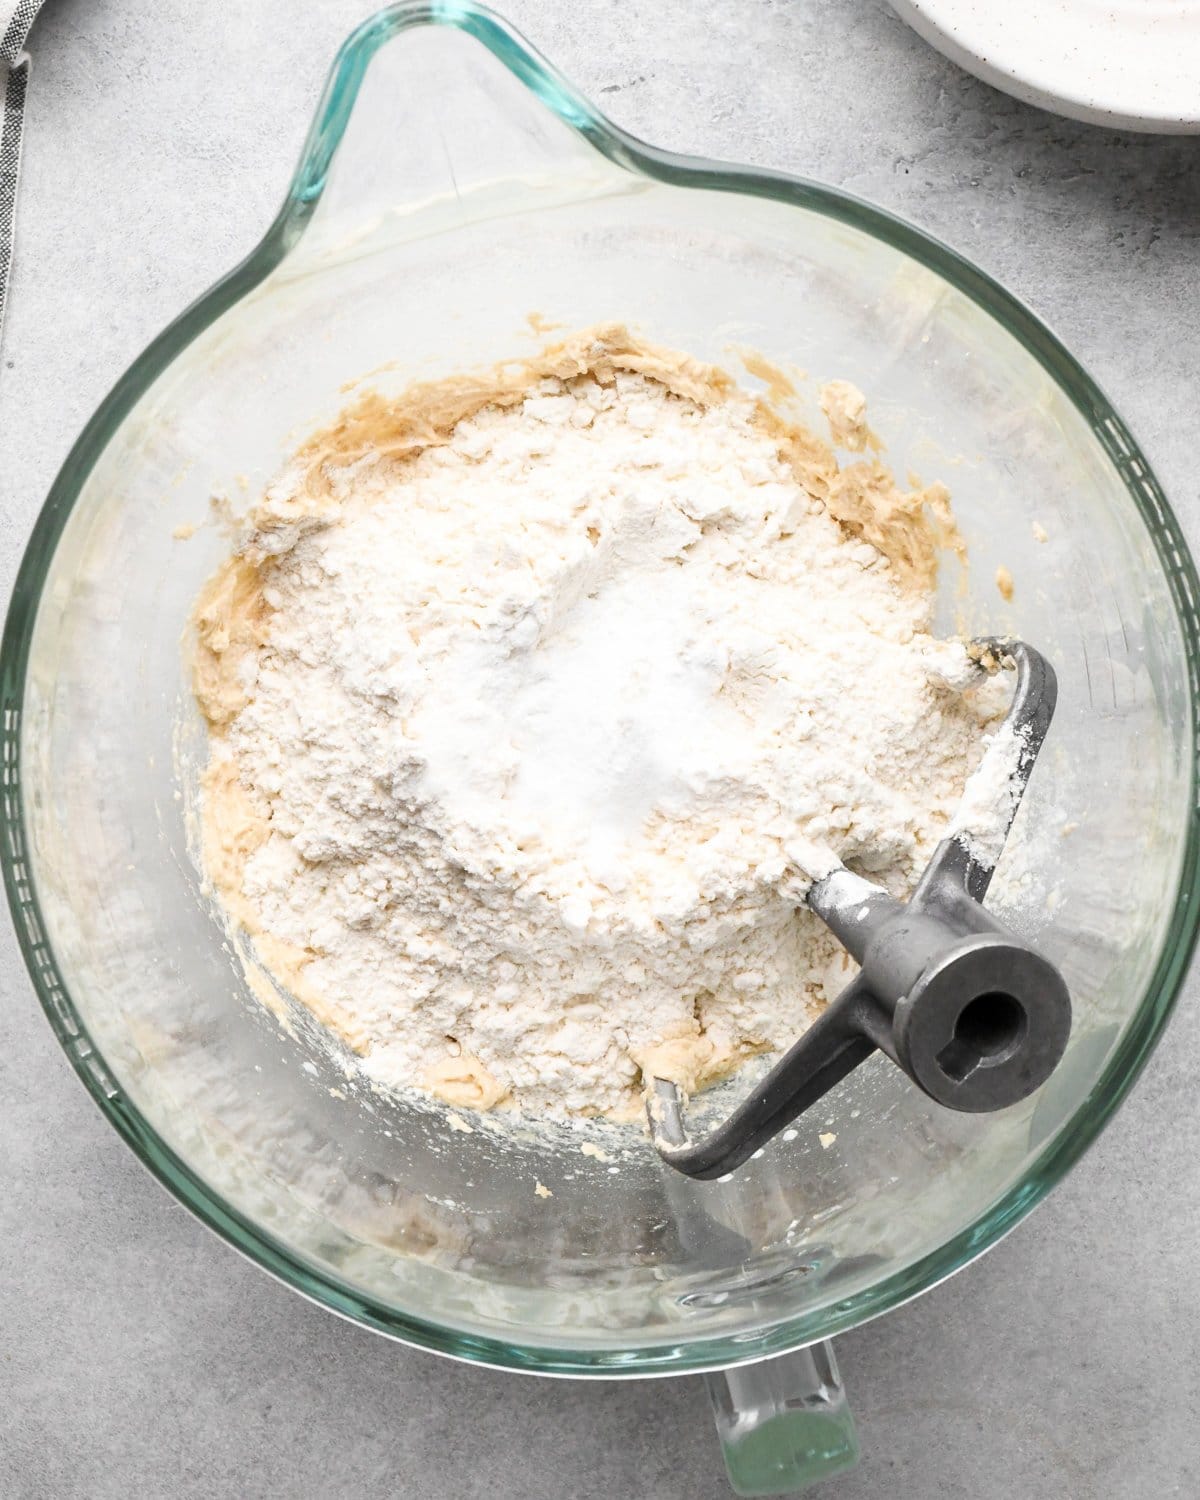
Next, add the flour, baking soda, baking powder and salt and beat to combine.
Why do you add baking soda/powder?
If we’re not baking the cookie dough, why do we need the leavening agents? The answer: is because it imparts the most authentic cookie dough taste! If you really don’t want to use them it’s ok – but they do make a difference in the overall taste of the cookie dough.
Then, stir in the mini chocolate chips. Note – the dough should be a little wetter than regular cookie dough so it’s easy to spread over the brownies.
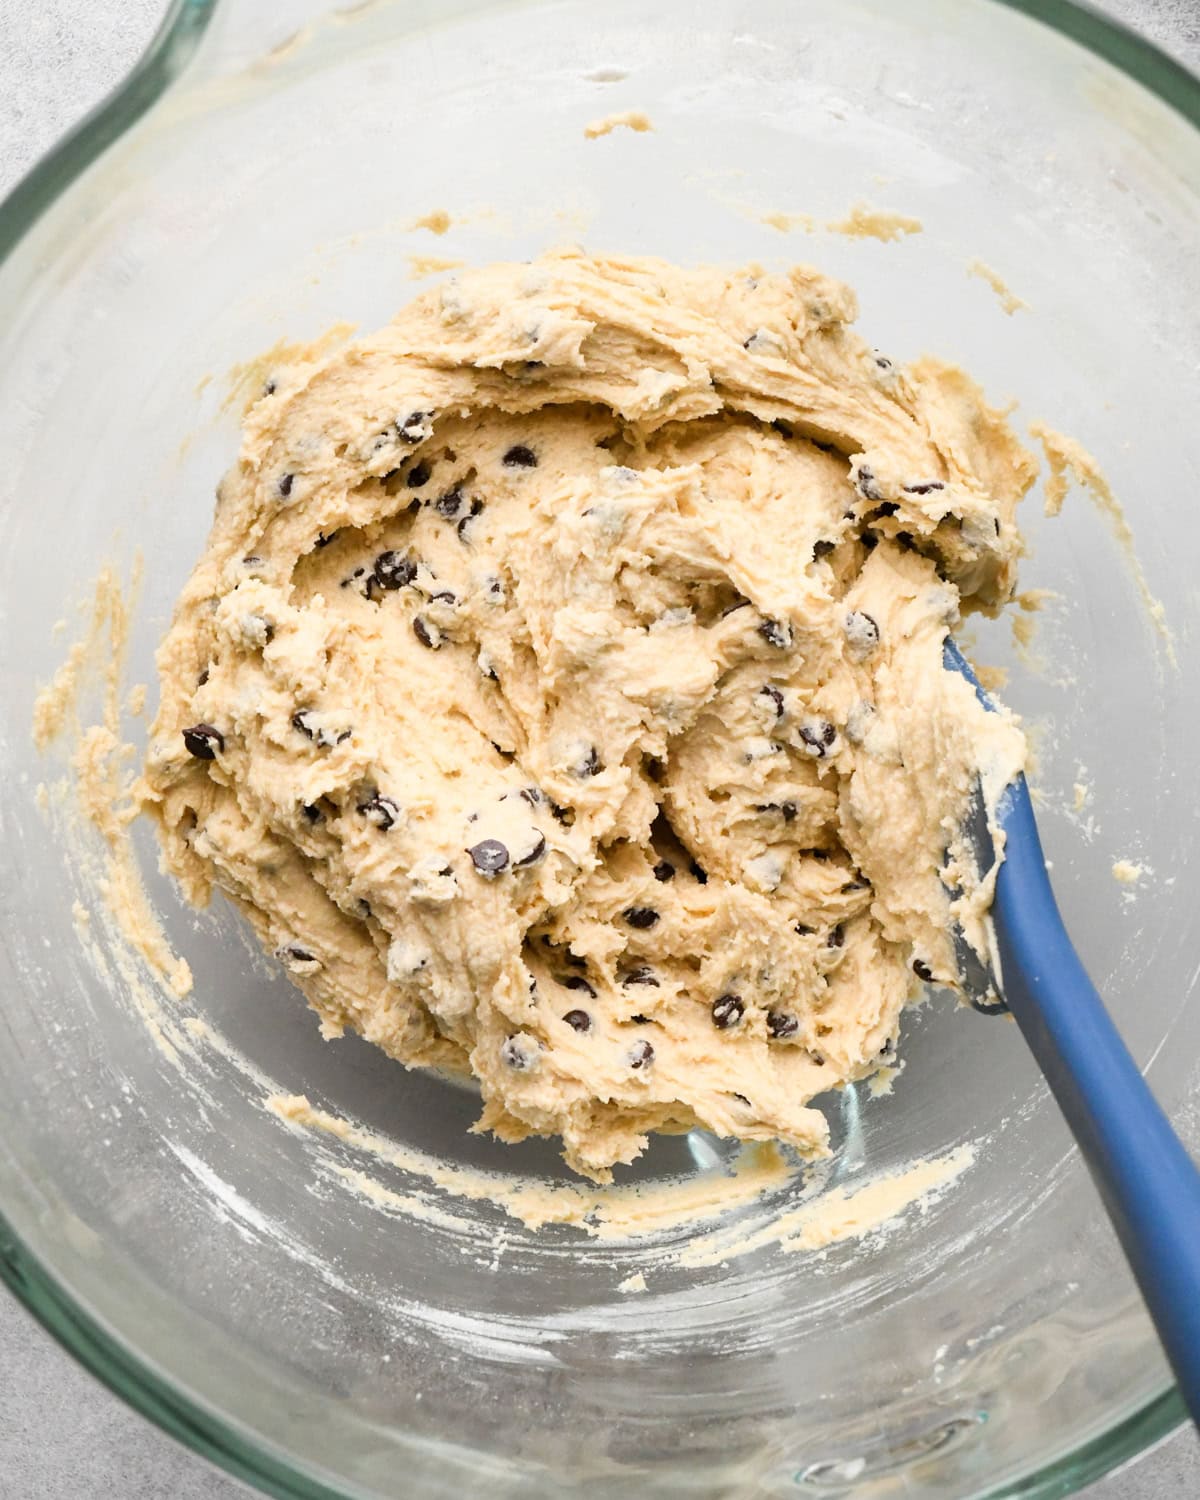
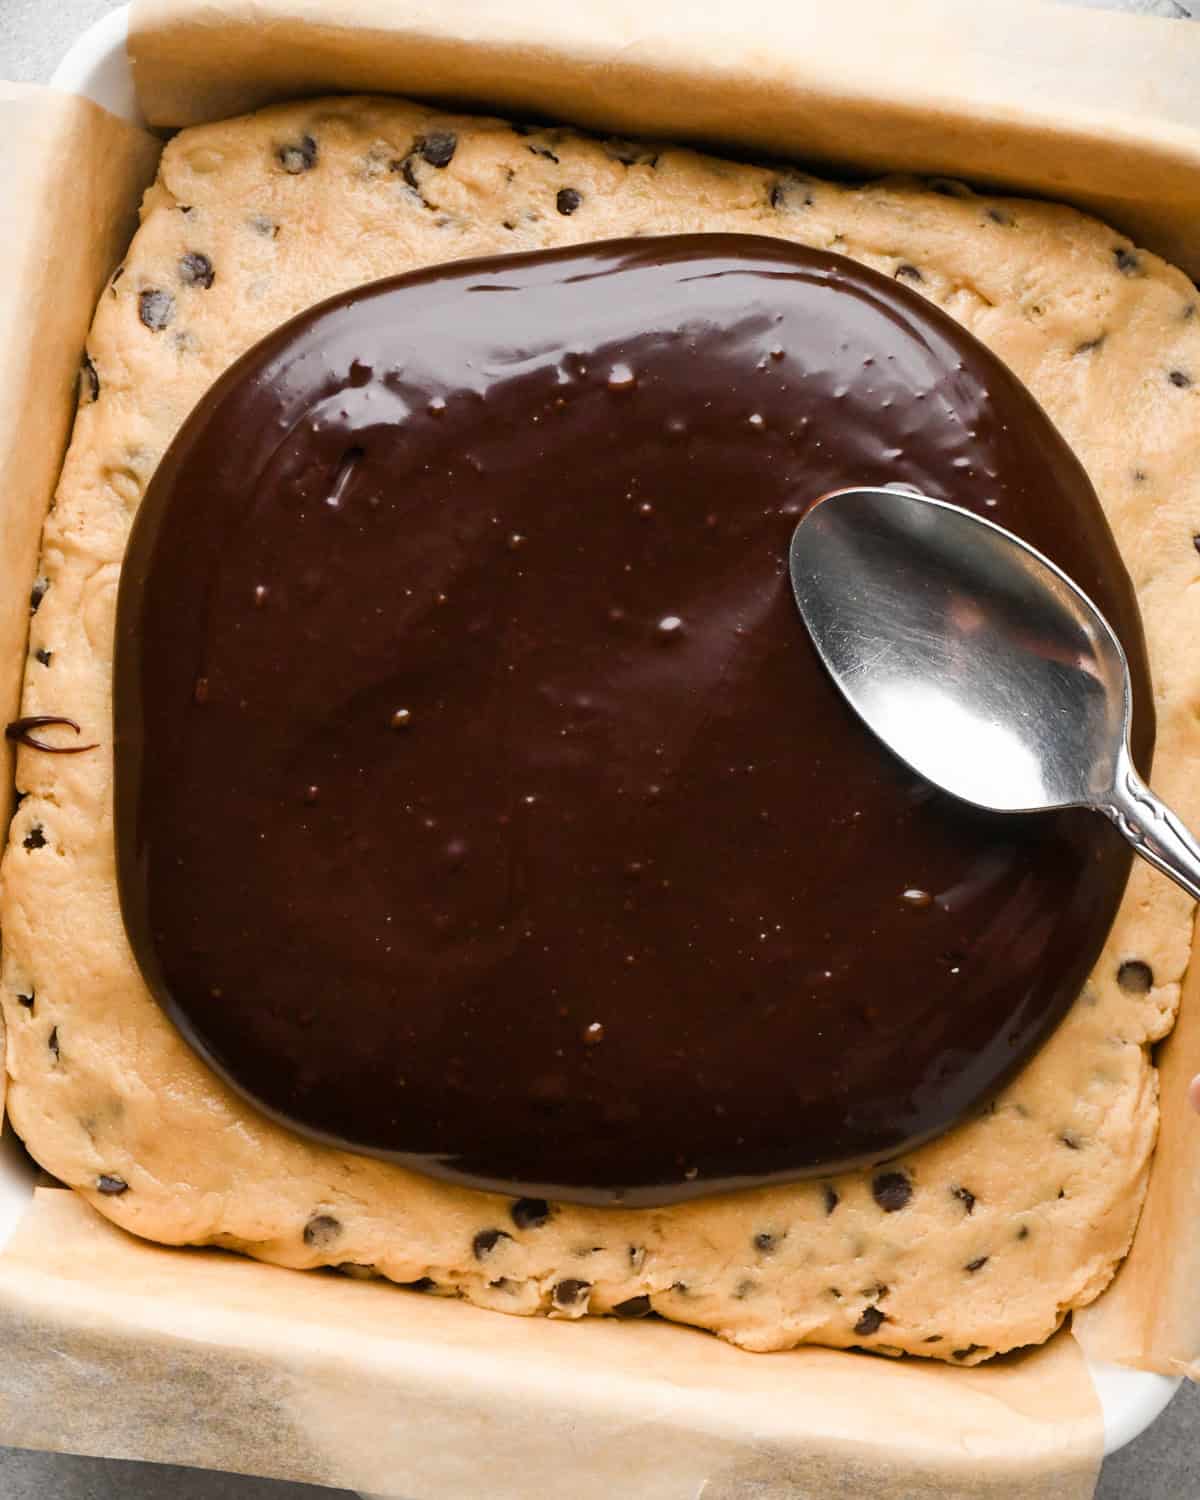
Next, spread the cookie dough over the cooled brownies. Be very careful not to press or spread too hard or you run the risk of making a mess of the brownie layer. NOTE: you could even freeze or refrigerate the brownie layer to make it easier to assemble the cookie dough brownies.

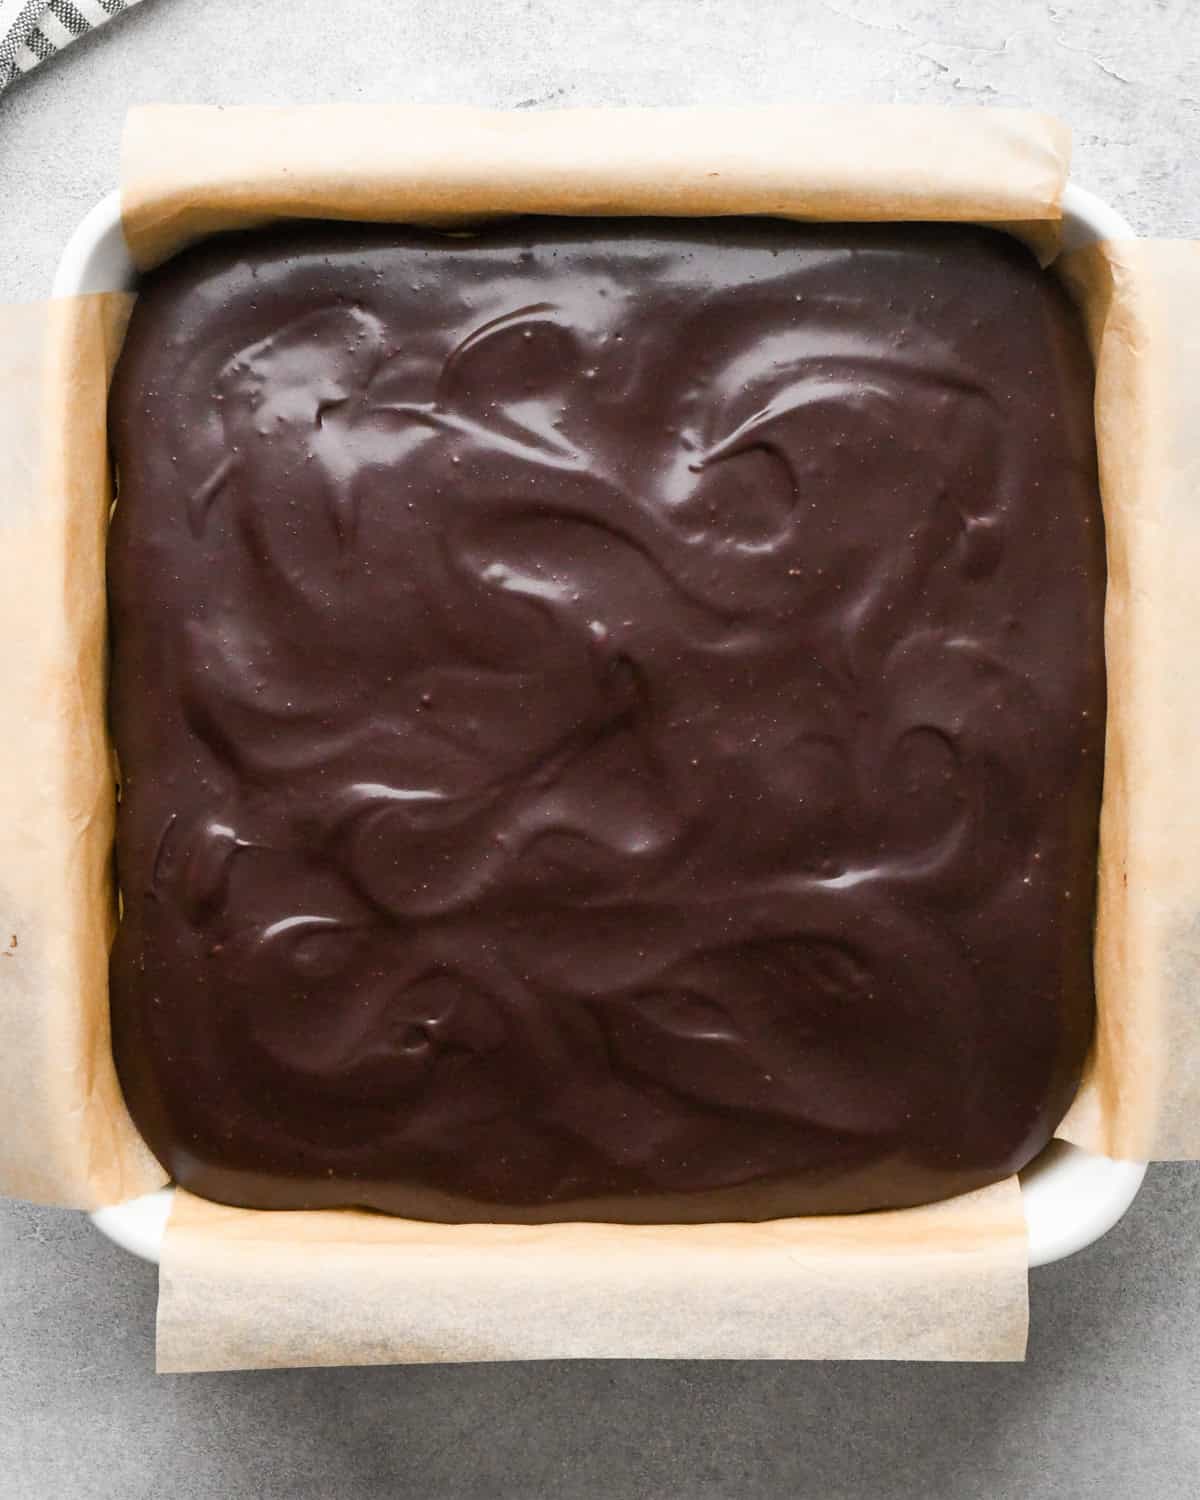
Make the Ganache Layer
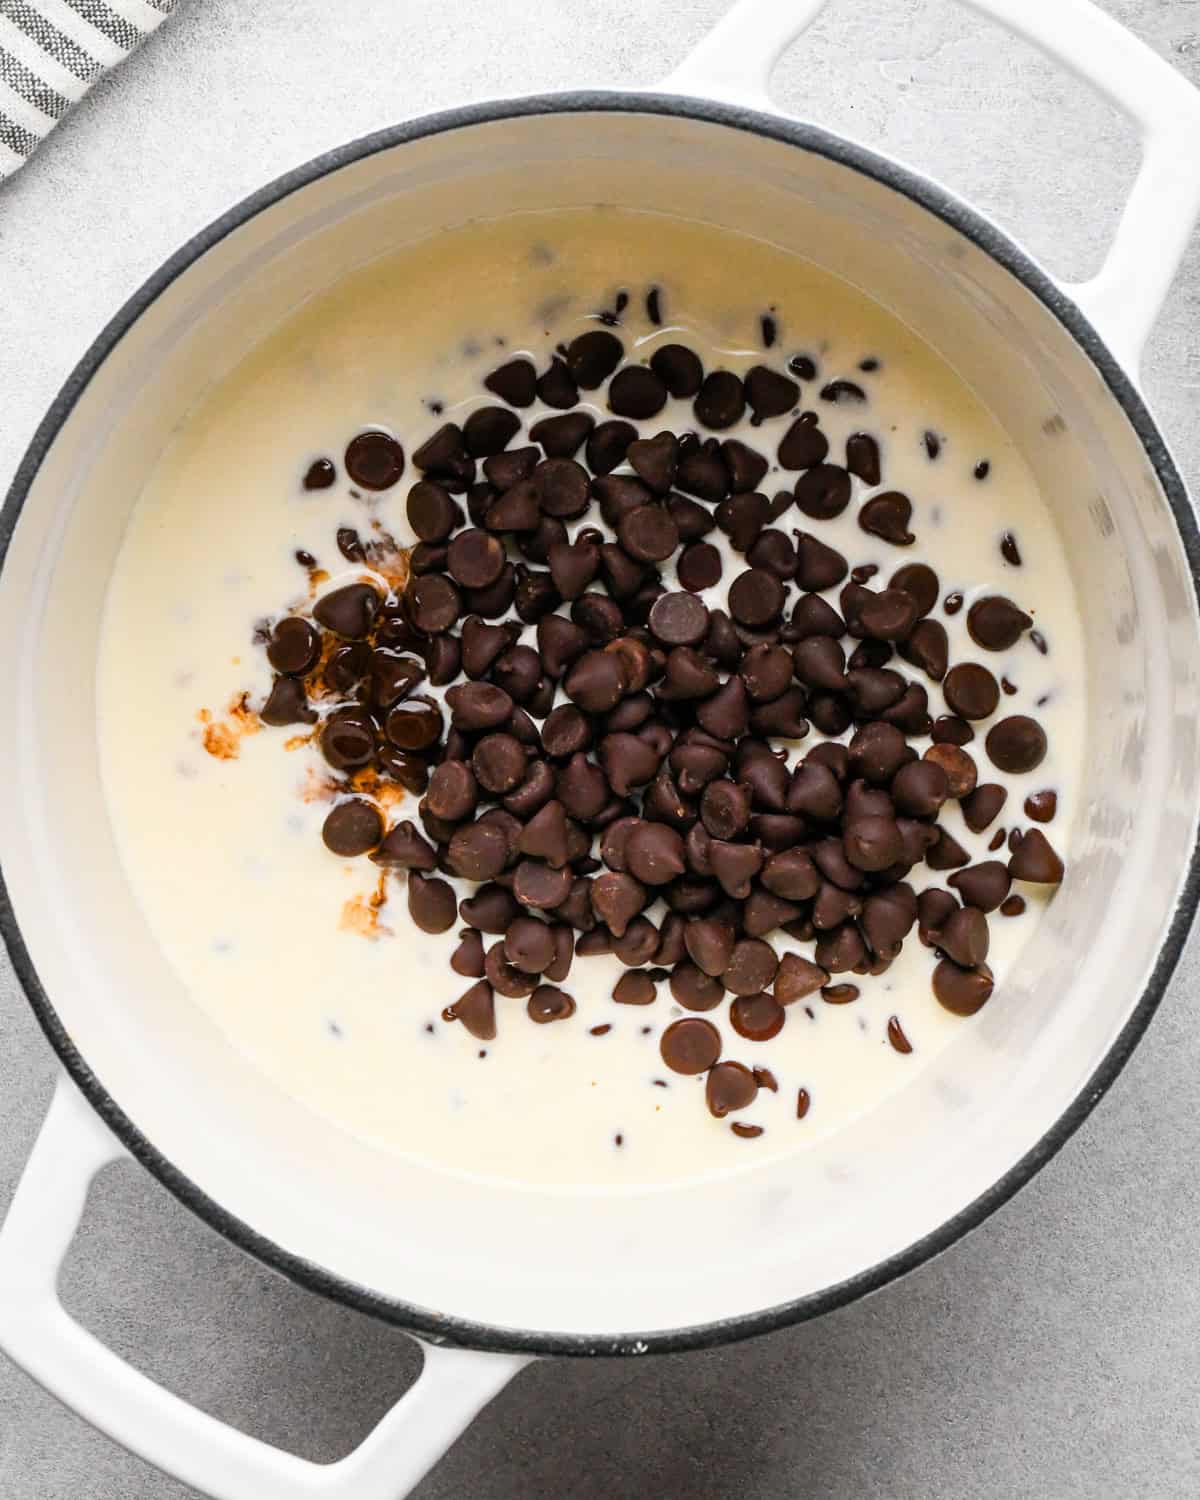
Next, it’s time to make the chocolate ganache. Begin by heating the heavy cream until it’s simmering.
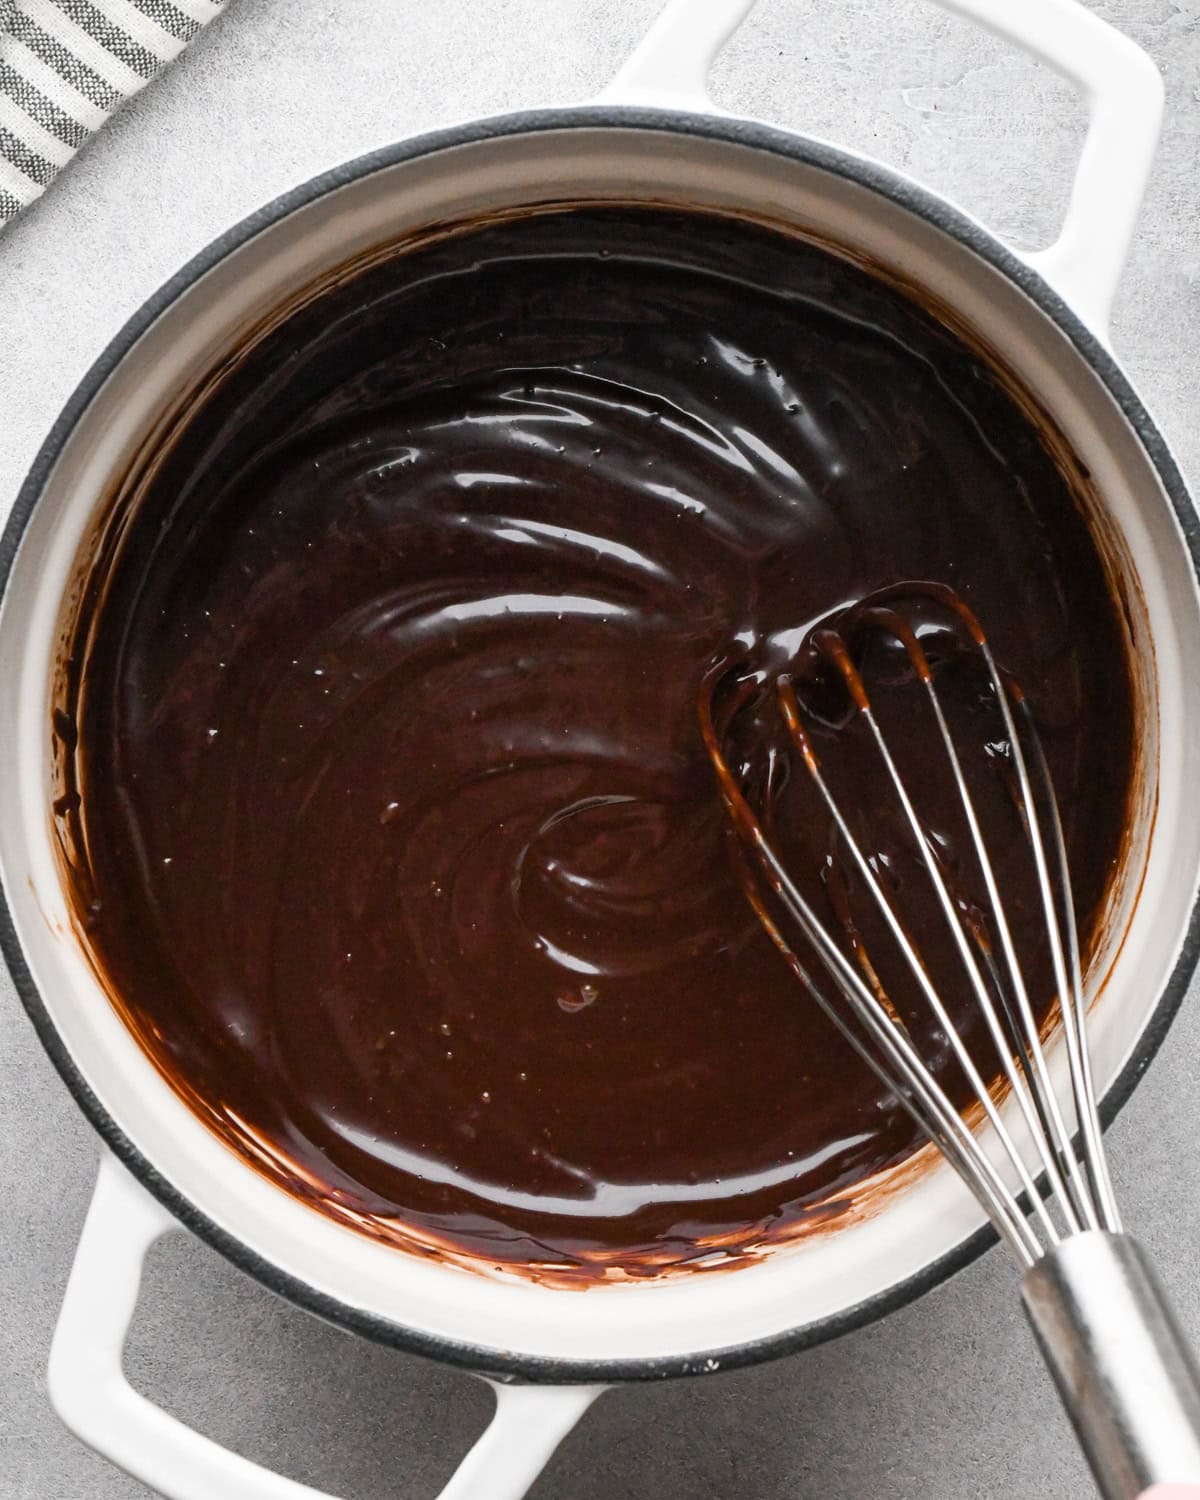
Once it’s simmering, remove the cream from the heat and whisk in chocolate chips and vanilla until smooth and glossy.
Then, let it cool for at least 10 minutes to thicken before putting it on the brownies.
Once the ganache has cooled, gently spread it over the cookie dough layer.
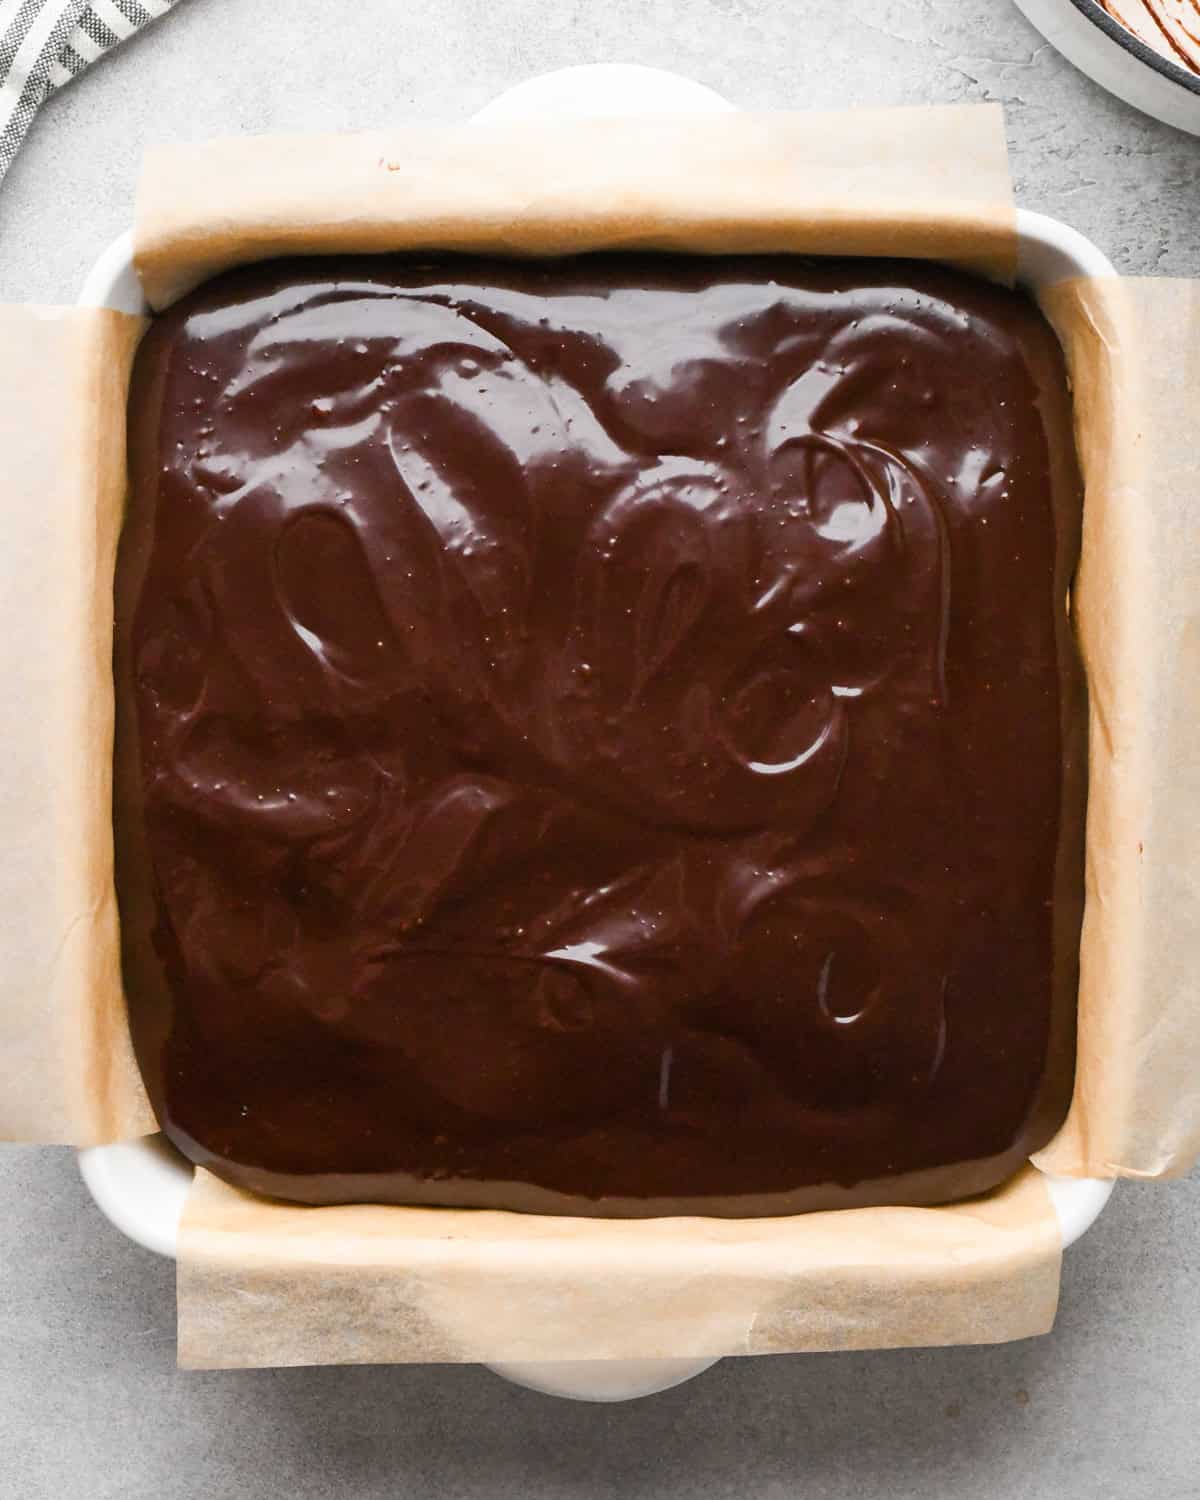
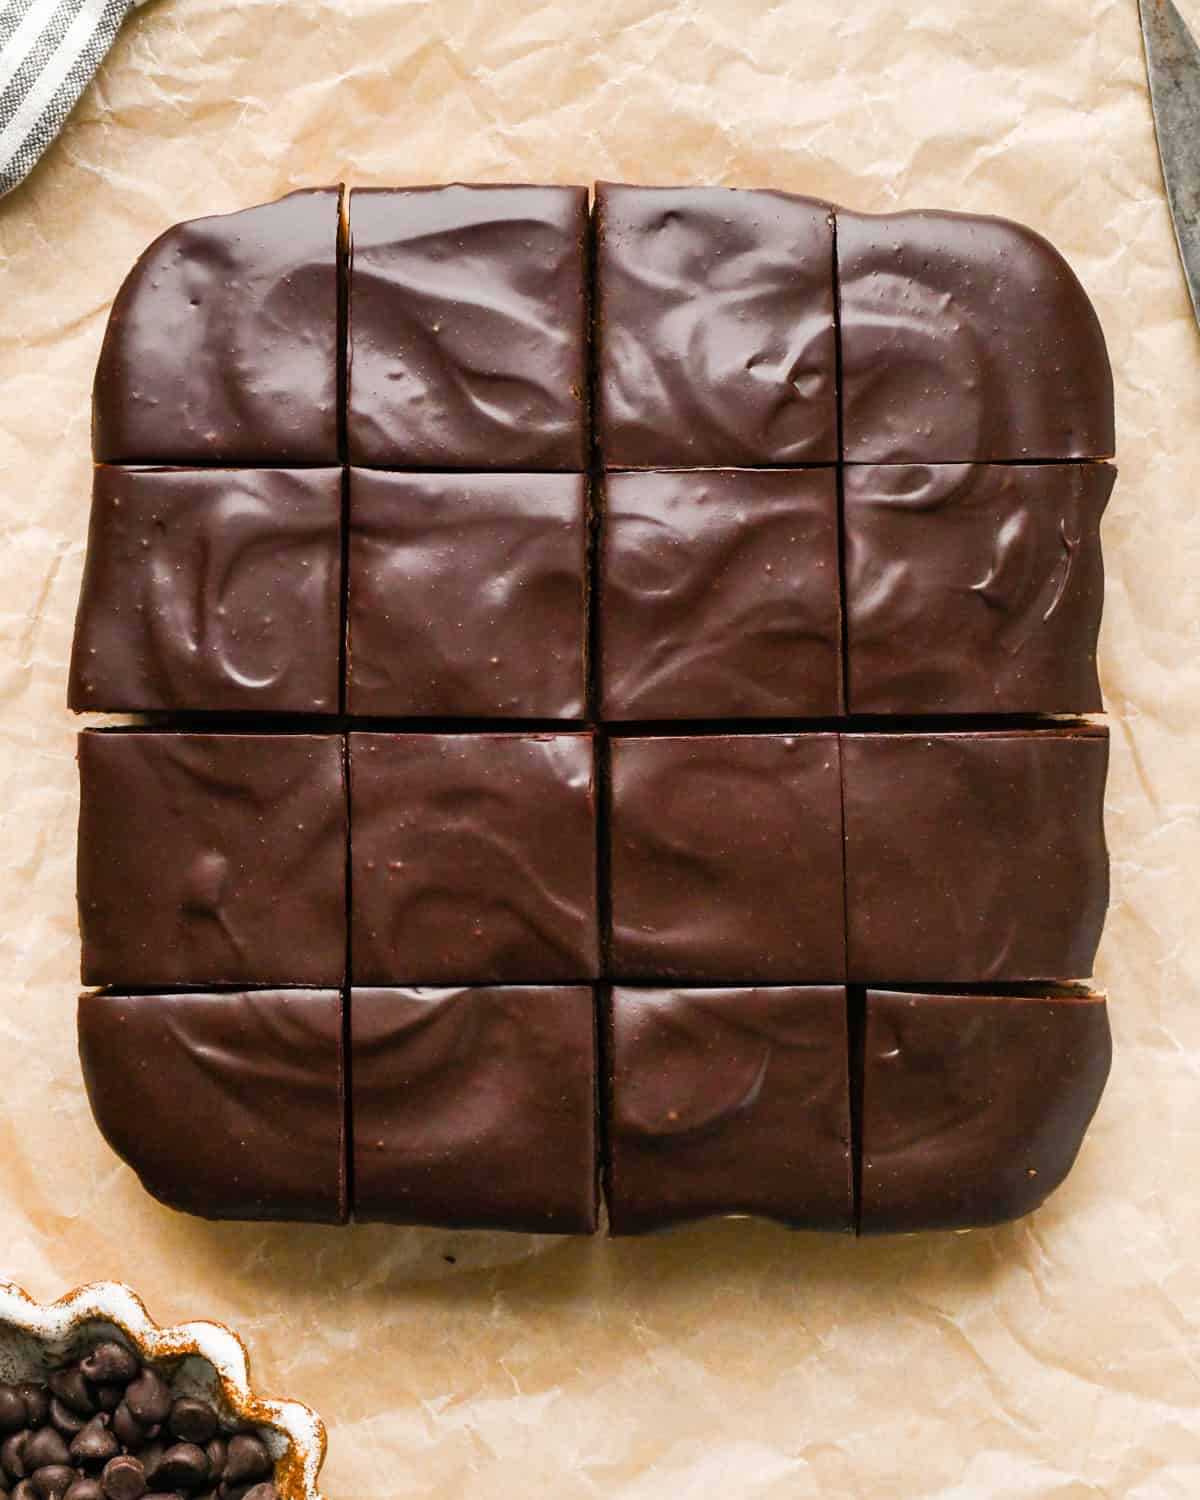
Transfer the brownies to the refrigerator until the ganache is set.
Then, cut into 16 squares (trust me they are rich) and serve slightly chilled or at room temperature. It’s easier to cut them when they are cold, but I like eating them close to room temperature.
Serve
Serve these brownies for dessert and everyone will be floored with how delicious they are. You could add a sprinkle of flaky sea salt on top if you feel so inclined.
Store/Freeze
Store leftover cookie dough brownies in an airtight container in the refrigerator for up to 5 days or in the freezer for up to 1 month.
Let them come to room temperature slowly before serving – do not microwave the brownies.
Cookie Dough Brownies Recipe FAQS
Yes, you can use your favorite box and follow the instructions if you’d prefer.
No. The cookie dough layer is added after the brownies have baked and cooled, kind of like frosting.
The FDA recommends avoiding the consumption of raw flour because there is a risk that it could be contaminated with bacteria. If you are worried about eating raw flour, you can heat treat the flour used in the cookie dough layer in this recipe.
The main goal of heat-treating flour is to ensure that it reaches 160 degrees Fahrenheit (71 degrees Celsius), which is the temperature that kills bacteria. There are two methods to heat treat flour to make it safe to use in this recipe.
1. Bake it. Preheat your oven to 350 degrees Fahrenheit (177 degrees Celsius) and spread the flour evenly on a large baking sheet. Bake for 5-10 minutes or until the temperature reaches 160 degrees Fahrenheit (71 degrees Celsius).
2. Microwave it. Place the flour in a microwave-safe bowl and heat it on high for 60-65 seconds, or until it reaches 160 degrees Fahrenheit (71 degrees Celsius).
Let the flour cool while you’re mixing the wet ingredients, then use it in the cookie dough.
Chill the brownies for at least 1 hour before slicing, and use a sharp knife wiped clean between cuts for neat layers. You can also dip the knife in hot water between cuts.
If you make and love my recipes, it would mean so much to me if you would leave a comment and rating! And don’t forget to follow along on Instagram, Pinterest, Facebook, TikTok and Youtube – be sure to tag @joyfoodsunshine and use the hashtag #joyfoodsunshine so I can see your creations!
Cookie Dough Brownies
Video
Equipment
Ingredients
Brownies:
- 1 cup semisweet chocolate (6 ounces)
- ½ cup salted butter
- 2 large eggs
- ¾ cup granulated sugar
- 2 tsp pure vanilla extract
- ¾ cup all-purpose flour
- 1 Tablespoon cocoa powder
- ¼ teaspoon fine sea salt
Cookie Dough
- ½ cup salted (softened)
- ½ cup granulated sugar
- ½ cup light brown sugar (packed)
- ¼ cup whole milk
- 1 tsp pure vanilla extract
- 1 ½ cups all-purpose flour
- ¼ teaspoon baking soda
- ¼ teaspoon baking powder
- ¼ teaspoon fine sea salt
- ½ cup mini chocolate chips
Chocolate Ganache
- ½ cup heavy cream
- 1 cup semisweet chocolate (6 ounces)
- ¼ teaspoon vanilla extract
Instructions
- Preheat oven to 350 degrees Fahrenheit (177 degrees Celsius), line a 9×9” baking dish with parchment paper and lightly grease, set aside.
Make the Brownie Layer
- In a small bowl, combine the flour, cocoa powder and sea salt, set aside.
- Melt the chocolate and butter together in a microwave safe bowl, or on the stovetop over low heat. Stir until smooth and glossy. Set aside.
- In the bowl of a standing mixer, beat the eggs for 1 minute (until pale and thick).
- Then, add the granulated sugar and beat for an additional1 minute.
- Add the melted chocolate/butter mixture and vanilla and stir on low speed until batter is smooth.
- Stir in the dry ingredients on low speed until incorporated.
- Evenly spread the brownie batter in the bottom of the prepared baking pan.
- Bake in the preheated oven until the top is set and the brownies are only very slightly “jiggly”, 25-30 minutes.**
- Place the brownie pan on a wire cooling rack to cool completely.
Make the Cookie Dough Layer
- In a standing mixer fitted with the paddle attachment, or in a large bowl with a handheld mixer, beat the butter, brown sugar and granulated sugar together for 1 minute.
- Add the milk and vanilla and beat until combined.
- Then, add the flour, baking soda, baking powder and sea salt and beat until incorporated.
- Stir in mini chocolate chips, set aside.
Make the Chocolate Ganache
- In a small saucepan, heat the heavy cream until simmering.
- Once simmering, remove from heat and whisk in chocolate chips and vanilla until smooth.
- Let cool for 5-10 minutes, whisking often.
Assemble the Cookie Dough Brownies
- Spread the cookie dough evenly over the cooled brownies – be careful not to press or spread too hard.
- Gently spread the cooled ganache over the cookie dough.
- Transfer the brownies to the refrigerator until the ganache is set.
Cut and Serve
- Remove the brownies from the refrigerator.
- Cut into 16 squares and serve at room temperature or slightly chilled.
Notes
- Semisweet chocolate – for the brownies and ganache you can use chips, bars, discs, etc. because the chocolate is melted.
- Salted Butter. unsalted butter works great in this recipe too.
- All-purpose flour. To make this recipe gluten-free, use an all-purpose gluten-free baking flour.
- Whole milk. heavy cream works great in place of whole milk.
- Mini chocolate chips. These are in the cookie dough layer and I don’t recommend substitutions. Sure, regular size chips work fine – but the mini chips just work so much better.
Nutrition
Nutrition information is automatically calculated, so should only be used as an approximation.


YUM 😋 This recipe is SO good, especially if you have a sweet tooth! I made it and tried it and was instantly impressed. It was almost to sweet but I really enjoyed it. Definitely recommend and will be making again in the very near future.
Thank you so much for the recipe.
Yes, a little square goes a LONG way with these brownies! They’re very indulgent! I’m so glad you love them!