How to Make a Lattice Pie Crust
Updated Oct 20, 2025
This post may contain affiliate links. Please read our disclosure policy.
Learn how to make a lattice pie crust with step-by-step photos and an instructional video using homemade pie crust or store-bought.
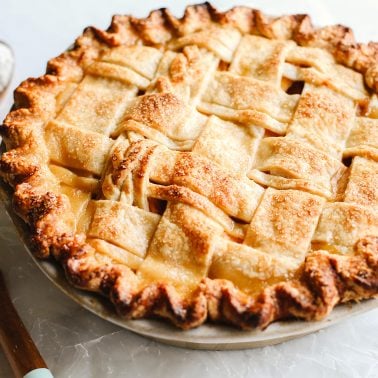
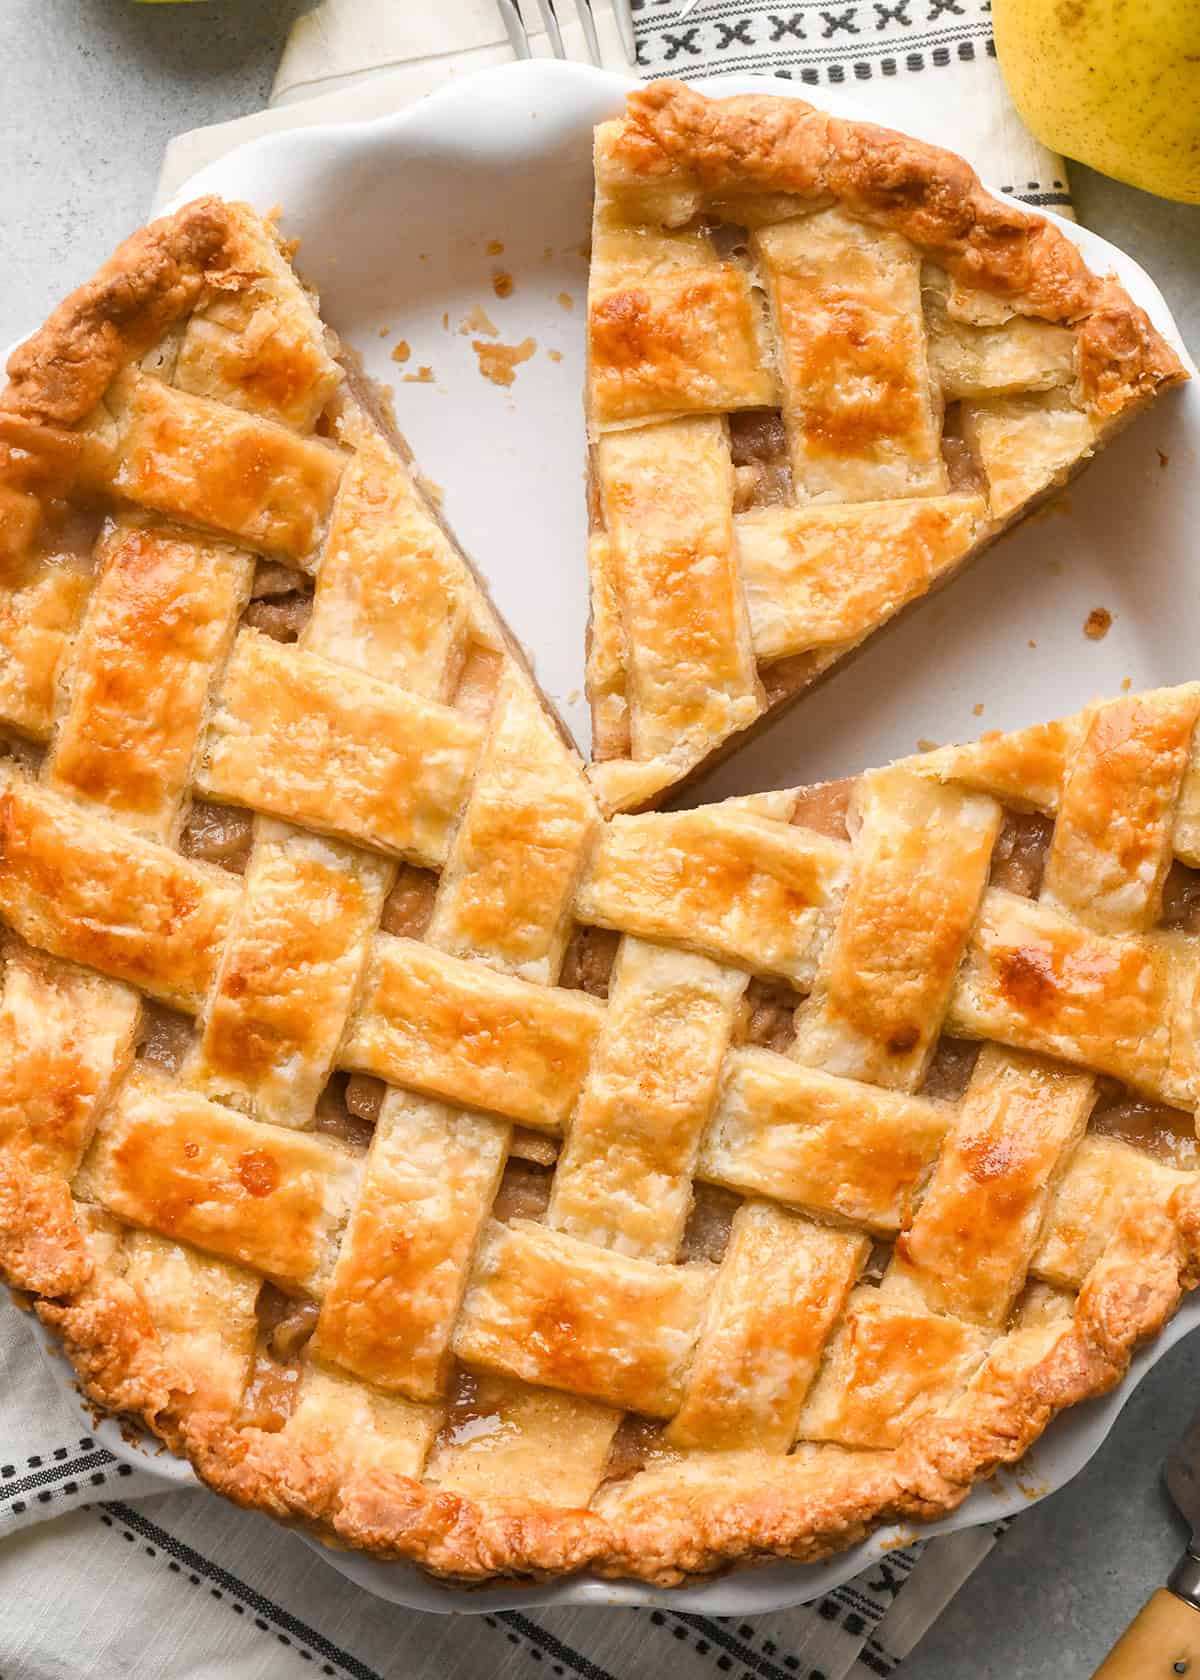
Making homemade pies is one of my all-time favorite past times – and I almost always opt to use a lattice pie crust.
It’s classically beautiful, and fairly simple to make. Plus, it allows the pie filling to vent so water can evaporate and the filling can thicken.
This tutorial on how to make a lattice pie crust will take the guesswork out of pie-making! Follow along with our very detailed step-by-step photos to ensure your success!
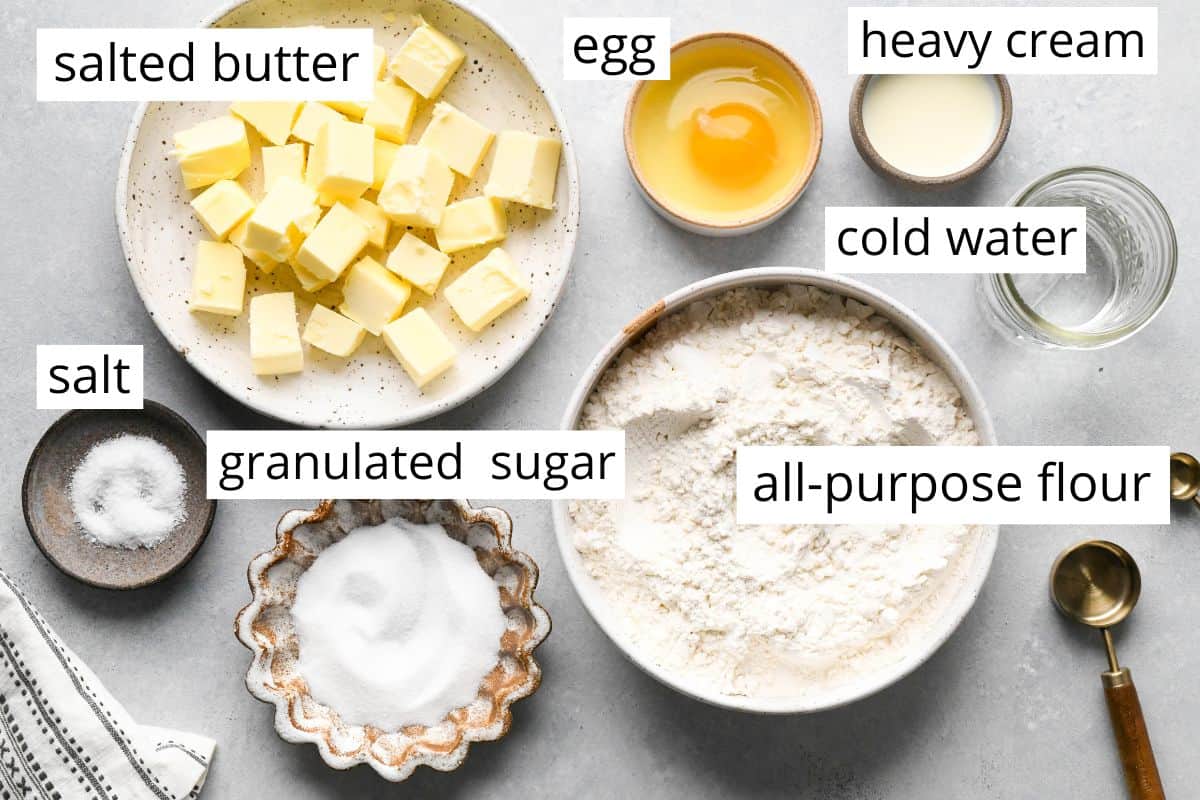
Homemade Pie Crust Ingredients
If you want to make your own crust, it only takes 5 ingredients (plus the egg wash). I describe in great detail how to make an all-butter pie crust as well as possible substitutions in this post.
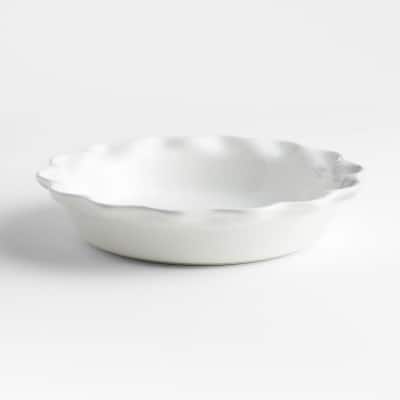
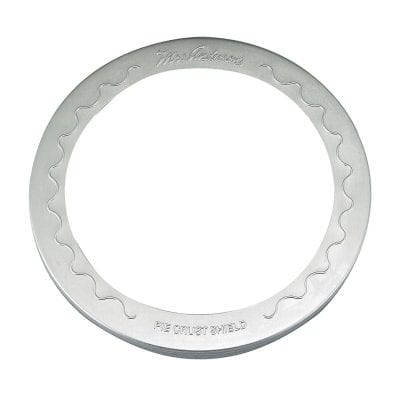
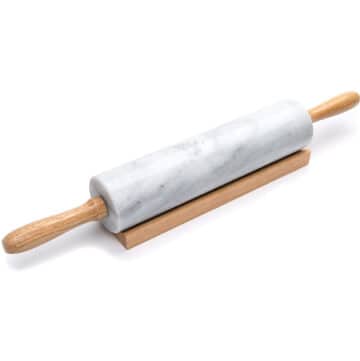
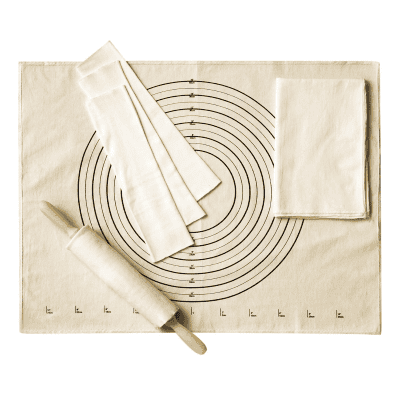
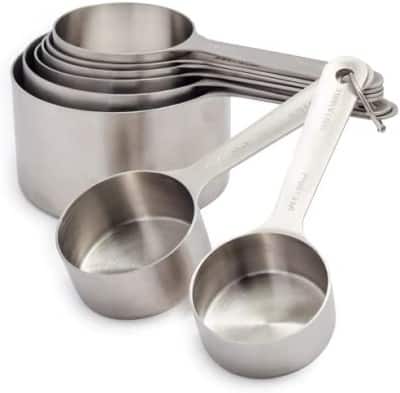
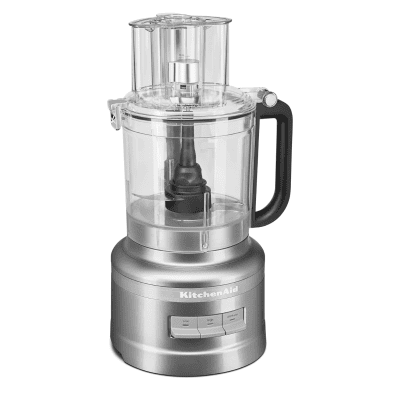
Must-have pie Crust Equipment
These are my must-have tools for making a lattice pie crust.

How to Make a Lattice Pie Crust
Let’s walk through how to make a lattice crust – and be sure to watch the video tutorial for additional guidance.
Make the Pie Crust
Begin by making the pie crust. I suggest using this all-butter pie crust recipe. It’s the only one I use and it’s the most delicious crust ever.
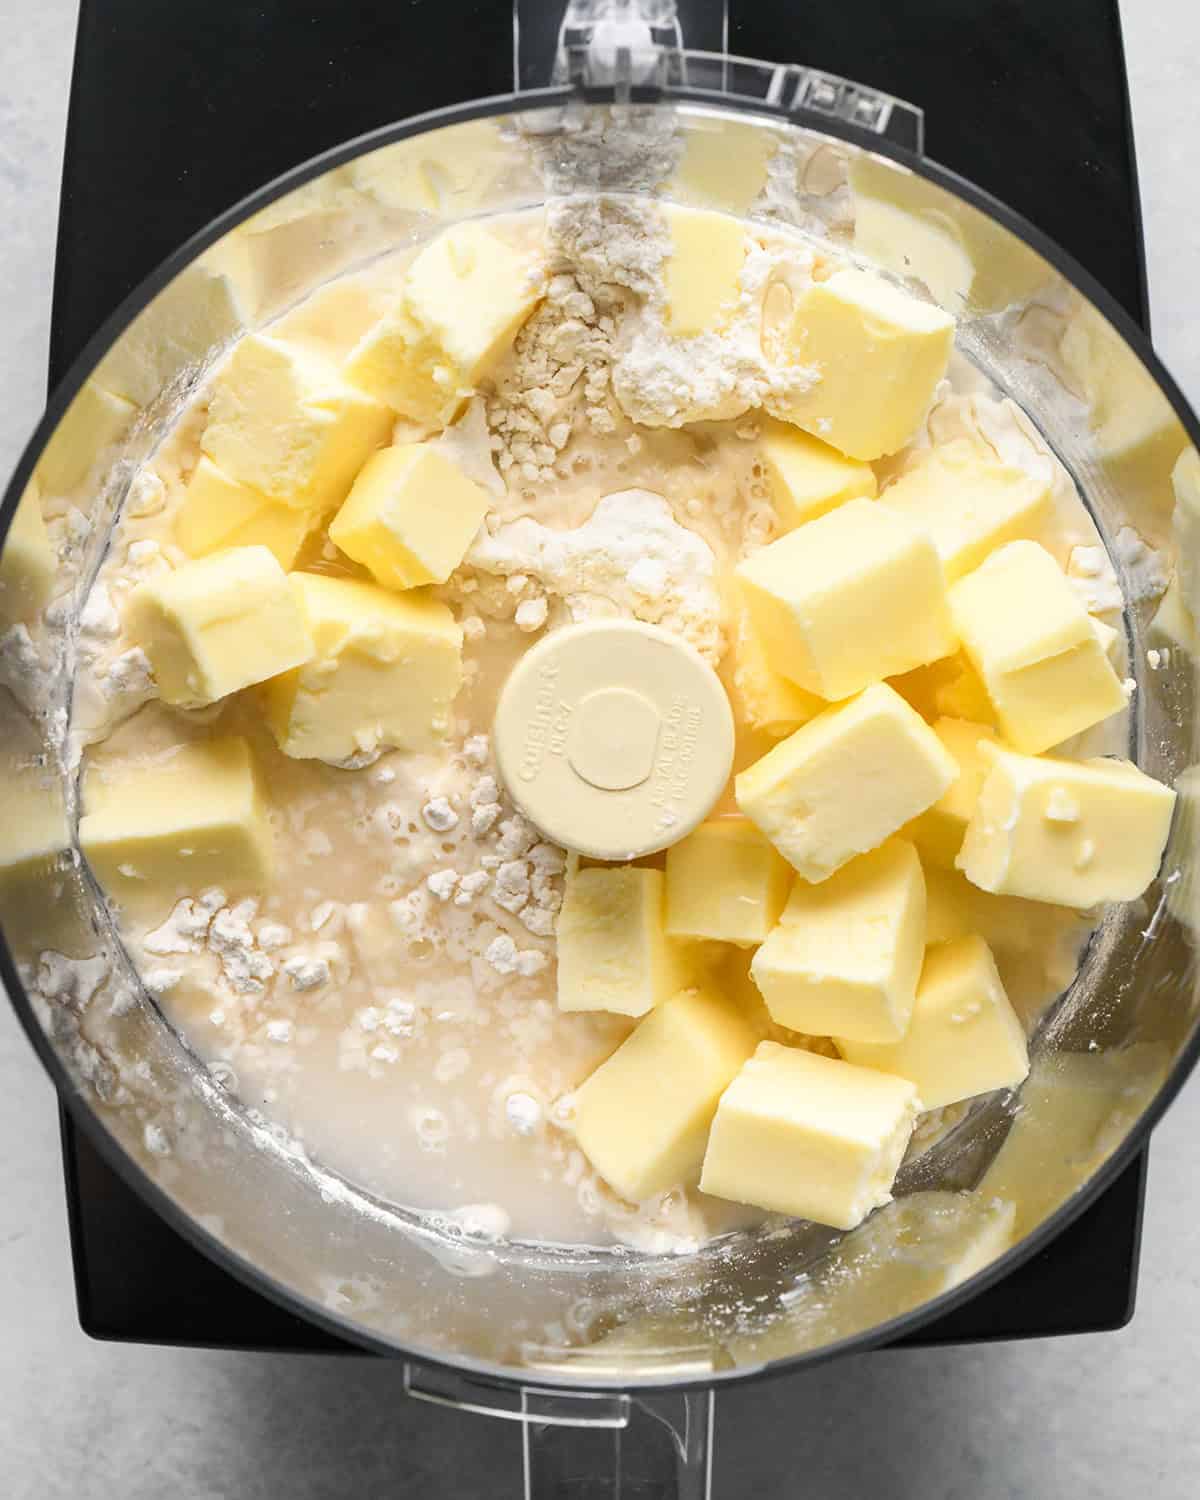
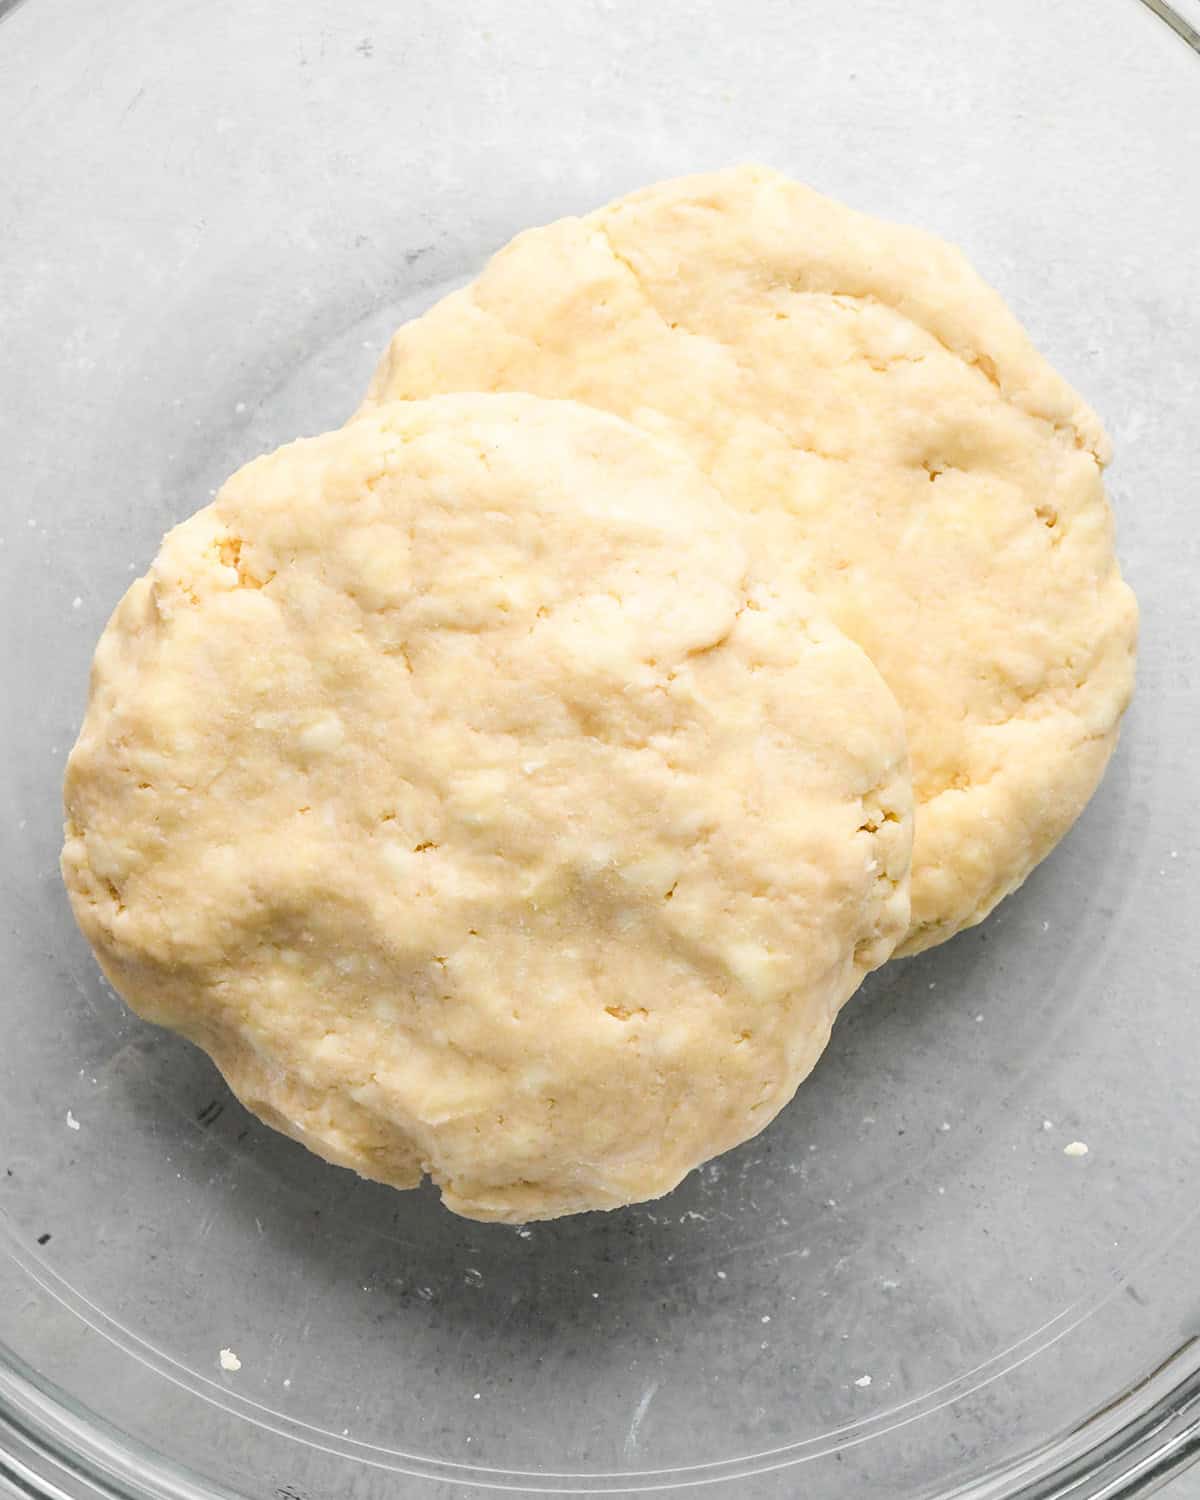
I use a food processor, but you can also cut the butter in with your hands. Begin by pulsing the dry ingredients in a food processor. Then add the cold ingredients and process until the dough just begins to form large crumbs and sticks together when pinched.
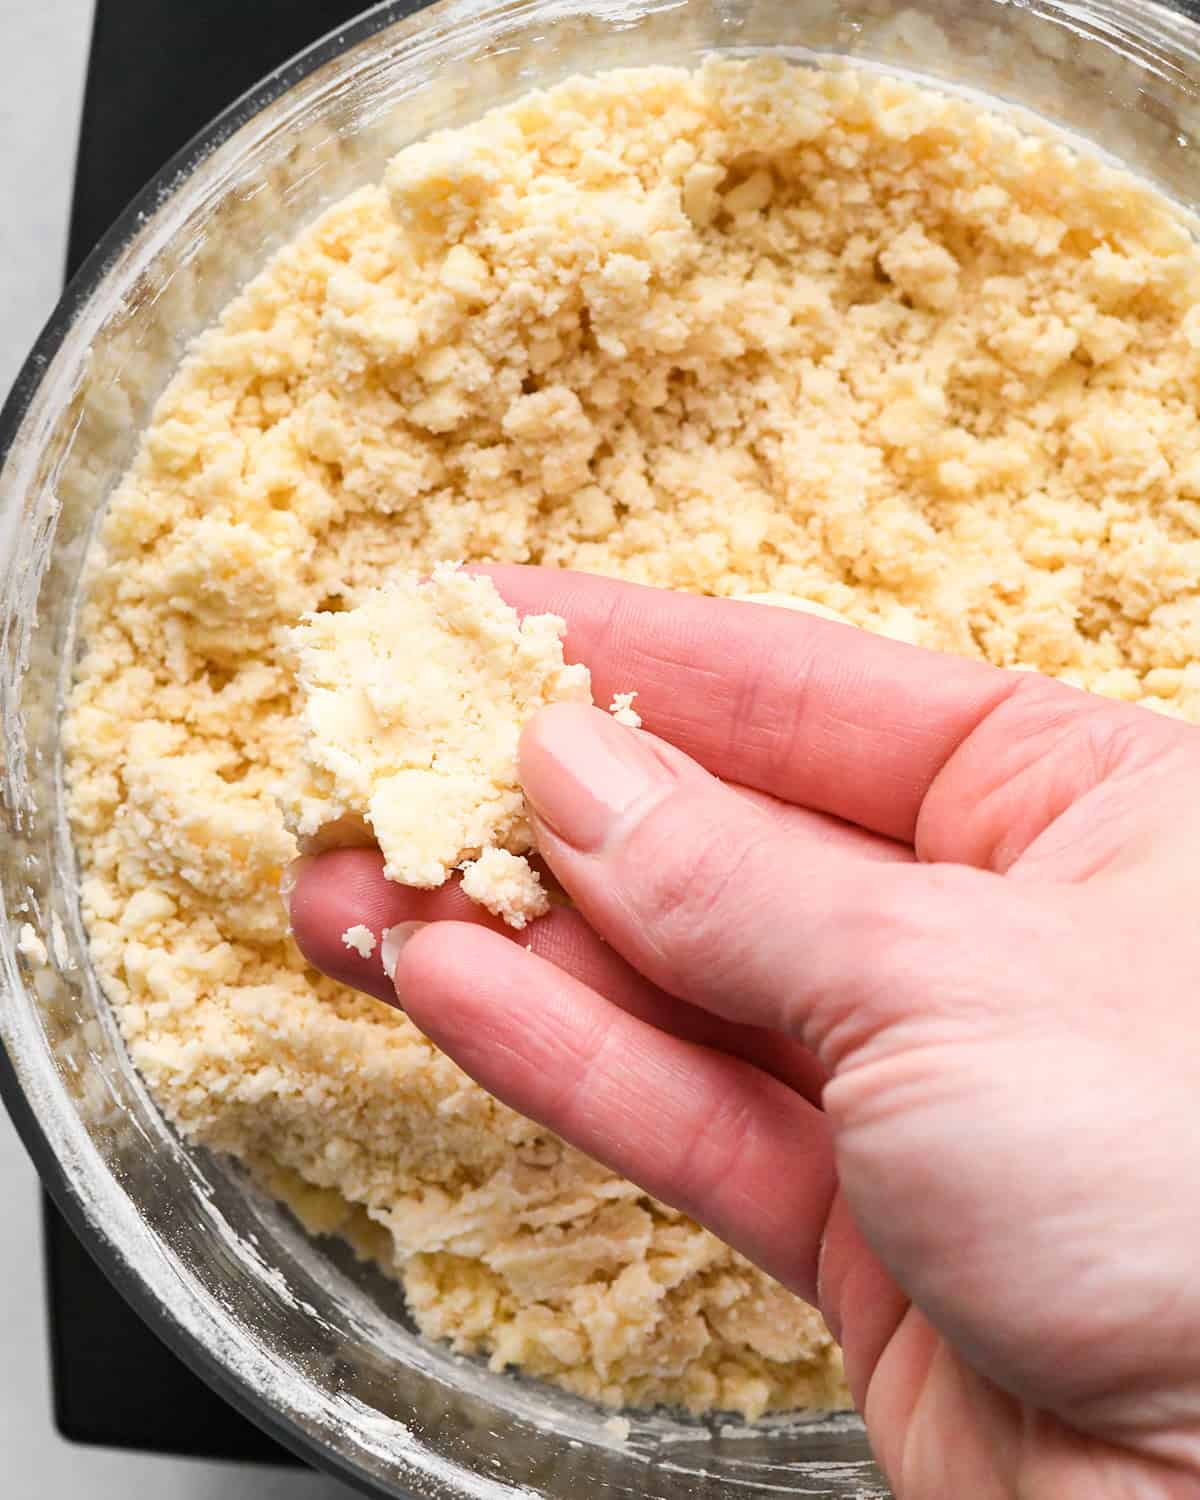
Then, turn the dough out onto a floured surface or into a large bowl and form it into 2 discs.
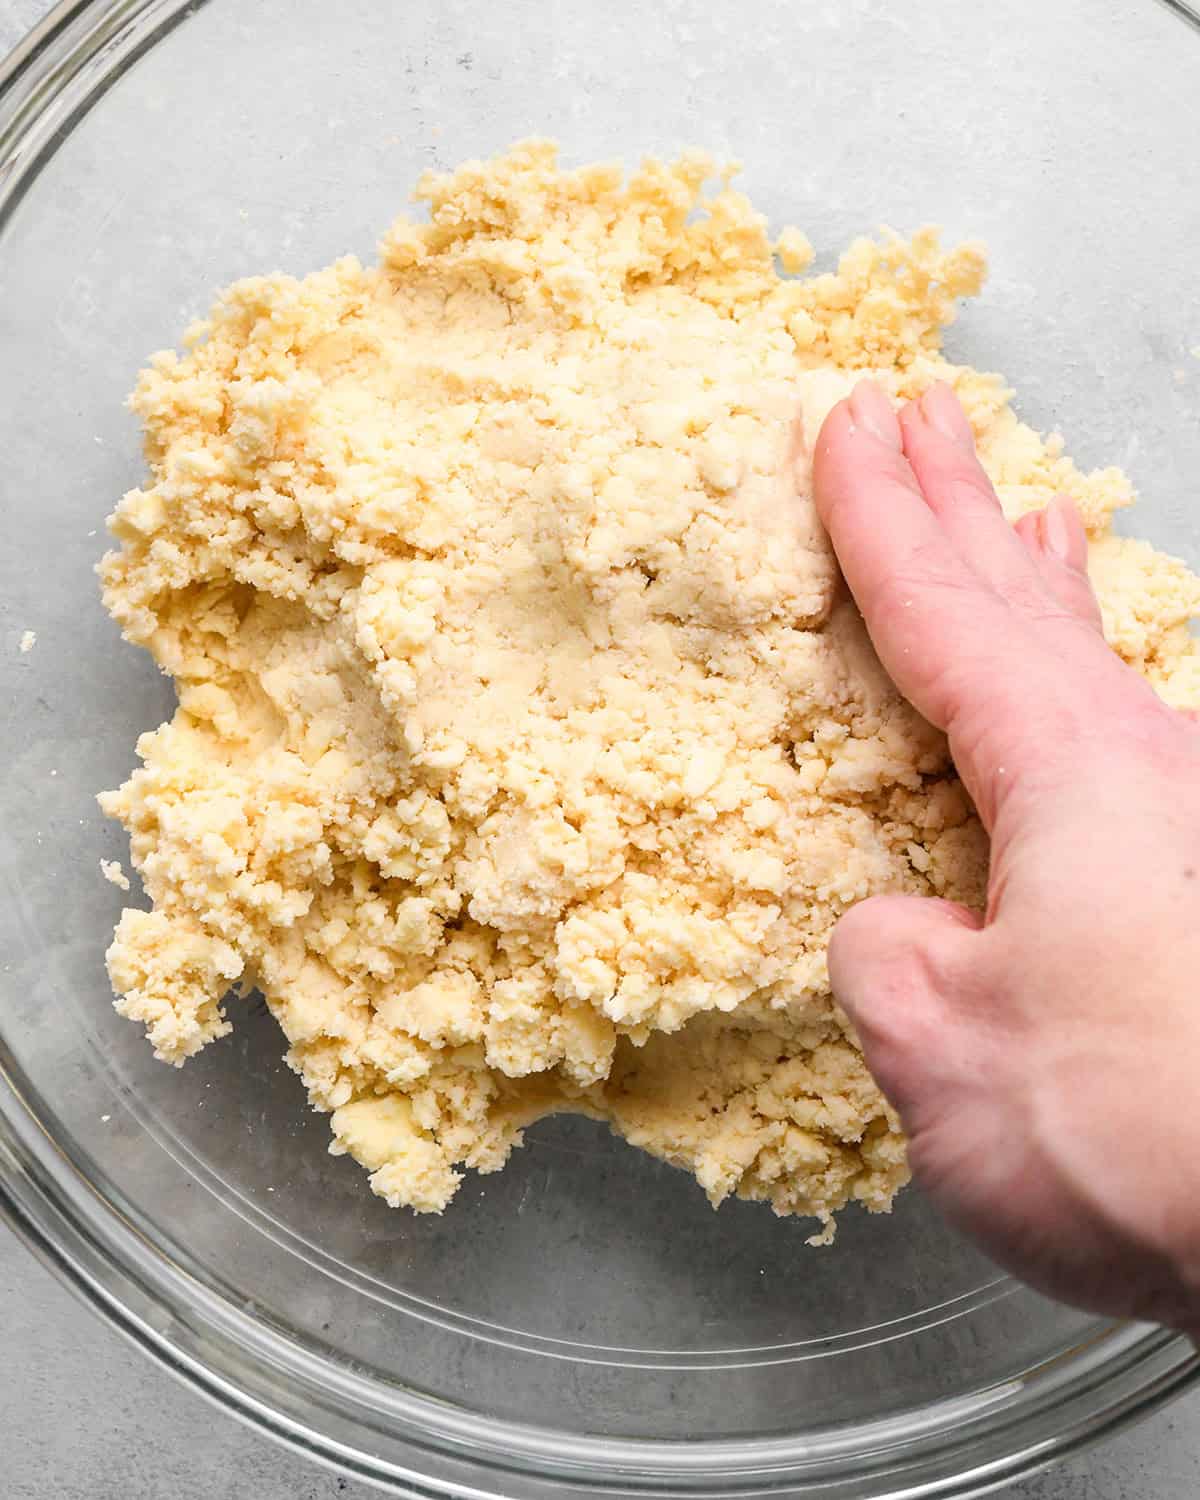
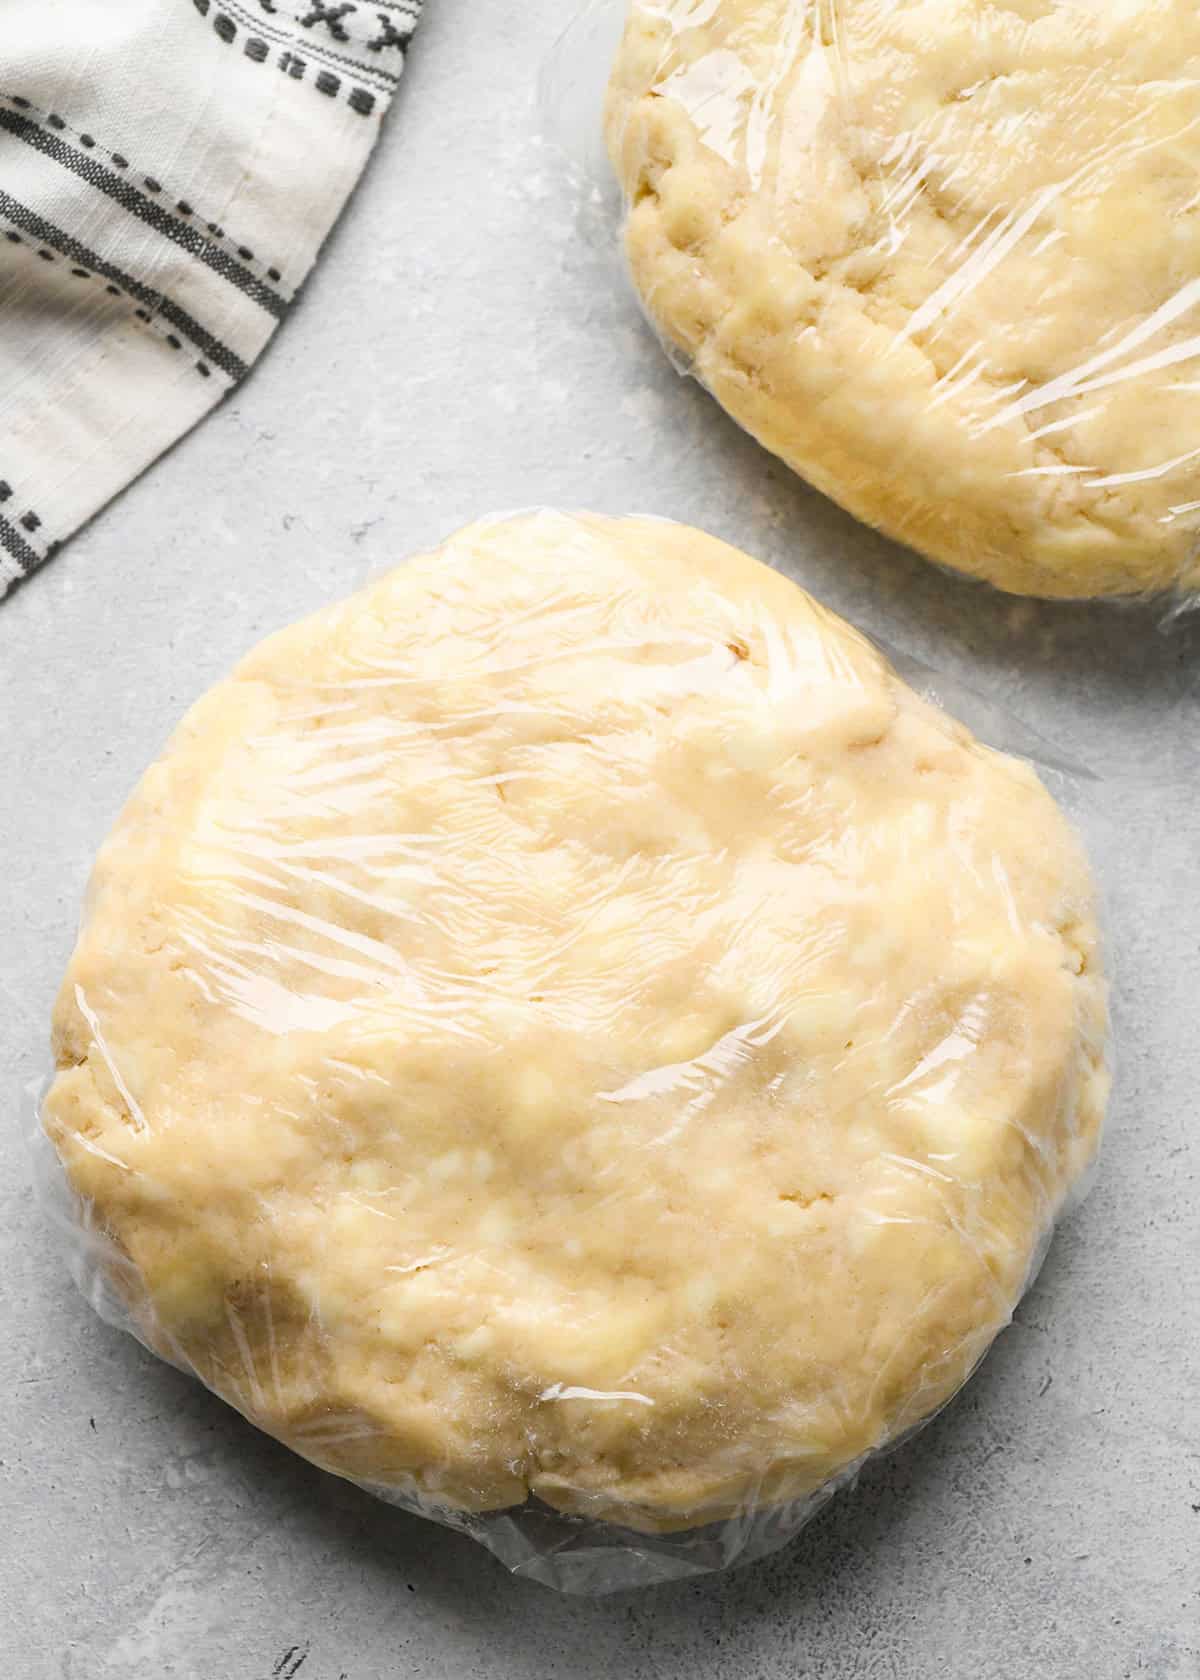
Next, wrap each disc in plastic wrap and chill for at least 2 hours, and up to overnight. If you are chilling overnight, put the wrapped discs into an airtight container or plastic bag.
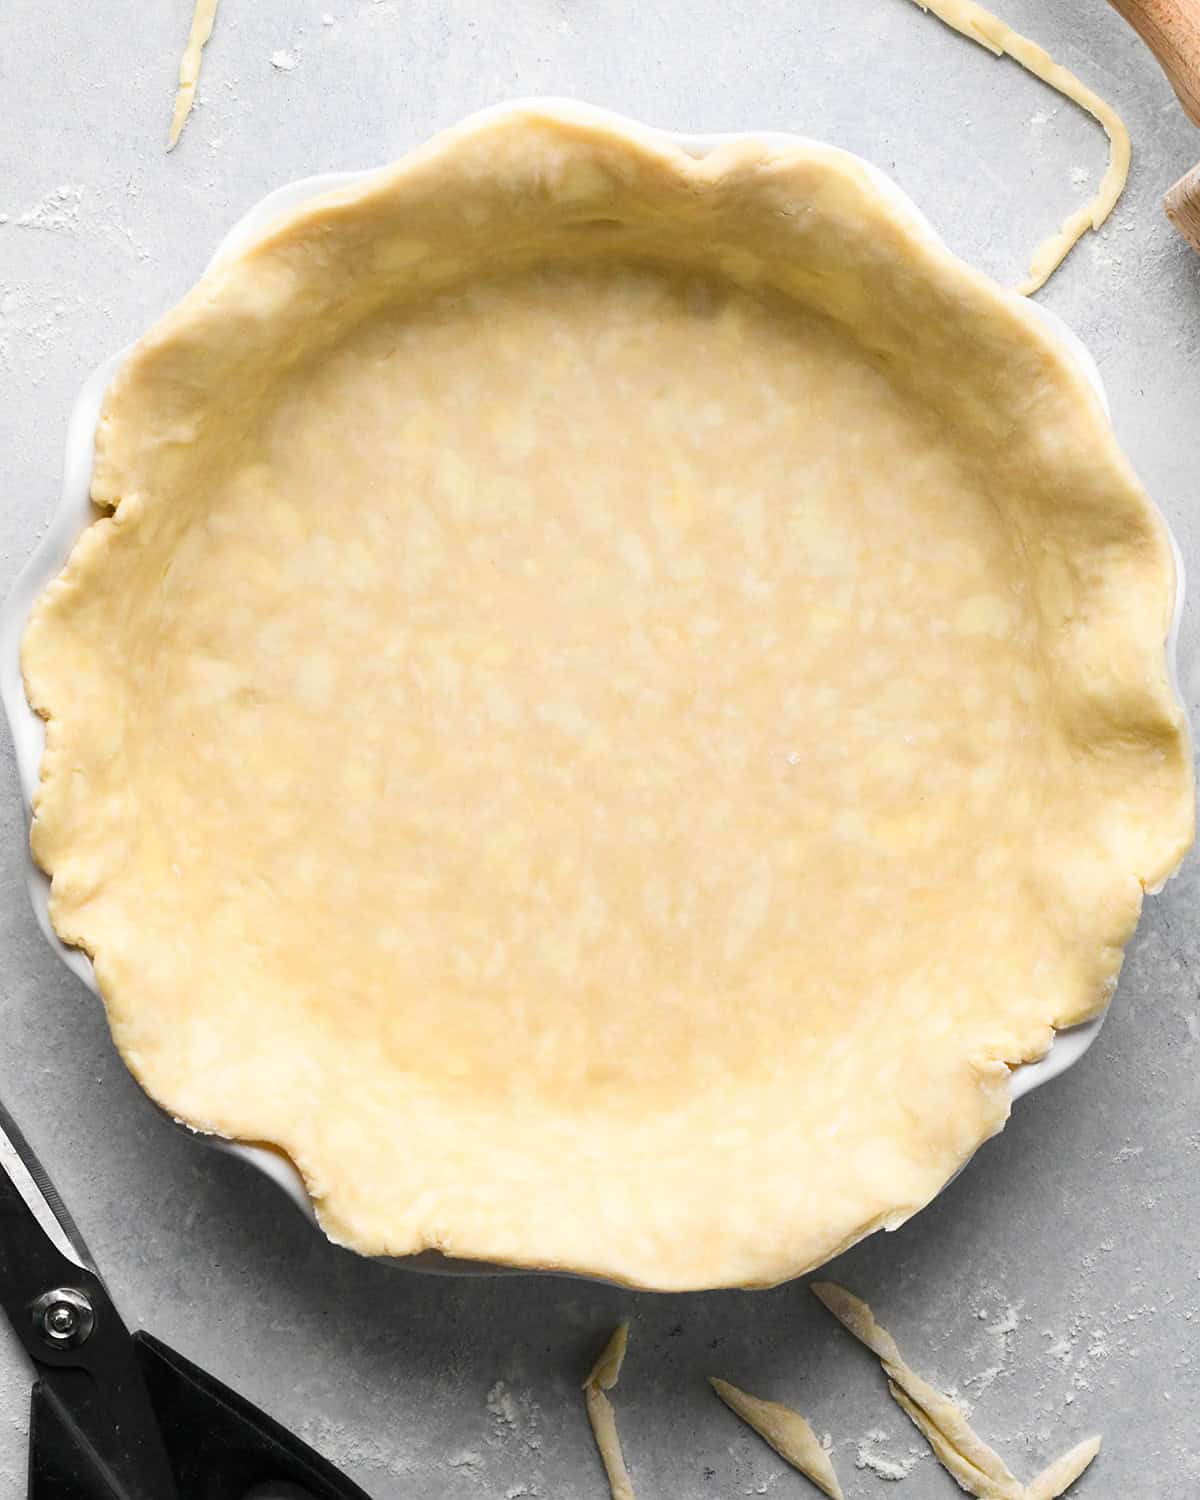
Form the Bottom Crust
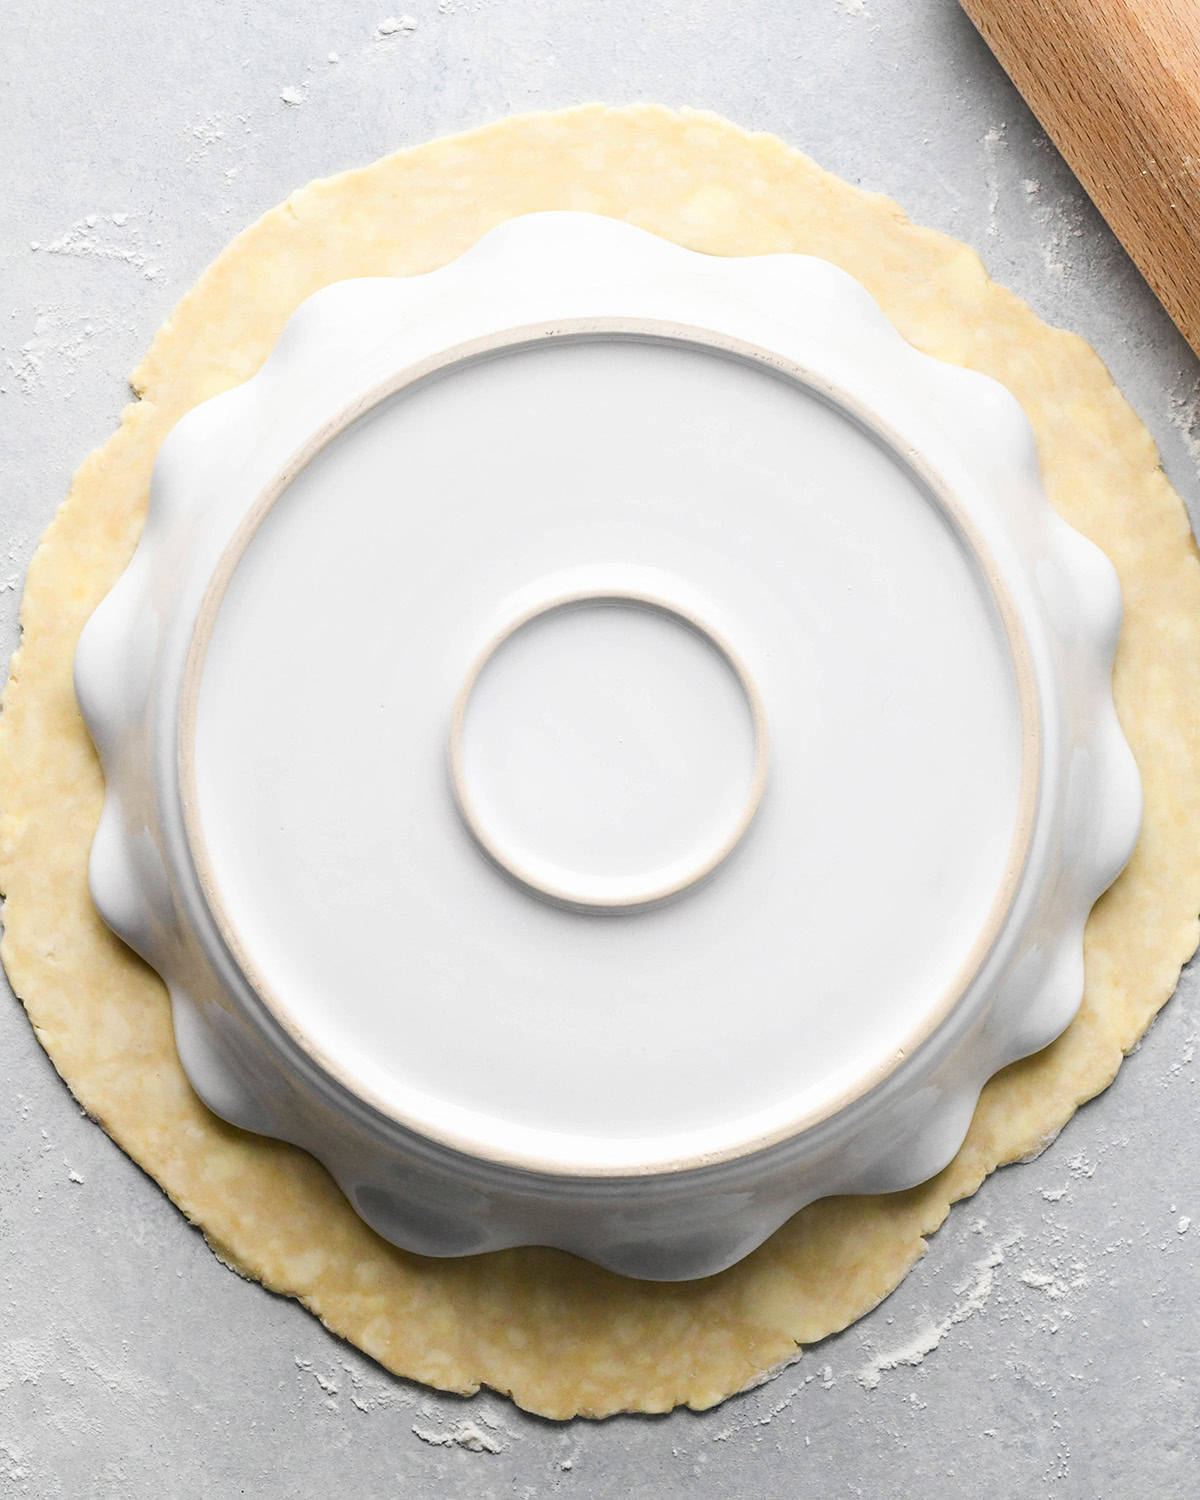
After chilling when you’re ready to make the pie, roll out one disc to fit into the bottom of a pie plate. Trim off any overly excess pieces but leave enough to pinch and make a fluted edge.
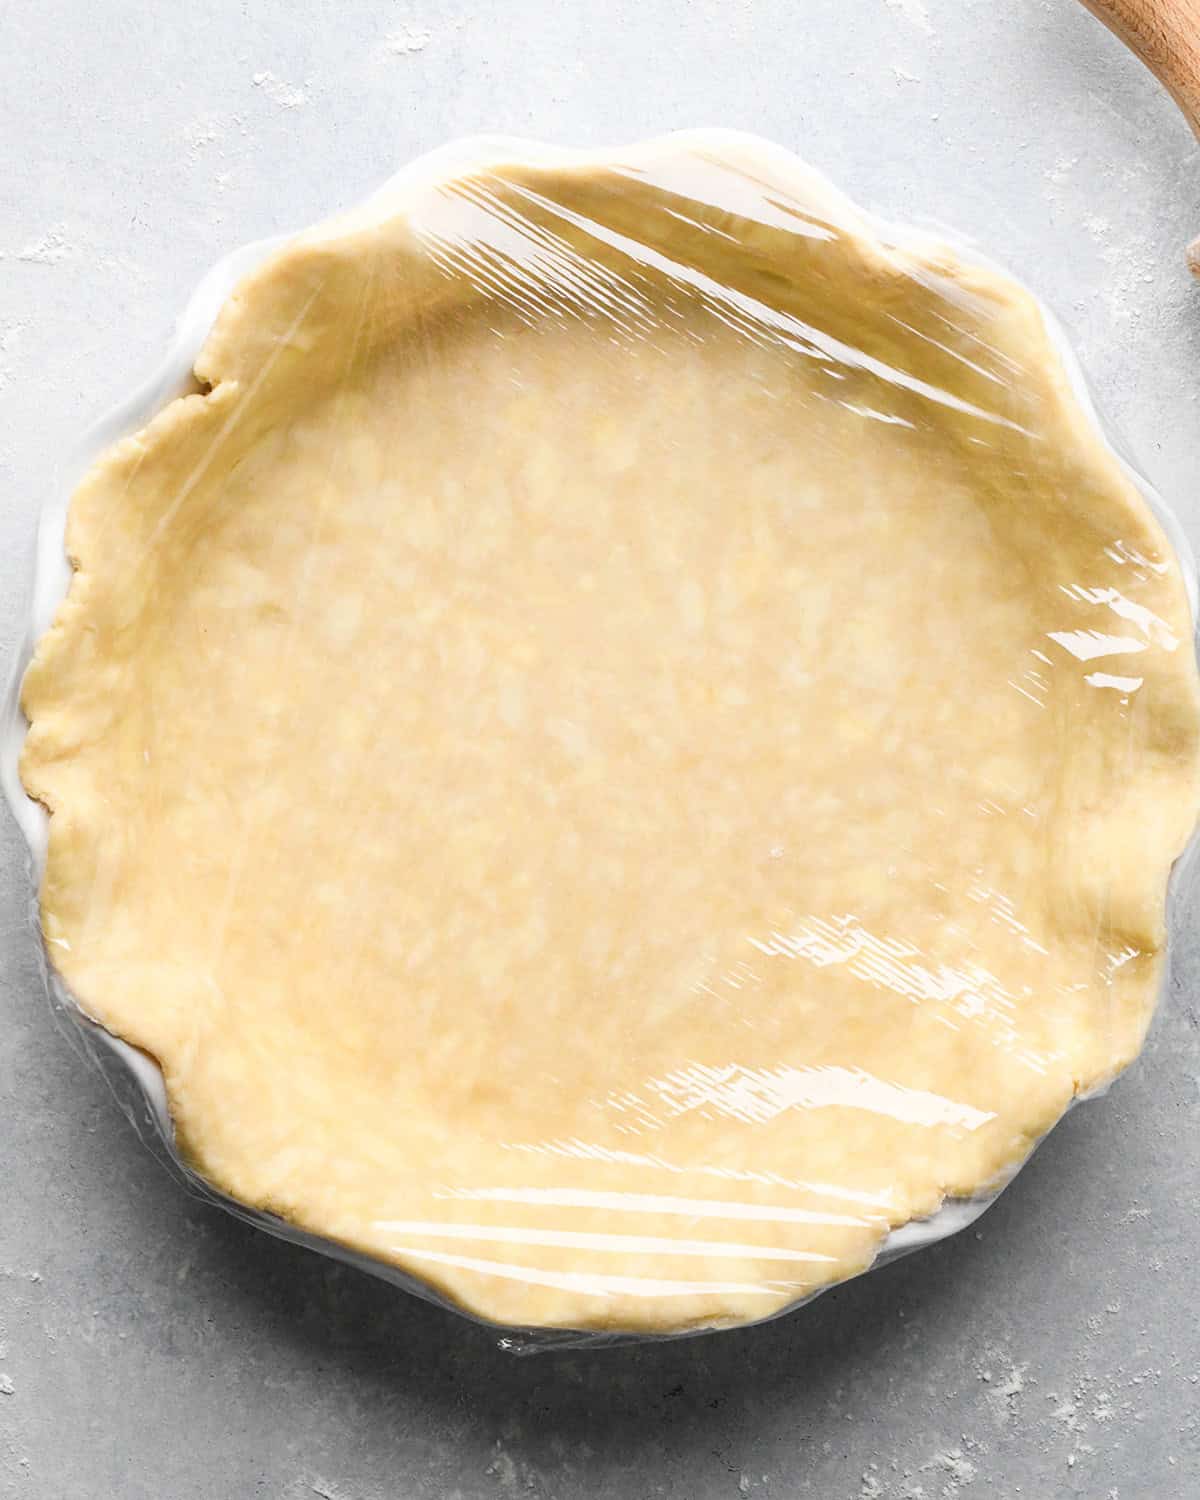
Then, cover the bottom pie crust with plastic wrap and put it back in the refrigerator.
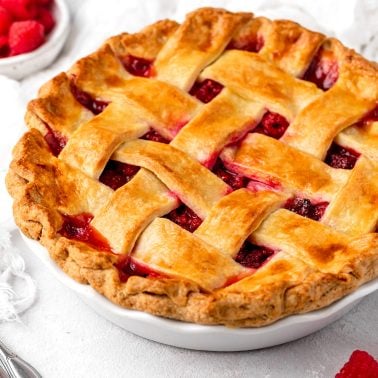
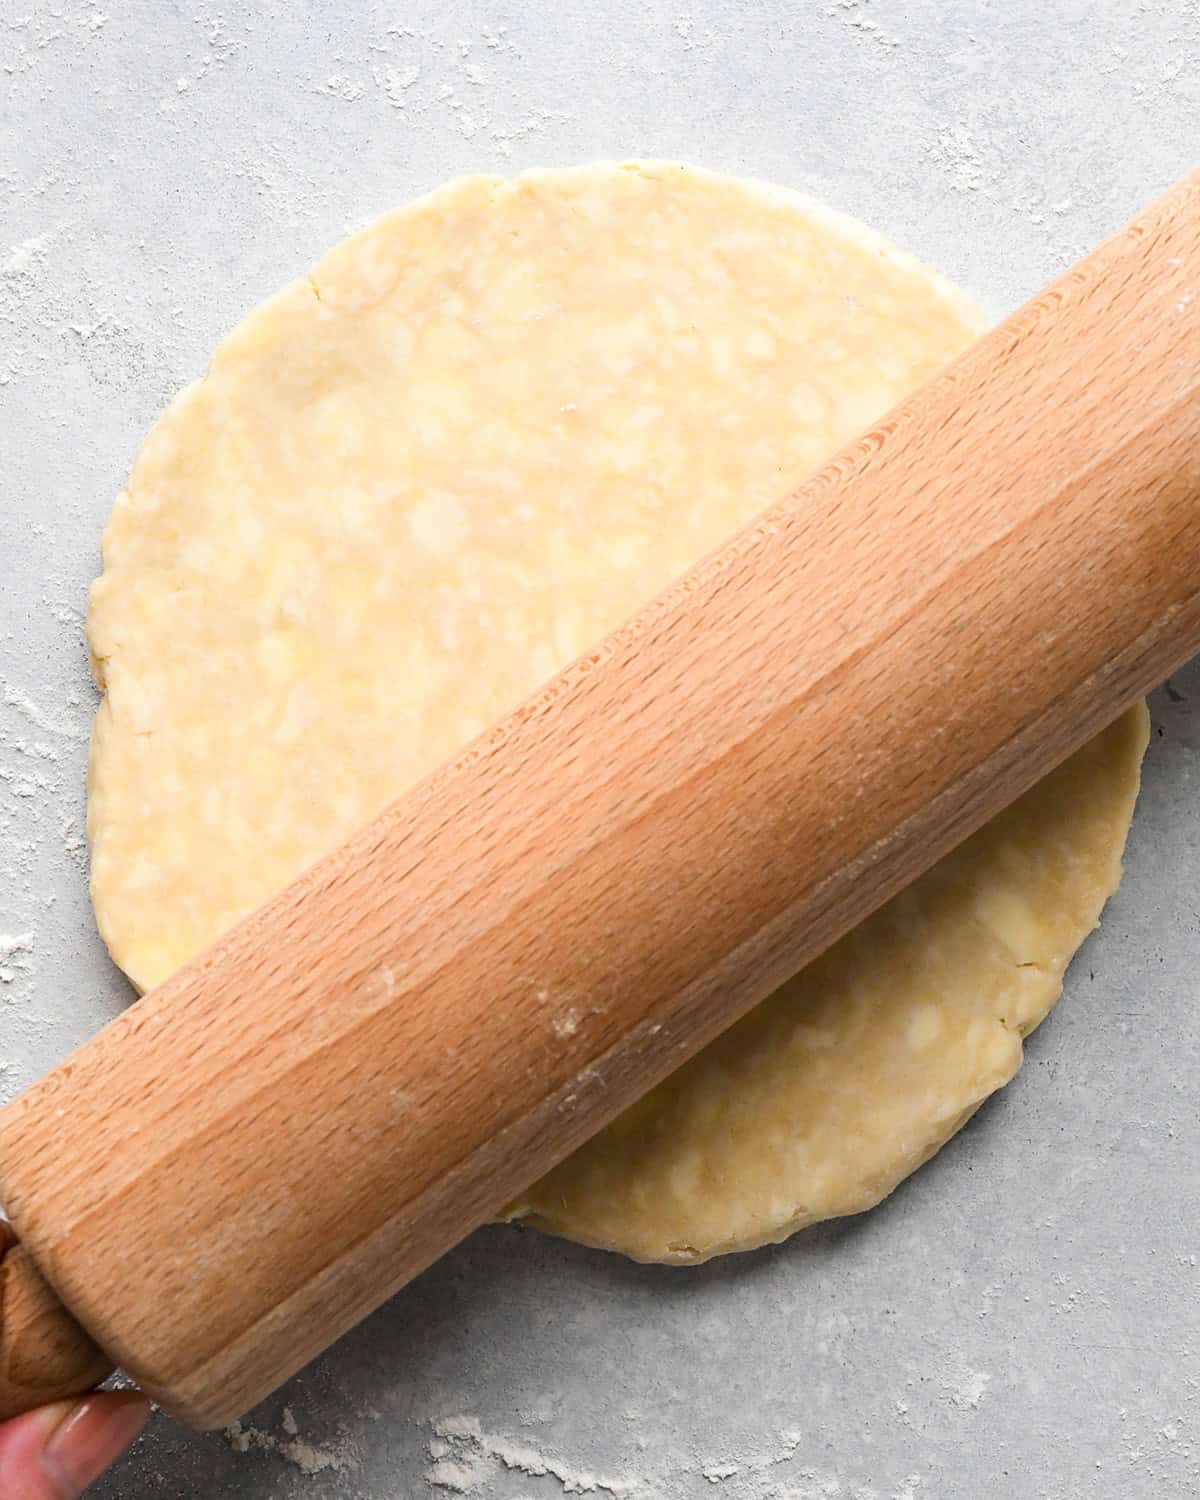
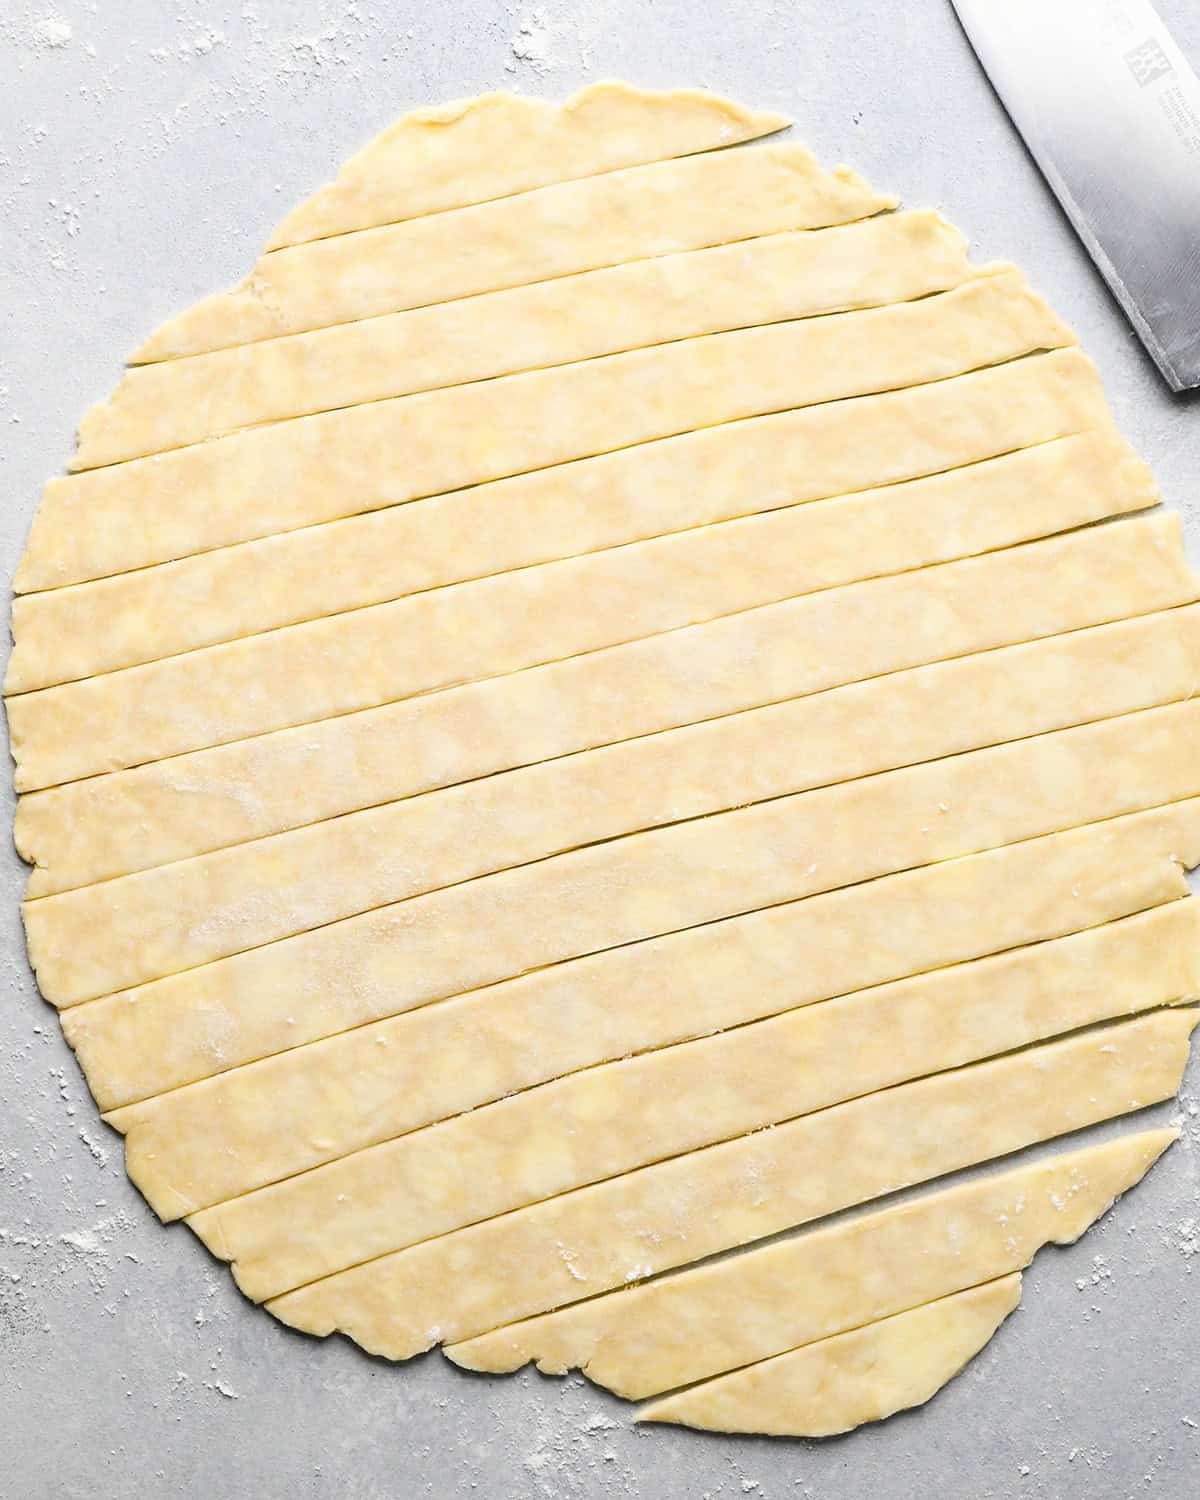
Roll & Cut the Top
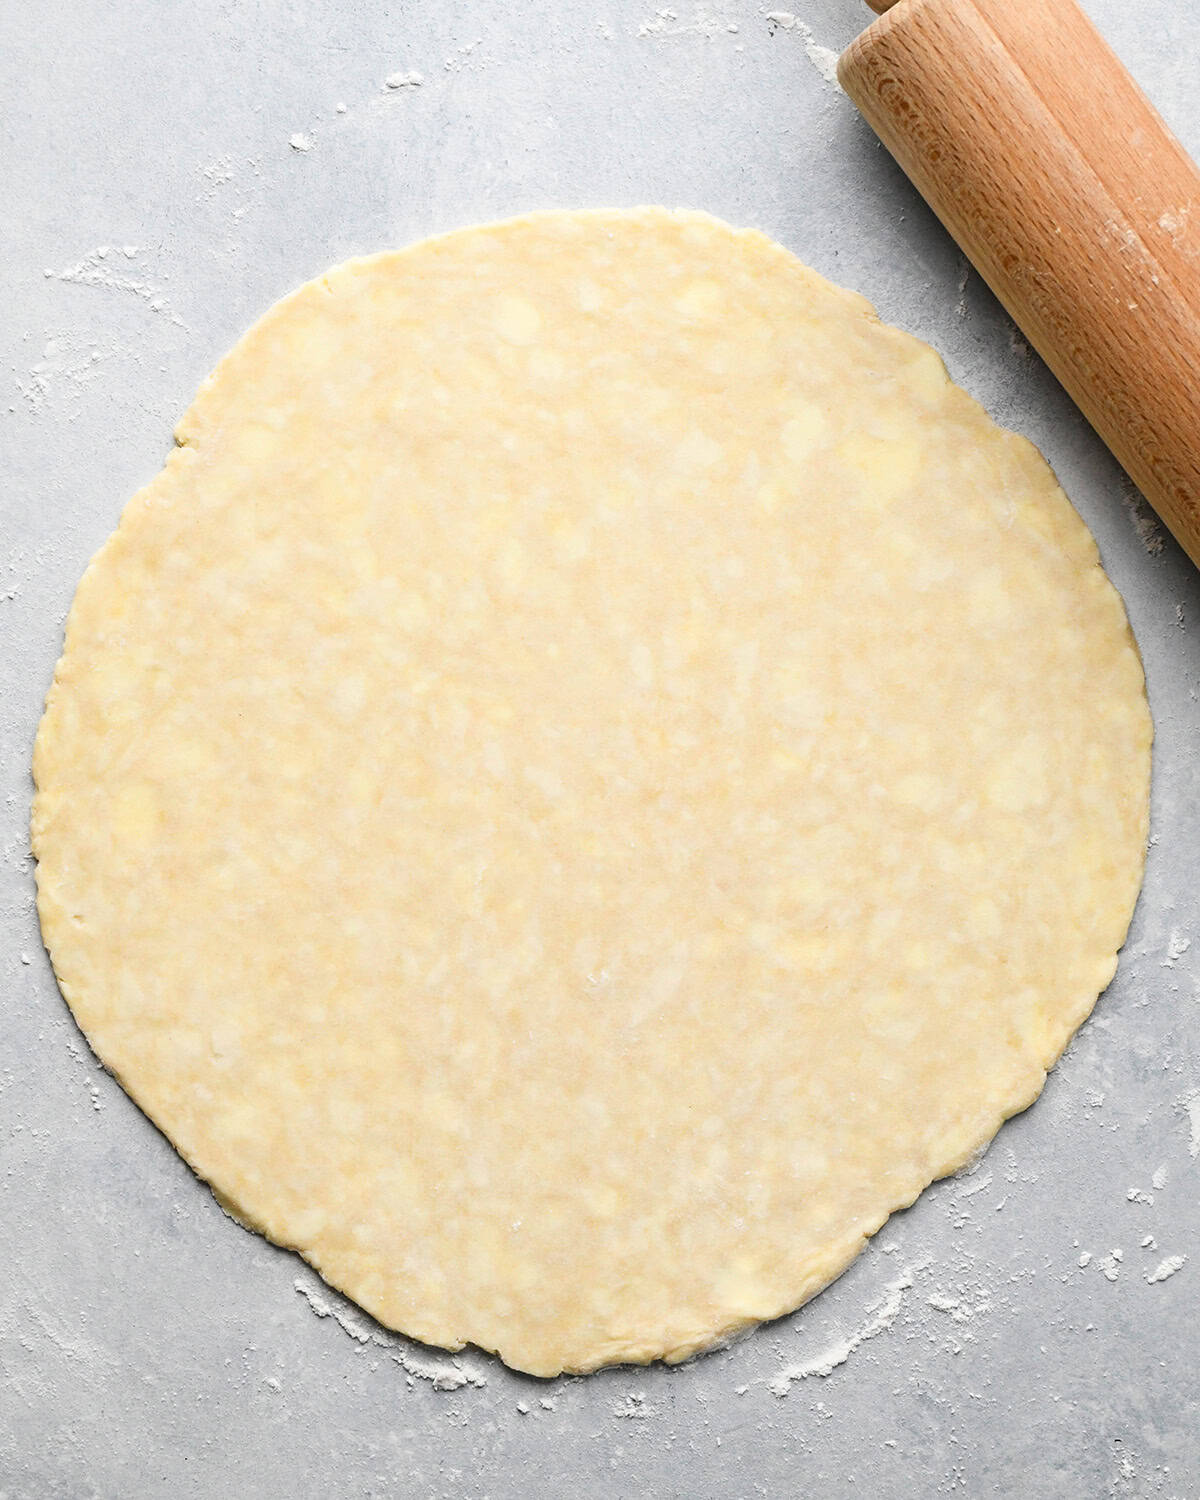
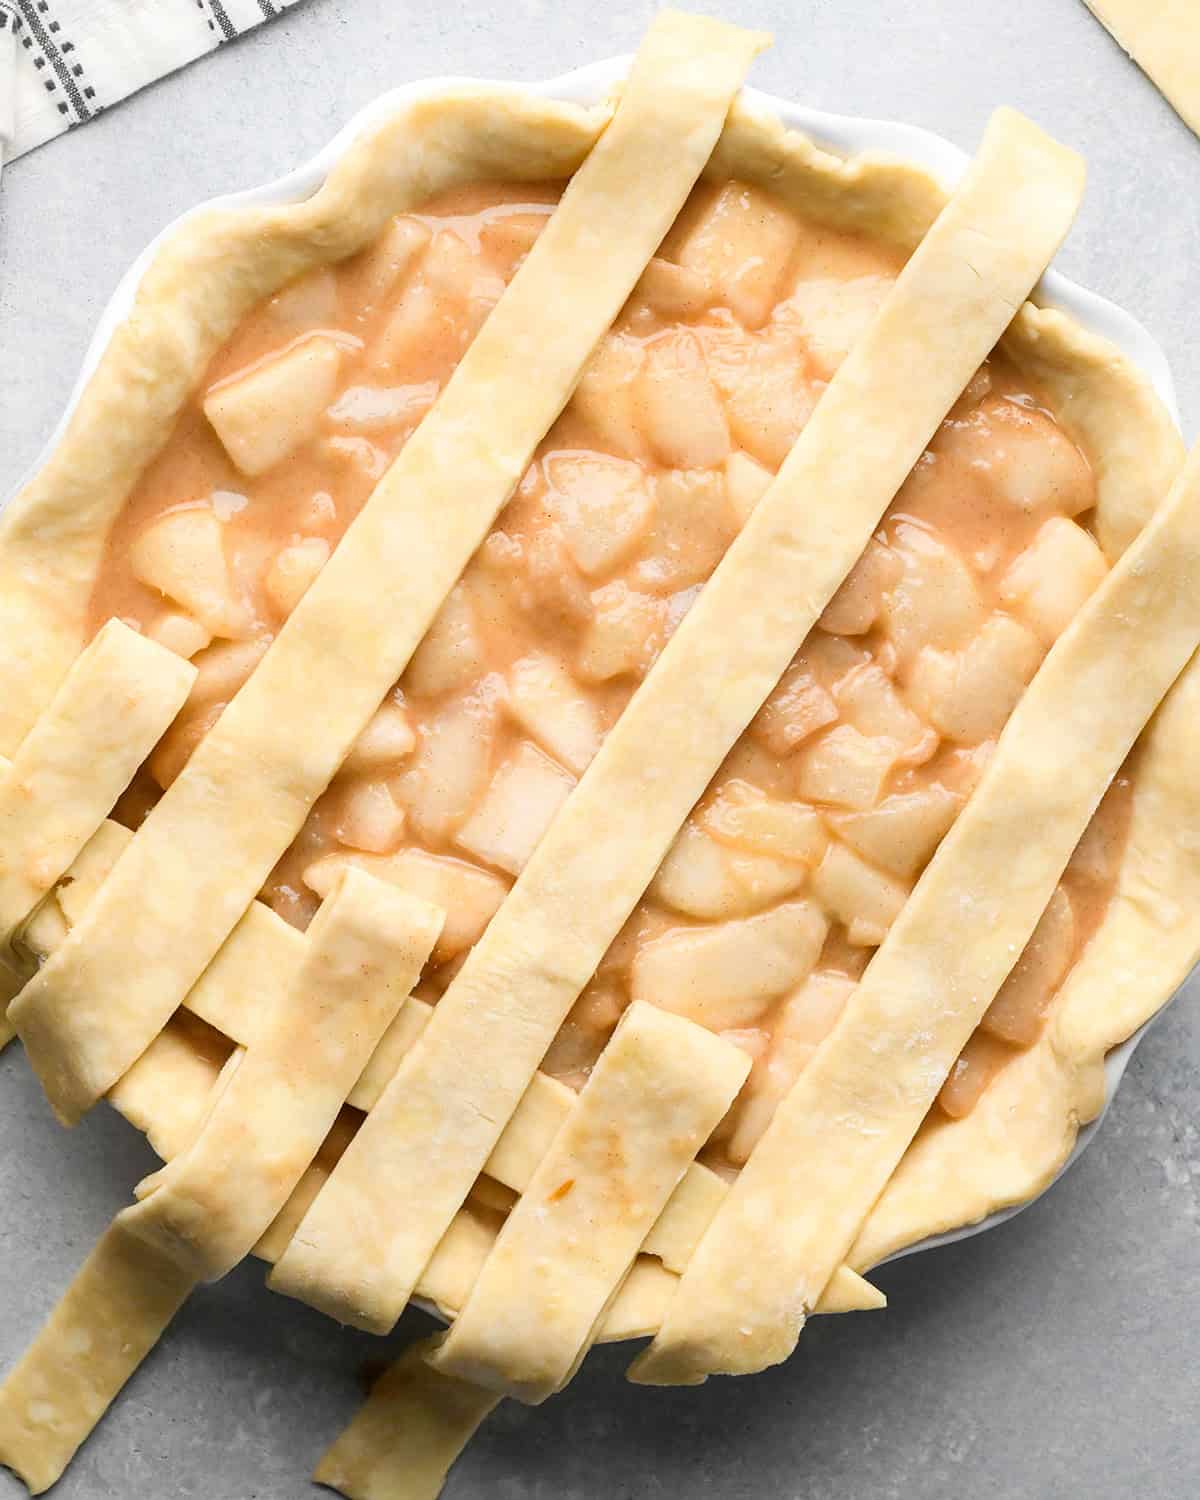
Roll out the second disc into a 12” circle.
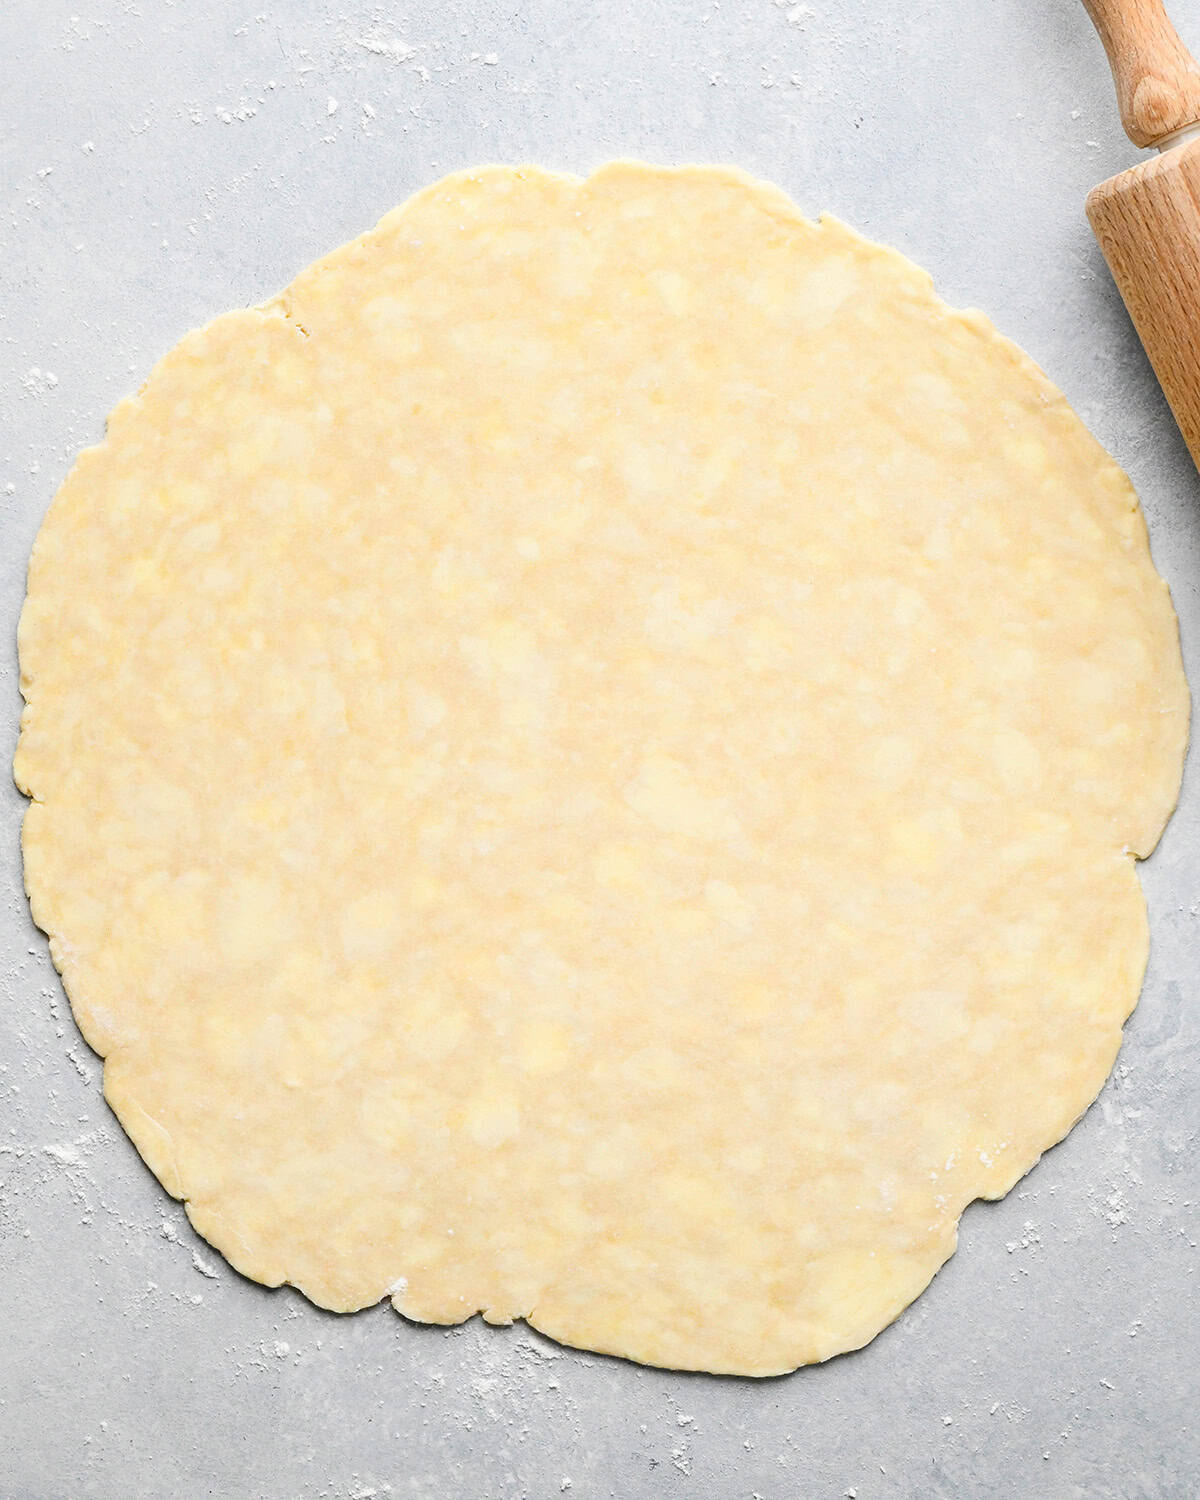
Using a knife, cut it into strips about ½” thick.
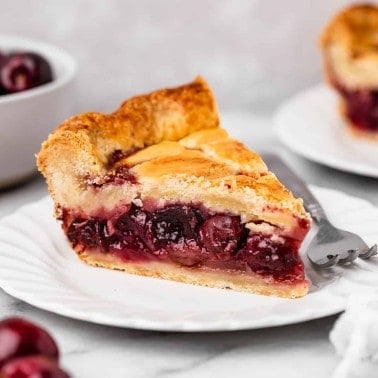
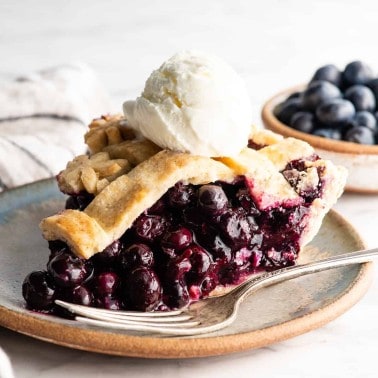
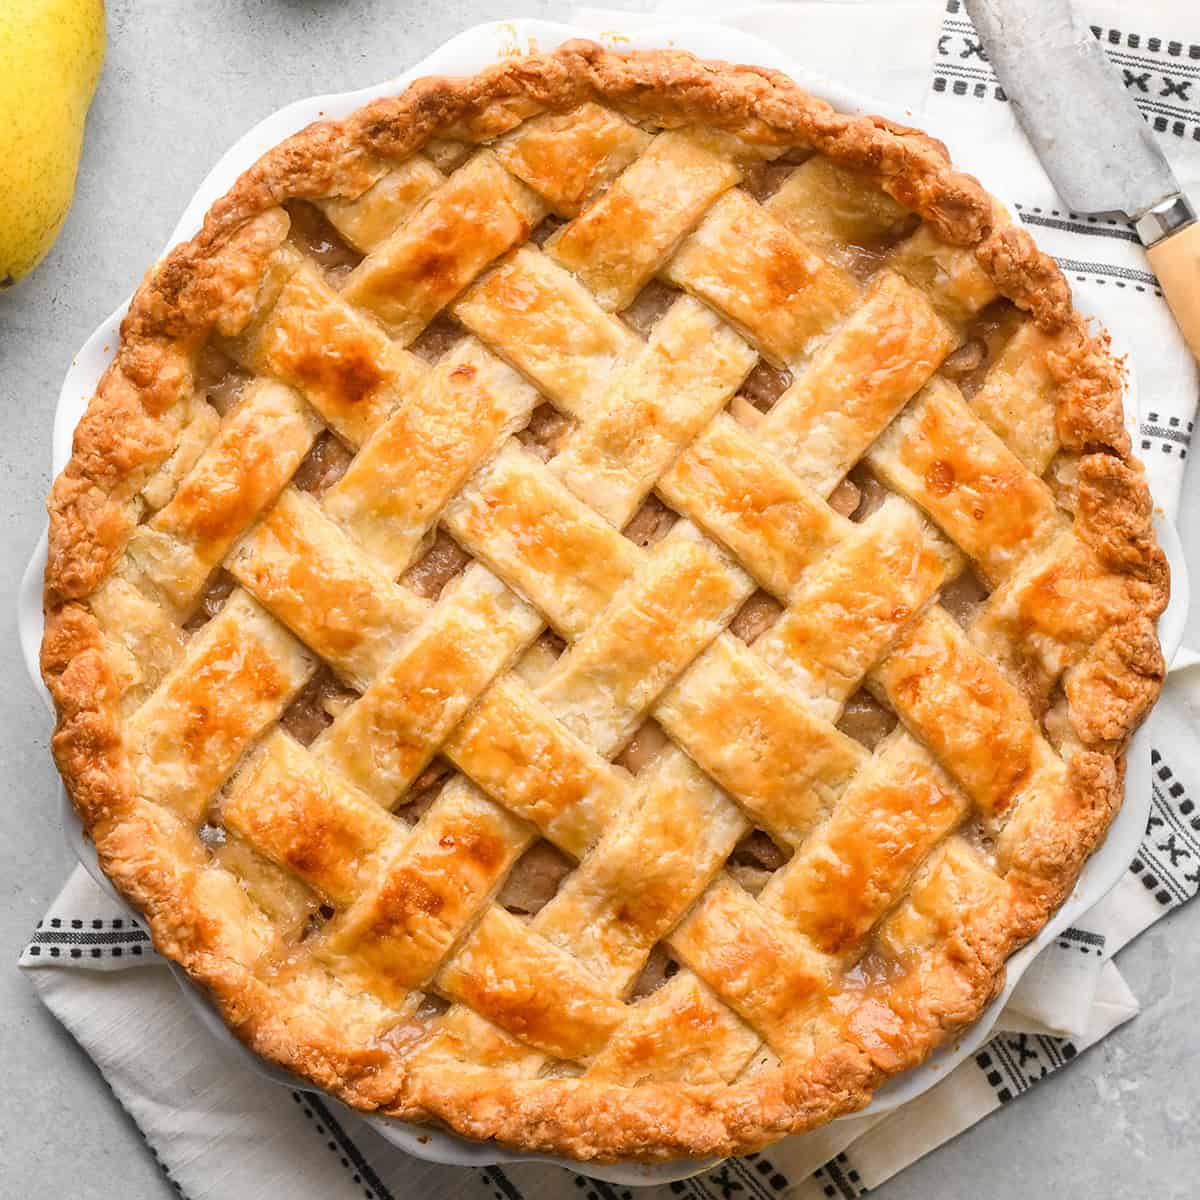
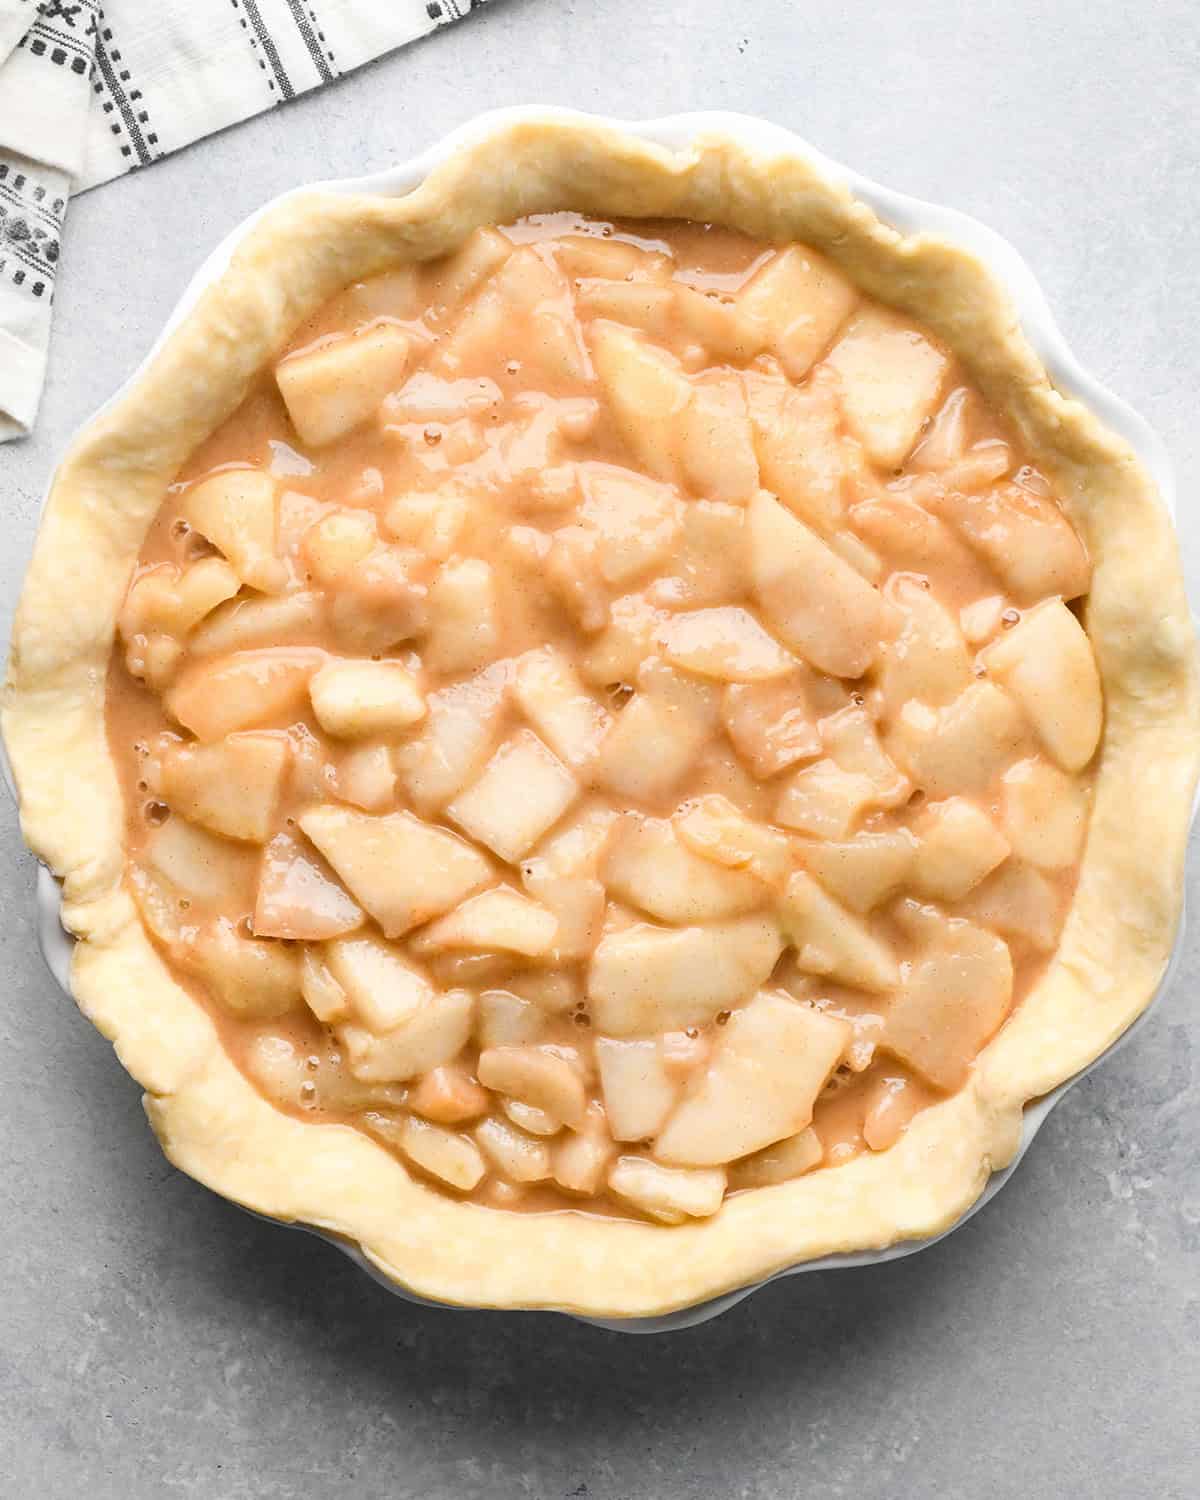
Then, remove the bottom crust from the refrigerator and fill it with your preferred filling. You need to use filling that will be baked like apple, pear, berry, etc. This is a pear pie!
Pie Fillings (Recipes)
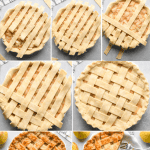
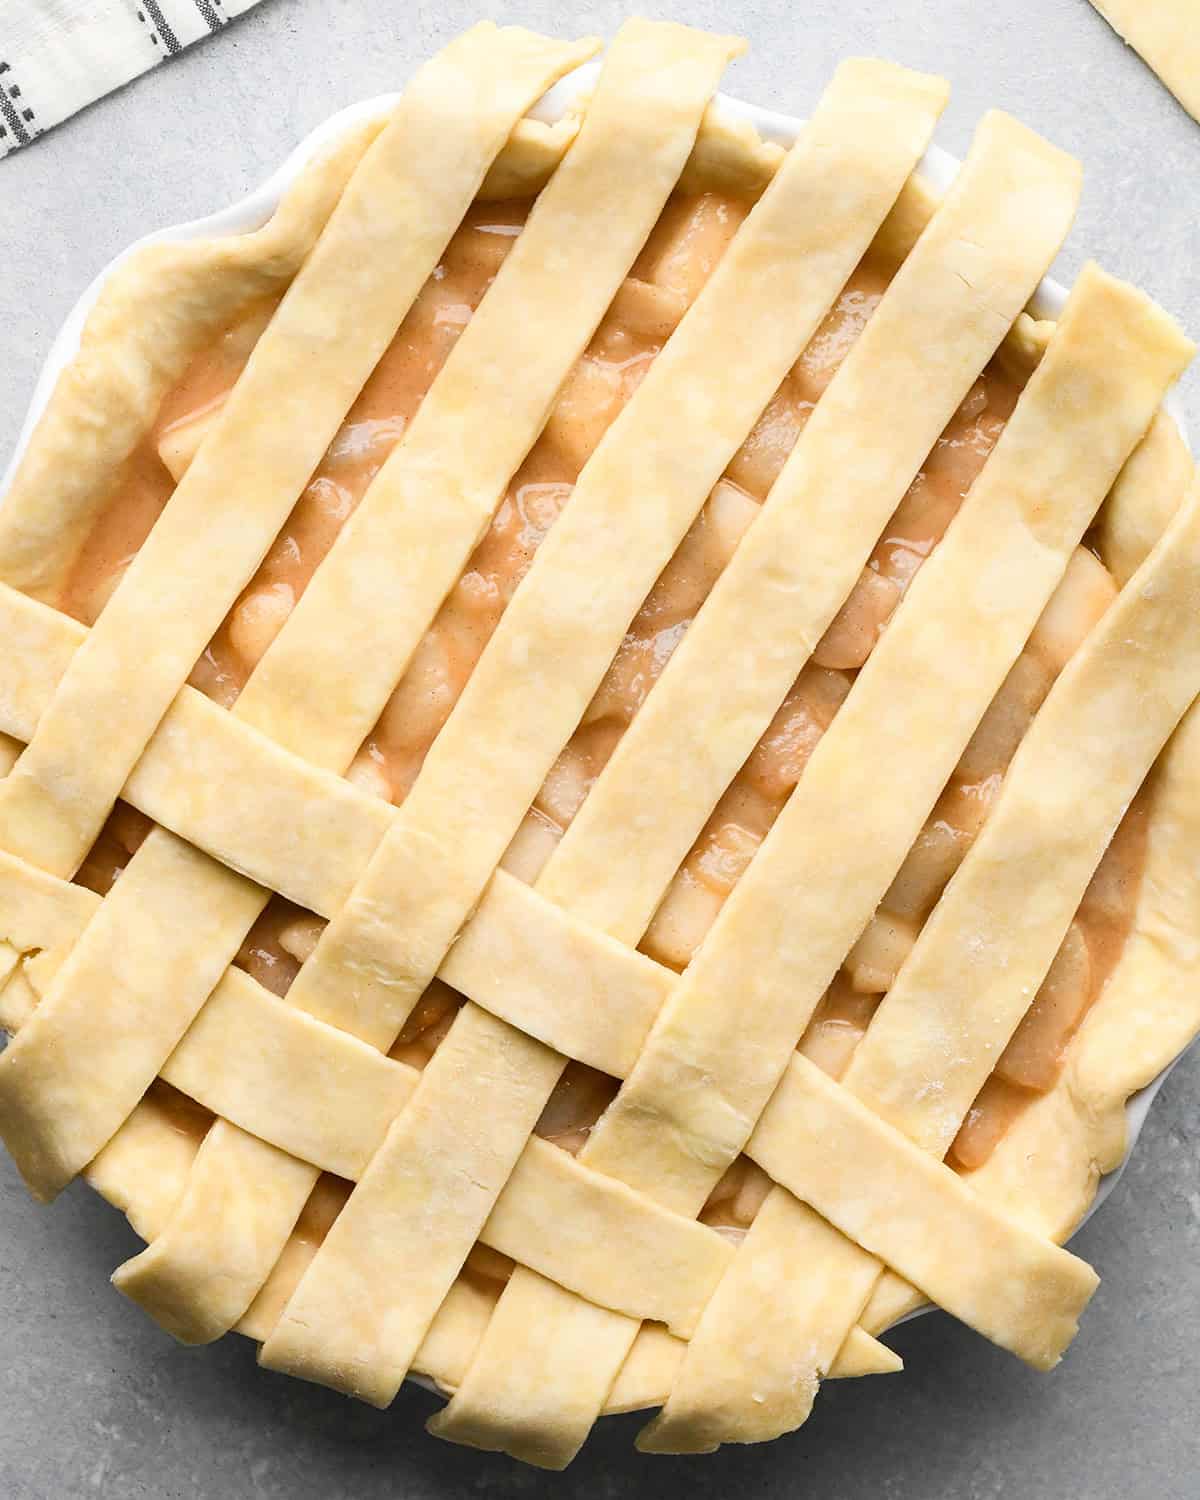
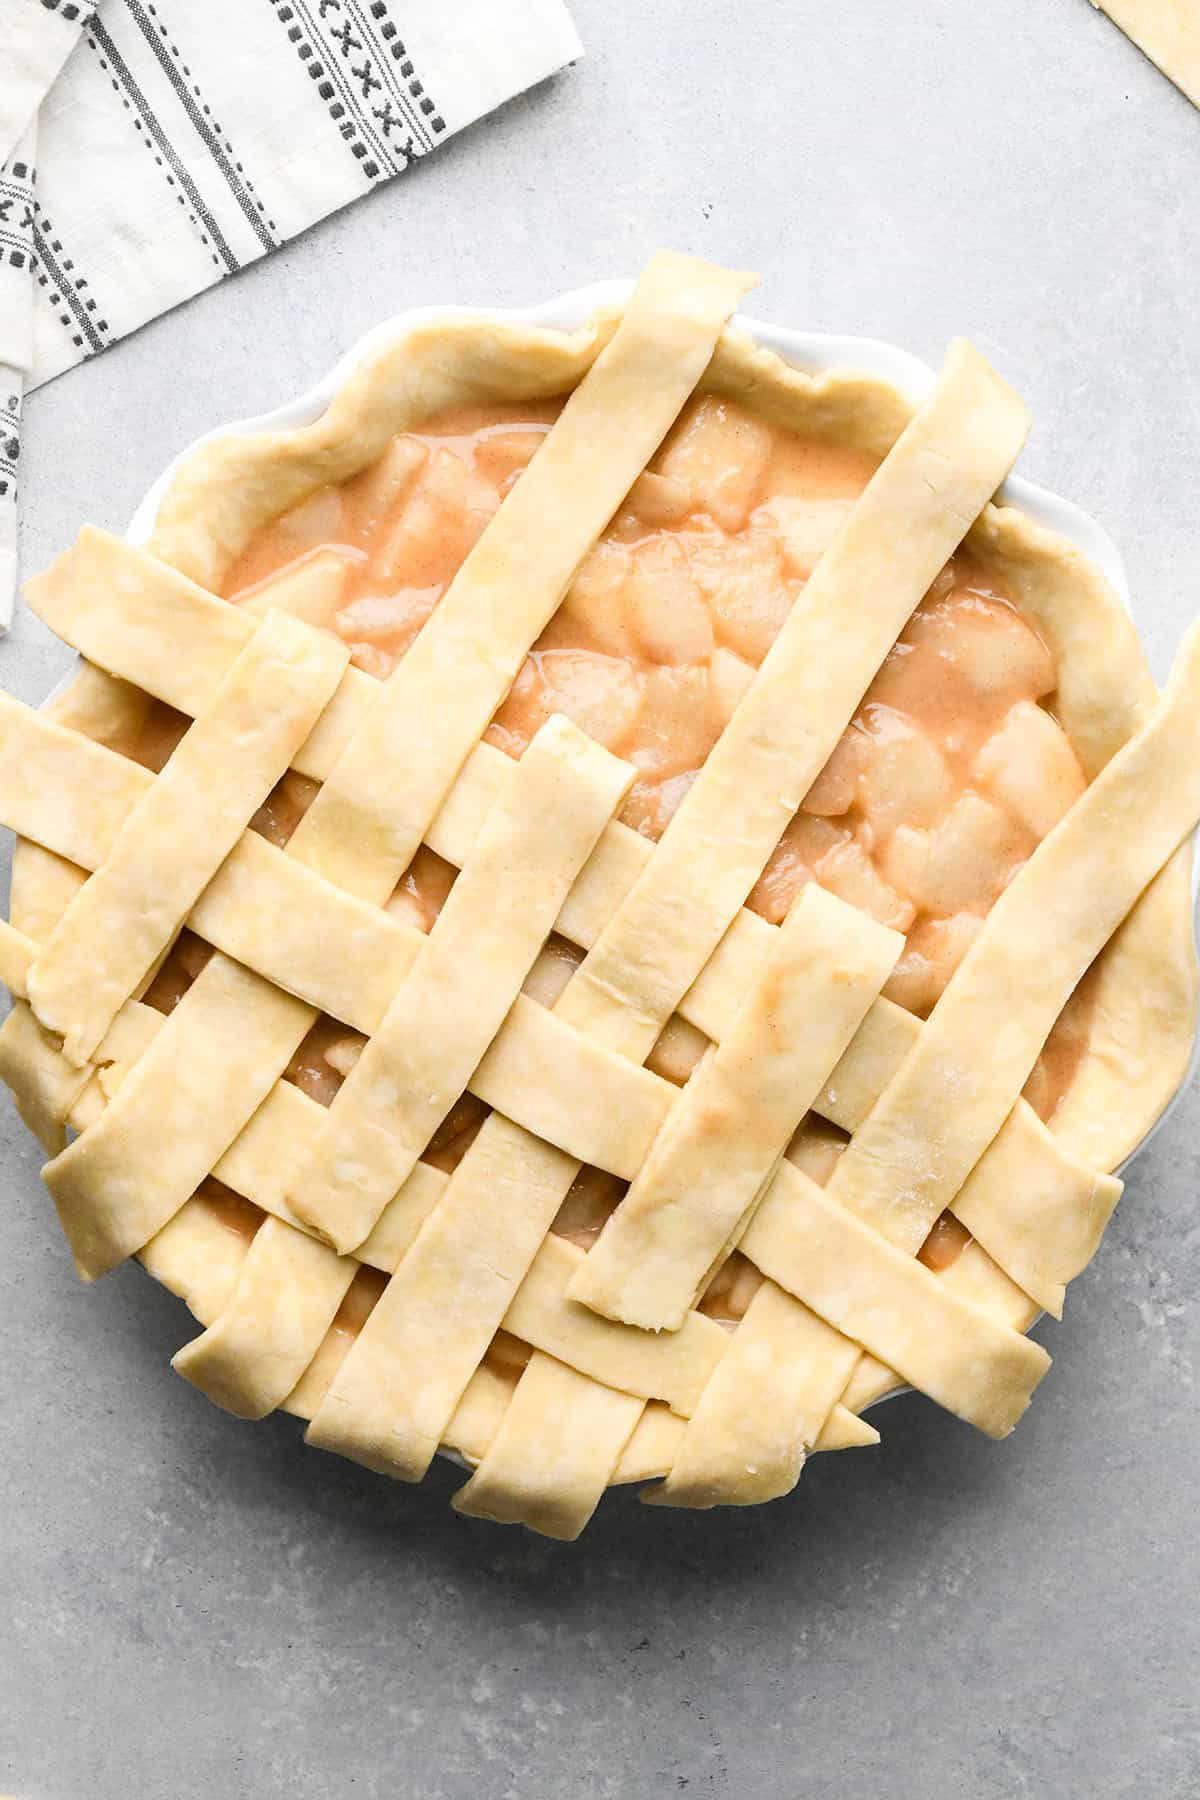
Form the Lattice
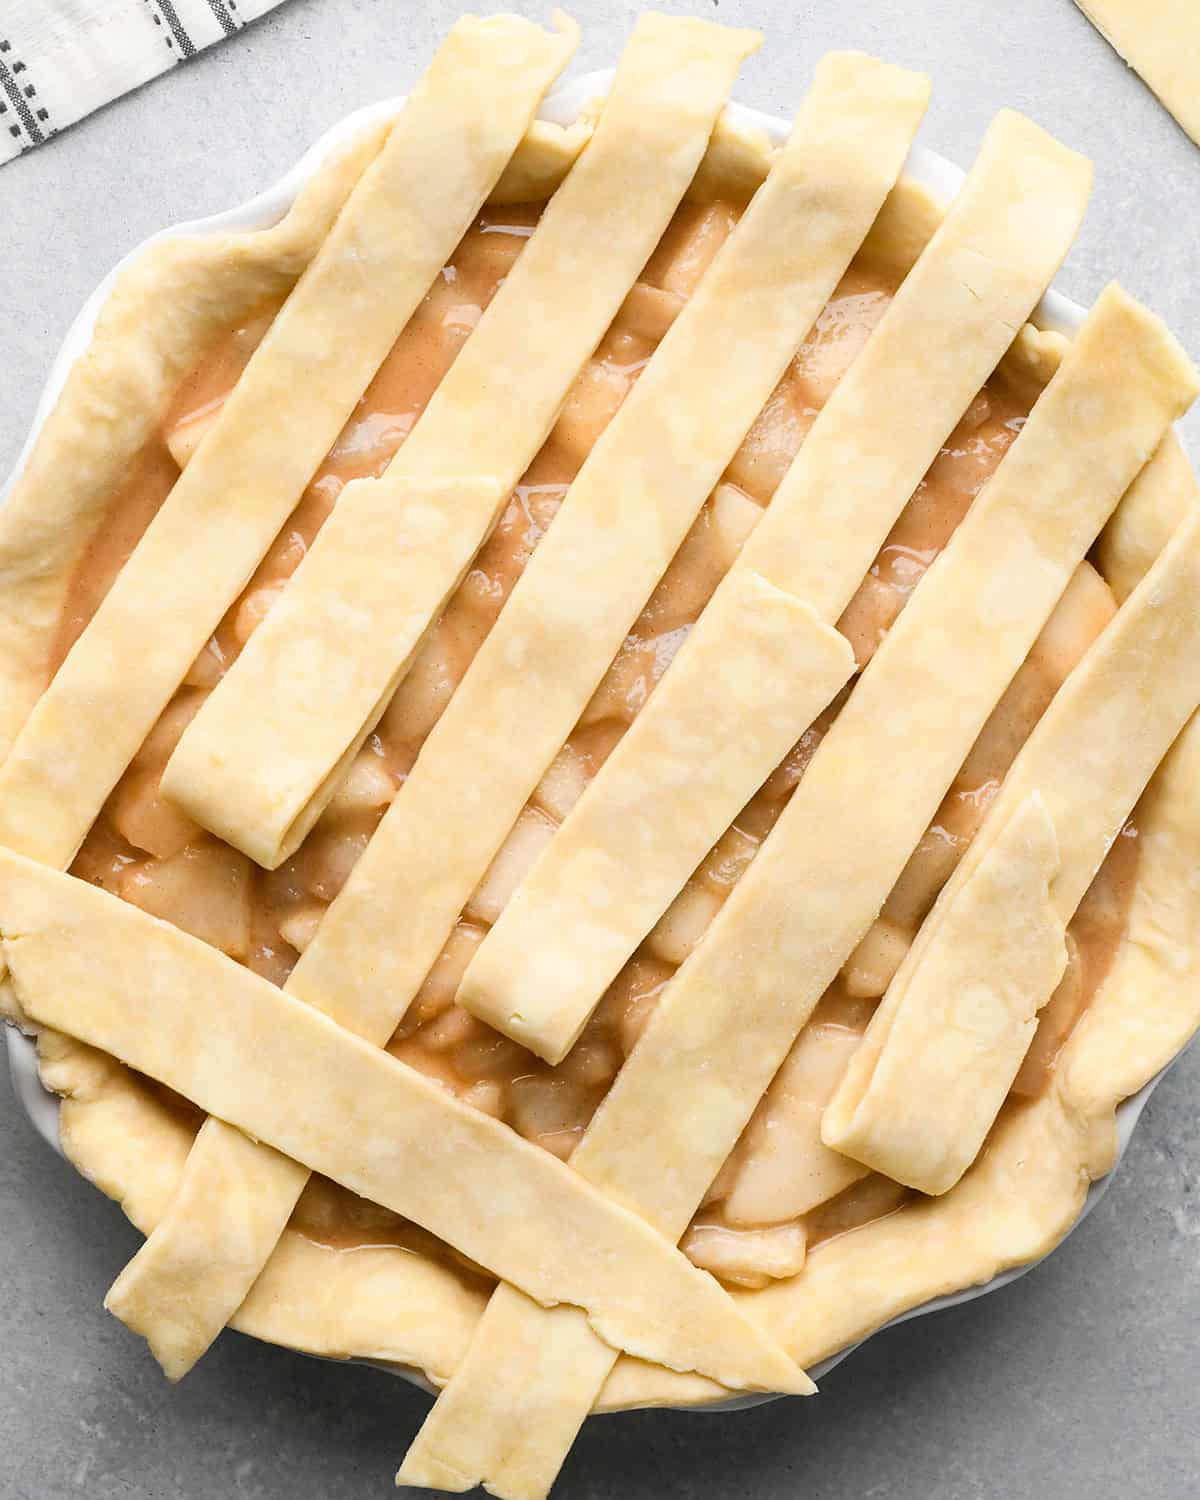
Lay about 6 strips on top of the pie filling horizontally. Then, lift up every other horizontal strip.
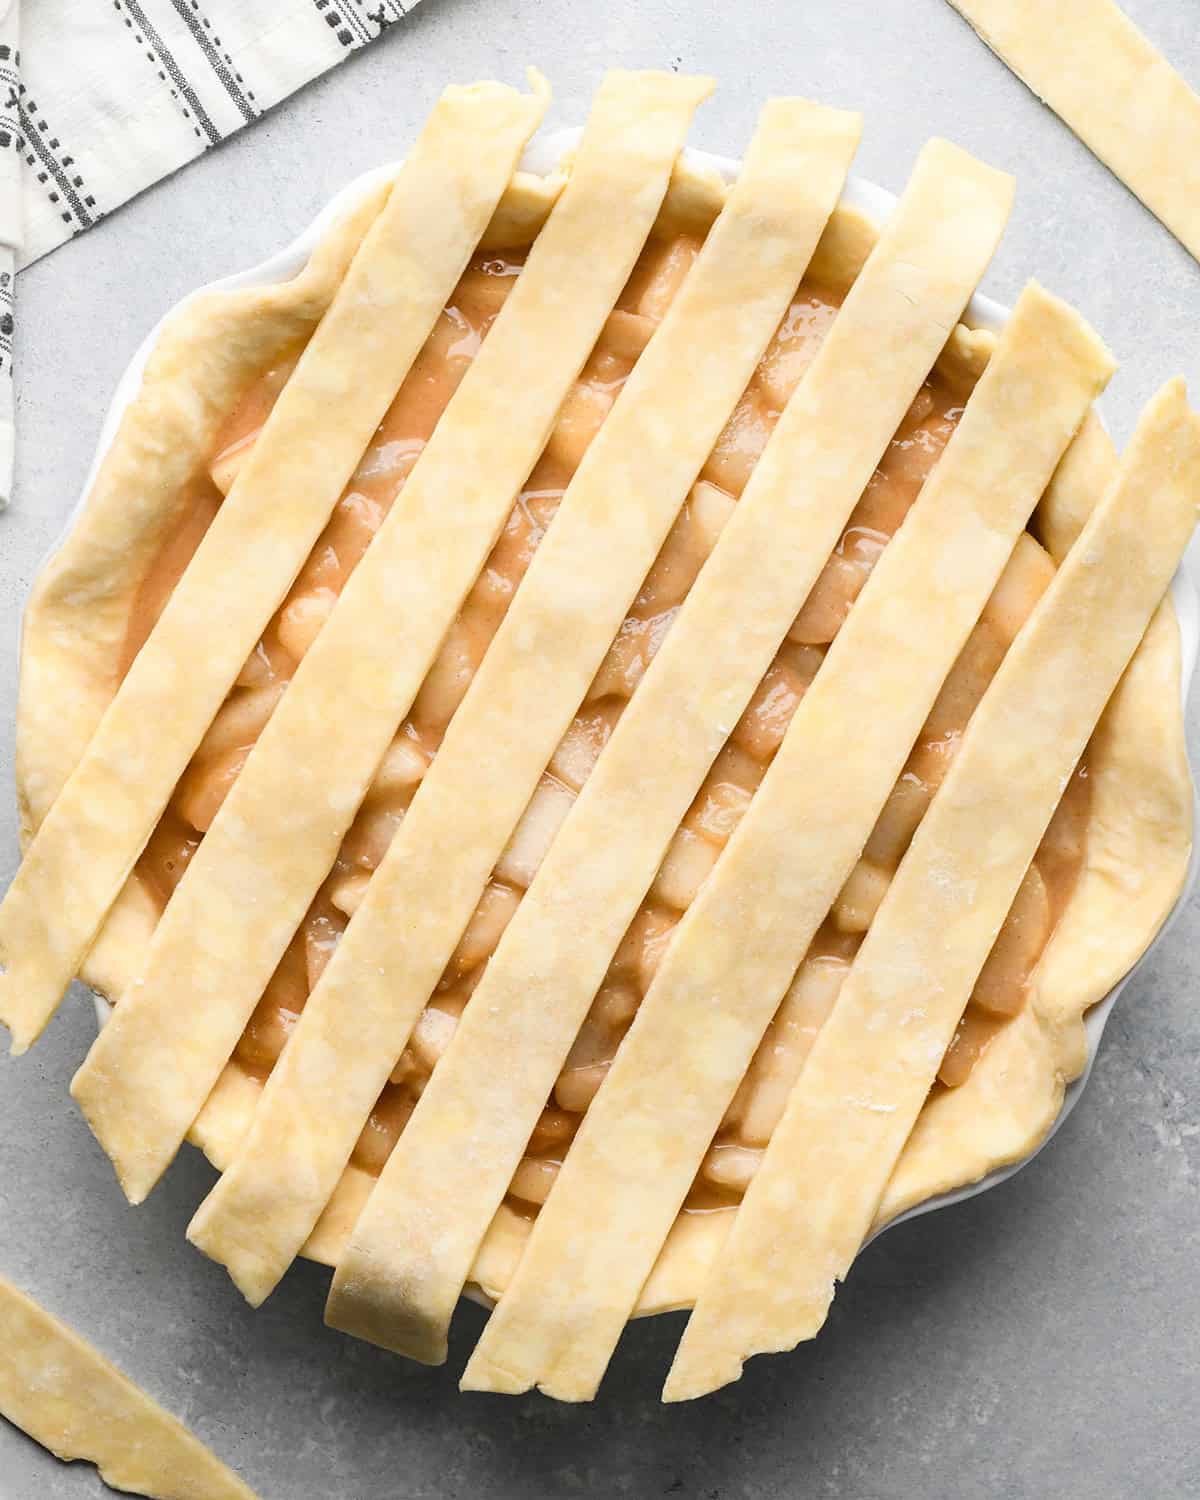
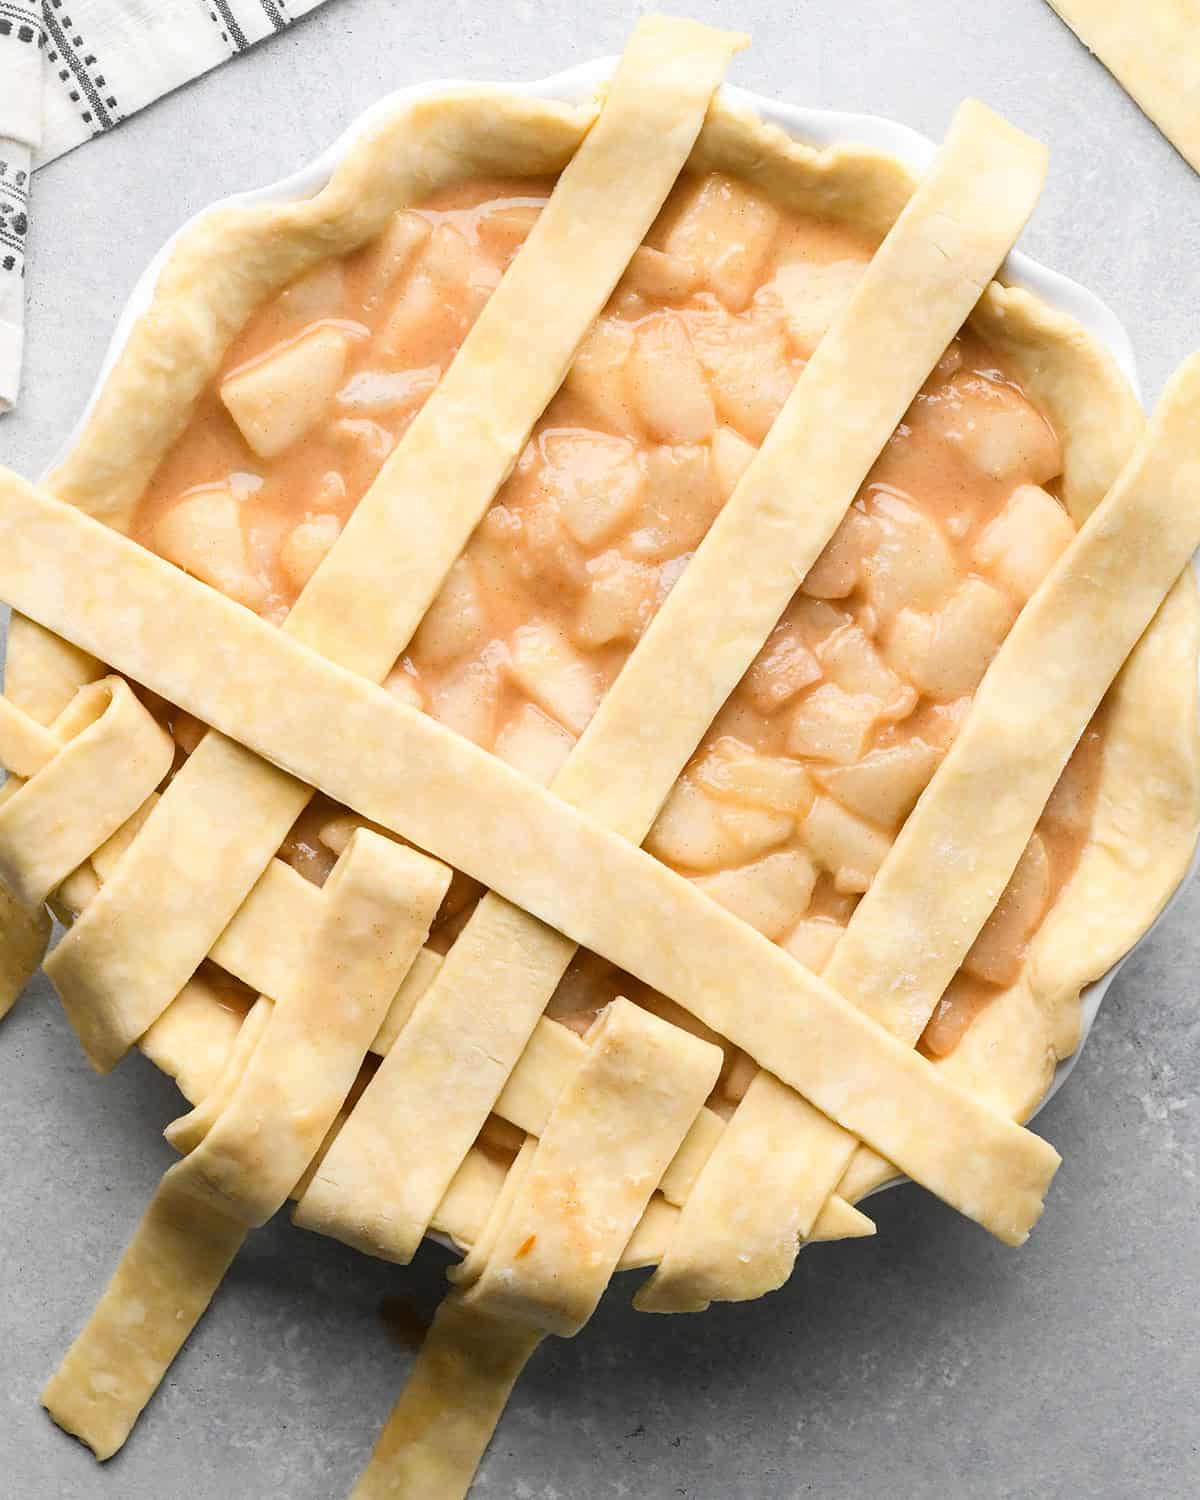
Next, place a short pie crust strip at the edge of the pie over the 3 unfolded horizontal strips. Then fold the remaining 3 strips back over the top.
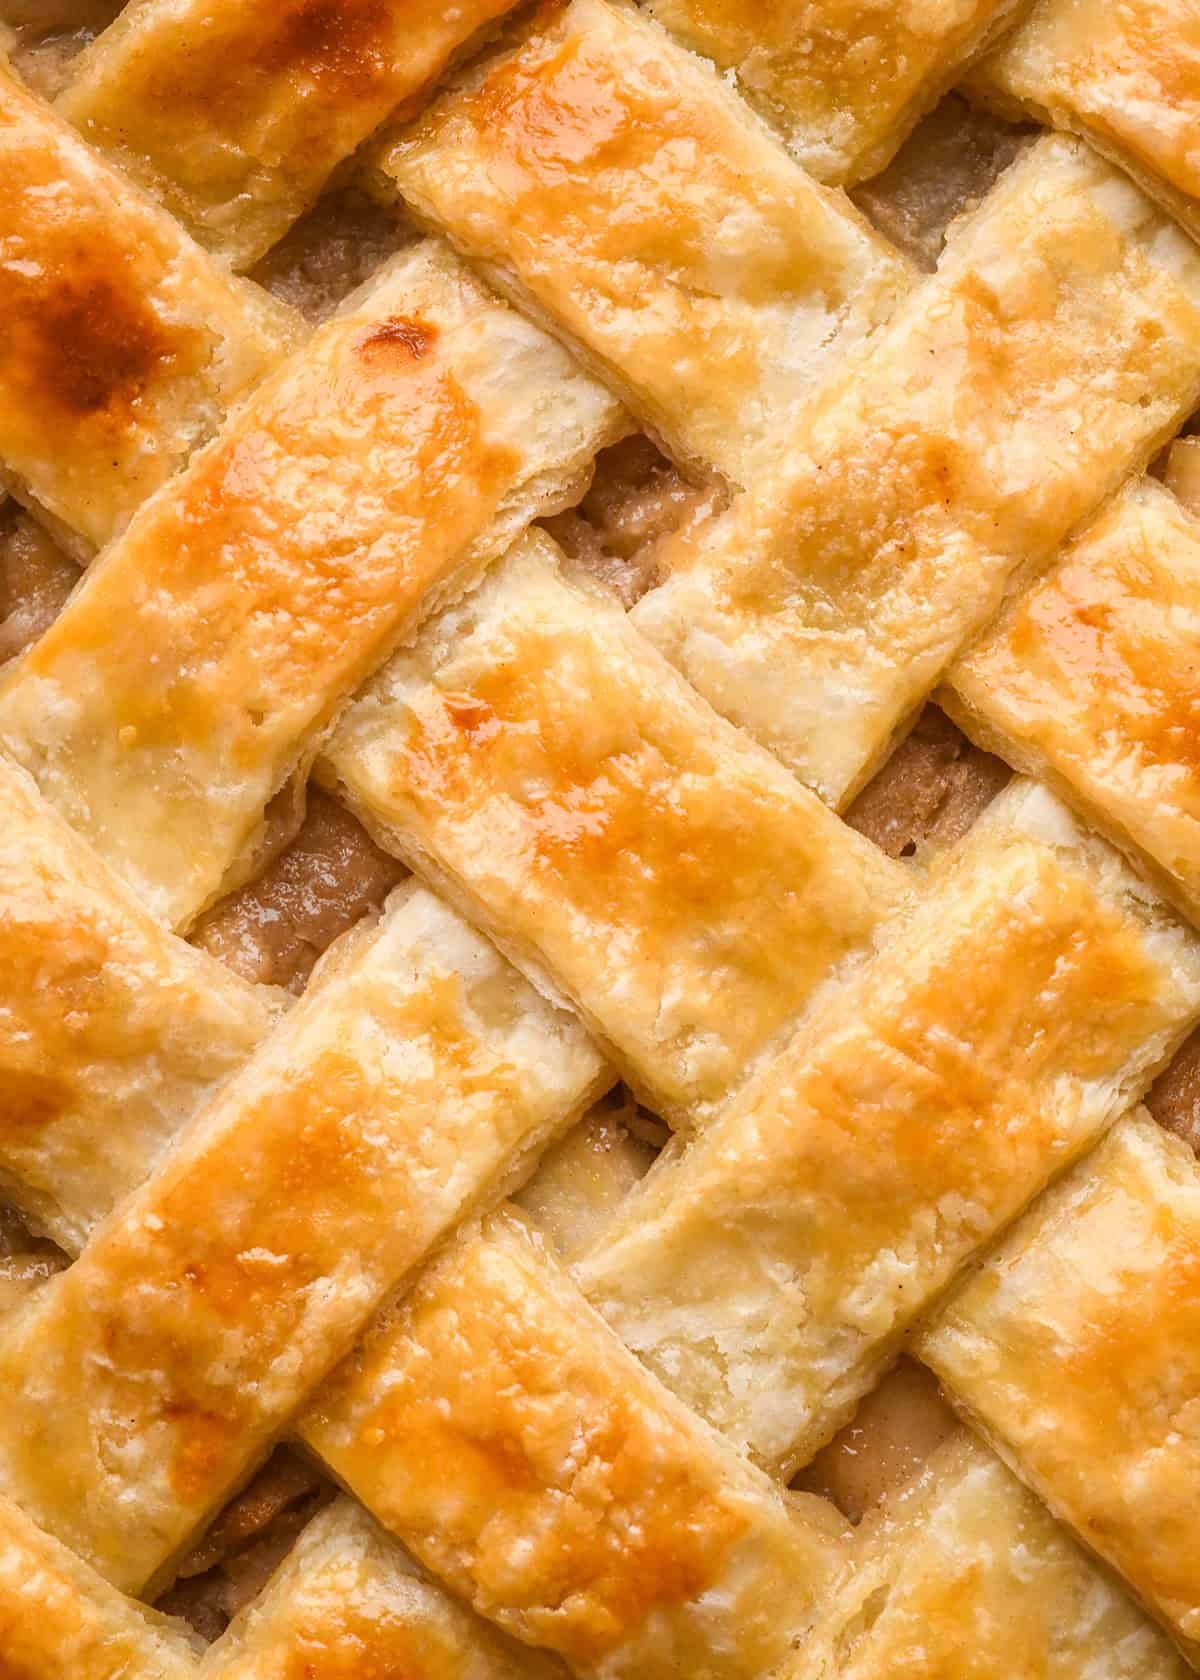
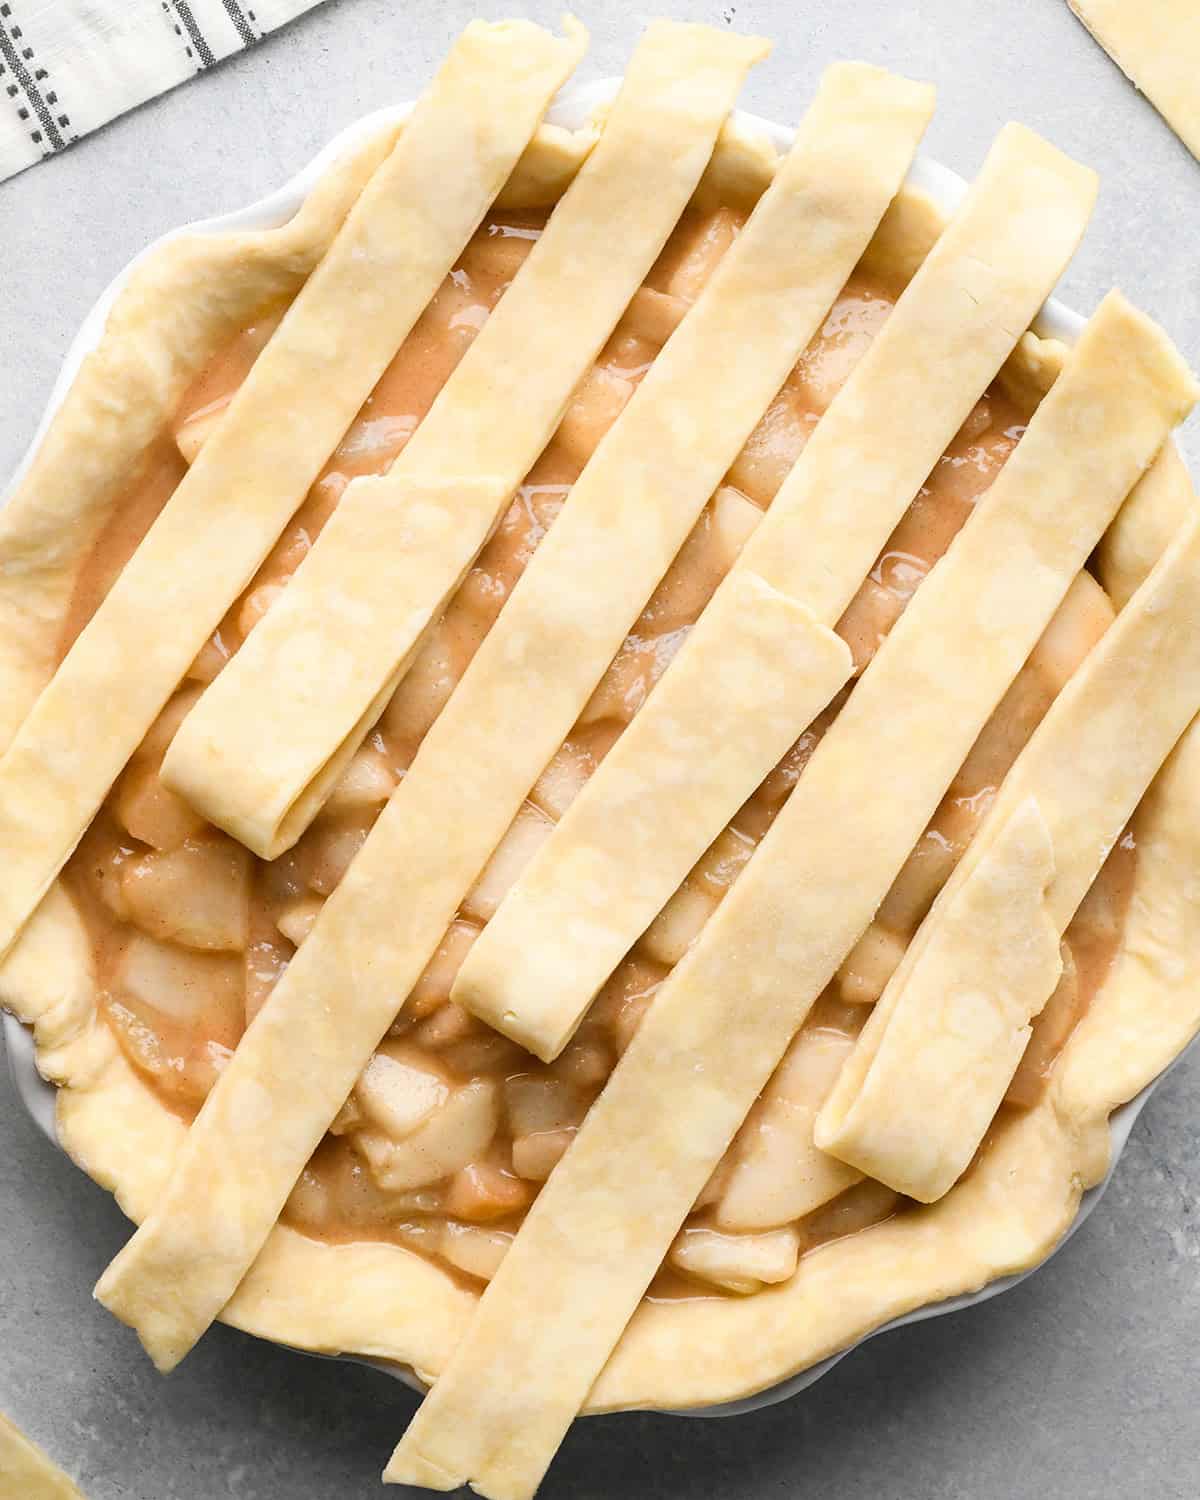
Each pie strip will alternate being above one strip, then underneath the next, until you have gone – over, under, over, under, over, under (in that order) the 6 horizontal pie crust strips.
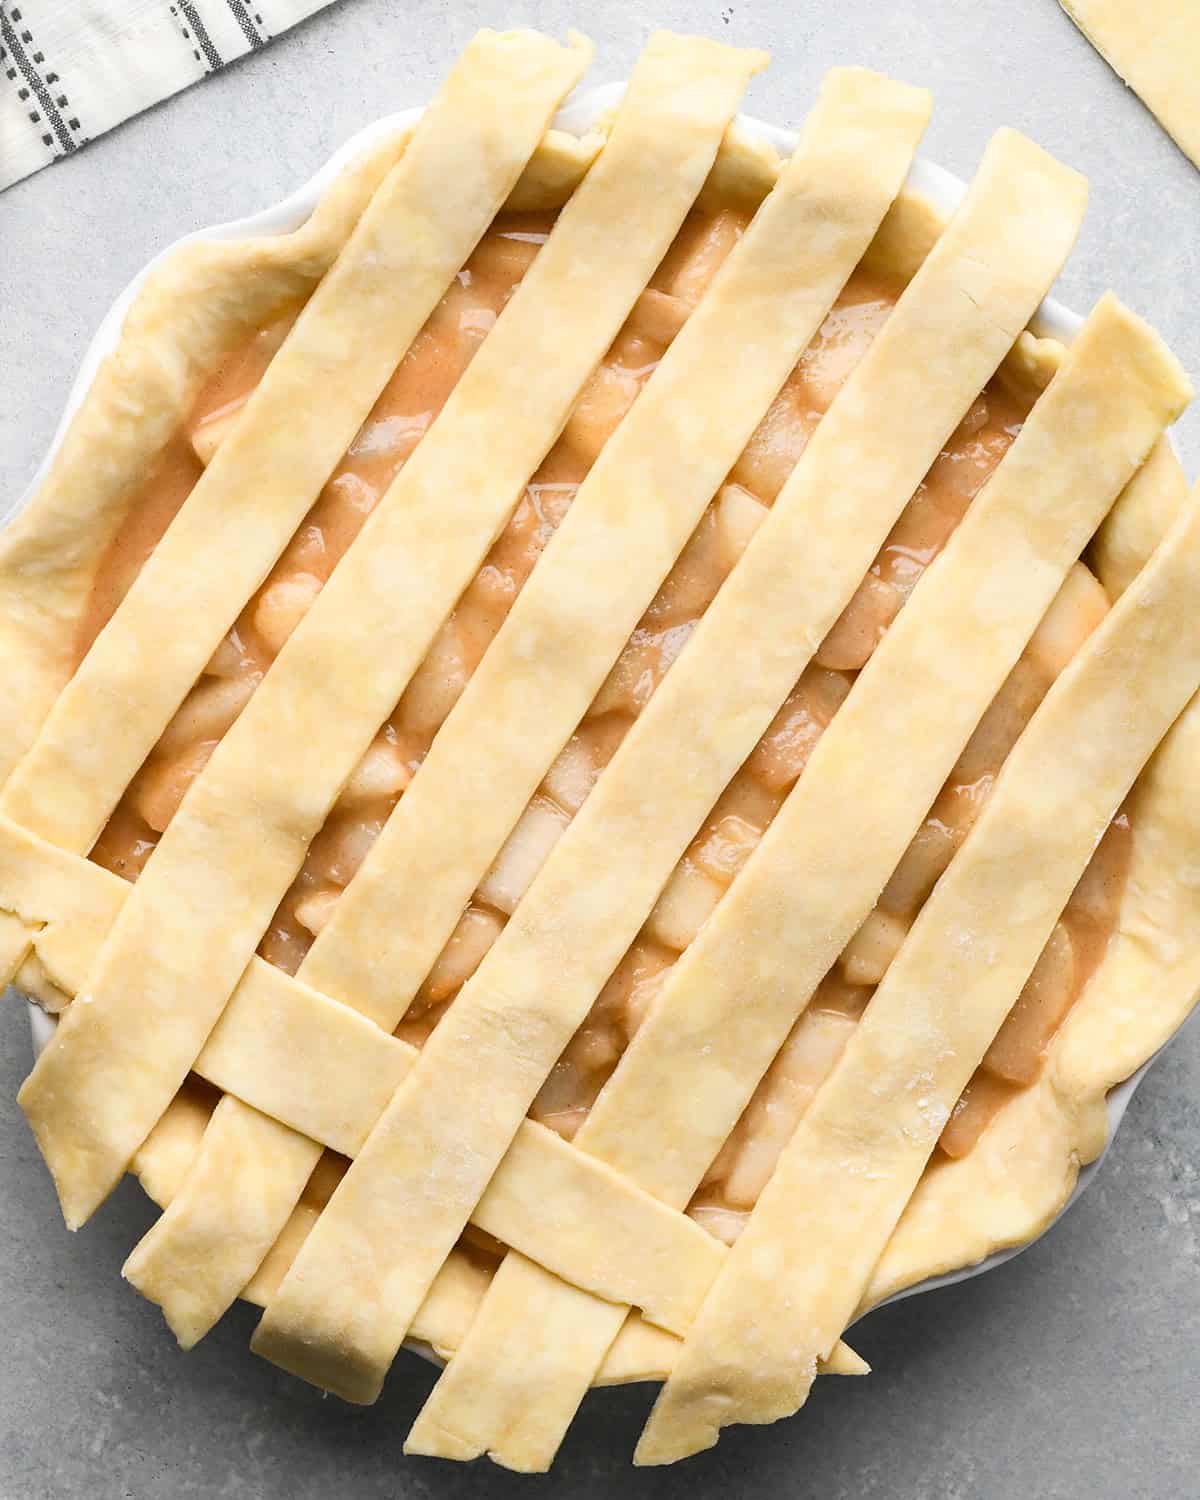
Then, lift up the 3 horizontal pie crust strips you did not lift up the first time and take the next longest pie crust and lay it on the pie. You are doing the same thing as the first strip and but the opposite order – so you will go under, over, under, over, under, over.
Repeat until the vertical strips cover the pie, alternating between starting with the horizontal strip over then under for each addition.
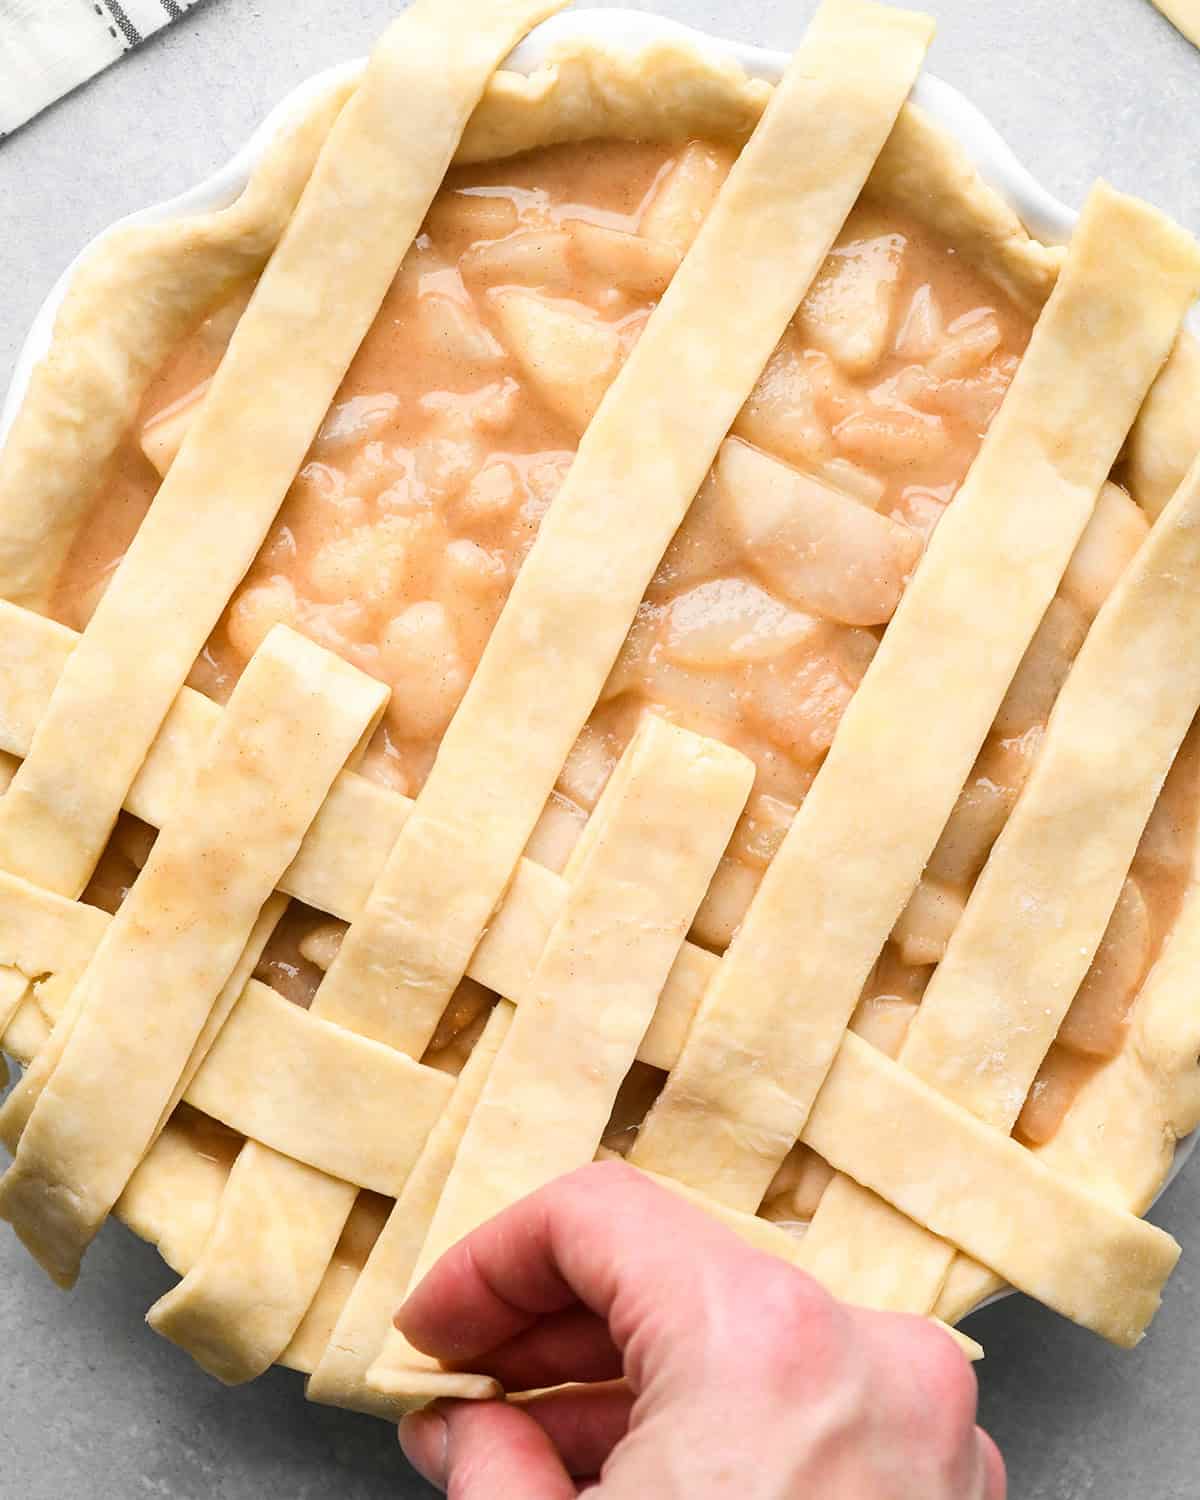
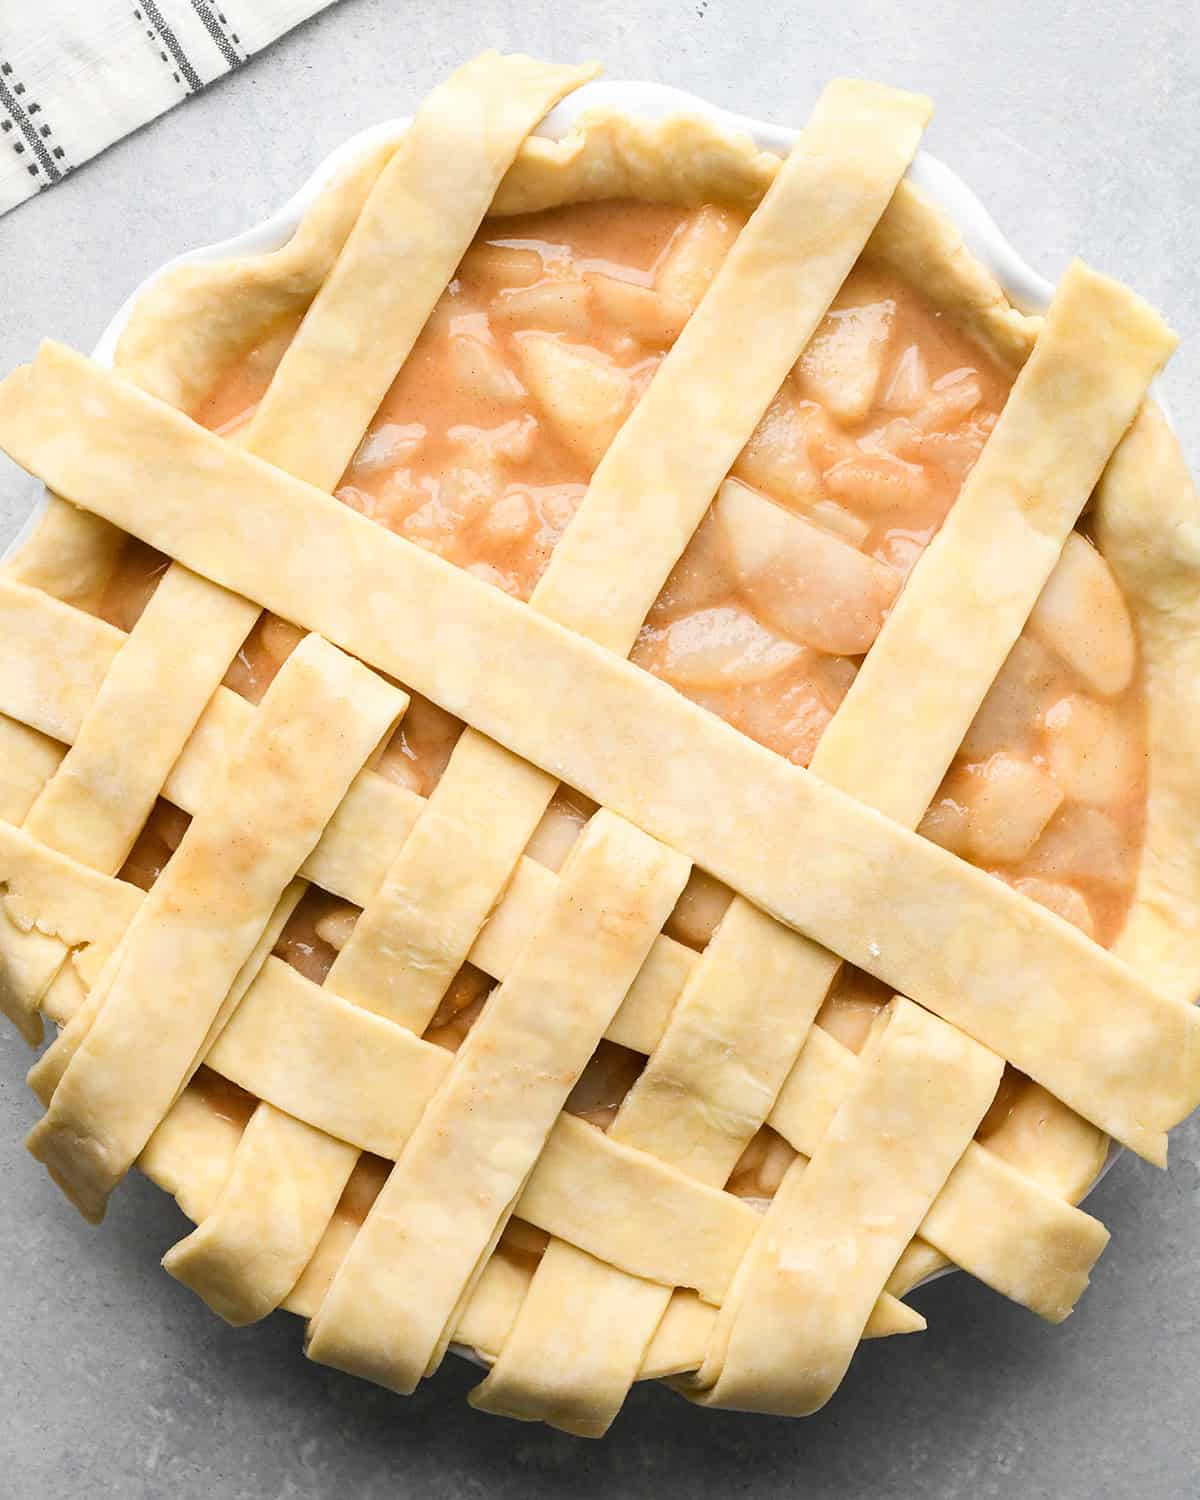
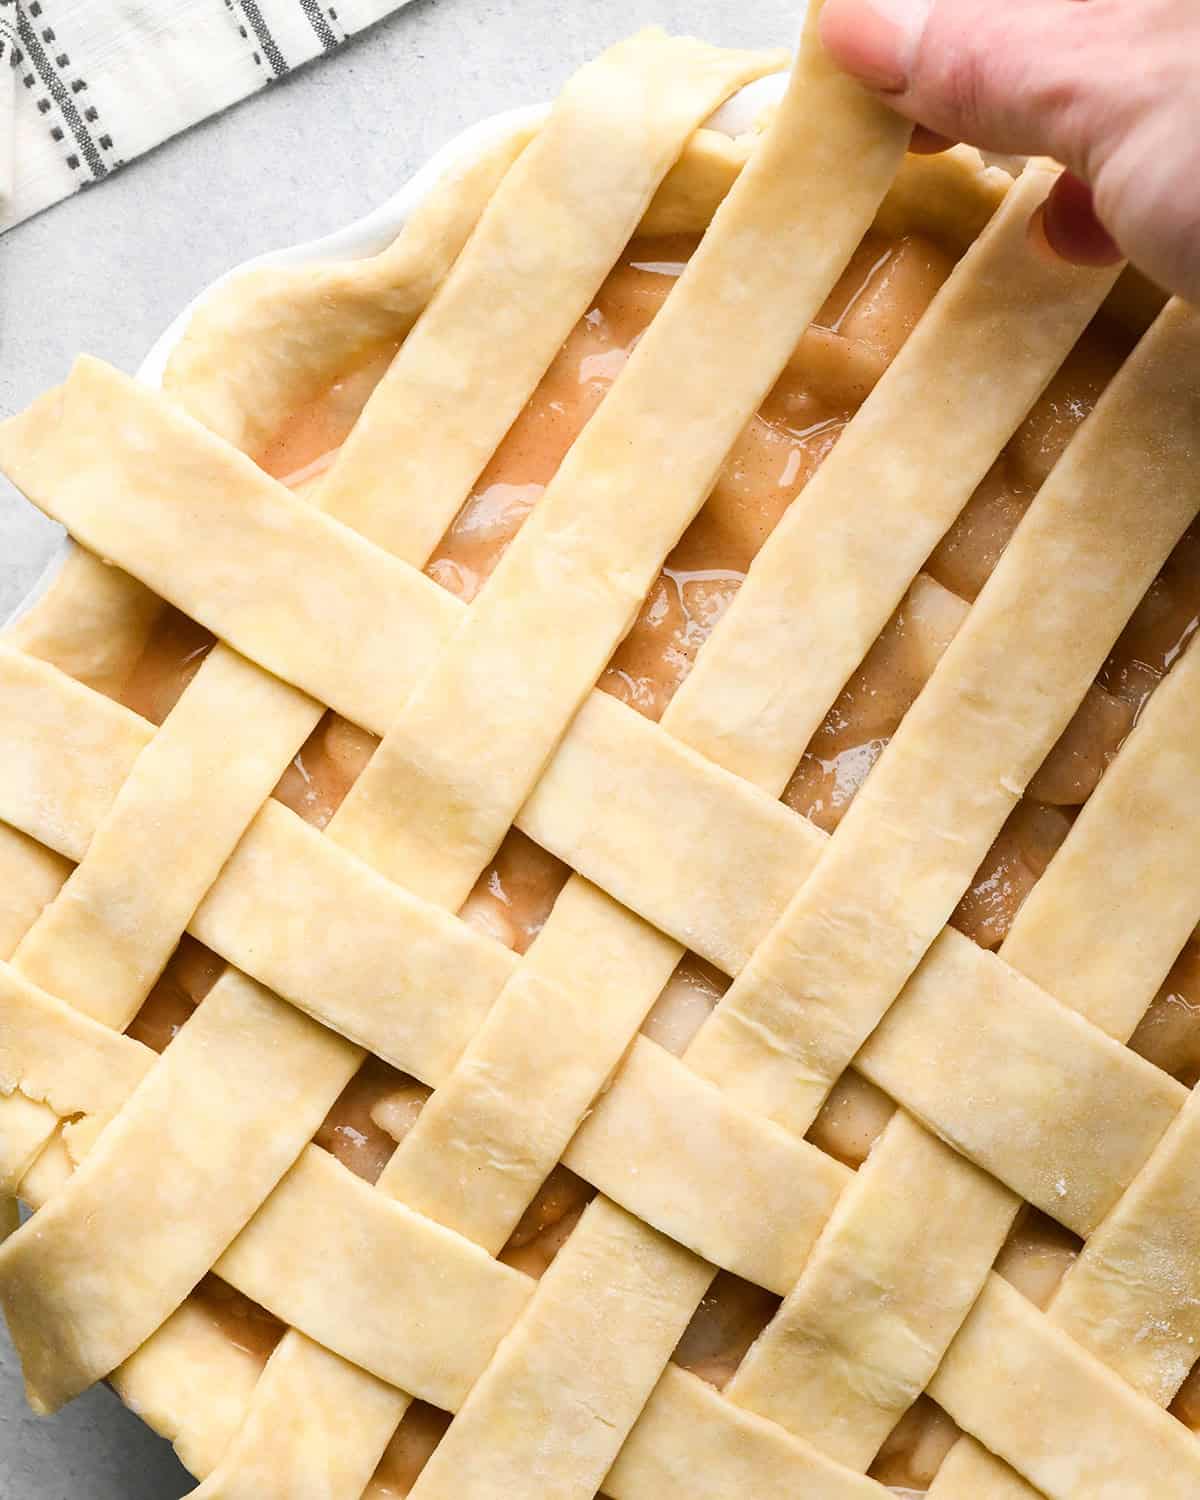

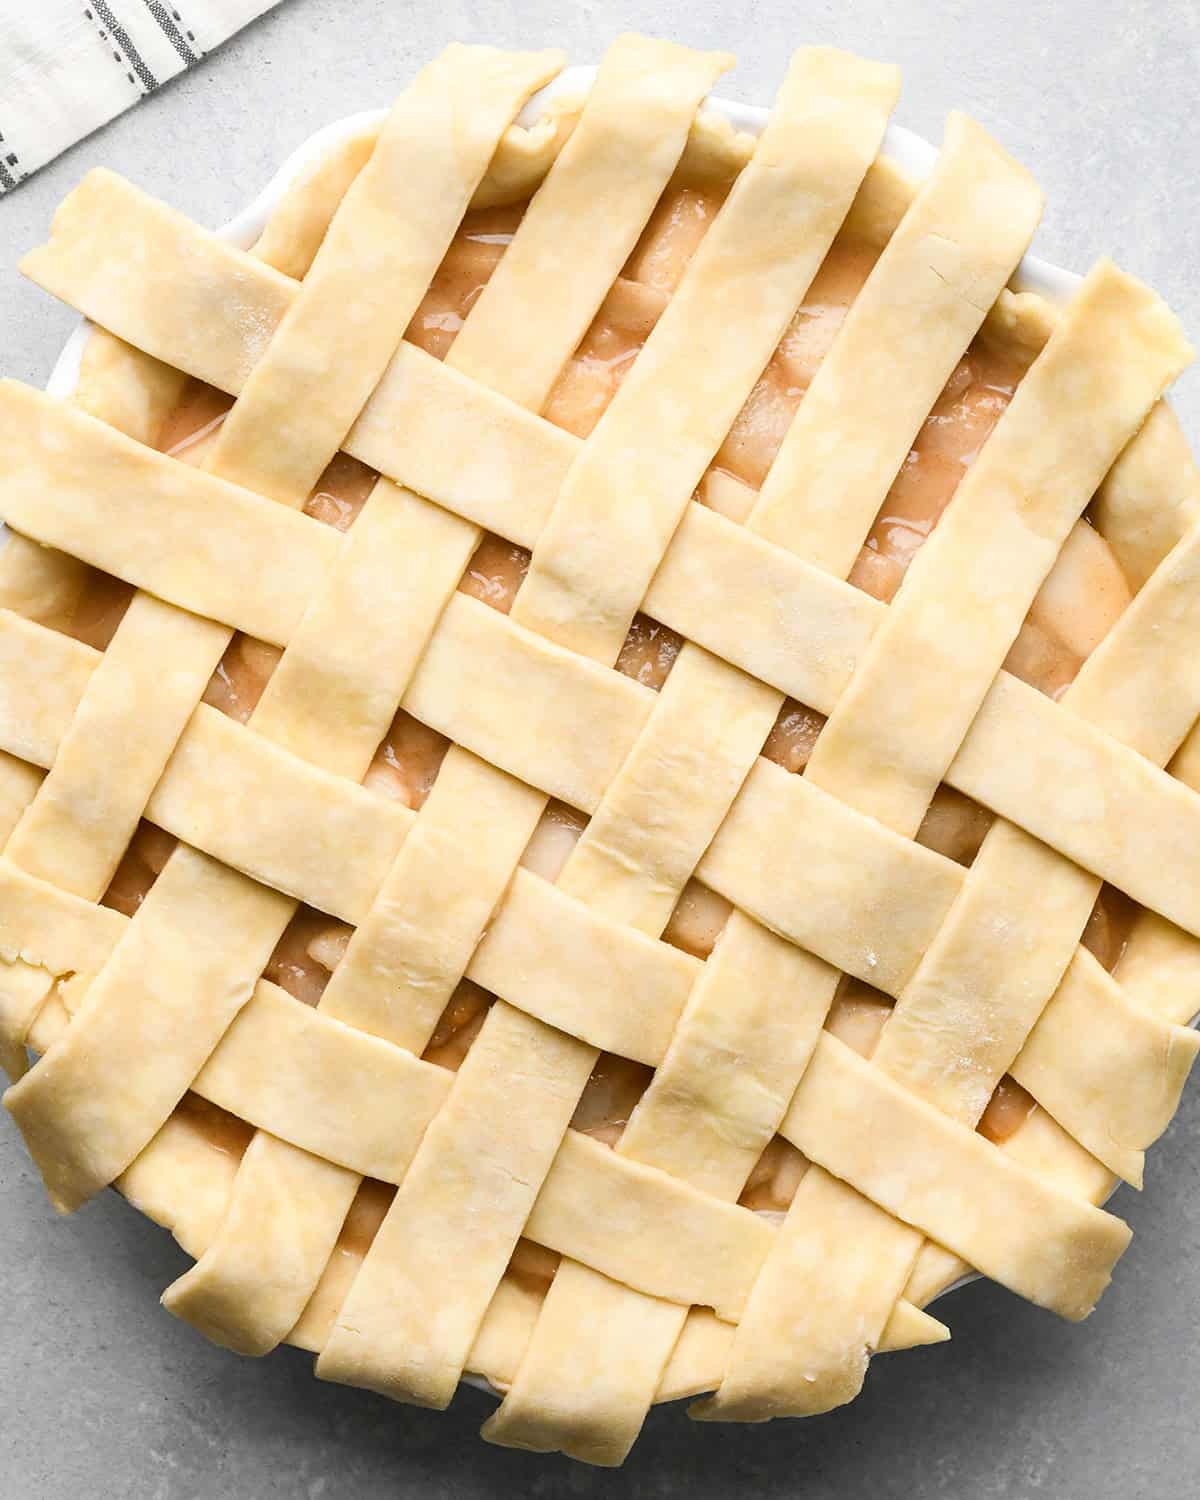
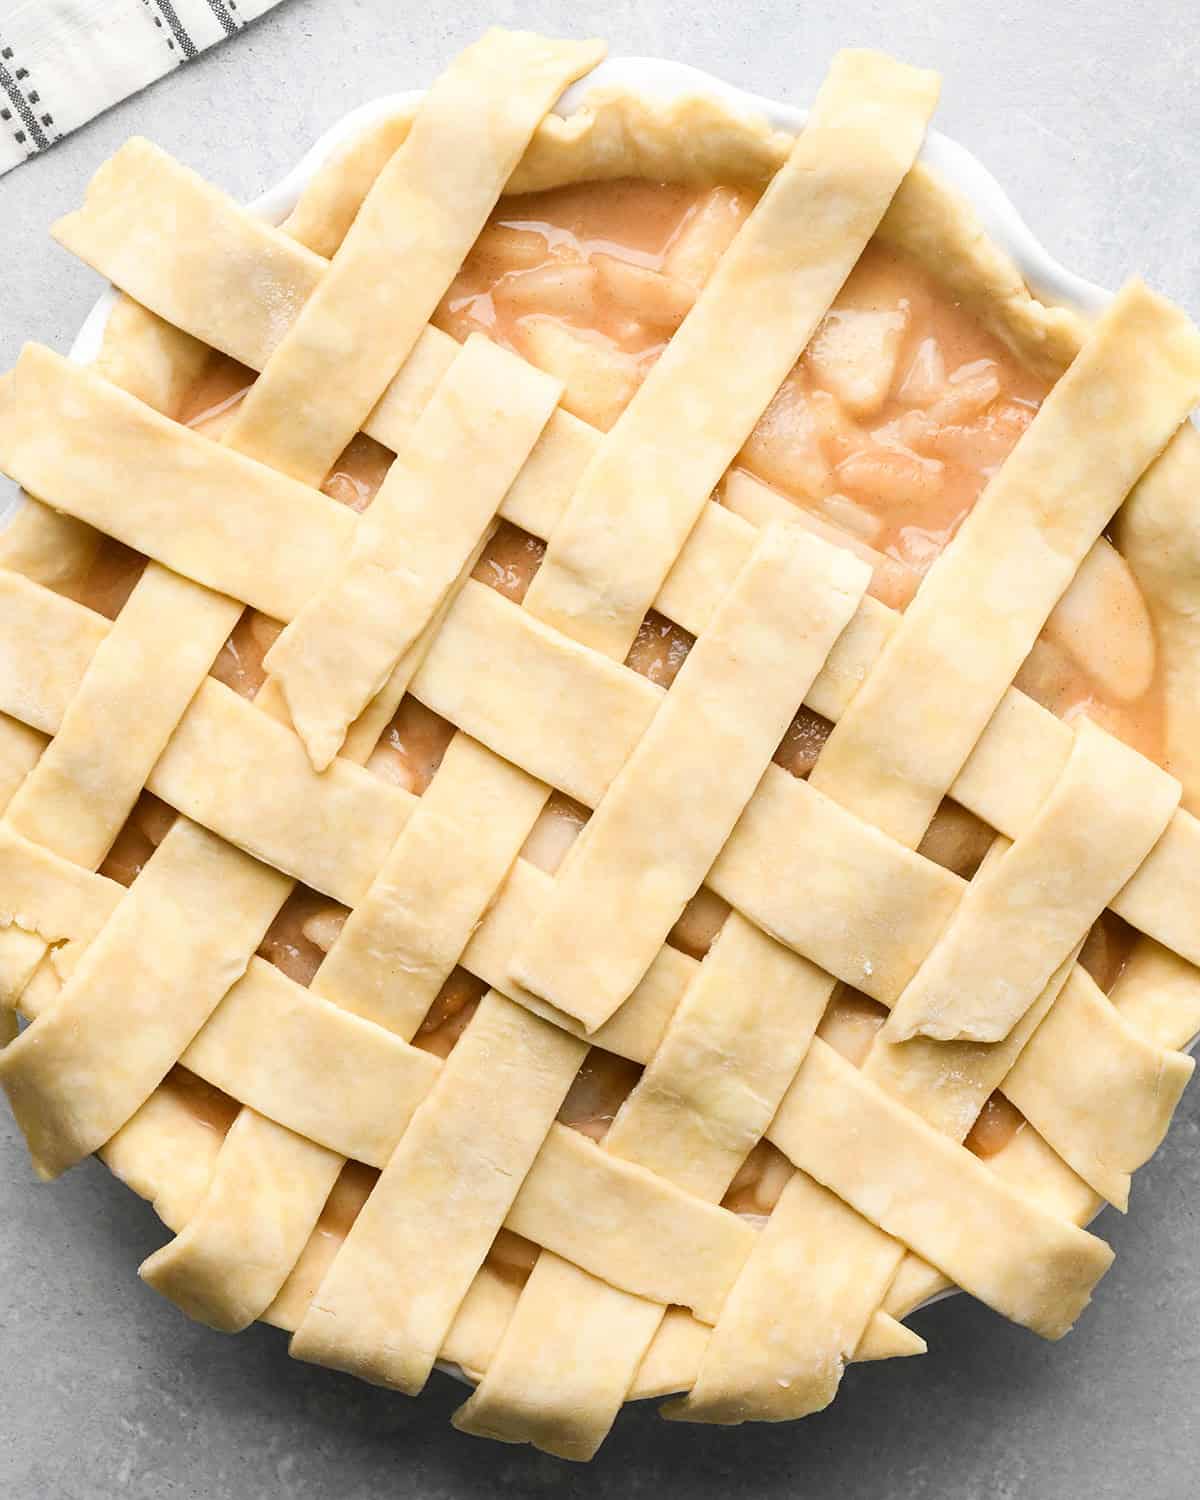
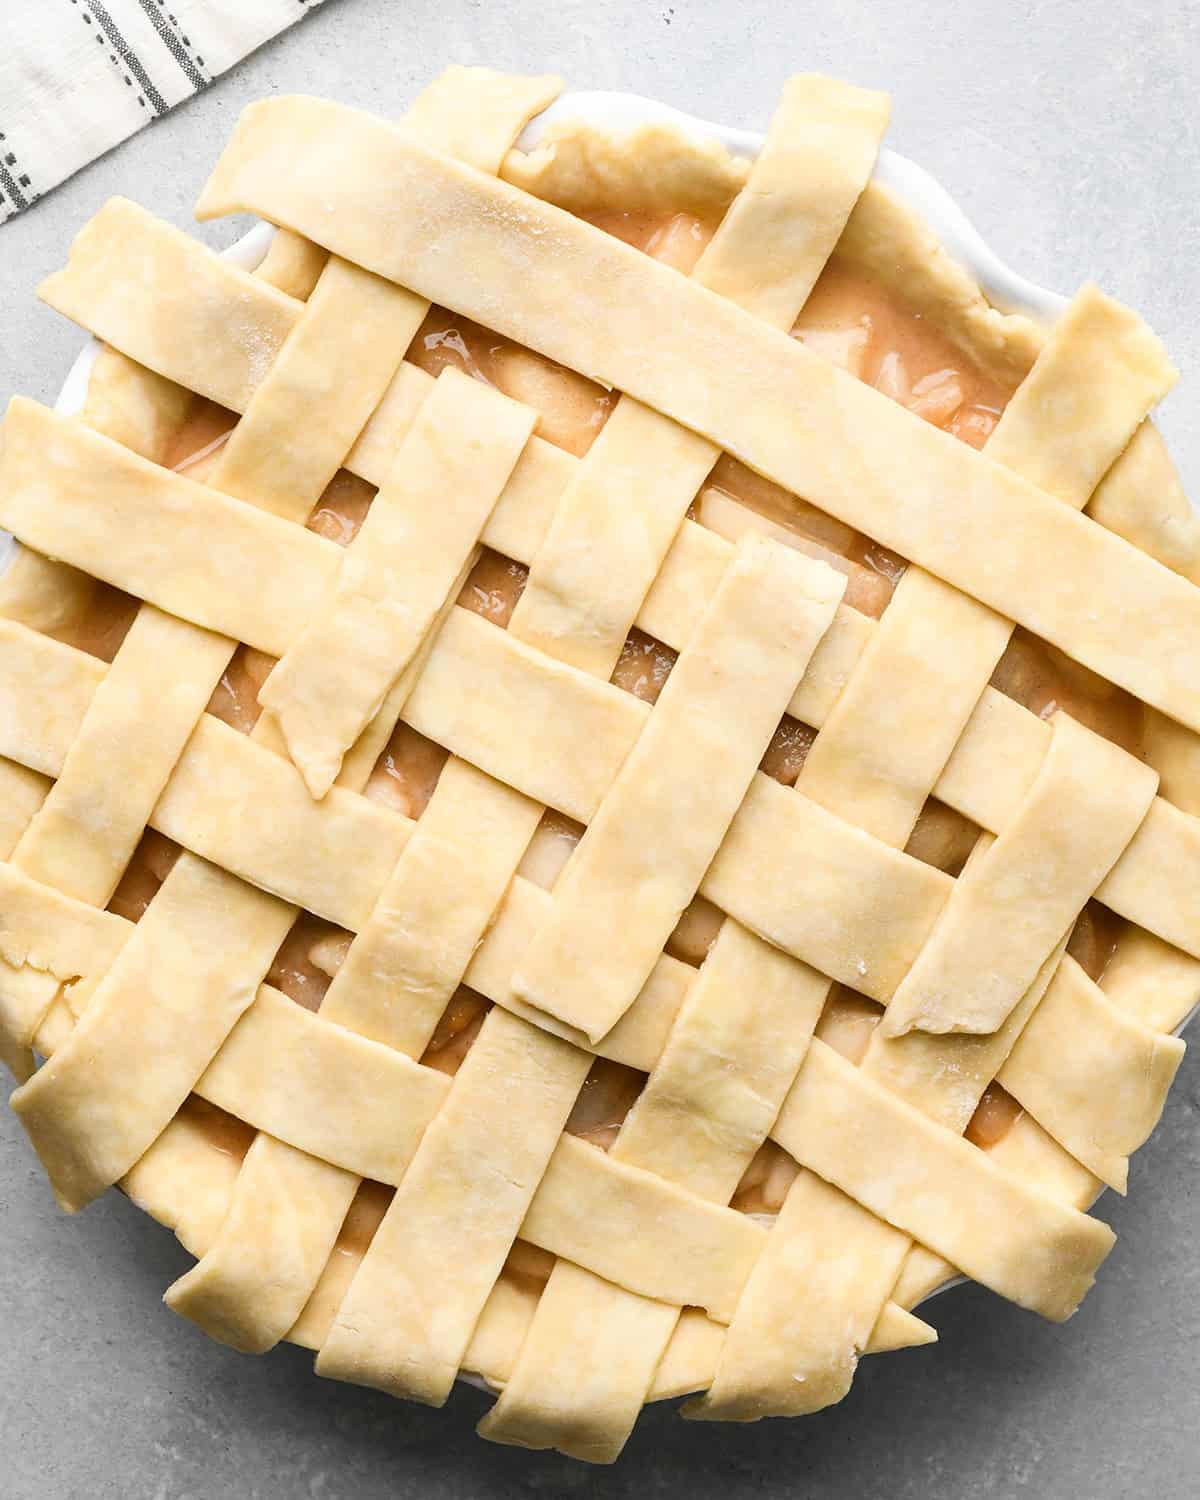
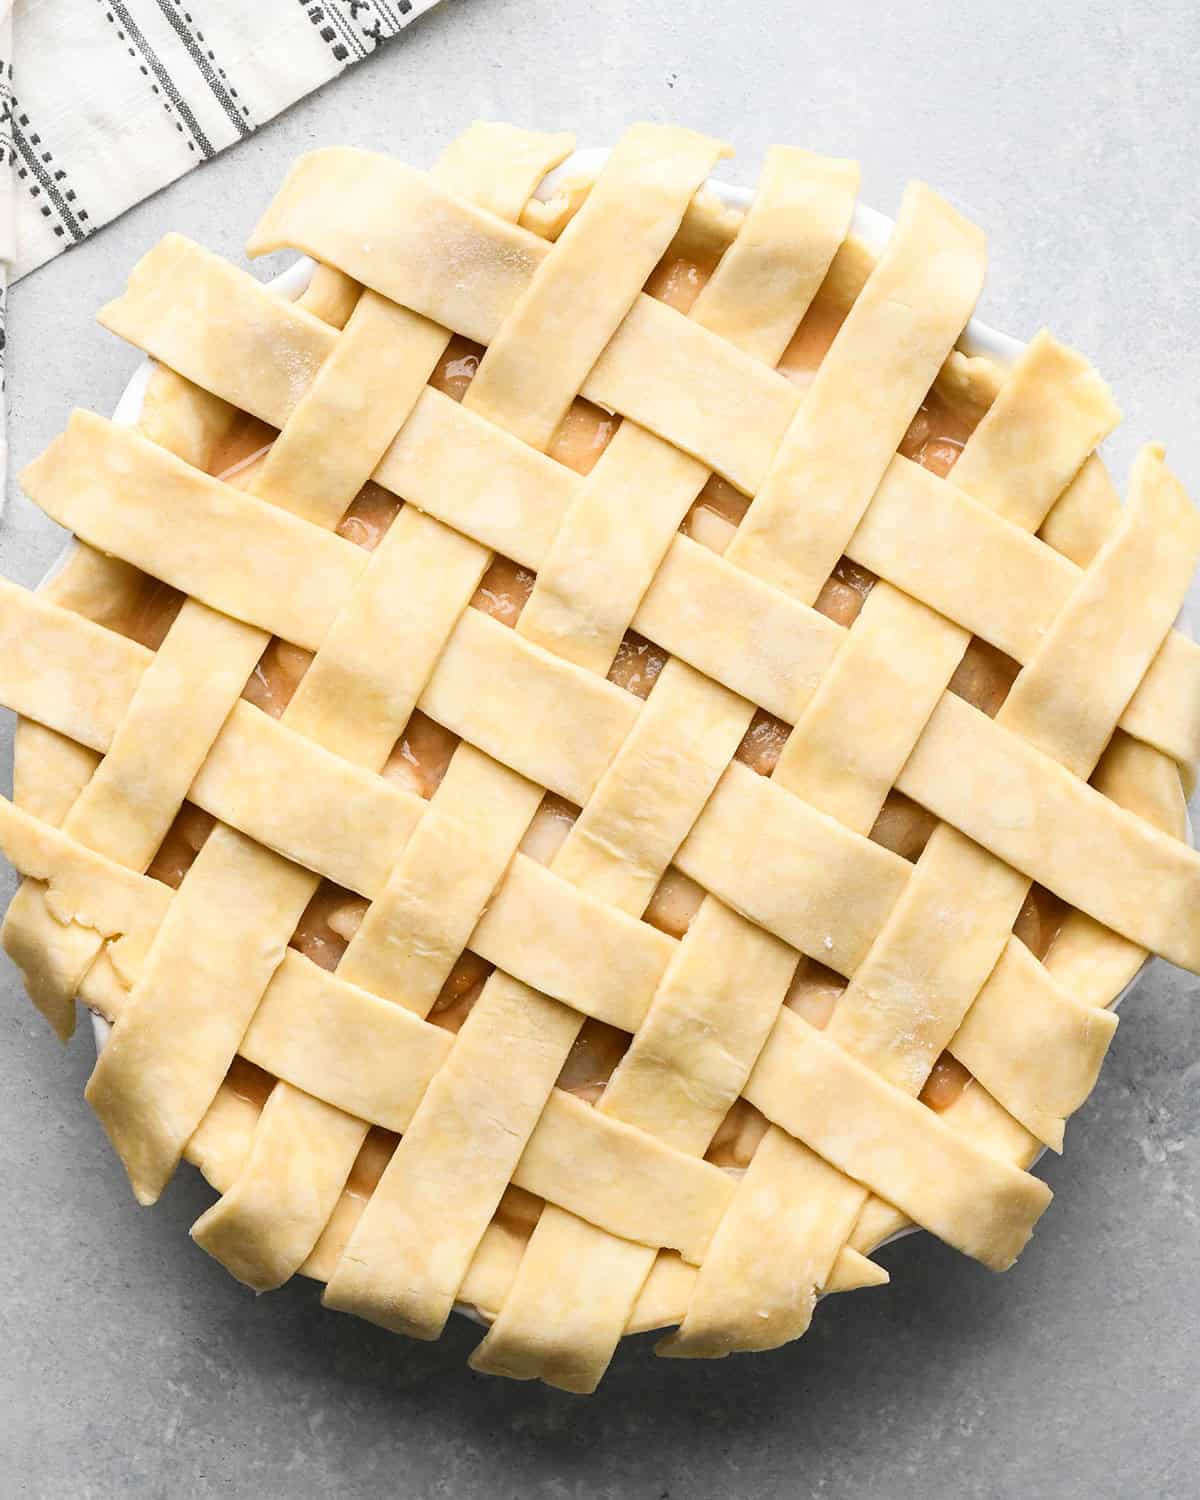
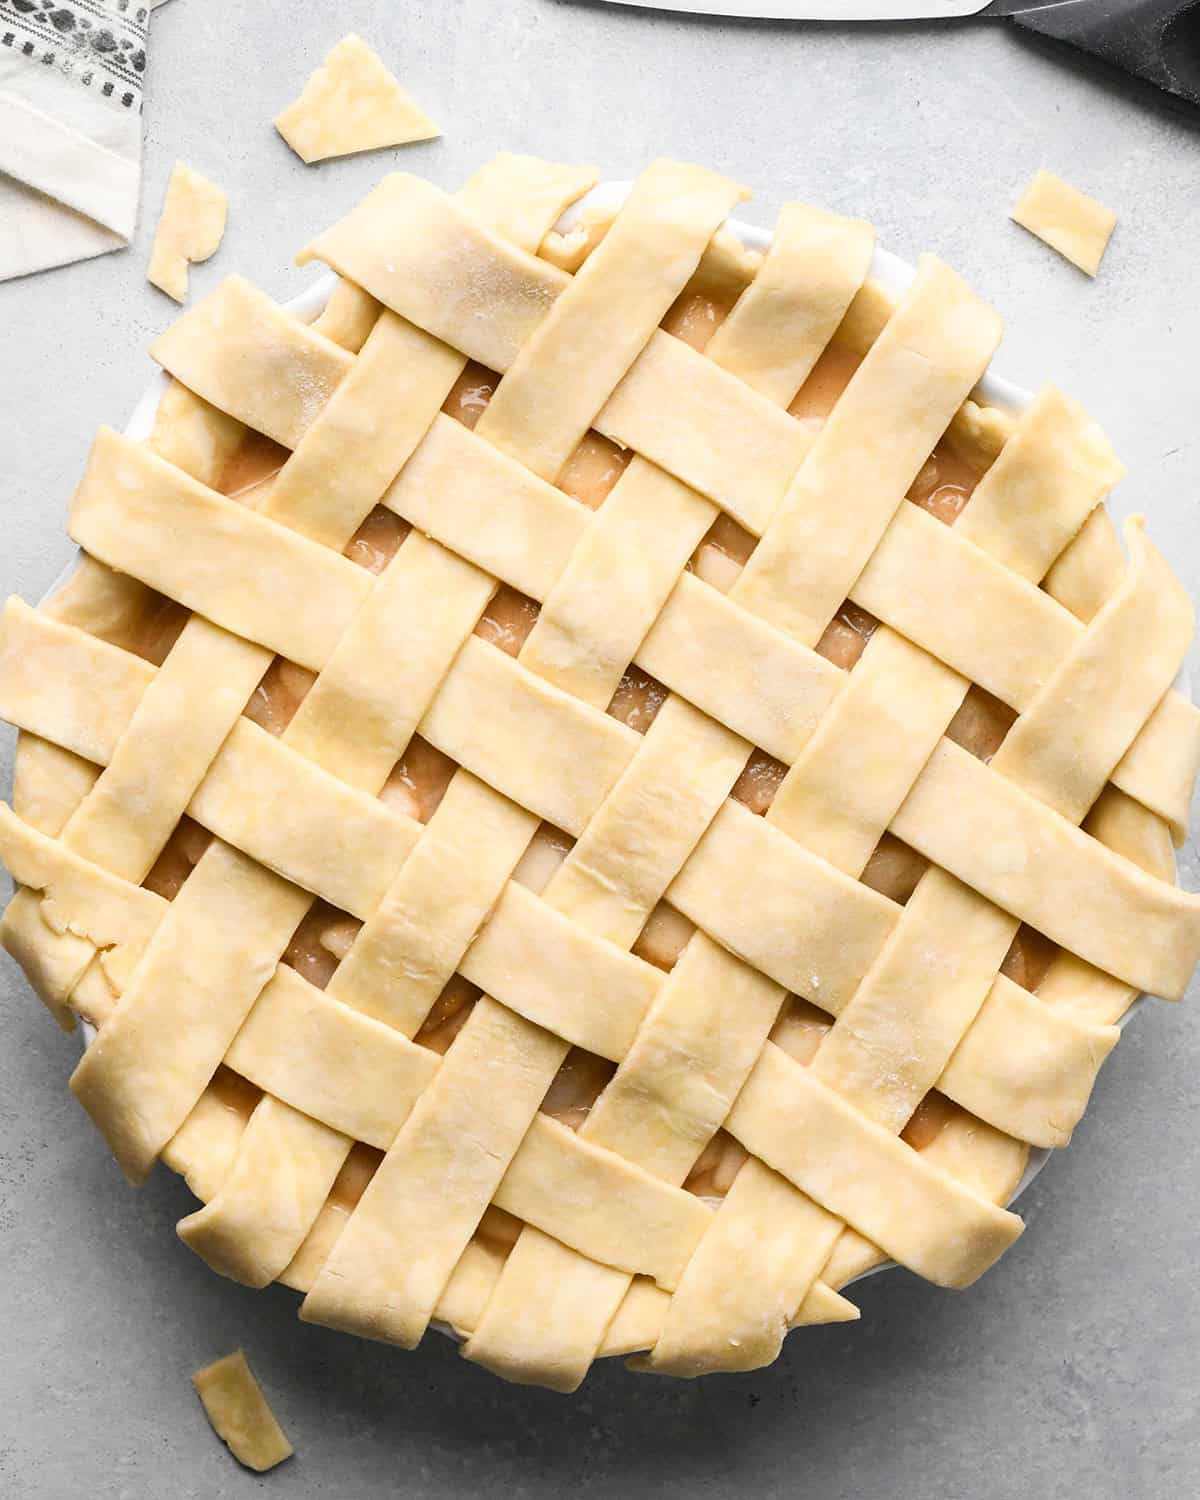
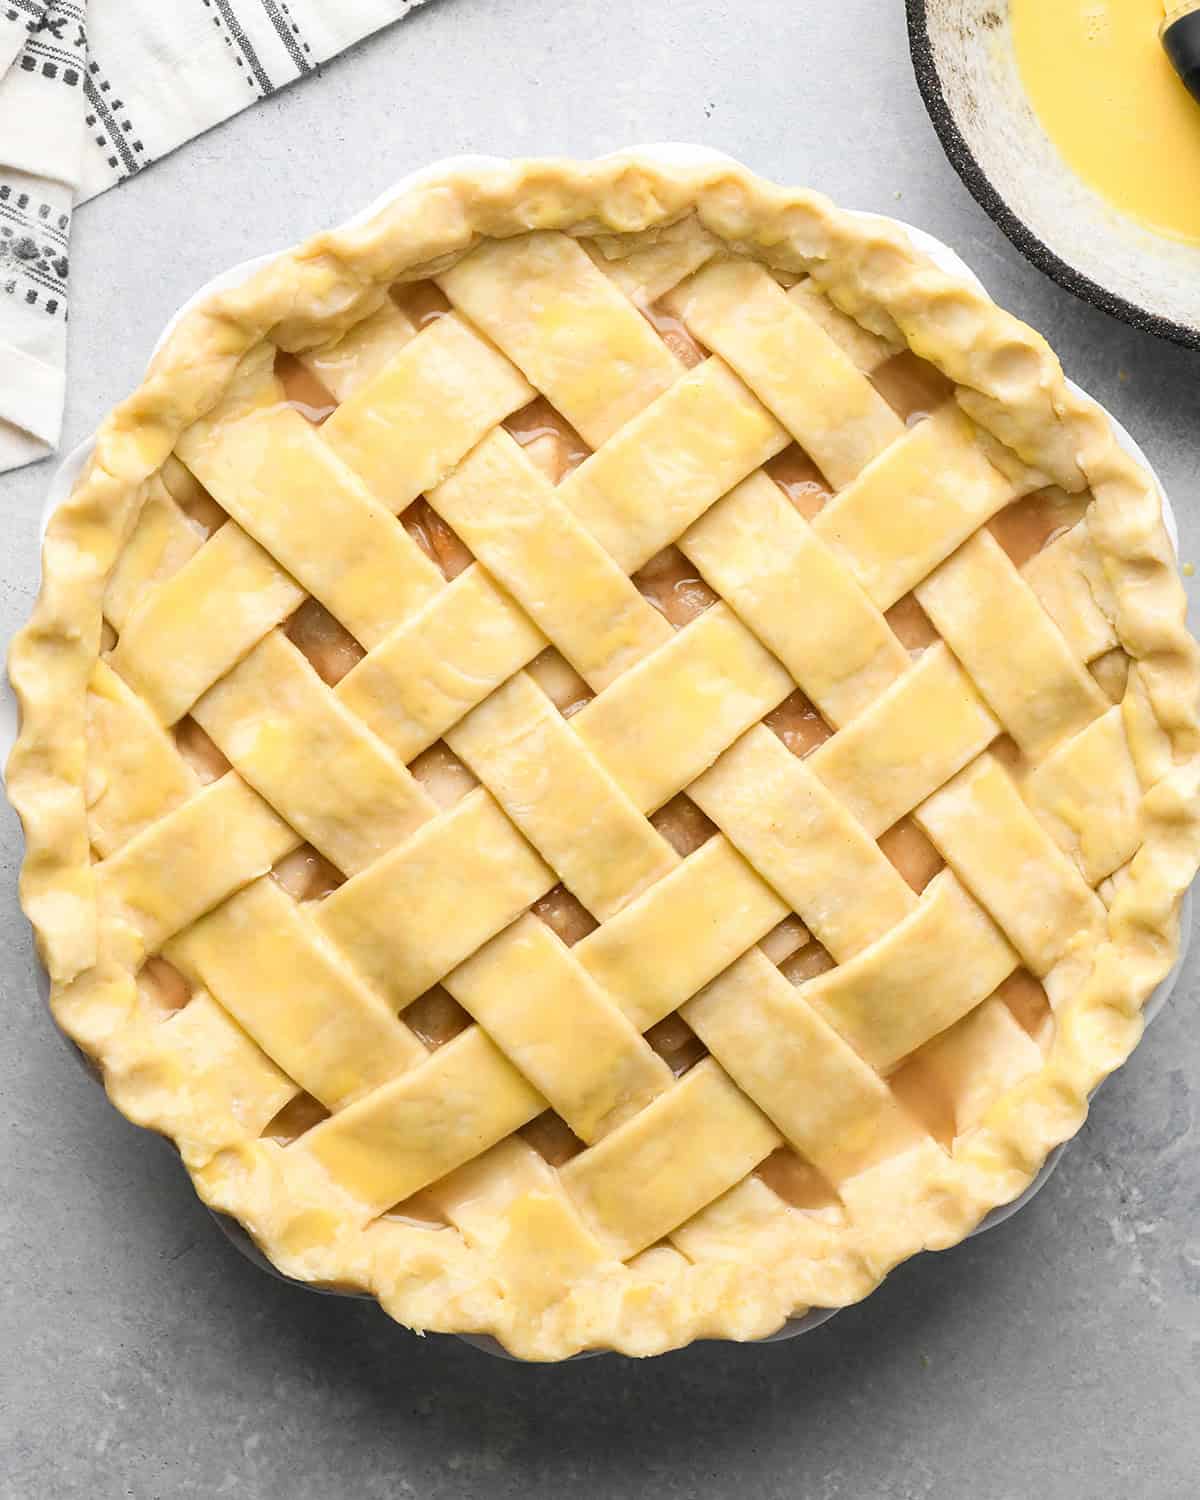
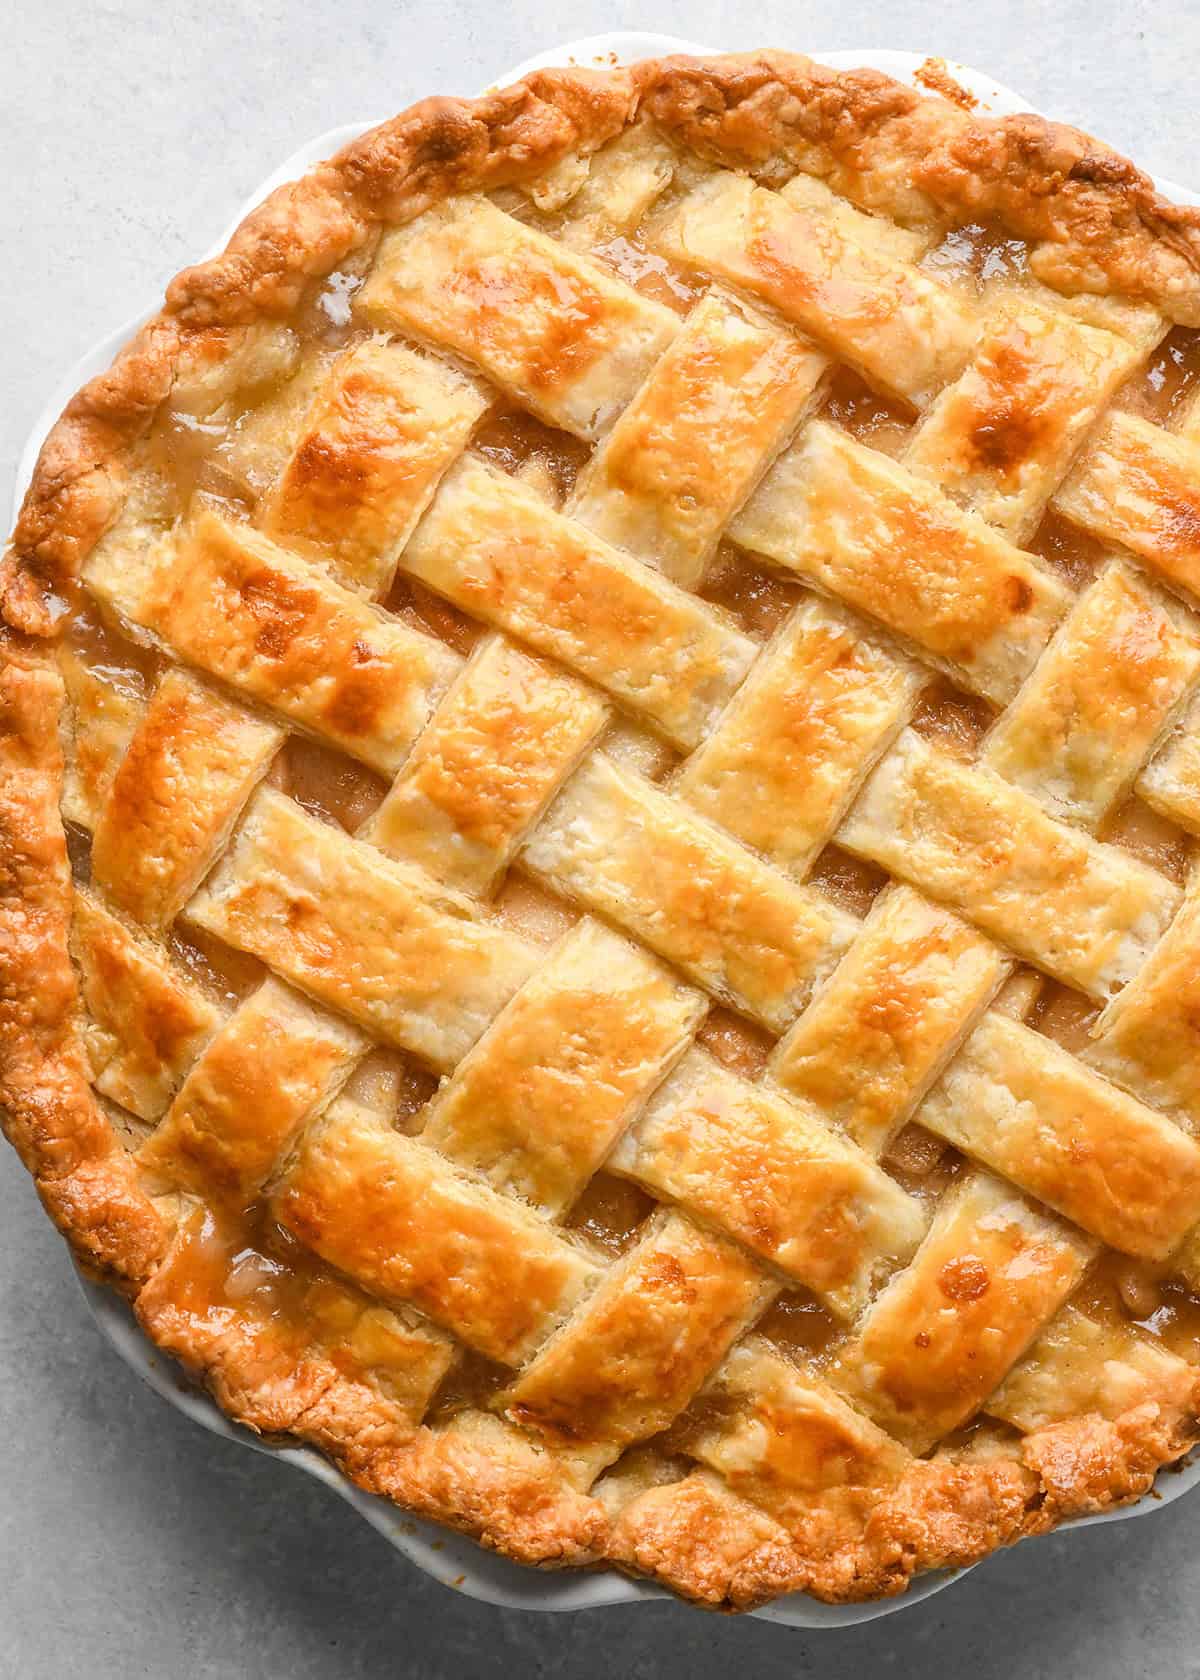
Make sure the strips are all straight and look how you want them. Then, trim off excess (if necessary) pie crust dough and pinch the edges, pressing the lattice top into the bottom pie crust.
Levtover pie crust
If you have leftover pie crust, use it to make these pie crust cookies!
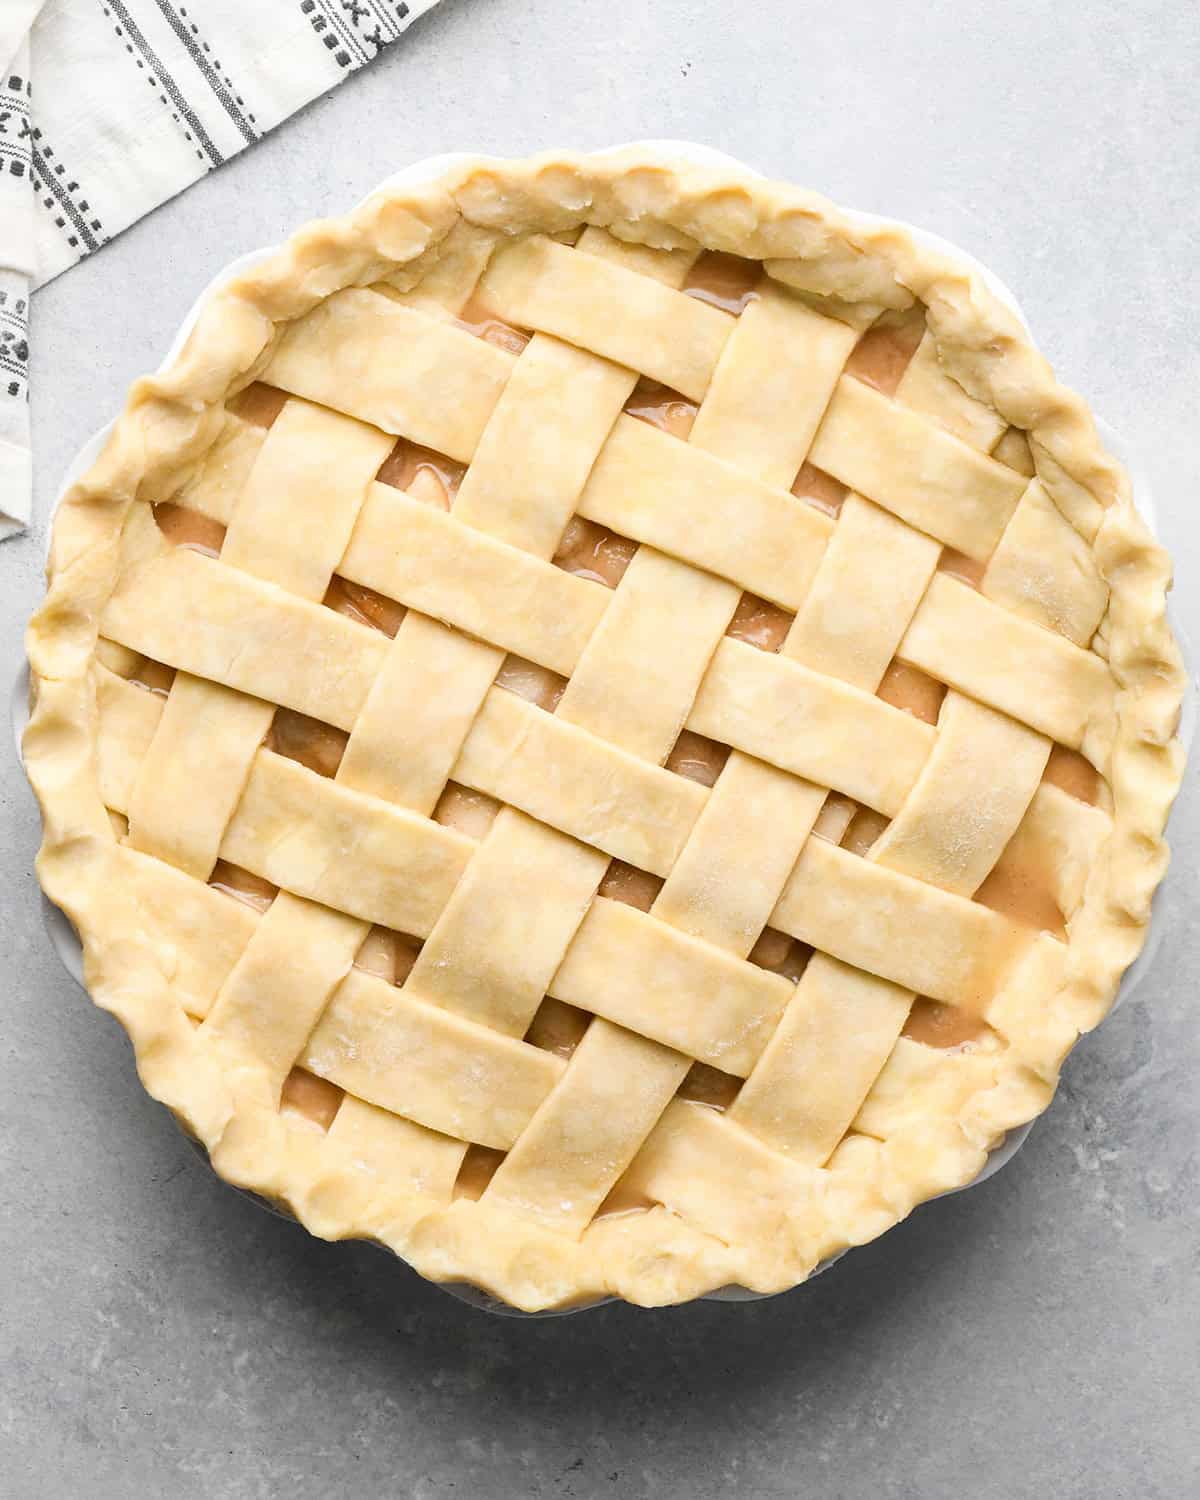
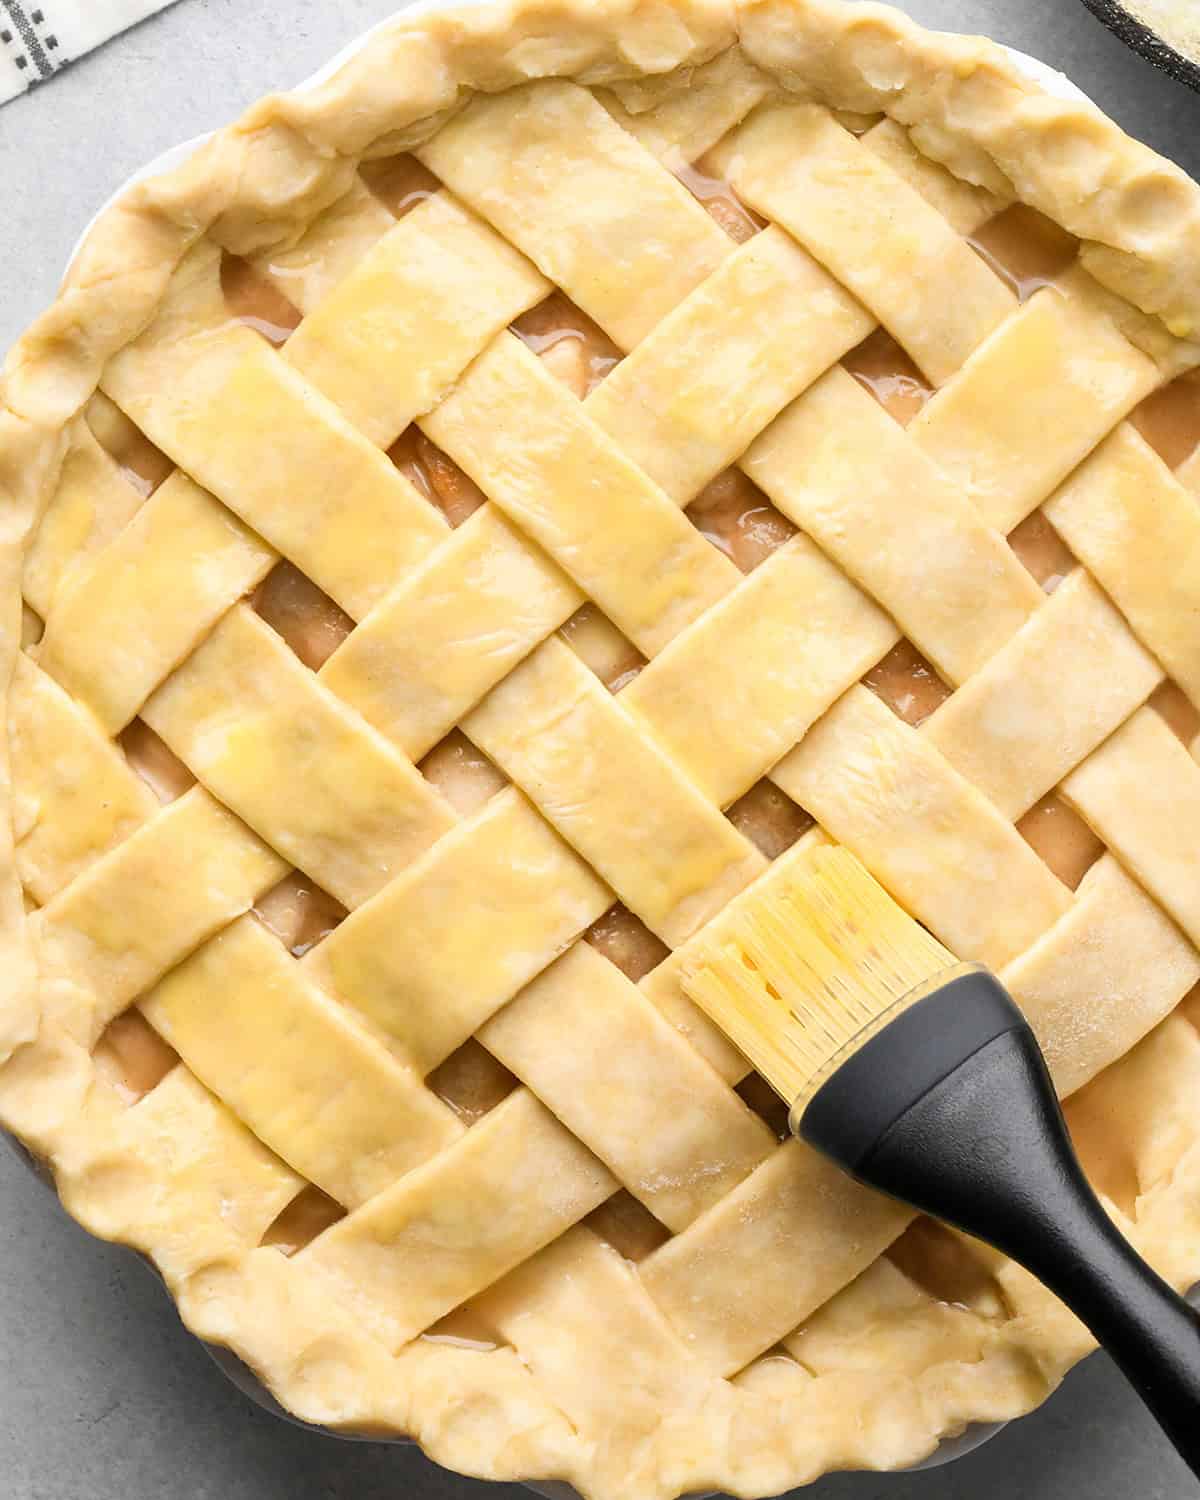
Make the Egg Wash
Once the pie is assembled, beat the egg and heavy cream together in a small bowl until smooth.
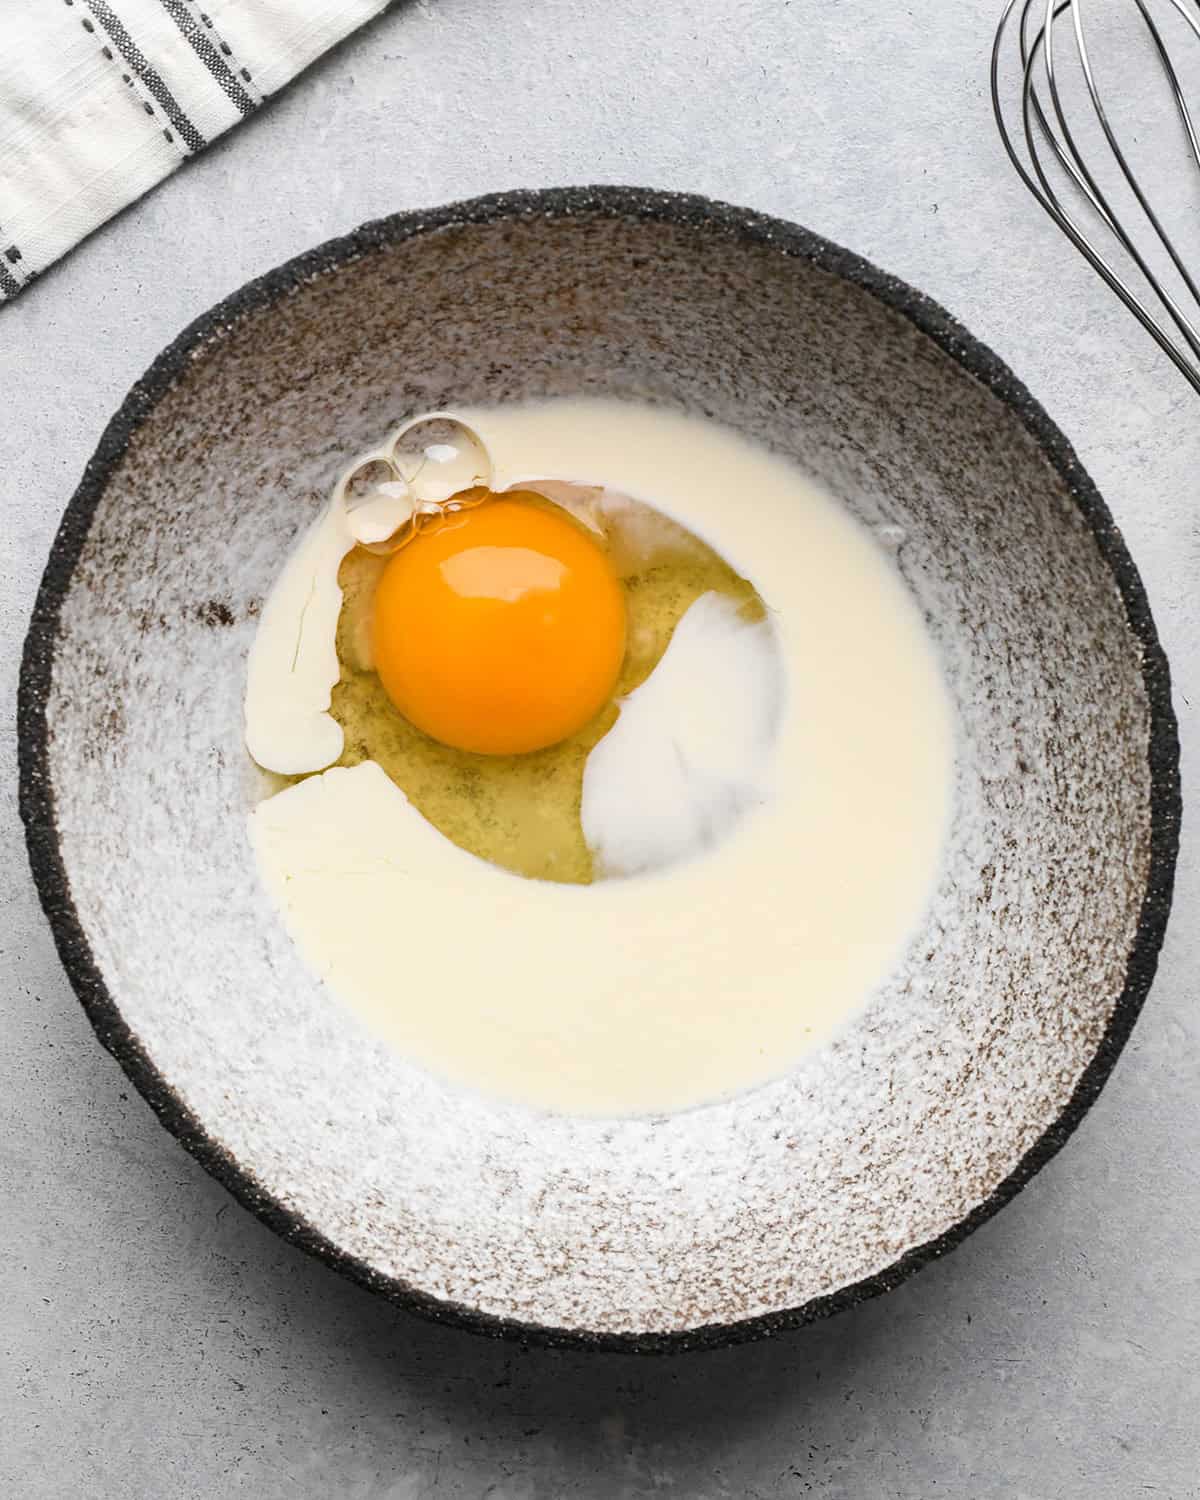
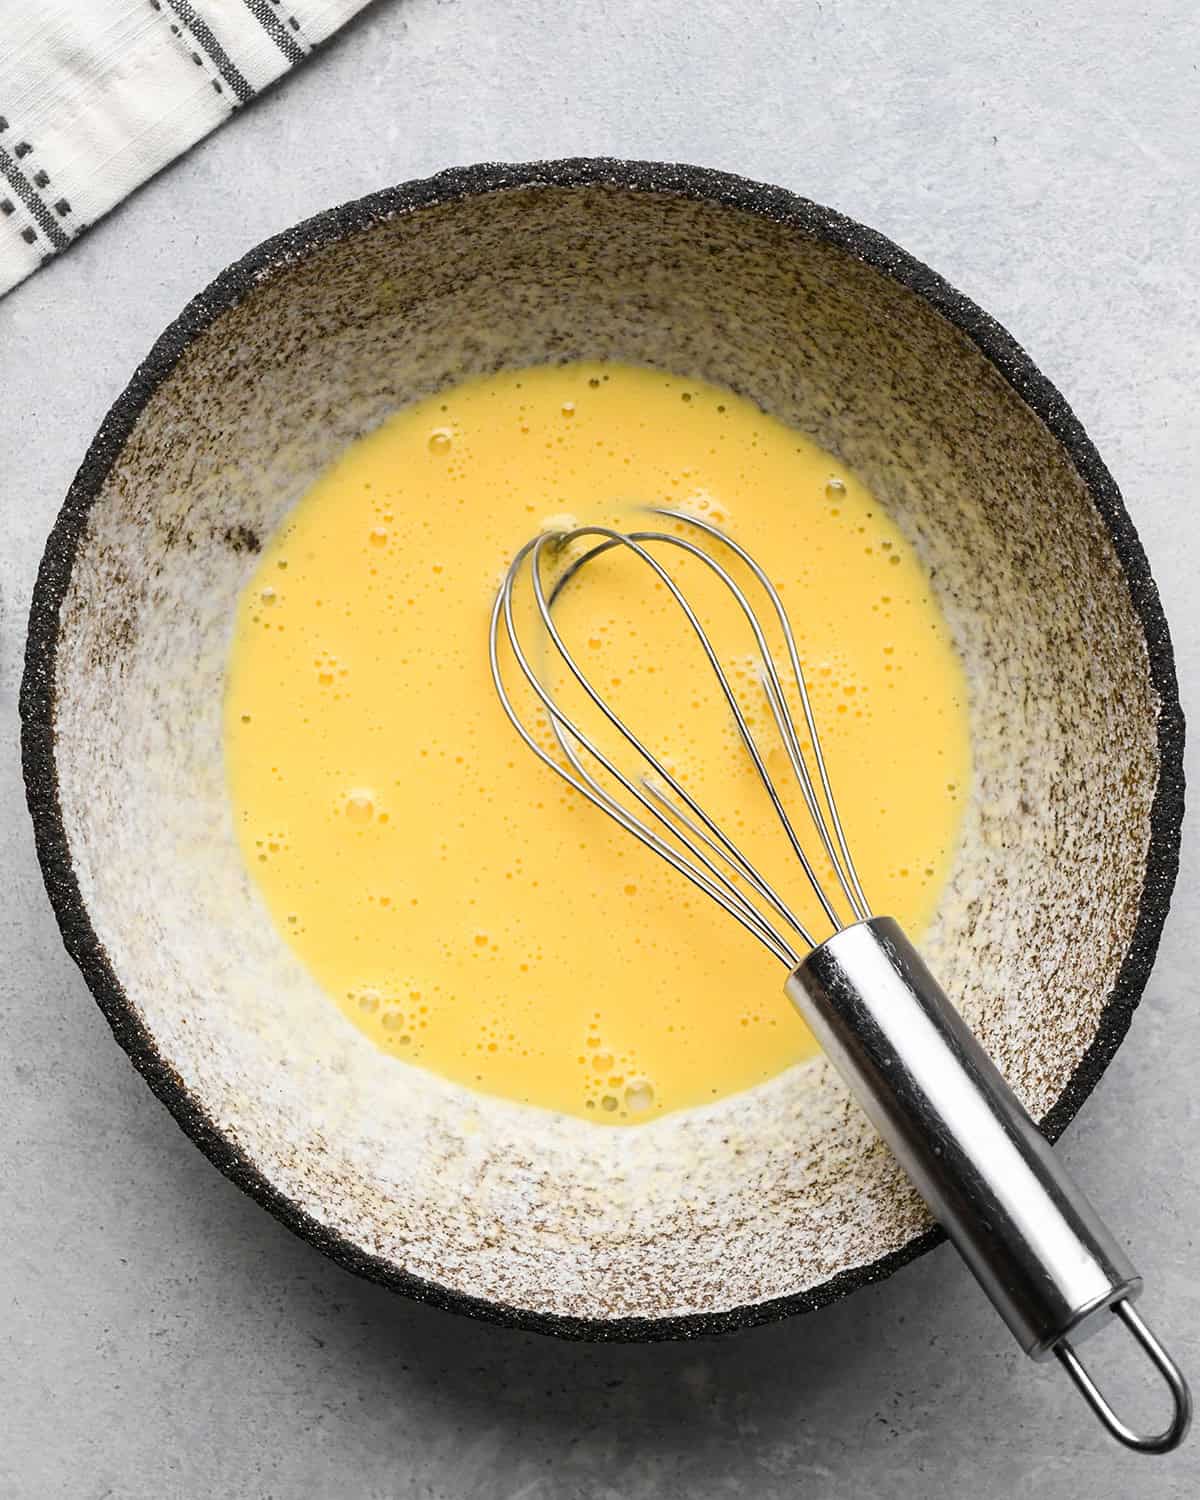
Then, brush it over the lattice top and sides of the pie crust.
Bake the Pie
Put a pie crust shield around the outer crust so it doesn’t burn.
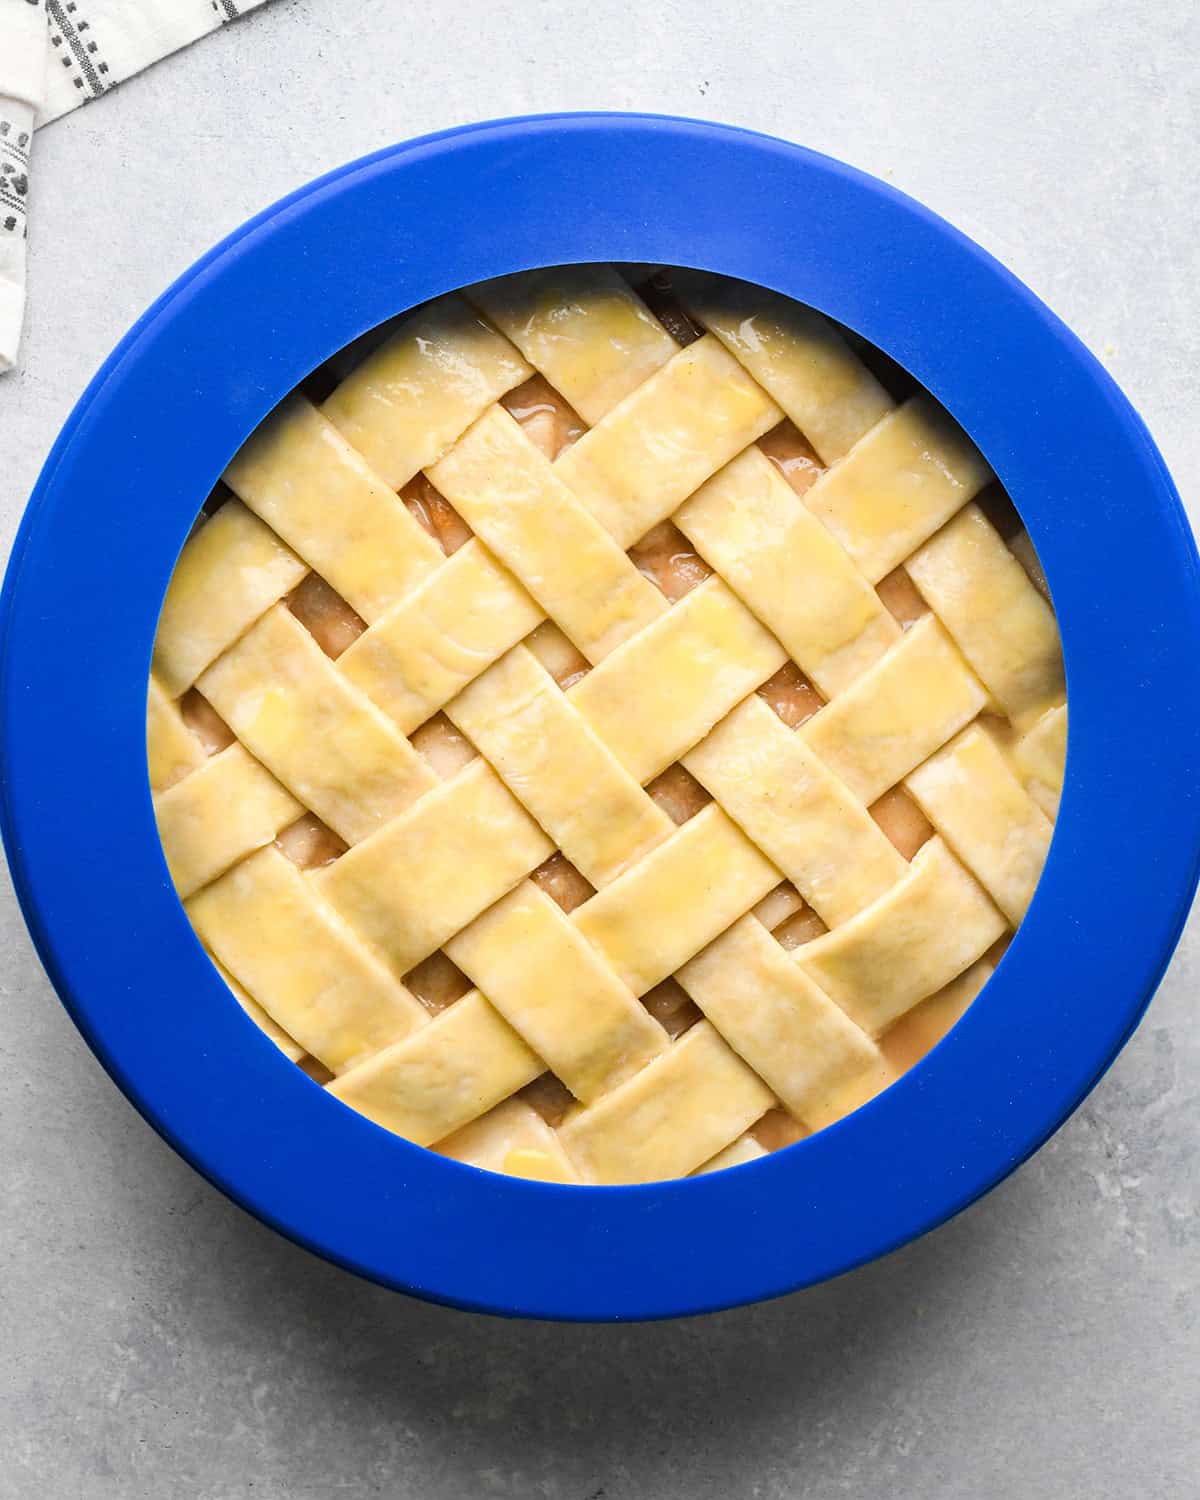
Bake according to the recipe instructions in the pie recipe you are using. Remove the pie crust shield in the last 5-10 minutes of baking.
Serve
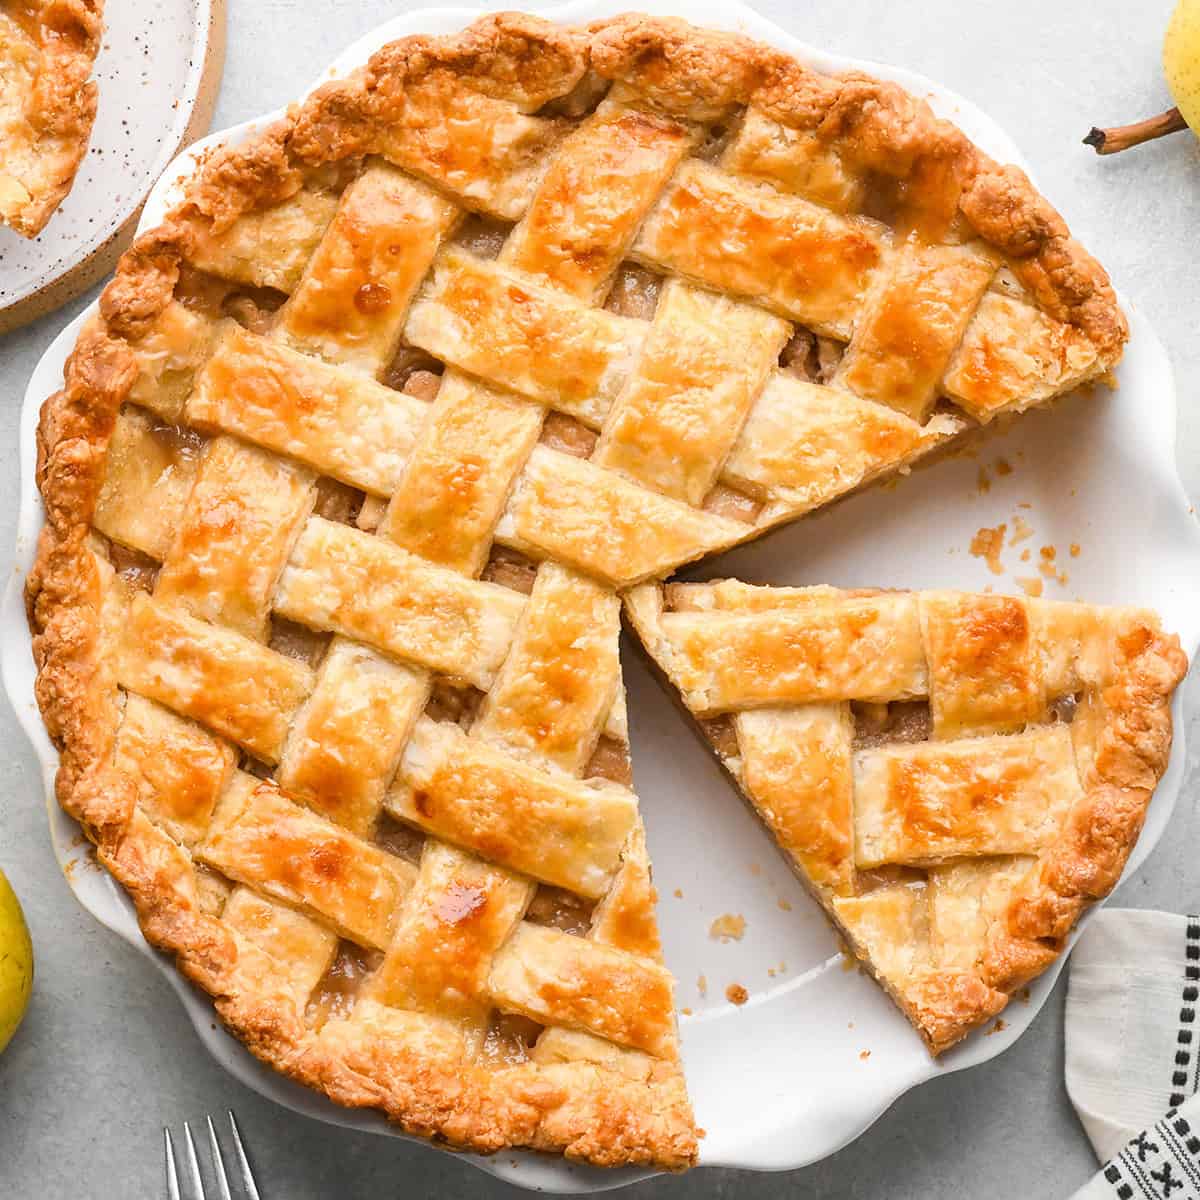
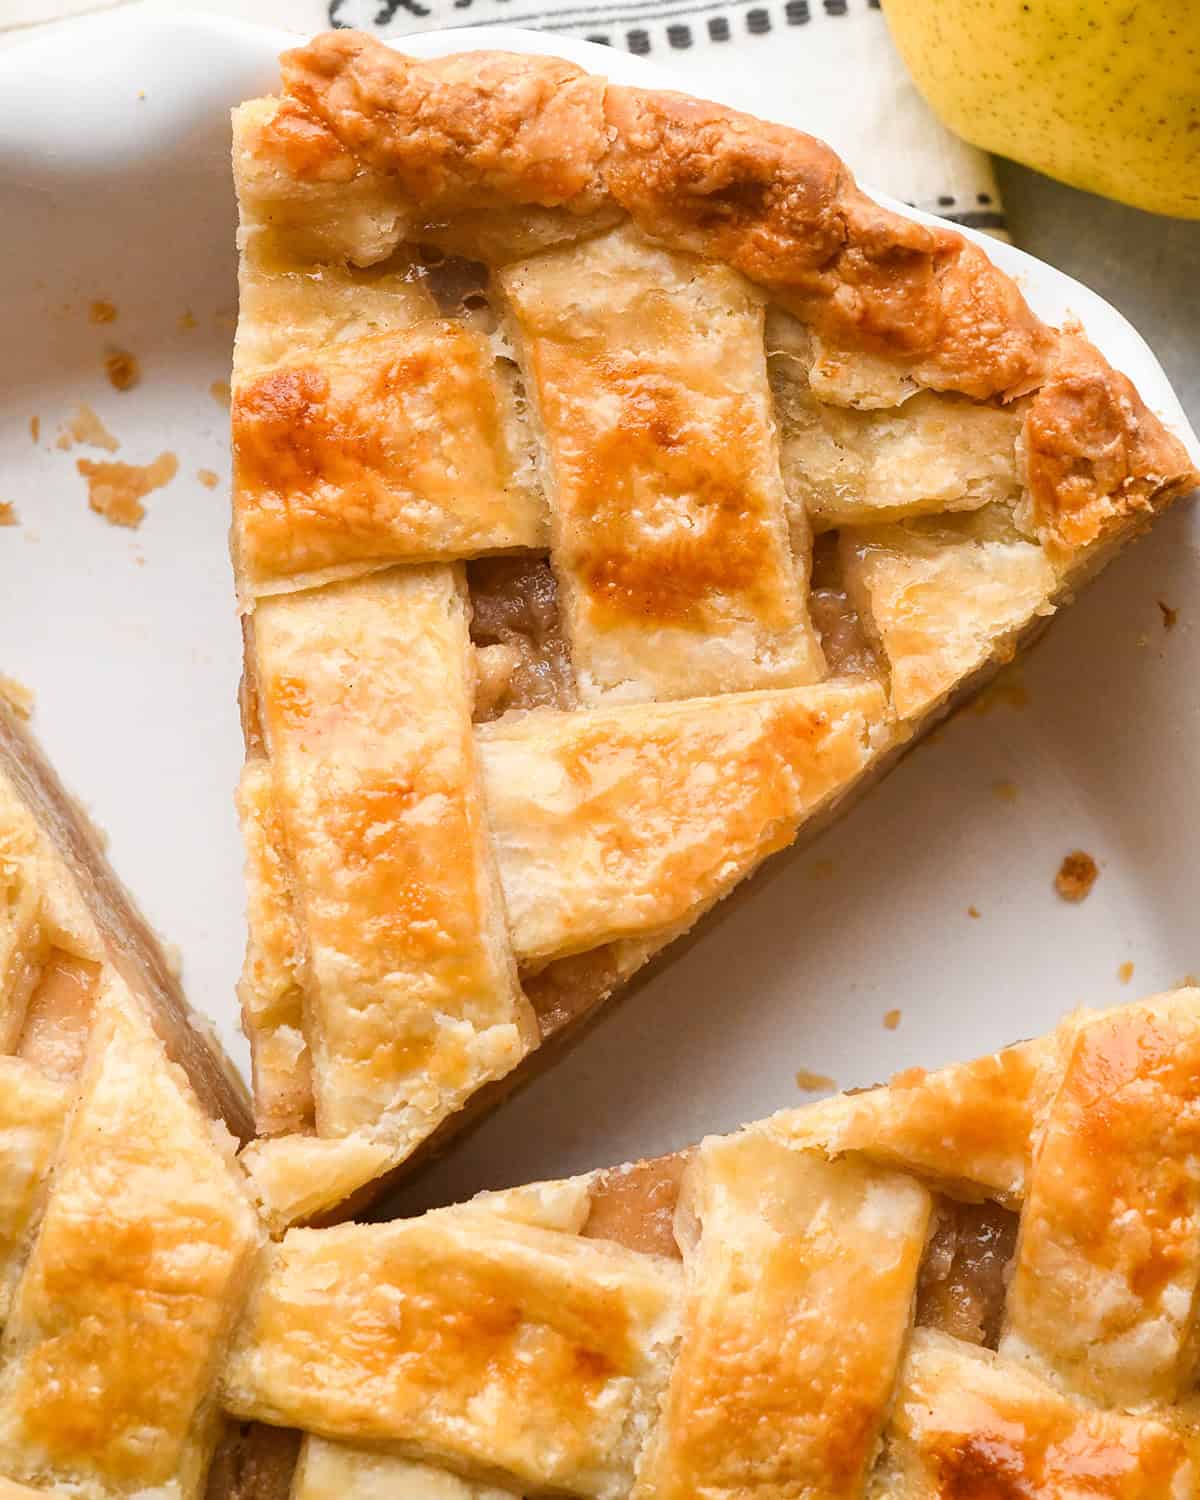
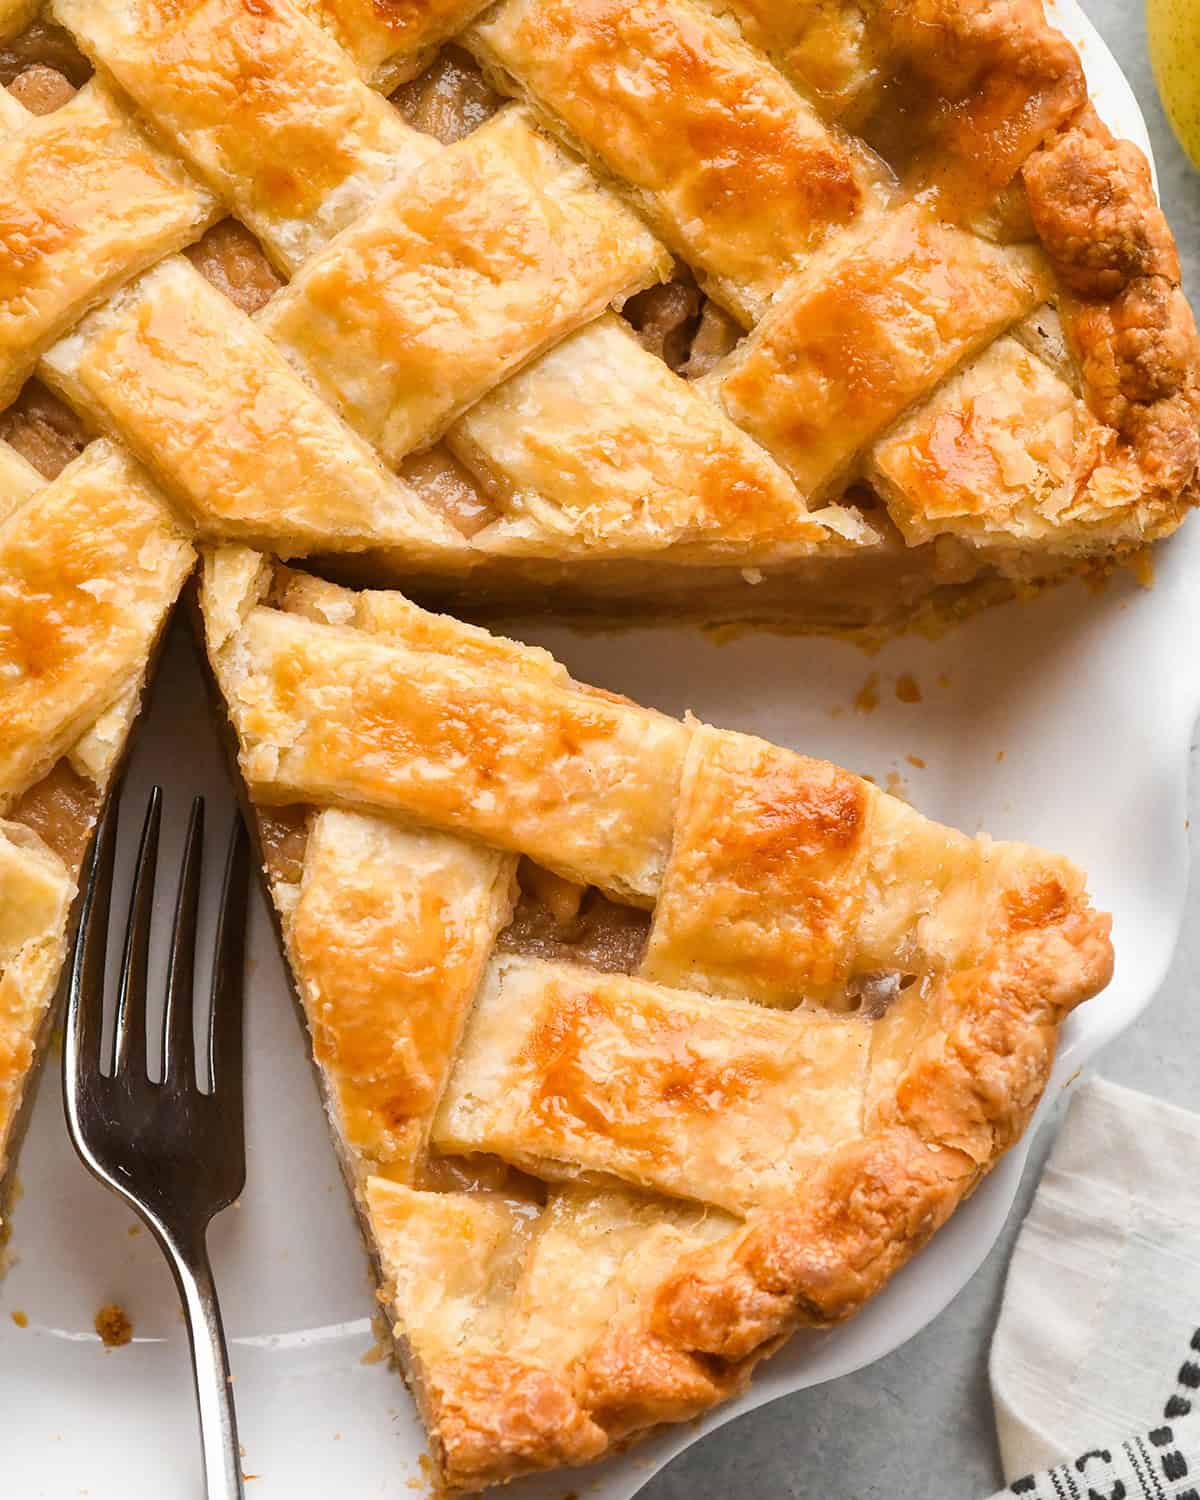
Pies baked with a lattice crust are best served after they have cooled completely, because the filling thickens as it cools.
If you want to serve a pie a little warm, I suggest letting it cool completely, then warming it very slightly in the oven set to 250 degrees F for 10-15 minutes.
Of course, I suggest serving any pie with a lattice crust a la mode – with homemade vanilla ice cream. Or, with a dollop of homemade whipped cream.
Store/Freeze
I suggest following the storage instructions in the pie recipe you decide to use with this lattice crust.
However, generally pie leftovers can be stored in an airtight container at room temperature for up to 3 days, in the refrigerator for up to 1 week, or in the freezer (tightly wrapped) for 2 months.
Lattice Pie Crust Recipe FAQS
To add a little pizzaz to your lattice crust, you can braid three, thin strips of leftover dough and add it to the top of one strip. You can also use pie crust cutters to make shapes and bake them onto the top of the lattice crust.
Yes – this is the only way I make my lattice pie crusts! There is no need for fancy equipment!
I just use a very sharp knife to cut strips of pie dough.
If you make and love my recipes, it would mean so much to me if you would leave a comment and rating! And don’t forget to follow along on Instagram, Pinterest, Facebook, TikTok and Youtube – be sure to tag @joyfoodsunshine and use the hashtag #joyfoodsunshine so I can see your creations!
How to Make a Lattice Pie crust
Video
Instructions
Make & Chill the Pie Crust
- Make this recipe: Double pie crust.
- Roll into 2 discs, wrap each disc in plastic wrap and chill for at least two hours, and up to overnight. (Or use a store-bought pie crust).
Form the Bottom Crust
- Then, roll out one disc to fit your pie plate. Trim off any overly excess pieces, but leave enough to pinch and make a fluted edge.
- Then cover the bottom pie crust with plastic wrap and put it back in the refrigerator to chill.
Form the Lattice
- Roll out the second disc into a 12” circle.
- Then using a very sharp knife, cut the dough into strips about ½” thick.
- Then, remove the bottom crust from the refrigerator and fill it with your preferred filling. You need to use filling that will be baked like apple, pear, berry, etc.
- Lay about 6 strips on top of the pie filling horizontally.
- Then, take one of the shorter strips and put it at the edge of the pie, lifting up every other horizontal strip so it alternates being above one strip, then underneath the next, until you have gone – over, under, over, under, over, under (in that order) the 6 horizontal pie crust strips.
- Then, take the next longest pie crust strip and do the same thing but the opposite order – so you will go under, over, under, over, under, over.
- Repeat until all of the vertical strips are used, alternating between starting with the vertical strip over then under for each addition.
- Make sure the strips are all straight and look how you want them. Then, trim off excess (if necessary) pie crust dough and pinch the edges, pressing the lattice top into the bottom pie crust.
Make & Apply the Egg Wash
- Then, beat the egg and heavy cream together until thick and smooth.
- Brush it over the lattice top and sides of the pie crust.
Bake
- Put a pie crust shield around the outer crust so it doesn’t burn.
- Bake according to the recipe instructions. Remove the pie crust shield in the last 5-10 minutes of baking.
Notes
Nutrition
Nutrition information is automatically calculated, so should only be used as an approximation.