Best Apple Pie Recipe
Updated Apr 15, 2026
This post may contain affiliate links. Please read our disclosure policy.
This is the best Homemade Apple Pie recipe ever! Its flaky, buttery crust is made from scratch, & the delicious apple pie filling isn’t overly sweet, letting the flavor of the apples really shine. Plus this apple pie is easy to make with a handful of simple ingredients.

I’m not sure there’s a more iconic dessert than a slice of warm apple pie served with vanilla ice cream! And this is truly the best homemade apple pie recipe ever!
A perfectly sweet apple filling with rich fall spices sits between two layers of buttery homemade pie crust for pure dessert nirvana (also try apple crumb pie, dutch apple pie, apple pie bars and apple cobbler)!
Homemade apple pie is easy to make with simple ingredients and tastes better than any bakery or restaurant. It is a must-make dessert during apple season, or any time of the year. See what Lily says,
This is absolutely the best apple pie I’ve ever made! Thank you so much, it will be the only recipe I’ll use from now on! The crust was flaky, apples were perfectly cooked, and everyone loved it!
– Lily

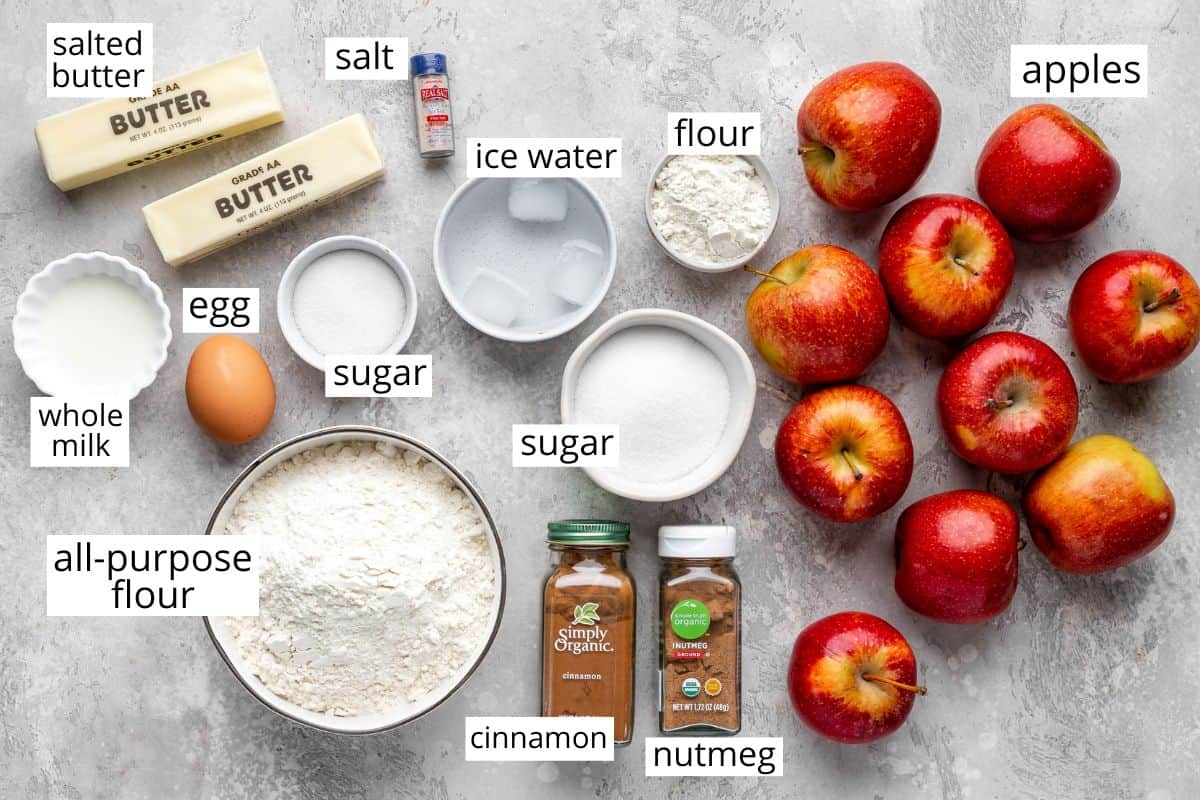
Apple Pie Recipe: Ingredients & Substitutions
Here are some notes about the ingredients in this apple pie recipe, as well as possible substitutions.
Apple Pie Crust
You can use a store-bought crust if you prefer, or here are some notes on substitutions. Check out this butter pie crust recipe for more tips and tricks on making homemade crust. Or, try these apple pie bars and skip the crust altogether!
- All-purpose flour. Pastry flour works well in place of all-purpose flour. For a gluten-free option, use a 1:1 all-purpose gluten-free flour.
- Salted butter: Unsalted butter and vegan butter (like Earth balance, which is what was used to make this dairy-free pumpkin pie), are good substitutions.
- Sea Salt. I always recommend baking with pure sea salt. If you have iodized table salt, you may need to decrease the amount of salt.
- Egg Wash (eggs & milk). this is optional. Heavy cream or half and half can also be used in place of milk. Or you can omit the egg and just use milk.
Apple Pie Filling Ingredients:
- Apples. Choose your favorite apple variety, I prefer a sweet/tart variety like pink ladies.
- Sugar. You can substitute up to half of the granulated sugar with brown sugar.
- All-purpose flour. Cornstarch or an all-purpose gluten-free flour blend both work well.
- Nutmeg. This is optional but recommended for a richer flavor.
How to make Apple Pie From Scratch
Making this Apple Pie Recipe from scratch is very simple and so rewarding (just like these other from scratch pies: Pumpkin pie and French silk pie). Let’s walk through the process together, and don’t forget to watch the video.
Make the Pie Crust
I have a full tutorial on making an all-butter pie crust, so if you need some more guidance I highly recommend starting there.
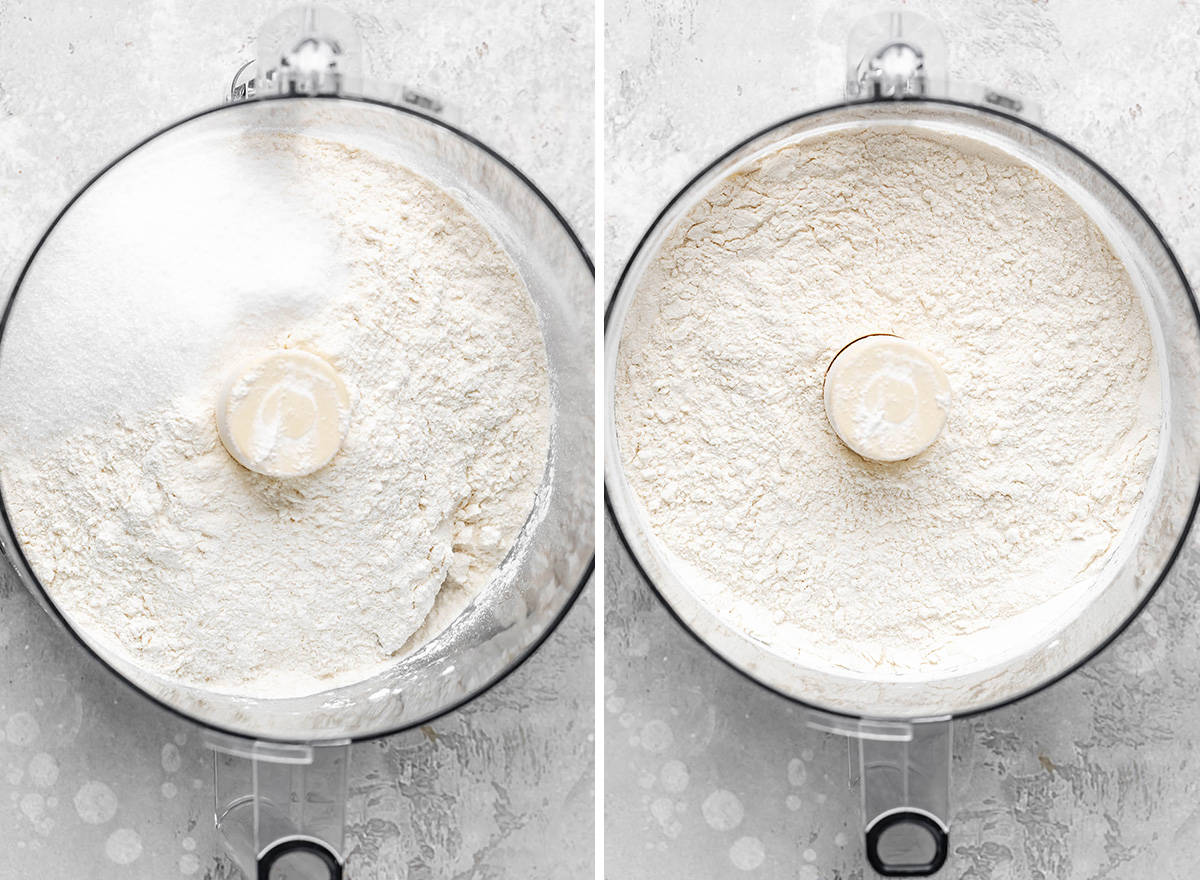
I use a food processor to make pie crust, you can also make it by hand using a fork or pastry cutter. Begin by combining the dry ingredients.
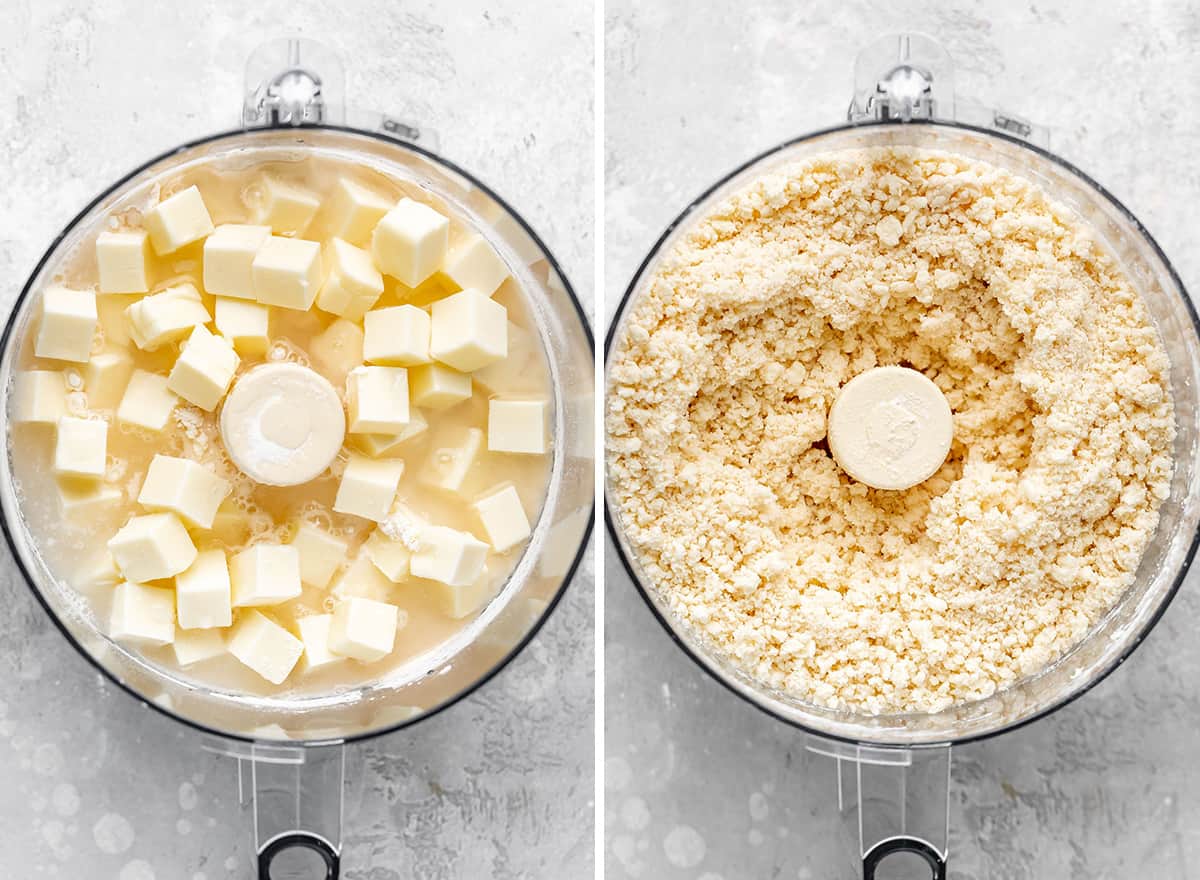
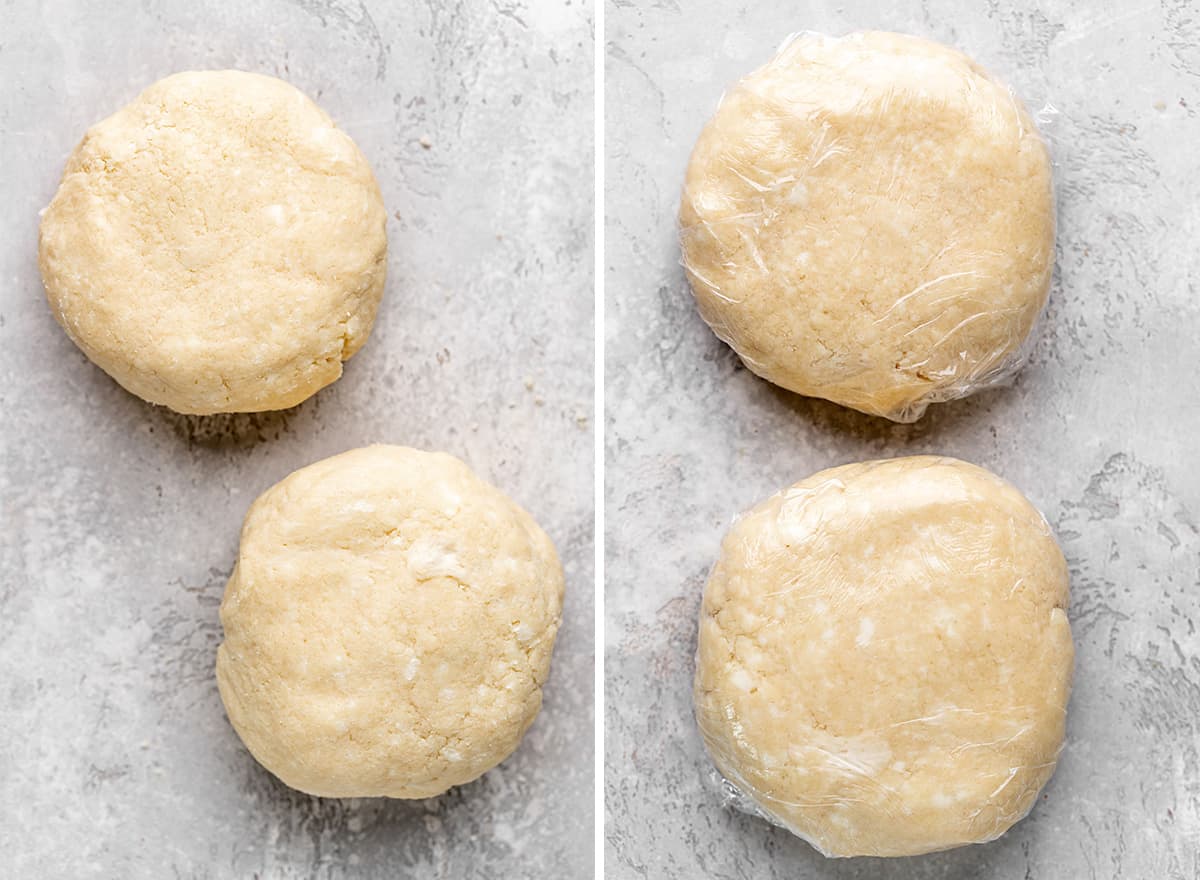
Then add the butter and ice cold water to the container and process for 15-30 seconds. Until the mixture looks like coarse sand (pictured below), and sticks together when it’s squeezed. It will easily form into a ball.
Form the dough into two, equal-sized discs. Wrap them tightly in plastic wrap and refrigerate for at least 2 hours, or overnight.
If you are chilling the dough overnight or for a long period of time (more than 2 hours), I recommend putting the wrapped discs in a plastic bag or airtight container to ensure that they don’t dry out.
Make the Apple Pie Filling
Once the dough has chilled, make the apple pie filling.
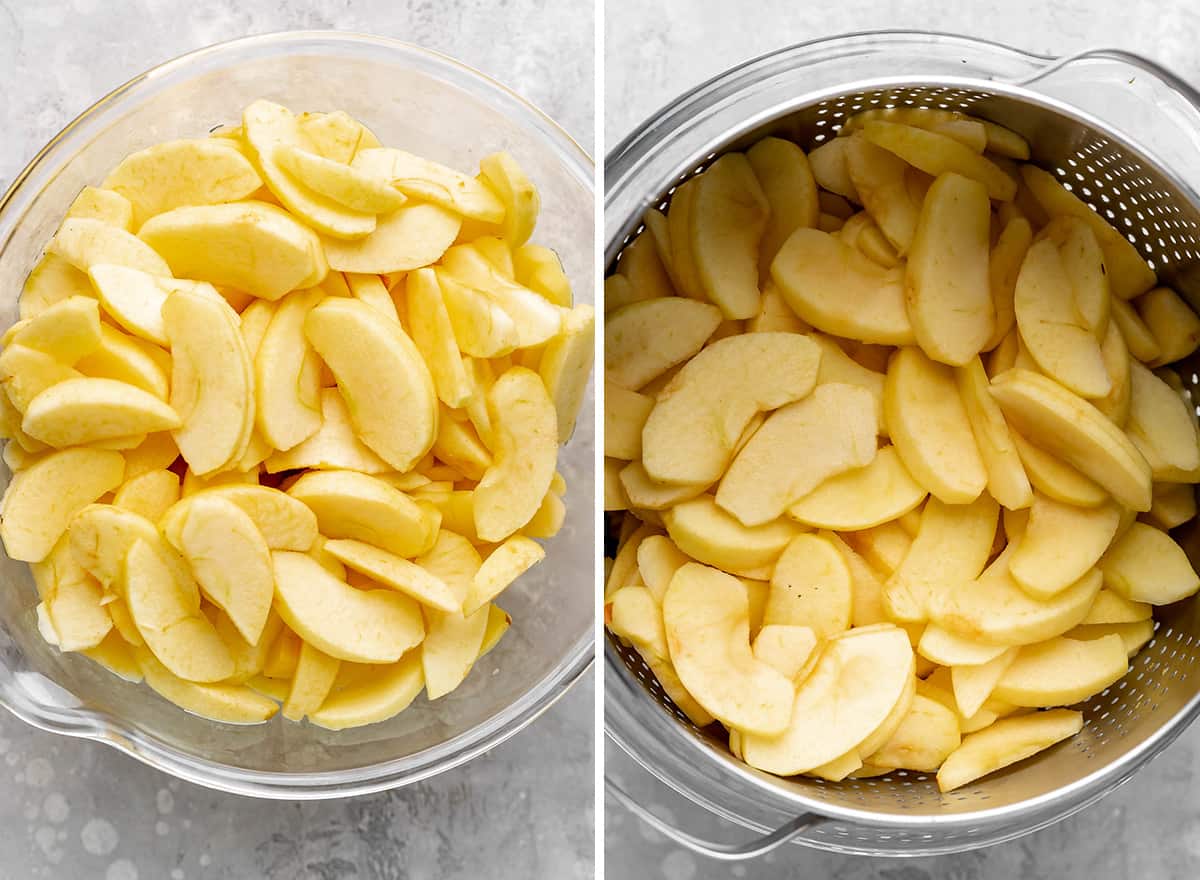
Start by peeling, coring and finely slicing the apples. I recommend using 10 cups of apples, which is roughly 3.5 lbs, 1500 g, or 7-8 medium/large apples.

Put the sliced apples in a microwave-safe bowl and microwave for 6 minutes. You can cook them on the stovetop, if desired. Cook until the apples are slightly soft but still firm.
Transfer the partially cooked apples to a colander and let them drain and cool. I recommend letting the apples cool while you roll out the crusts, so they have plenty of time to release as much water as possible.
While the apples are cooling, mix the dry ingredients for the filling together in a small bowl.
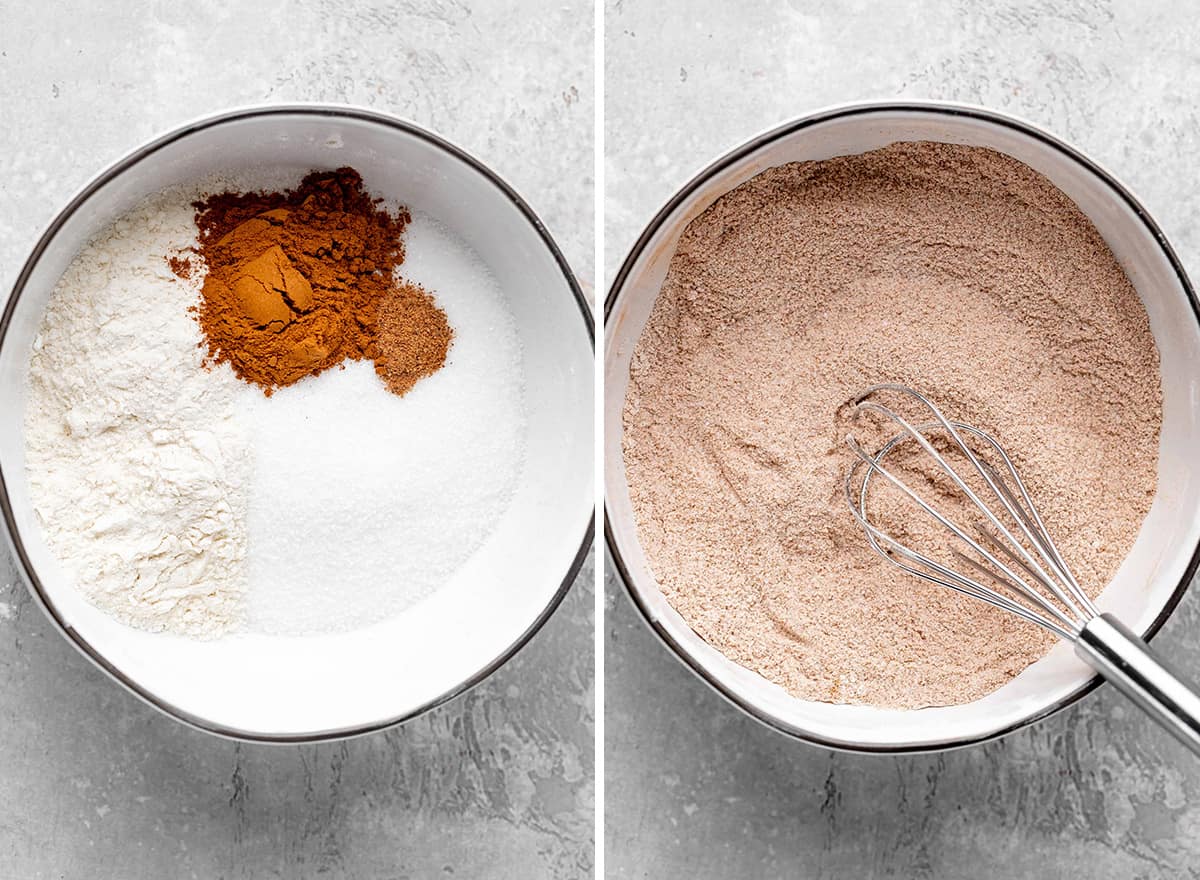
Then, transfer the drained apples into a bowl and stir in the dry ingredients until evenly distributed. Set aside while you assemble the apple pie.

Assemble the Apple Pie
Once the filling is ready and the crusts have chilled, preheat the oven and form the pie crusts (top and bottom).
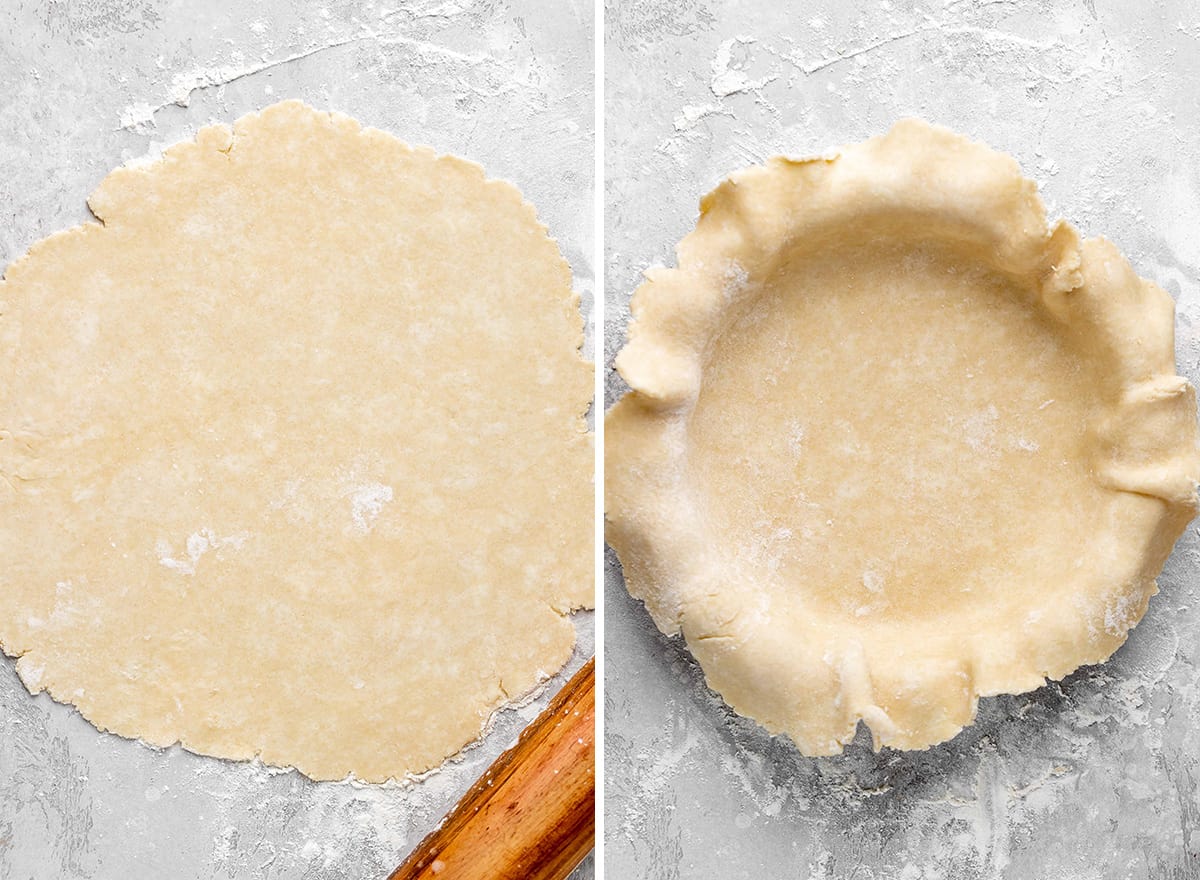
Remove the dough from the fridge, place it on a well-floured surface and let it sit at room temperature for about 5 minutes so it’s soft enough to roll.
Roll out one disc and place it into the bottom of the pie dish.
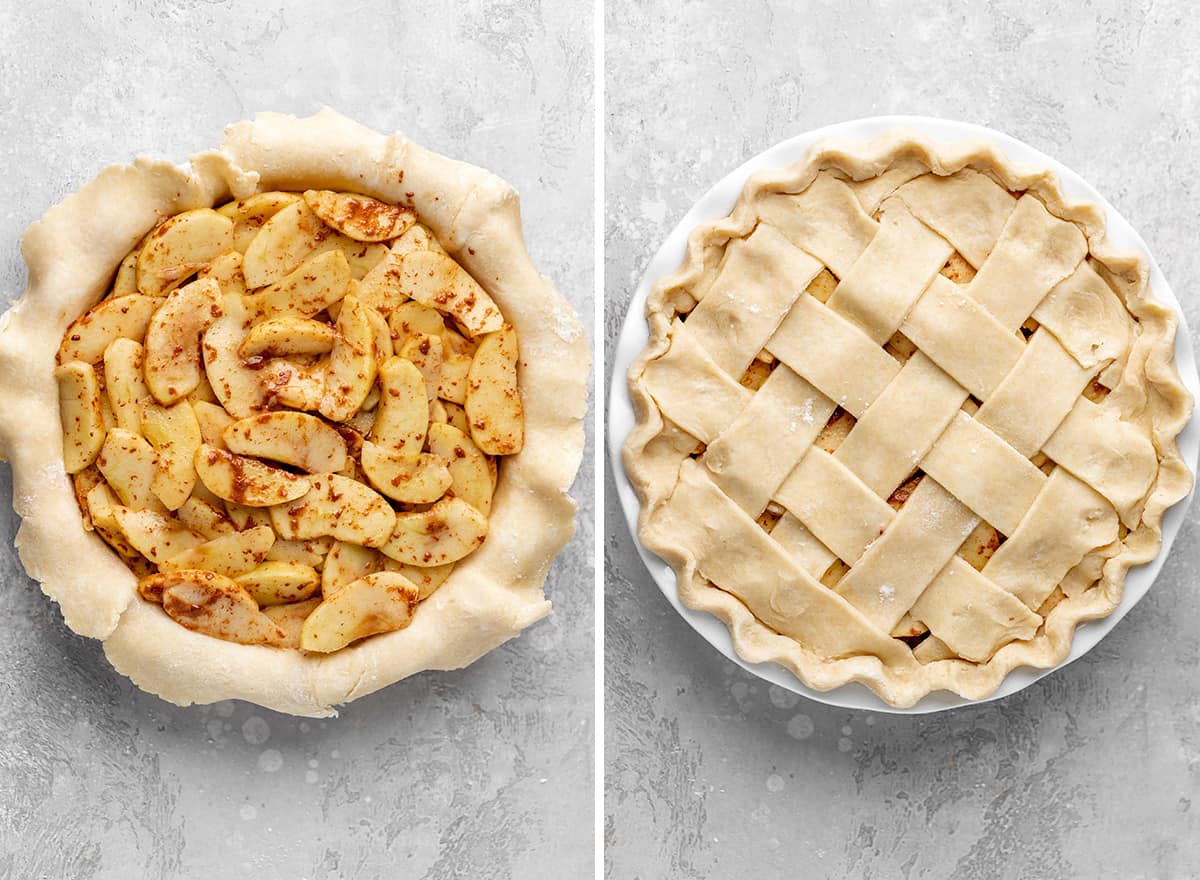
Then add the apple pie filling to the bottom pie crust.
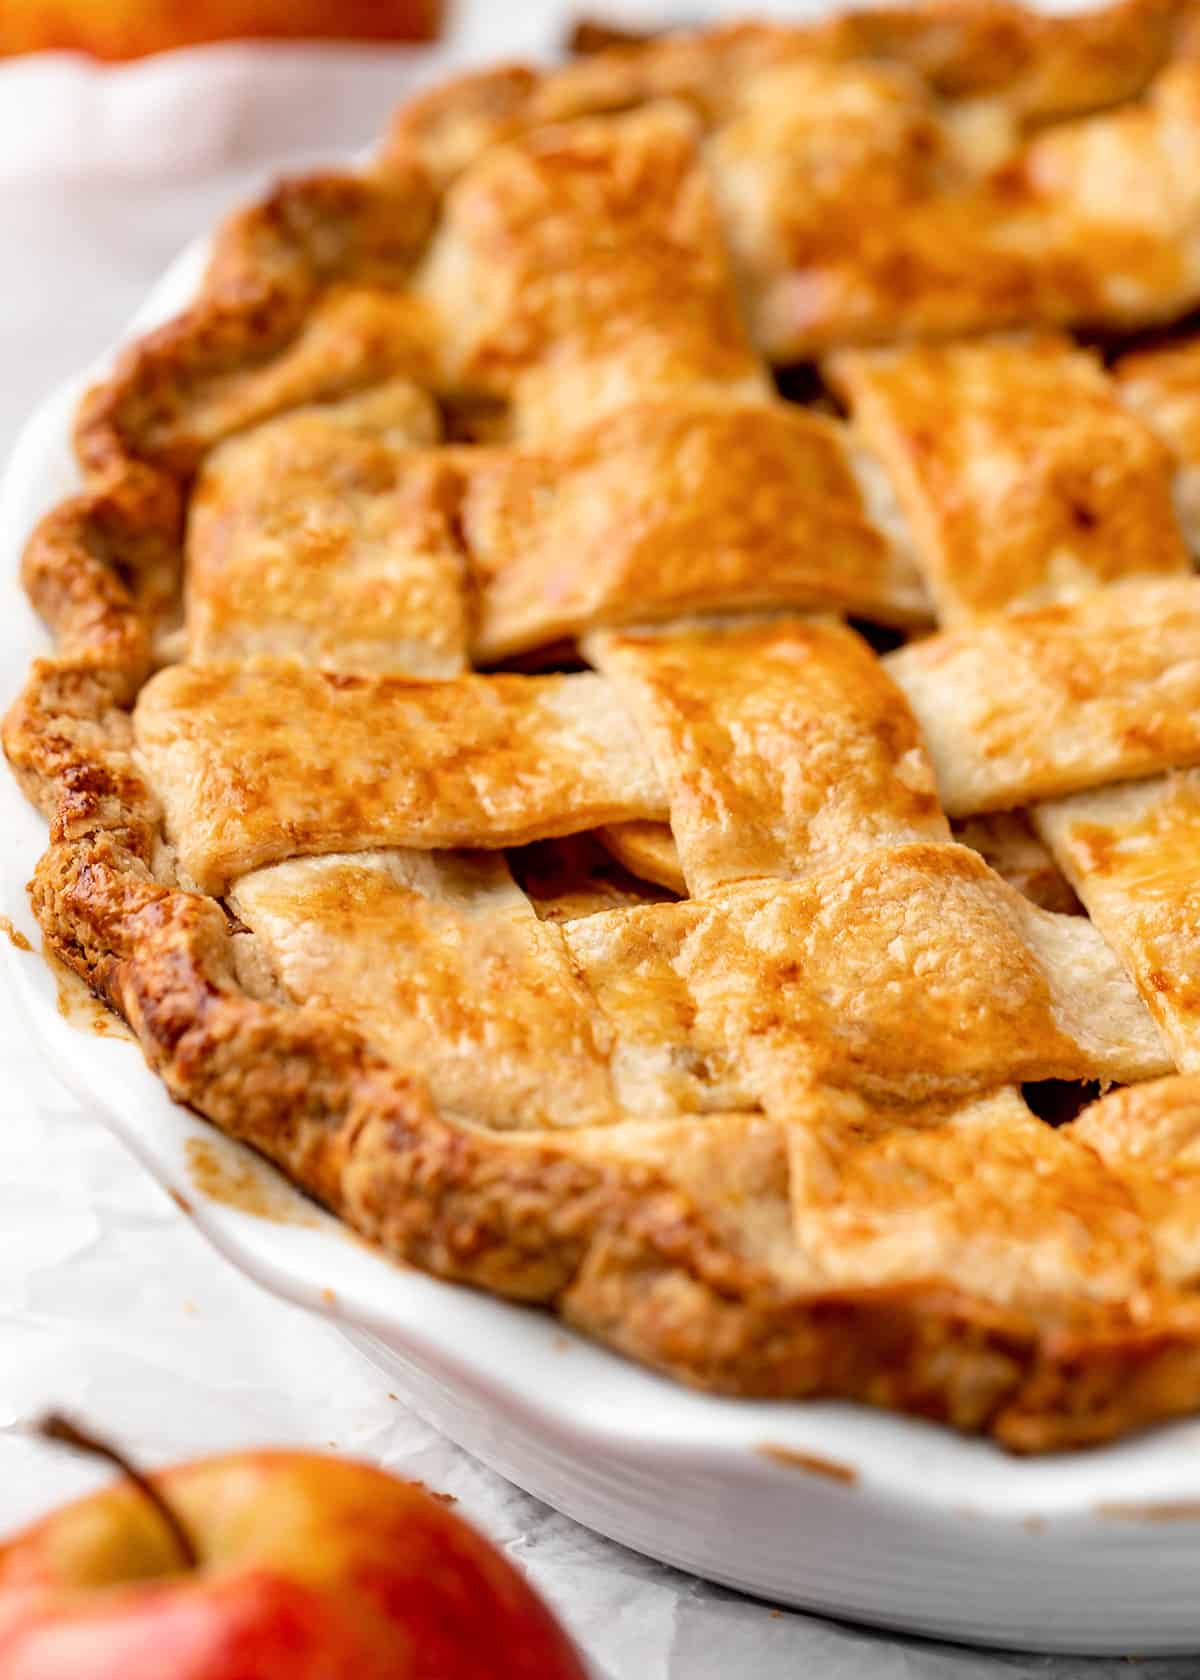
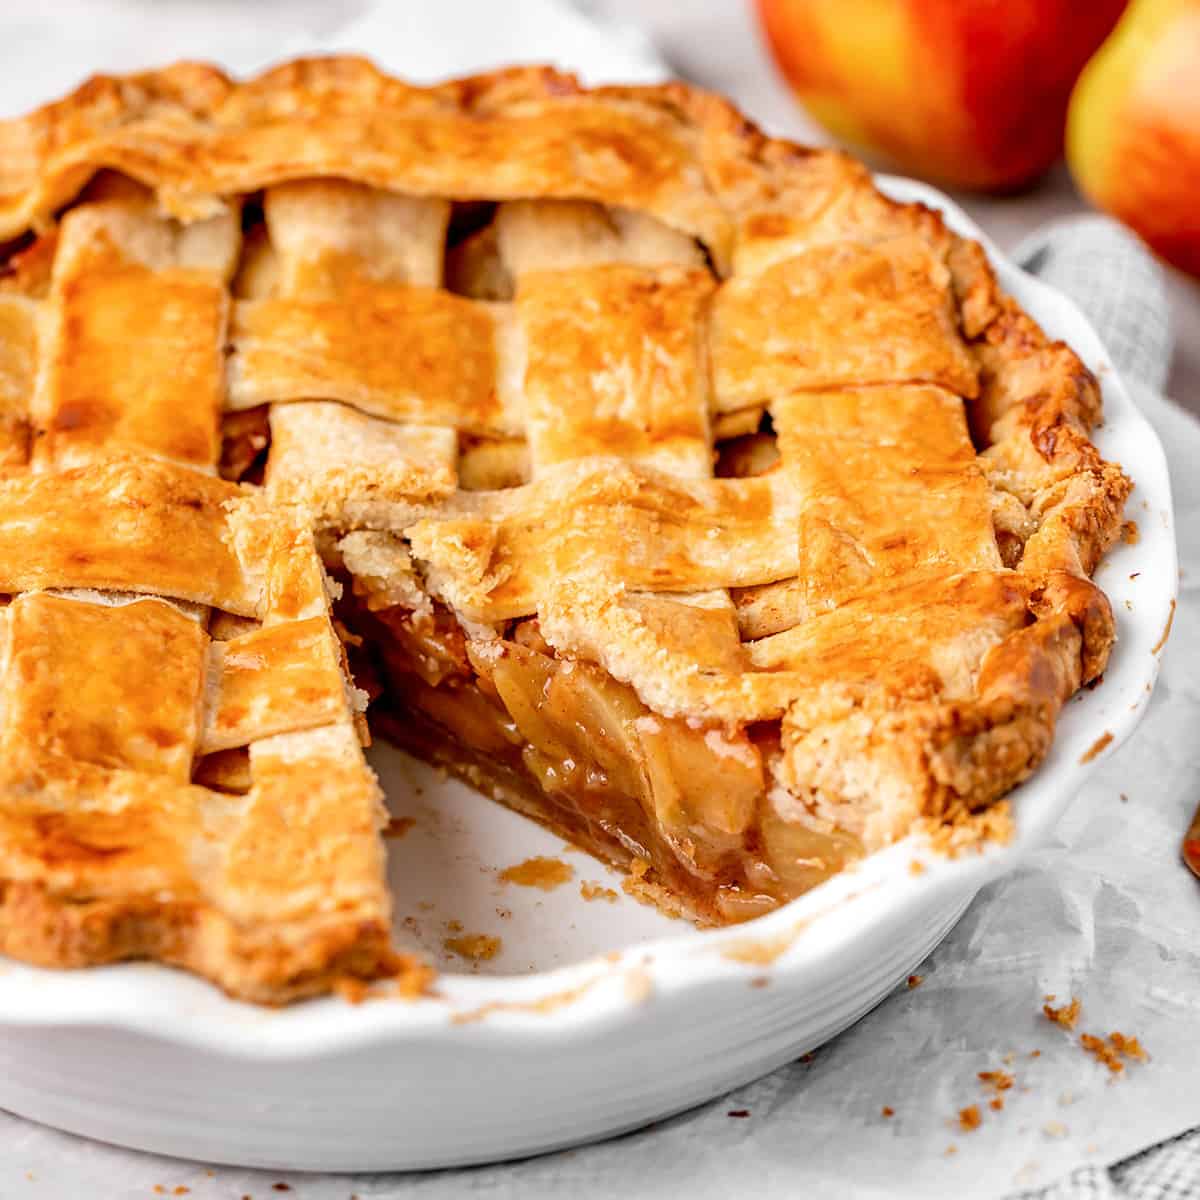
Next, place the second crust on top of the apple filling. Make any design you’d like, lattice (see my tutorial on how to make a lattice pie crust), shapes, etc. Or you can put the solid crust on top and cut vents into it to ensure steam can escape during baking.
If you have leftover pie crust, use it to make these pie crust cookies!
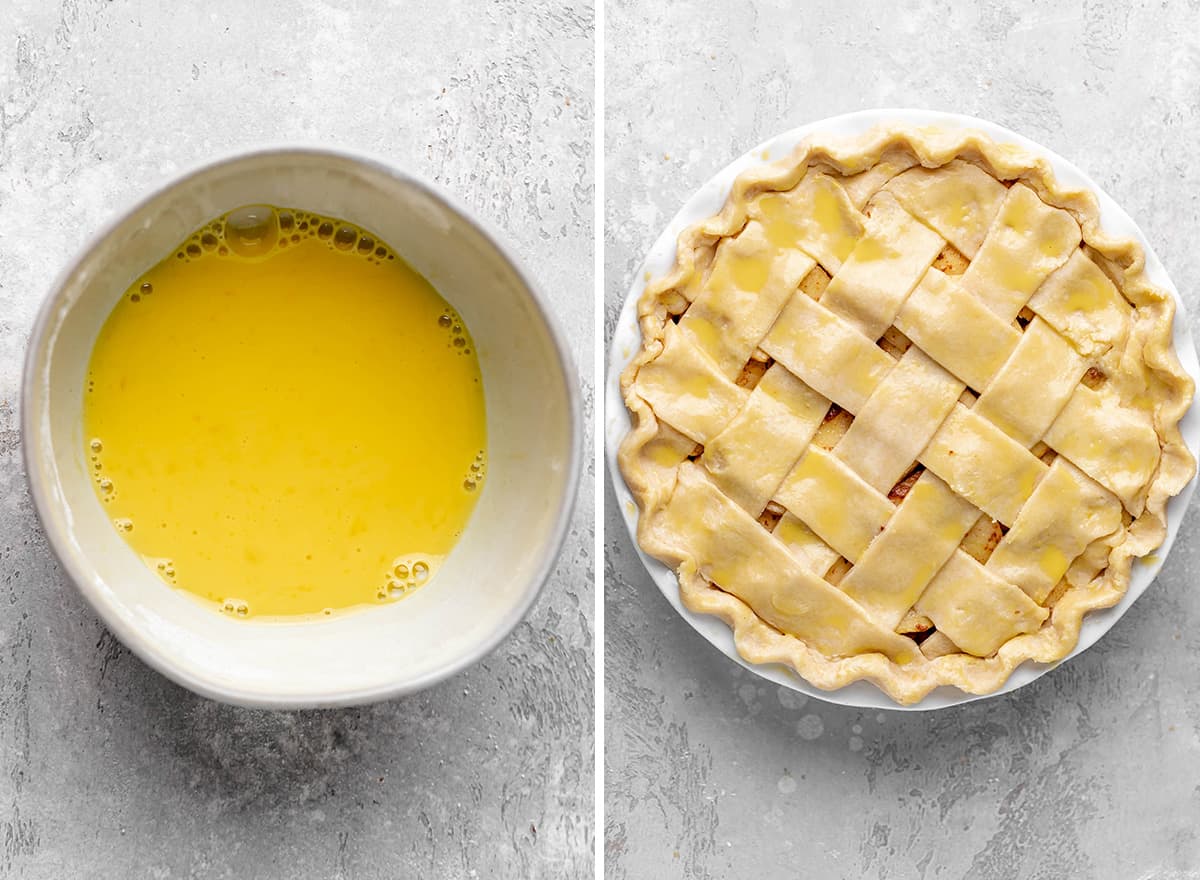
Optional Egg Wash
I’ve made this apple pie recipe many times, with and without the wash. Here are some benefits of using an egg wash on pie crust:
- Golden-brown color
- Sugar adheres to it if you’d like to add a sprinkle to the outside.
- Makes a heartier crust.
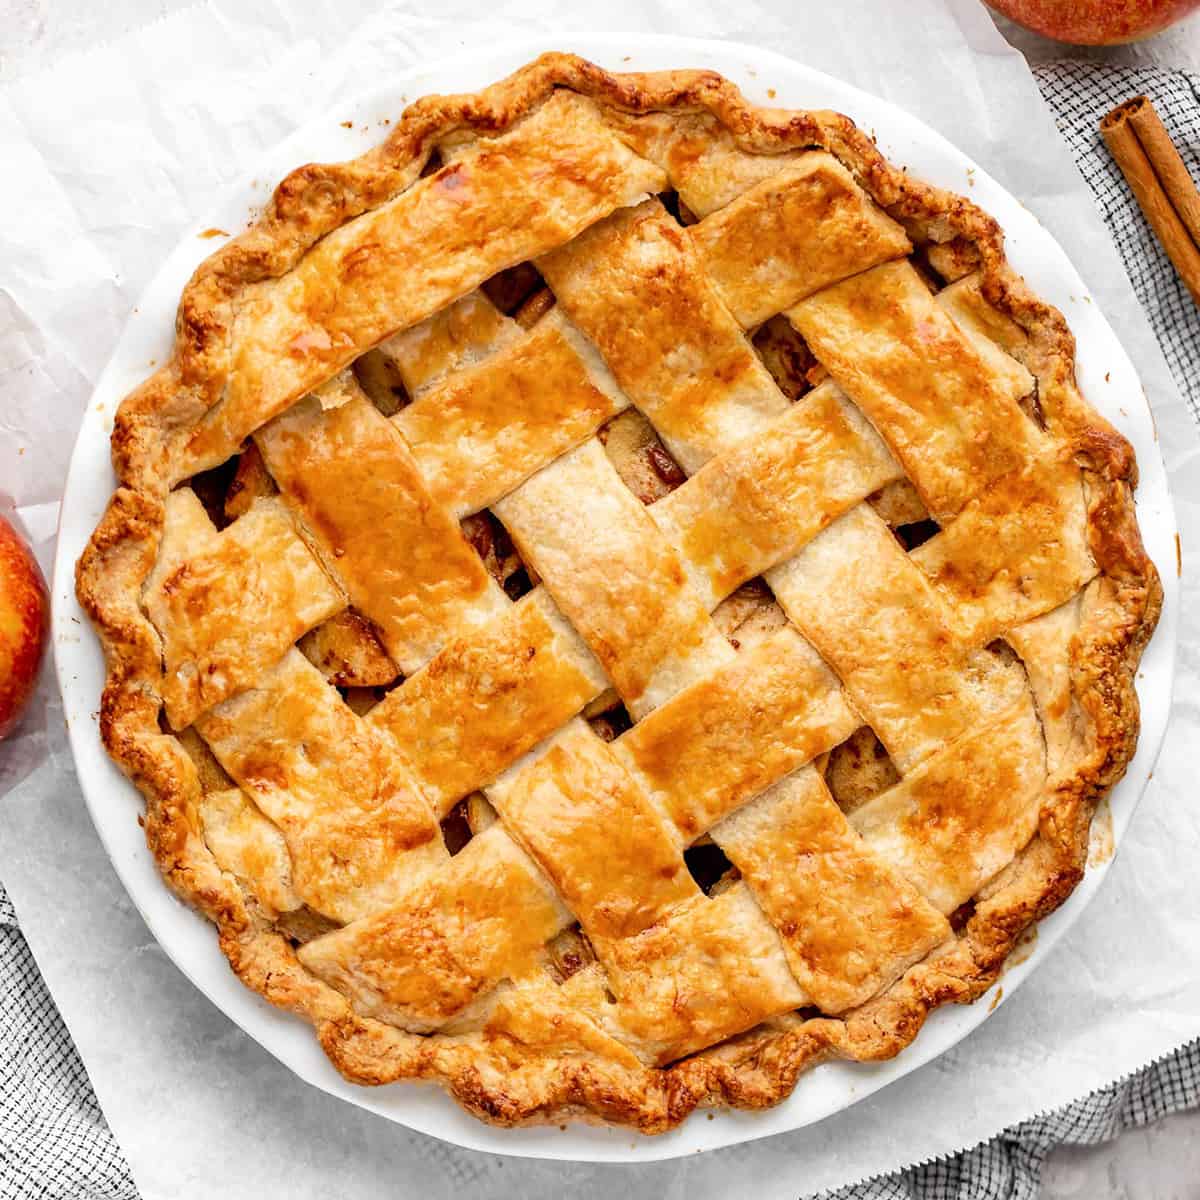
Bake
In this apple pie recipe, the pie is baked for 60-70 minutes at 350 degrees Fahrenheit (177 degrees Celsius).
If the entire top crust starts browning too quickly, you can cover it loosely (tent it) with foil to prevent further browning until the last 10-15 minutes of baking time.
If you don’t have a convection oven, be sure to bake the apple pie on the lower rack in your oven to ensure the bottom crust cooks before the top is too brown.
Use a Pie crust shield
I always use a pie crust shield when I bake pies. It ensures that the filling is cooked (even though the apples are pre-cooked in this pie) before the crust gets too brown. If you don’t have a pie crust shield then you can cut out a piece of aluminum foil to fit around the outer edge of the pie.
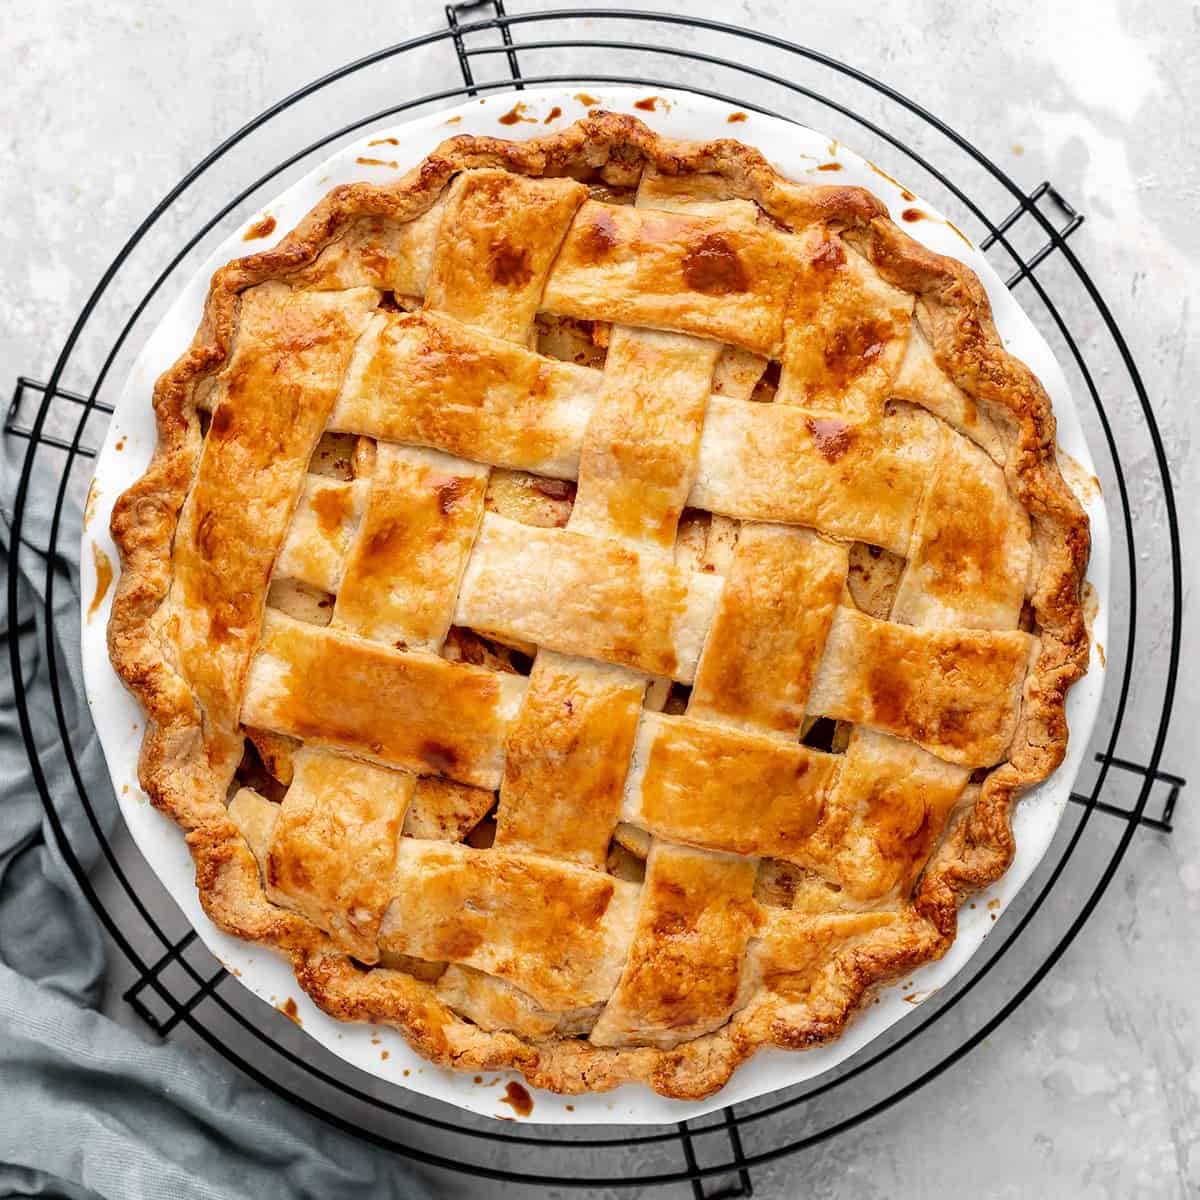
Cool
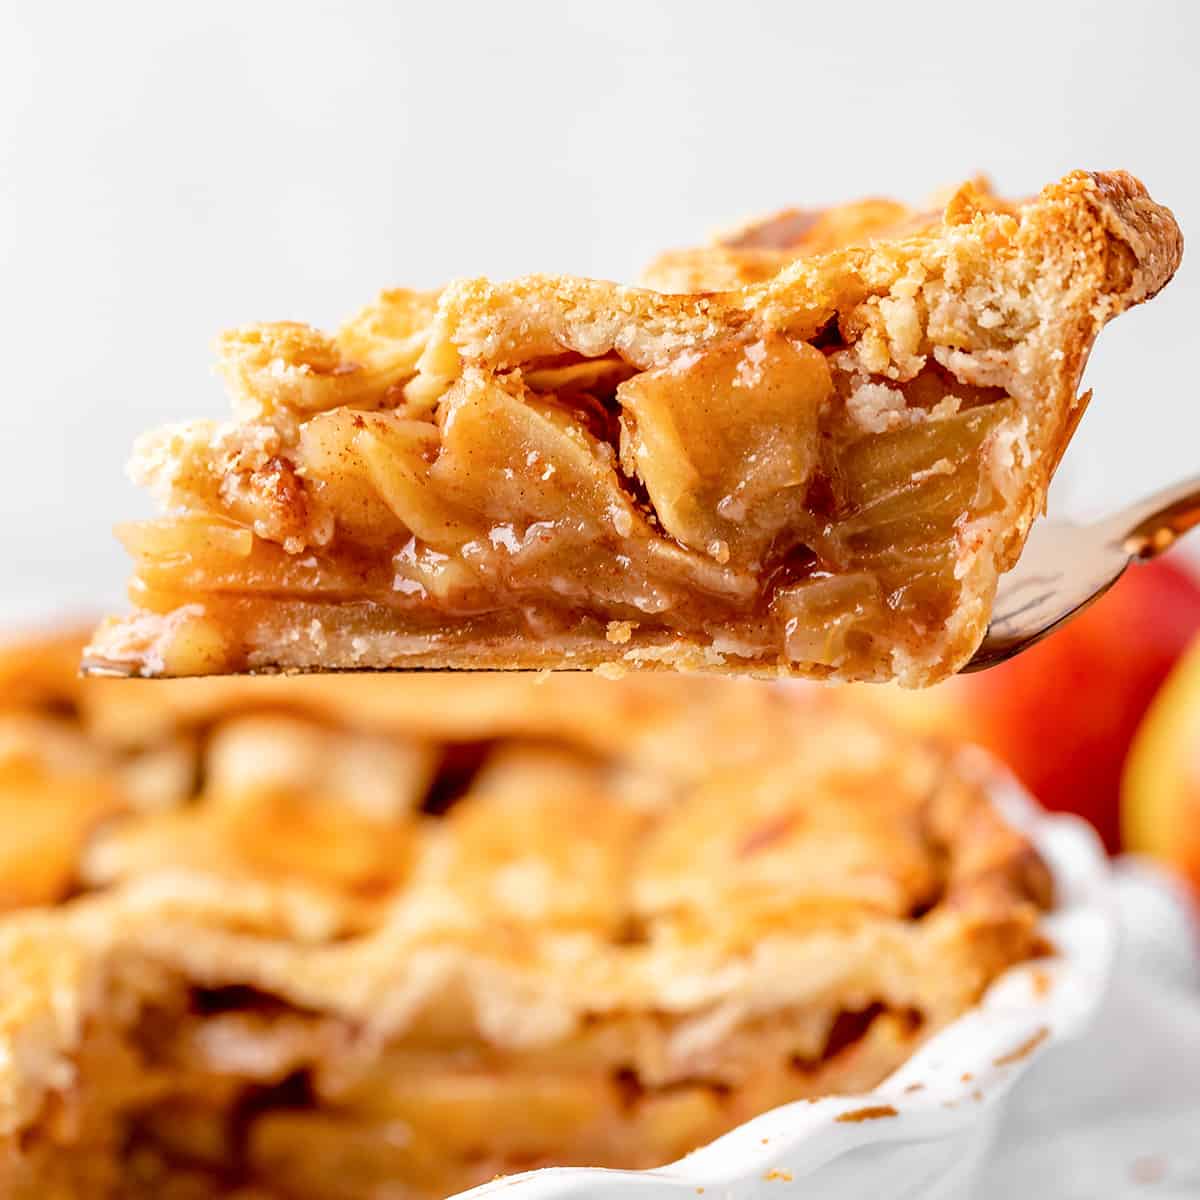
This apple pie is best after it has cooled completely. I recommend letting it cool on a wire rack for at least 3 hours, preferably longer.
It’s a great pie to make the day before an event or holiday because it’s even better the second day. The filling thickens as it cools and the crust hardens.
Serve
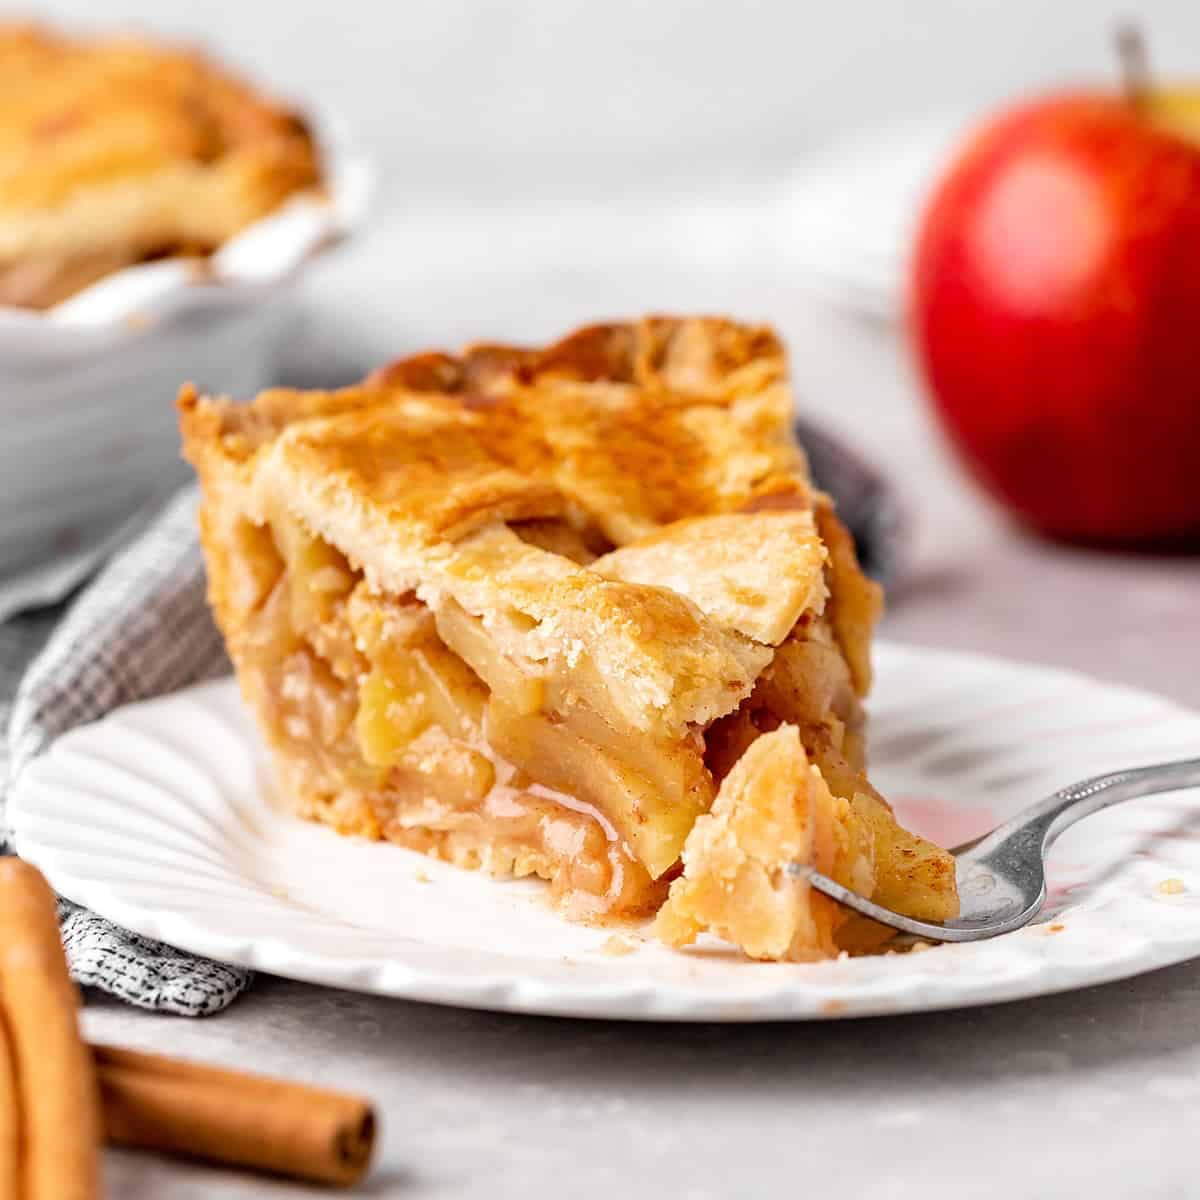
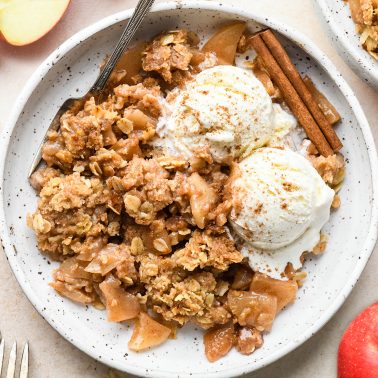
Serve this apple pie with a dollop of fresh homemade whipped cream or a scoop of vanilla ice cream for the perfect fall treat!
Store
Store leftovers in an airtight container at room temperature for up to 3 days or in the refrigerator for up to 1 week.
Freeze
1. Freeze the entire pie. Bake the pie & let it cool to room temperature. Then wrap it tightly with plastic wrap and foil and freeze for up to 2 months. Thaw in the refrigerator overnight before cutting and serving.
2. Freeze individual slices. Put the slices of apple pie on a baking sheet and put them in the freezer to flash-freeze. Then, once they’re frozen, wrap them in plastic wrap and store in an airtight container for up to 2 months. Thaw in the refrigerator for about 6 hours.
Apple Pie Recipe FAQs
Everyone has their favorite apple variety to bake with, mine is a tossup between Pink Ladies and Granny Smith. However, I usually just choose a variety that’s on sale! I love the sweet/tart contrast! Here are some of my suggestions for apples to use in this apple pie recipe!
Pink Ladies (aka: Crisps Pink)
Granny Smith
Fuji
Honeycrisp
Jonagold
Jazz
Braeburn
Gala
Golden Delicious
Yes absolutely. This is why this recipe uses that method. It helps prevent soggy crust.
Both work very well. I prefer flour, but have used cornstarch with great results.
Be sure to use a colander to let the water drain out of your apples as they cool before mixing the dry ingredients into them.
Let the apple pie cool completely before serving. This will thicken up the filling and harden the crust.
Do not add any excess water to the pie when you add the filling.
Pre-baking the apples and draining them before adding them to the pie is the way I do this. If you don’t do this step, you could end up with a soggy bottom crust and a pie that doesn’t set up well.
You can freeze it two ways:
1. Freeze the entire pie. Bake the pie & let it cool to room temperature. Then wrap it tightly with plastic wrap and foil and freeze for up to 2 months. Thaw in the refrigerator overnight before cutting and serving.
2. Freeze individual slices. Put the slices of apple pie on a baking sheet and put them in the freezer to flash-freeze. Then, once they’re frozen, wrap them in plastic wrap and store in an airtight container for up to 2 months. Thaw in the refrigerator for about 6 hours.
If you make and love my recipes, it would mean so much to me if you would leave a comment and rating! And don’t forget to follow along on Instagram, Pinterest, Facebook, TikTok and Youtube – be sure to tag @joyfoodsunshine and use the hashtag #joyfoodsunshine so I can see your creations!

Best Apple Pie Recipe
Video
Ingredients
Apple Pie Filling:
- 10 cups sliced apples peeled, cored and sliced (about 3.5 lbs)
- ½ cup granulated sugar
- 3 Tablespoons all-purpose flour
- 2 Teaspoons ground cinnamon
- Dash of nutmeg optional
Double Pie Crust:
- 2 ½ cups all-purpose flour
- 1 teaspoon sea salt
- 2 Tablespoons granulated sugar
- 1 cup butter COLD, cut into 1 inch pieces
- ½ cup ice cold water
Instructions
Make the Crust
- Place all pie crust ingredients in the order listed into a food processor fitted with an “S” blade process for 15-40 seconds, or until the mixture resembles a coarse meal and holds together when pinched.
- Remove dough from processor (it will be crumbly), transfer it to a large bowl or flat surface, and form into two, equal-sized round discs.
- Wrap both discs of dough in plastic wrap and refrigerate for at least 2 hours, or overnight.
Make the Filling
- Place the peeled and cored apples in a microwave safe dish and cook for 6 minutes, until apples are slightly soft.
- While apples are in the microwave, in a small bowl, mix together sugar, flour cinnamon and nutmeg.
- Once apples are finished cooking in the microwave, put them in a colander to drain excess water. Let them cool in the colander for at least 10 minutes.
- Transfer cooled & drained apples to a bowl, add dry ingredient mixture and stir until it’s evenly distributed.
Assemble
- Preheat your oven to 350 degrees Fahrenheit (177 degrees Celsius).
- Remove crusts from refrigerator and roll into circles, about ¼ inch thick. (you may need to let them sit on the counter at room temperature for 5 minutes, or until it rolls a little easier).
- Gently place one round crust into pie plate.
- Pour filling into unbaked pie crust.
- Place second crust on top of the apple pie filling and shape the edges. Cut 4 slits in the top to vent steam. (or make a lattice crust).
Bake & Cool
- Place a pie crust shield or aluminum foil over the outer crust of the pie to protect it from burning. Remove shield in the last 10-15 minutes of baking if it doesn’t begin to brown under the shield)
- Bake the pie on the middle/lower rack in the preheated oven for 60 minutes or until the filling begins to bubble and the top is lightly browned.
- Let cool for at least 3 hours (the filling thickens as it cools).
- Serve with vanilla ice cream.
Notes
- All-purpose flour. Pastry flour works well in place of all-purpose flour. For a gluten-free option, use a 1:1 all-purpose gluten-free flour.
- Salted butter: Unsalted butter and vegan butter (like Earth balance, which is what was used to make this dairy-free pumpkin pie), are good substitutions.
- Egg Wash (eggs & milk). this is optional. Heavy cream or half and half can also be used in place of milk. Or you can omit the egg and just use milk.
- Apples. Choose your favorite apple variety, I prefer a sweet/tart variety like pink ladies.
- Sugar. You can substitute up to half of the granulated sugar with brown sugar.
- All-purpose flour. Cornstarch or an all-purpose gluten-free flour blend both work well.
- Nutmeg. This is optional but recommended for a richer flavor
- Be sure to use a colander to let the water drain out of your apples as they cool before mixing the dry ingredients into them.
- Let the apple pie cool completely before serving. This will thicken up the filling and harden the crust.
- Do not add any excess water to the pie when you add the filling.
2. Freeze individual slices. Put the slices of apple pie on a baking sheet and put them in the freezer to flash-freeze. Then, once they’re frozen, wrap them in plastic wrap and store in an airtight container for up to 2 months. Thaw in the refrigerator for about 6 hours.
Nutrition
Nutrition information is automatically calculated, so should only be used as an approximation.


This was super easy to make. I baked it for an extra 10 minutes to get it a nice brown color on top and heated it up at 350 degrees the next night for 20 minutes or so for a party. I wasn’t sure how it would taste becasue the apples looked pretty firm under the lattice crust but it was delicious. All the guests loved it served with ice cream. Some even wanted a care package to take home. I will definitely make this pie again.
I’m so happy you and your guests love it!
I’ve made this apple pie a few years in a row now and it’s such a hit! I love it!
This year I’ve decided to make it the day before Thanksgiving, would you re-heat before serving? Or just set it out early enough to get it to room temp? Thank you!
I love reheating it in the oven for 10ish minutes before serving!
We don’t have a food processor. Was thinking of making this for thanksgiving. Can I use a hand mixer to make the crust?
You can mix the crust by hand using a fork or pastry cutter.
I don’t have a food processor. I use a dough knife or just 2 butter knives and keep cutting it until it’s a crumb texture then I start adding tablespoons of ice water and mix with my hands at that point. It’s easy. Good Luck
That’s a great way to do it! I also use a fork or pastry cutter when I don’t want to pull out the food processor!
We don’t have a microwave, how else can I precook the apples?
On the stovetop!
I made your apple pie today. Watching the video made it look so easy. It’s a bit labor intensive washing, peeling and slicing apples, which usually keeps me from making apple ANYTHING! But I wanted to try serving this for Thanksgiving so today I did a trial run. I measured out the crust ingredients exactly into my food processor. My dough held together but felt very heavy. I formed into 2 disks and wrapped up tightly over night. When my apples were ready, I had to leave the dough disks out for a while before they were pliable enough to roll out. Your recipe says roll dough out from 1/4 to 1/2 inches. 1/2 inches seems way too thick to me, so I went closer to 1/4″. I had trouble getting my rolled out crust off of the parchment paper (which always happens to me). It wasn’t beautiful but very rustic. My husband loved it. Me too. I’ll just have to try again next week, maybe 2 days ahead for less stress on my part, lol. Happy Thanksgiving 🦃
I’m asking for help and advice. Anytime I make an all butter crust the butter oozes out of dough when I bake it. I’m left with a hard crust that I can pick up in one piece. It’s thrown away for sure. I’ve used cubed butter put in freezer x15 minutes, place whole pie in fridge x 45 minutes to no avail. I’ve even just baked the pie. Butter oozes out every time. So what is the secret? I’ve had luck with butter and shortening as the fat for pie dough.
I wish I could be in the kitchen with you while you make this and try to troubleshoot. Do you mix the crust by hand or use a food processor?
Very easy very good
Thank you so much, Emily!
First time baking apple pie! I choose this recipe because it seems easy to make ! …whatever it works out or not, I just loved making this with my daughter! …thanks for sharing your recipe !!
This is absolutely the best apple pie I’ve ever made!
Thank you so much, it will be the only recipe I’ll use from now on!
The crust was flaky, apples were perfectly cooked,and everyone loved it!
Hi,
instead of vegan butter, can I use coconut oil for the crust?
YES!!!! I love apple pie. It’s my favorite type of pie in any form from Dutch apple pie to regular apple pie. I loved your tip about not lowering the temperature and keeping it steady because your crust looks so perfectly, evenly baked.