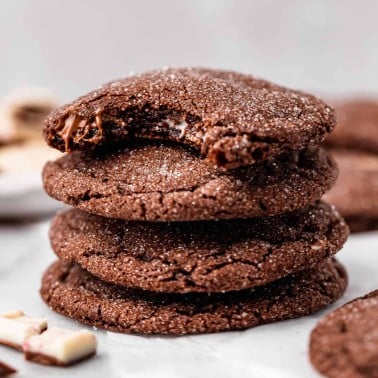
Chocolate Thumbprint Cookies
Updated Feb 15, 2024
This post may contain affiliate links. Please read our disclosure policy.
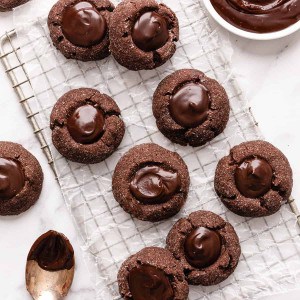
Chocolate thumbprint cookies – a melt-in-your-mouth chocolate cookie is filled with a rich chocolate ganache. A simple but impressive holiday cookie for chocolate lovers that’s easy to make!

When it comes to dessert I firmly believe there is no such thing as too much chocolate – hence these chocolate thumbprint cookies!
They to traditional thumbprint cookies, but every component contains chocolate! A rich, chocolate, shortbread-like cookie is baked and filled with a luscious chocolate ganache.
They’re easy to make with simple ingredients, and are the perfect Christmas cookie for chocolate lovers.

Chocolate Thumbprint Cookies: Ingredients & Substitutions
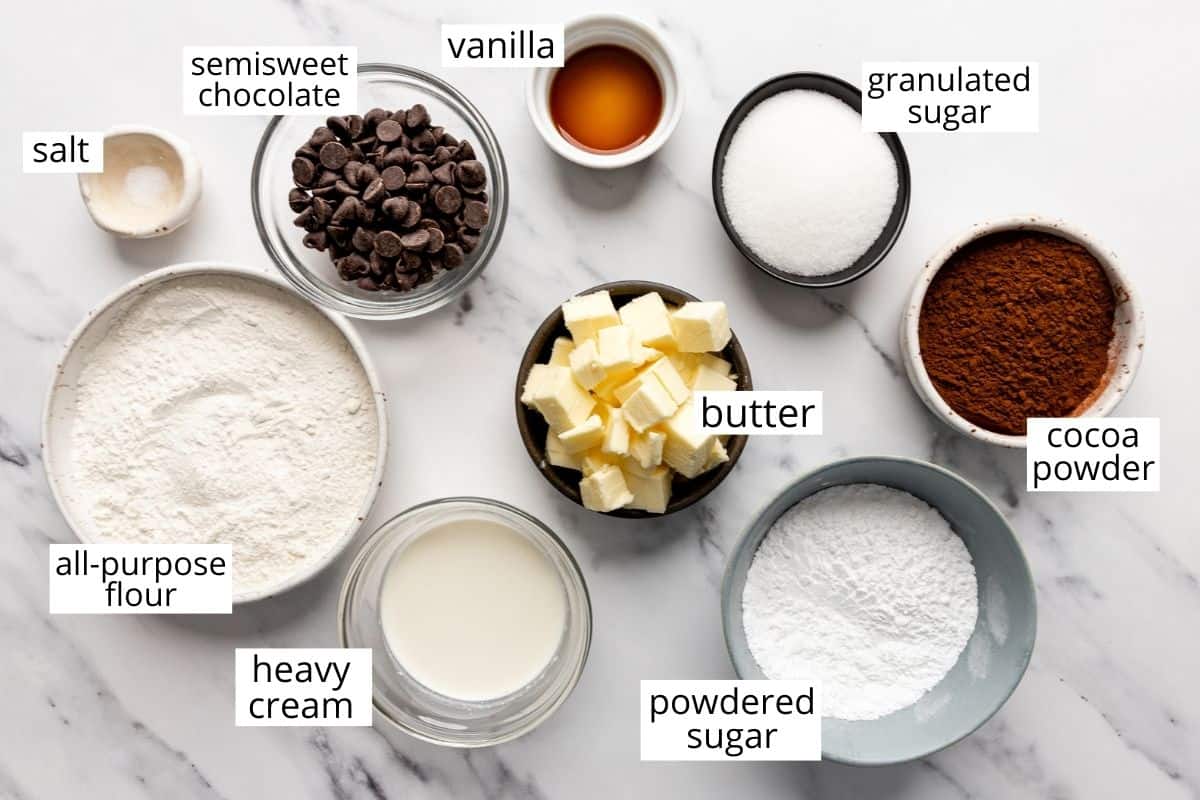
- All-purpose flour. I suspect using an all-purpose gluten-free baking flour would work well, but I have not tried it (report back if you do).
- Salted butter. Unsalted butter works well in this recipe.
- Powdered sugar. white granulated sugar also works in this recipe, however I prefer the texture with powdered sugar!
- Pure vanilla extract. You can substitute up to 1 tsp of the vanilla extract with another extract, if preferred (peppermint, almond, etc.)
- Semisweet chocolate. I usually use chocolate chips (easy) but you can use discs, chopped bars, etc.

How to make Chocolate Thumbprint Cookies
Let’s walk through this recipe step-by-step, and don’t forget to watch the video.
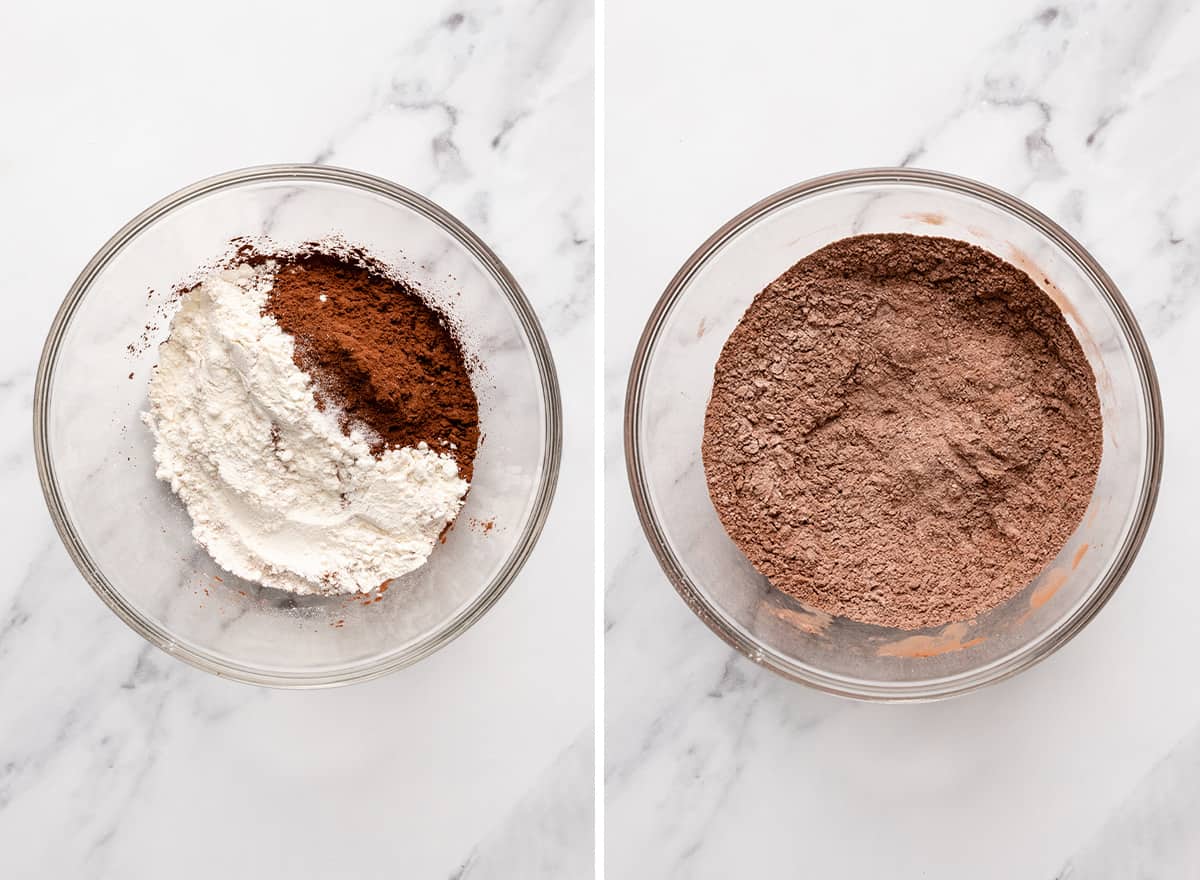
Begin by combining the dry ingredients in a small bowl, then set the mixture aside.
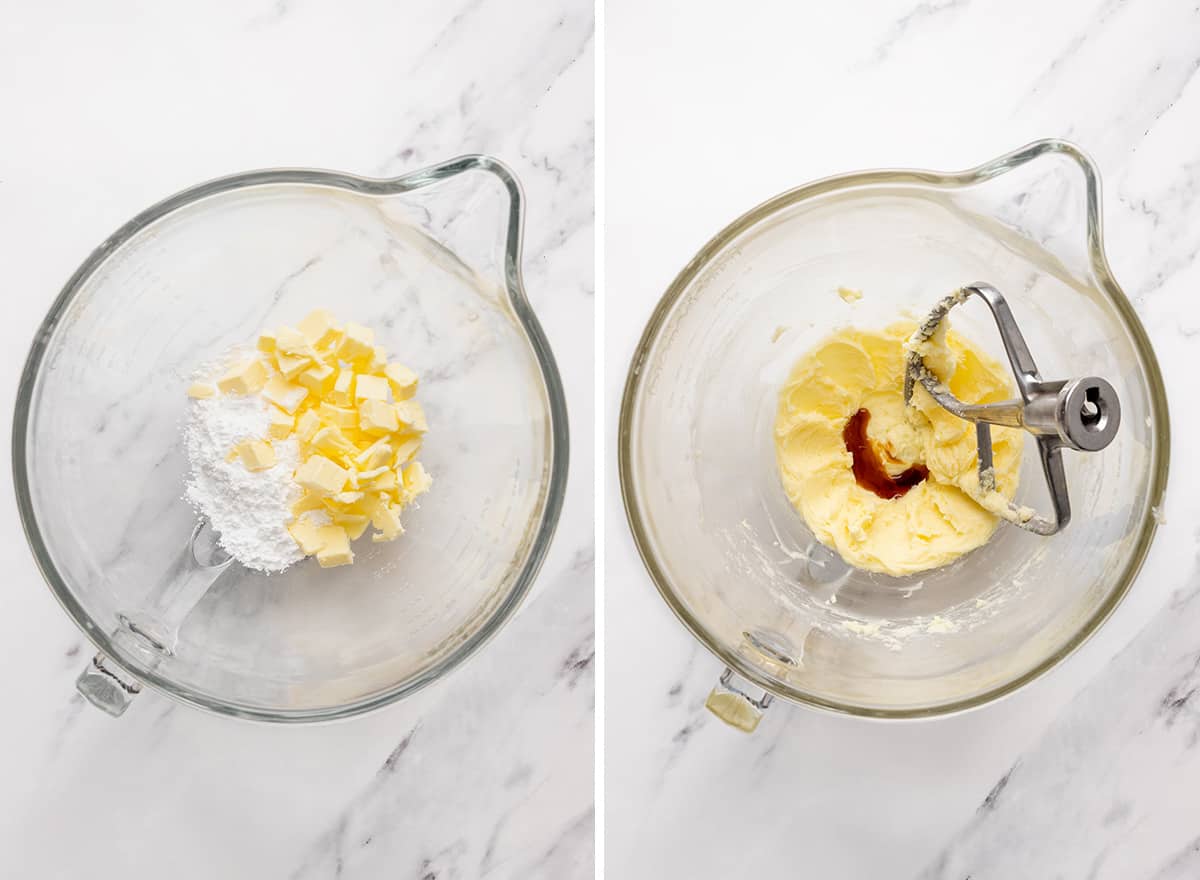
Next, beat the butter and powdered sugar together until fluffy (about 1 minute) either in the bowl of a standing mixer or in a large bowl with a handheld mixer.
Then, add vanilla and beat to combine.
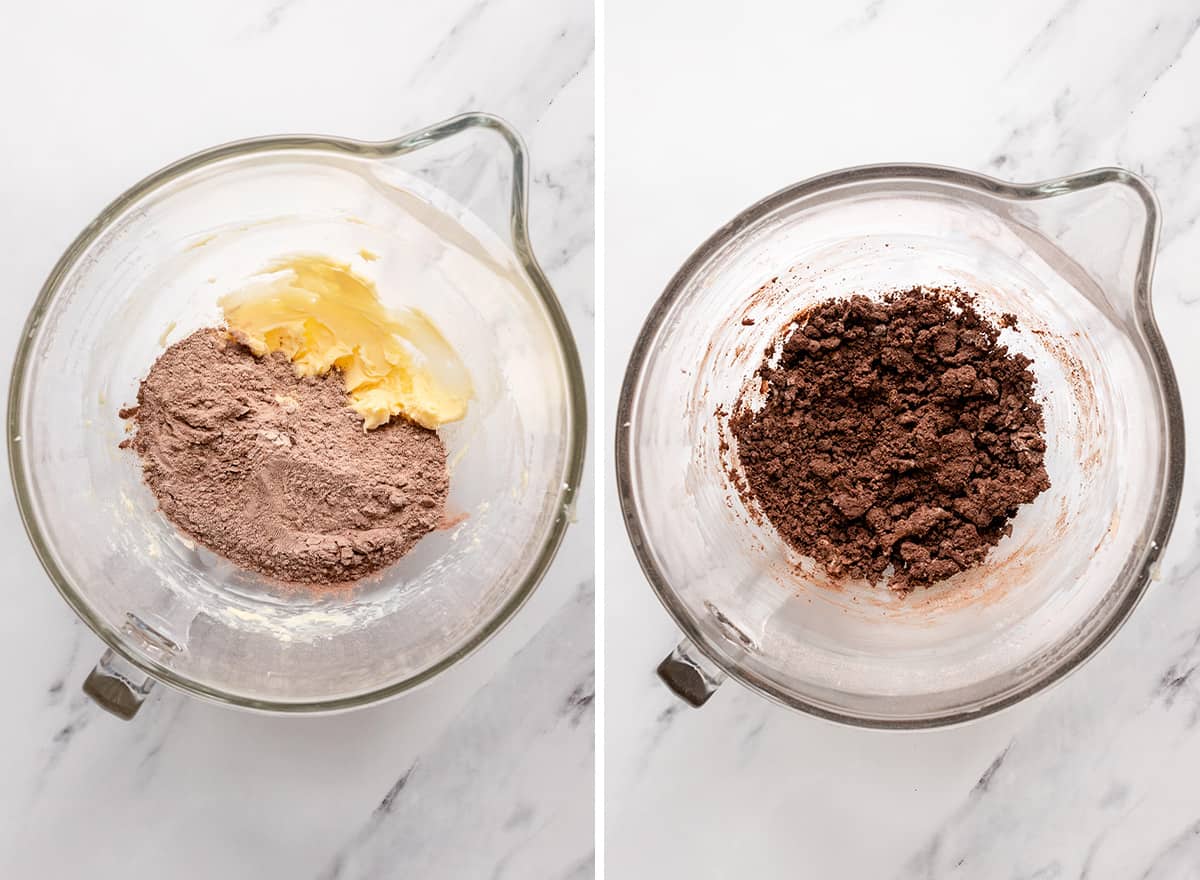
Next, add the dry ingredient mixture and beat on low speed, then increase to medium-high and beat until the mixture forms large crumbs and easily sticks together when pinched (about 1 minute).
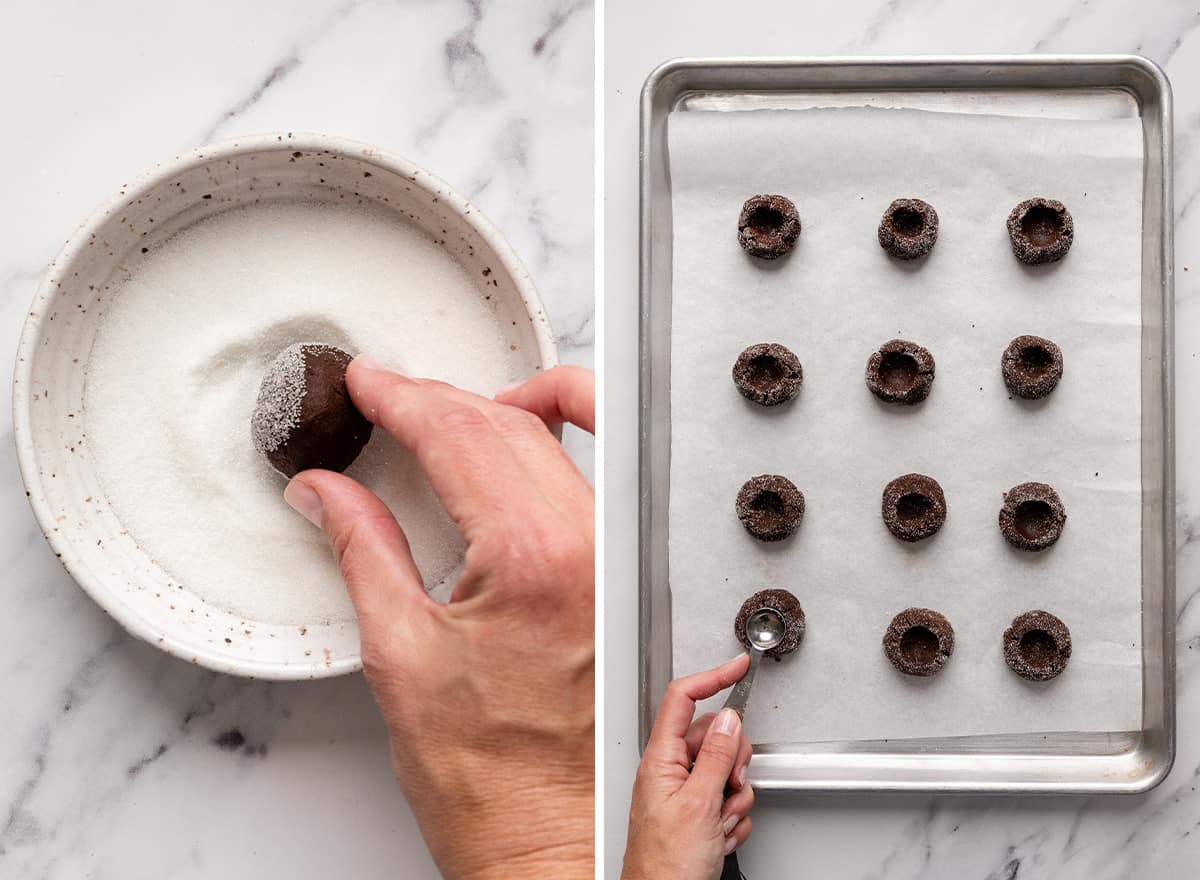
Then, measure out 1 tablespoon portions of dough and roll each one into a ball, then roll it in granulated sugar.
Press the center down gently with a round, 1 teaspoon measuring spoon, if the dough cracks around the spoon, gently form it back together with your fingers. Evenly space the cookies on a prepare baking sheet.
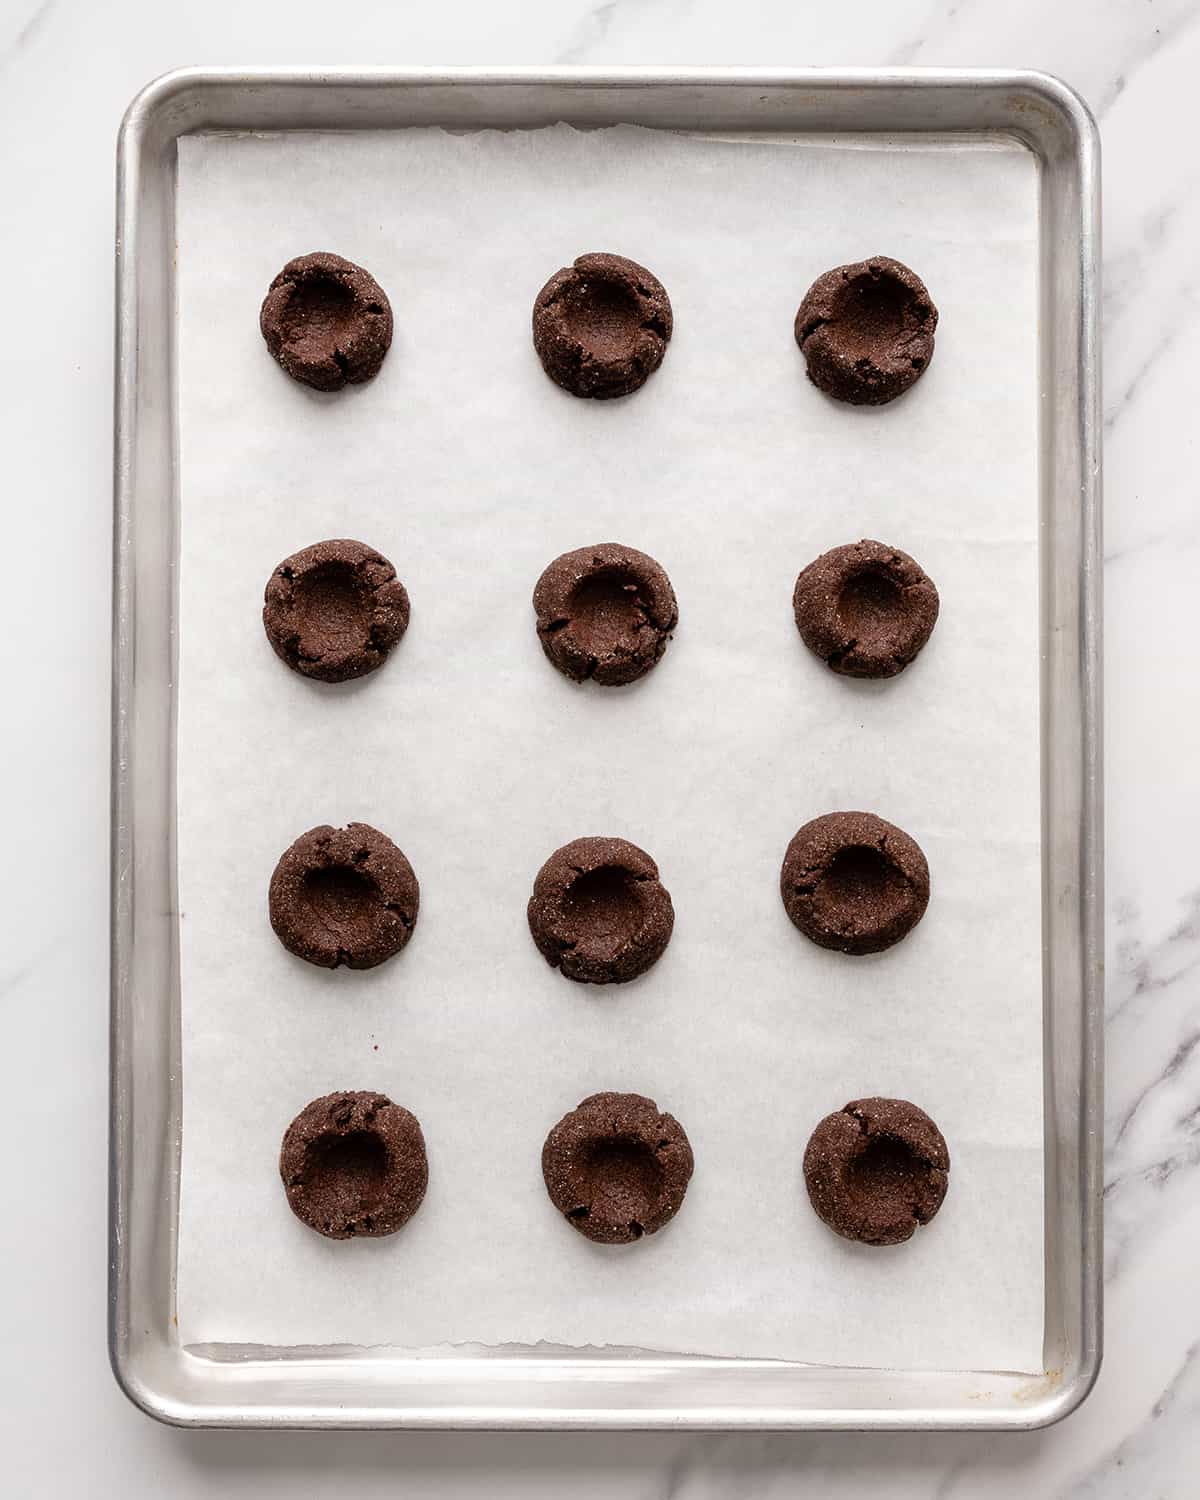
Then, bake the chocolate thumbprint cookies for 8-9 minutes. If the wells puff up, gently press them back down with the teaspoon when you remove them from the oven.
Let the cookies cool on the baking sheet for 5 minutes before transferring to a wire rack to cool completely.
Make the Chocolate Filling
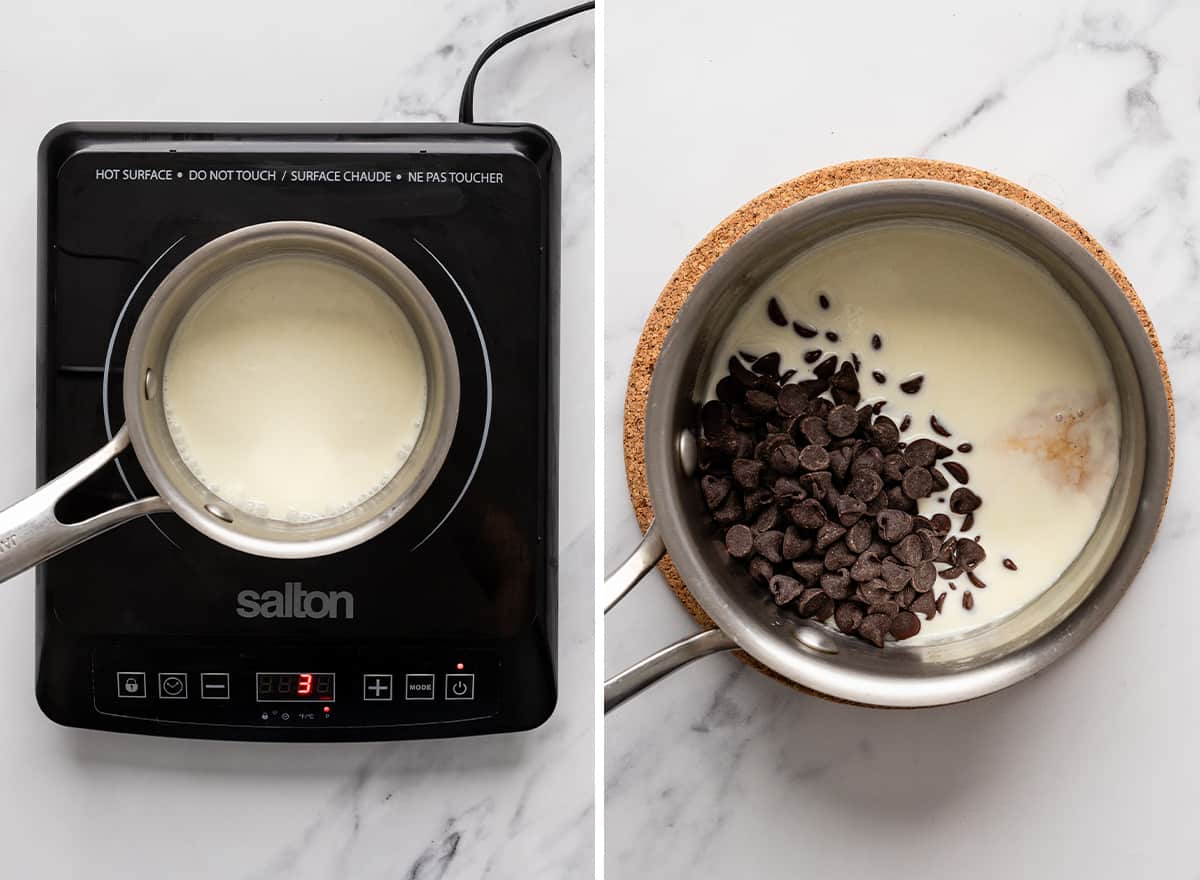
While the cookies are cooling, make the chocolate ganache by heating ½ cup heavy cream in a small saucepan until it just begins to boil around the edges.
Then, remove it from the heat and whisk in the chocolate chips until smooth and glossy.
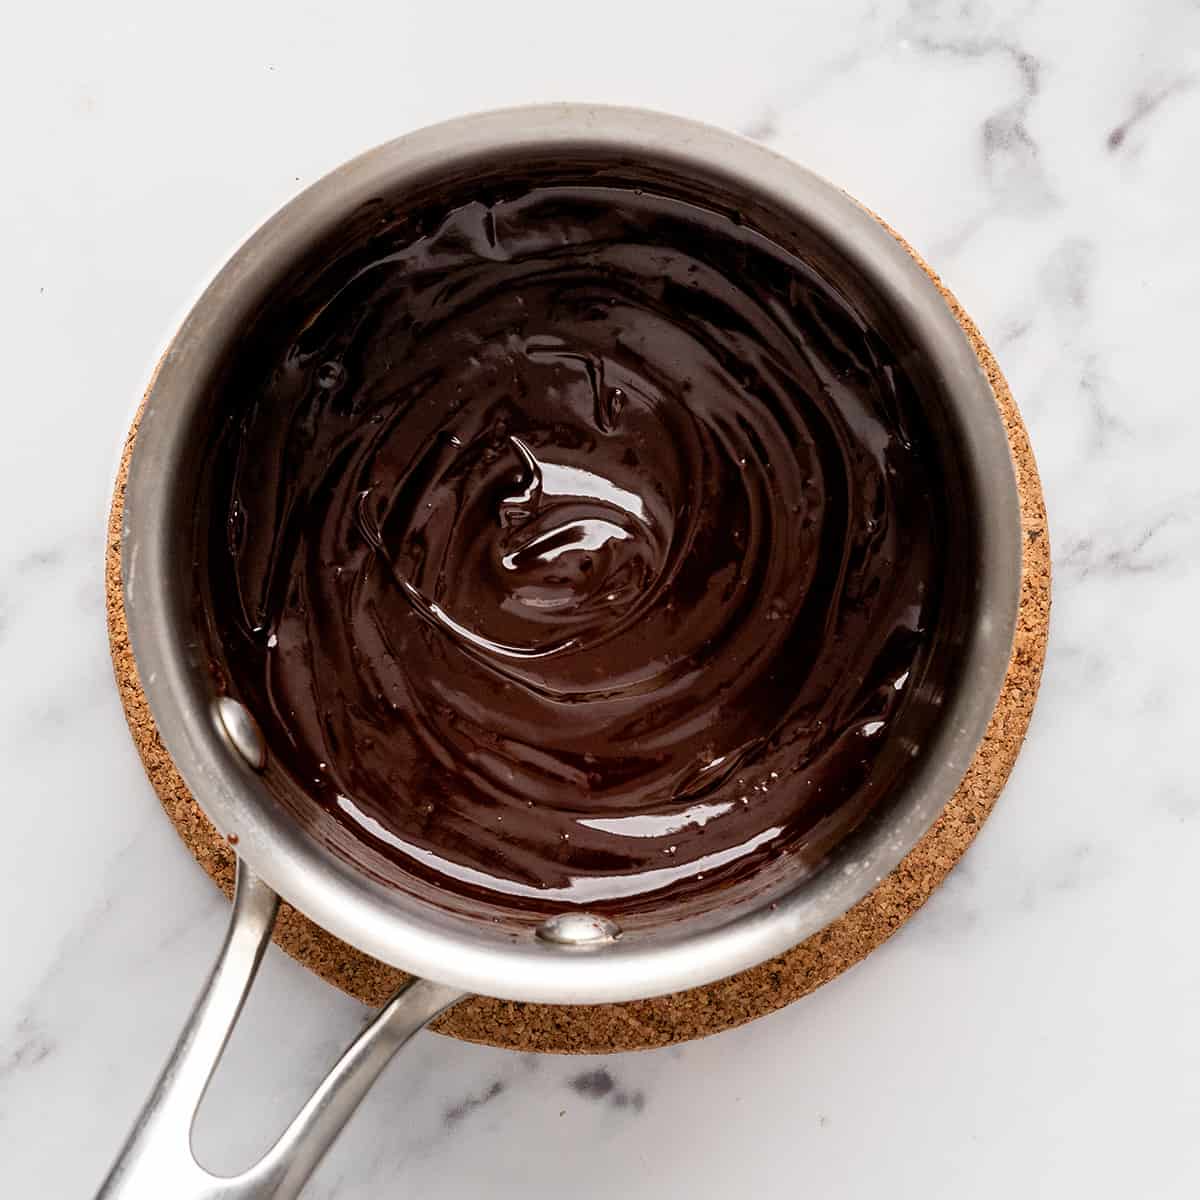
Once smooth and all the chocolate chips have melted, whisk in the vanilla and let it cool slightly until it’s thickened.
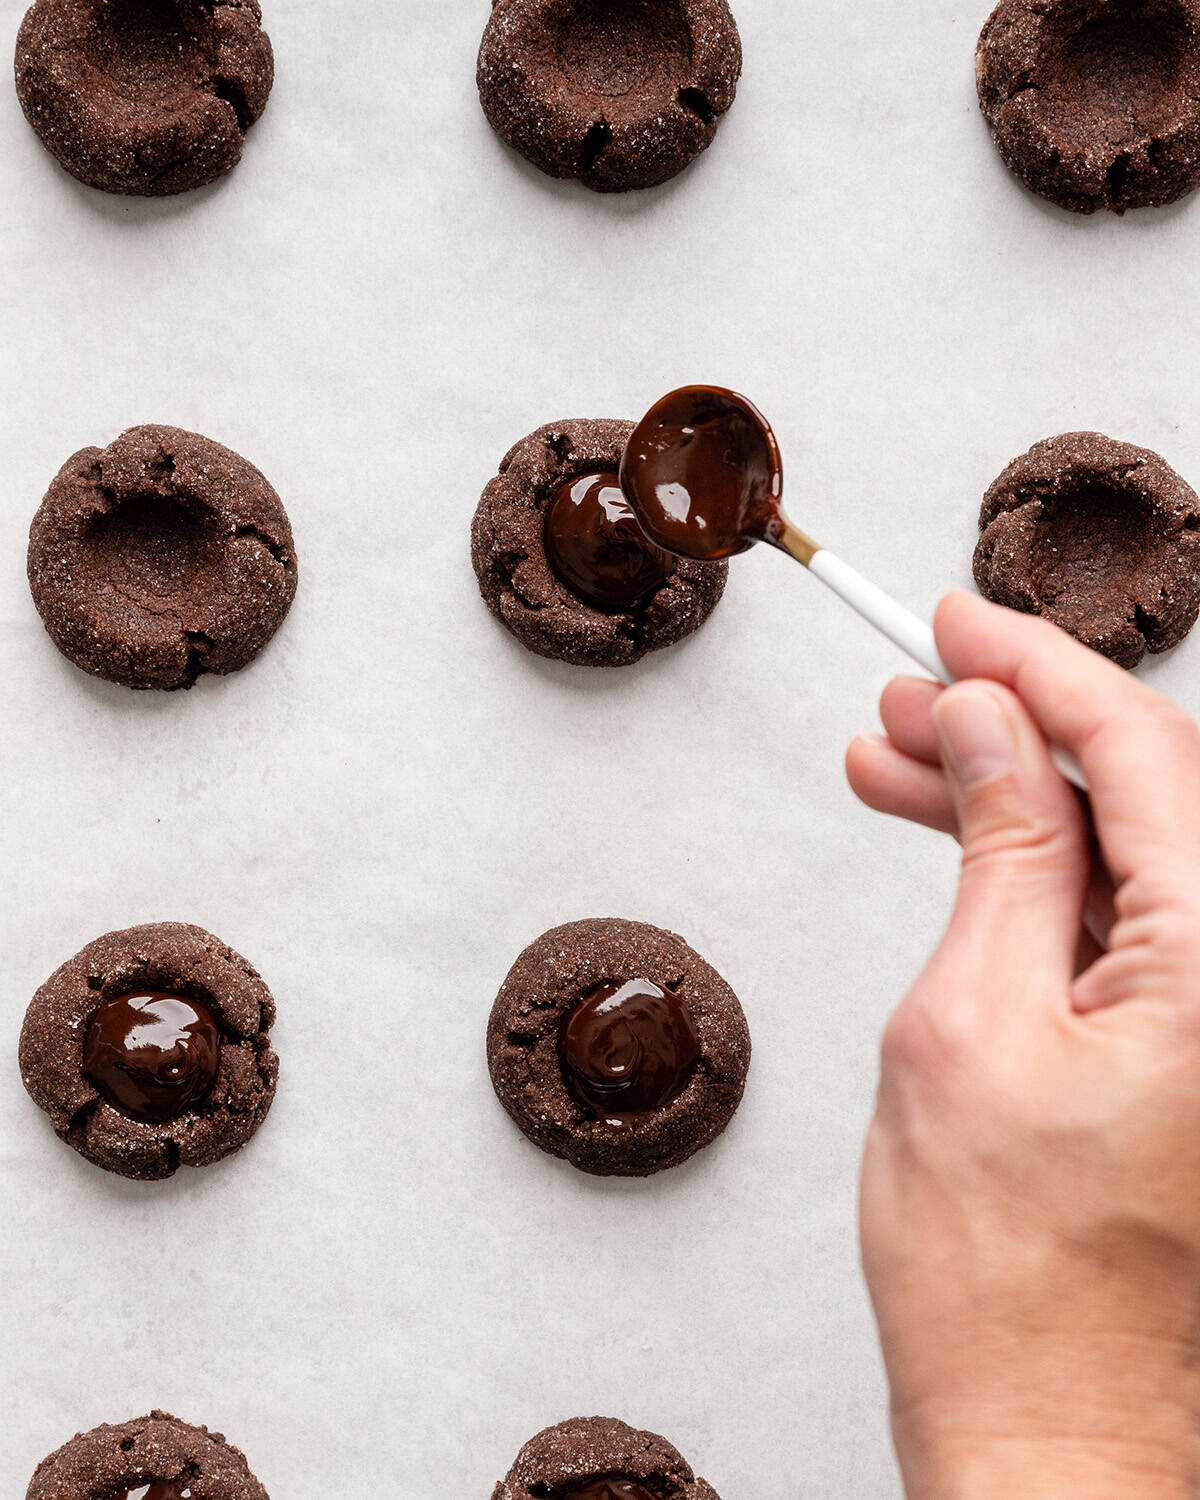
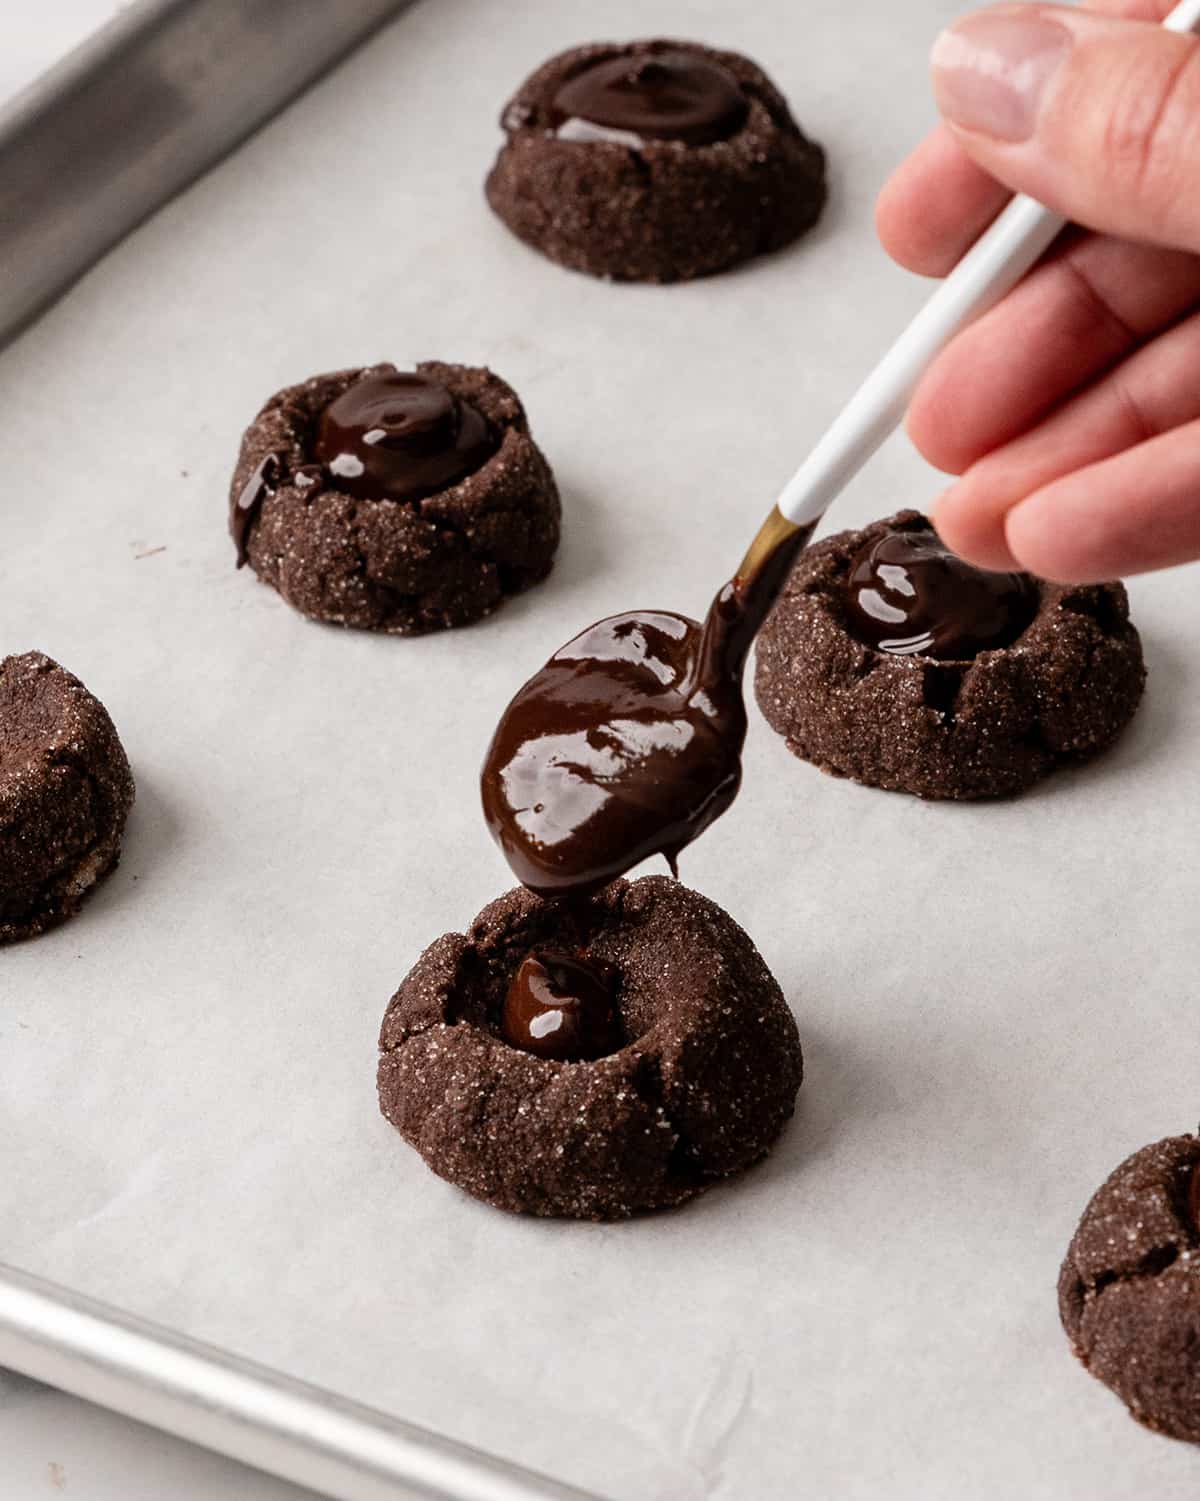
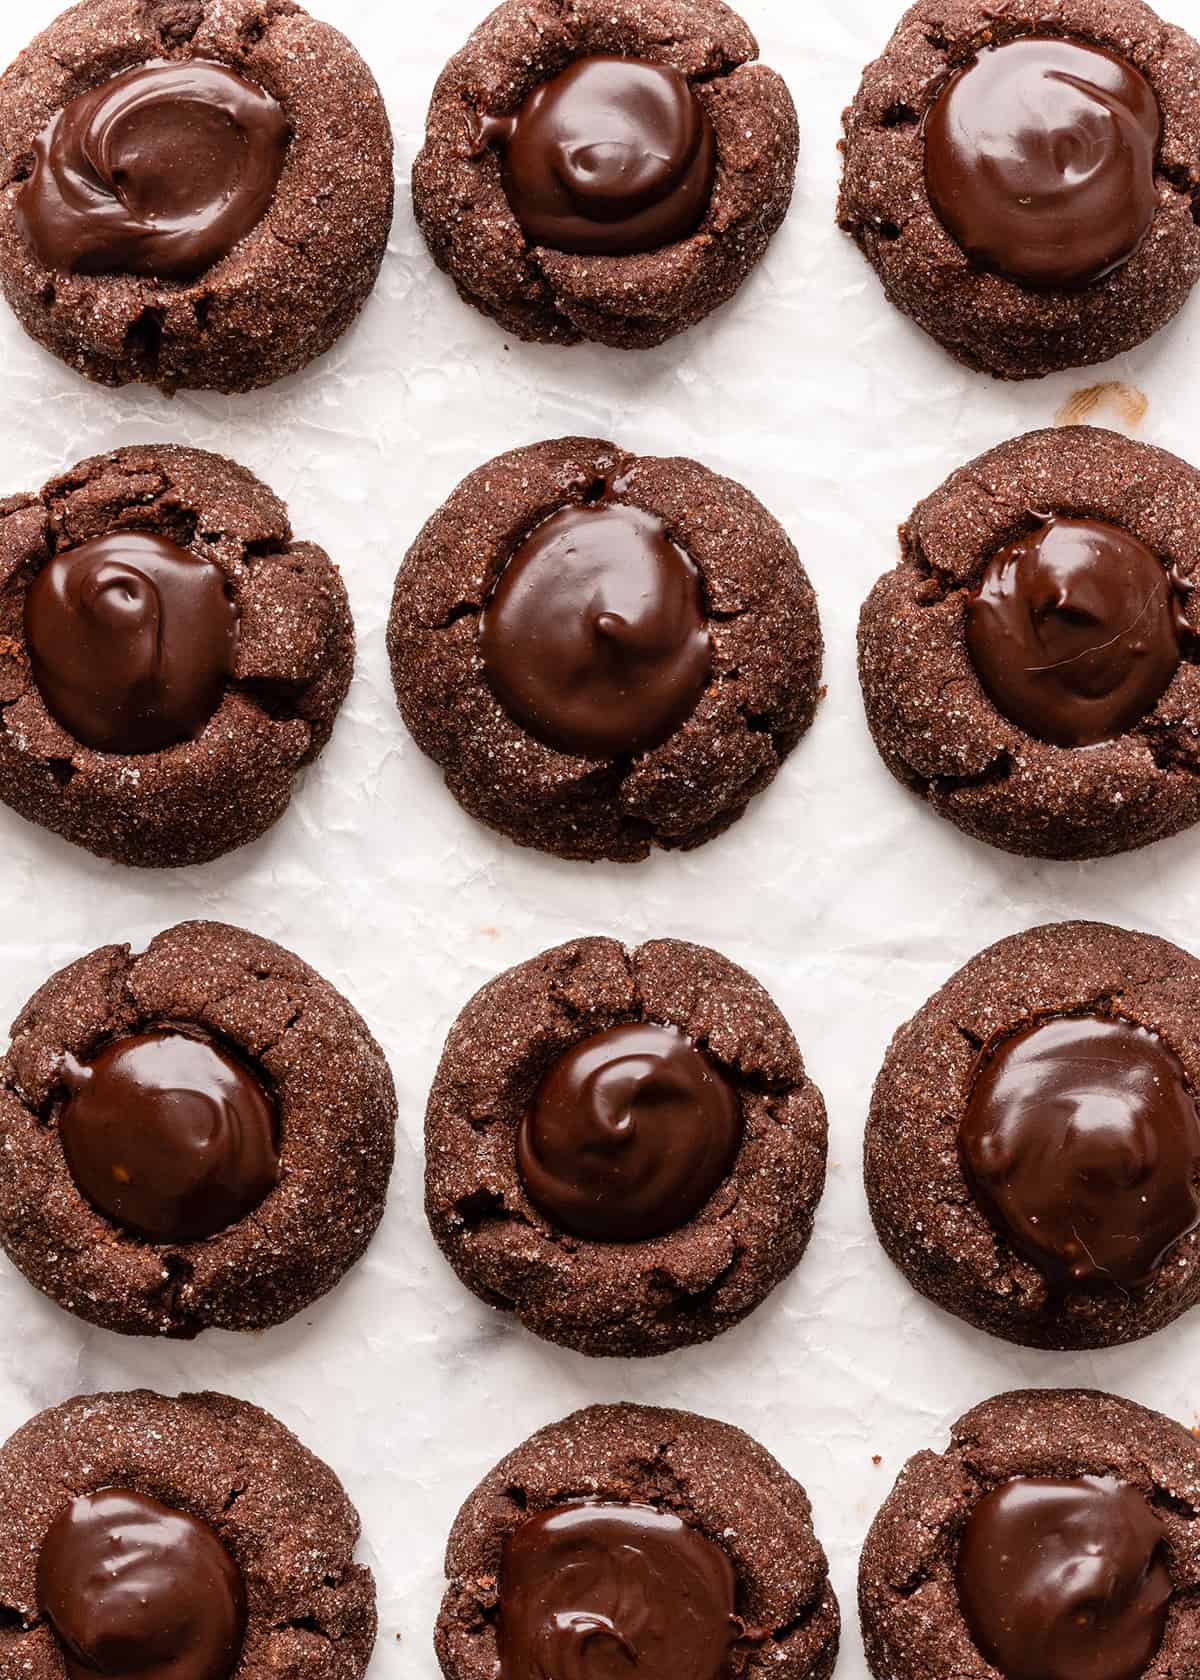
Assemble
Then, use a 1 teaspoon measuring spoon to add the slightly cooled filling to the well in each thumbprint cookie.
Let the cookies sit at room temperature to harden completely, or chill them in the refrigerator.
Store
Store leftover chocolate thumbprint cookies in an airtight container at room temperature for up to 5 days or in the refrigerator for up to 1 week.
Freeze
You can freeze these chocolate thumbprint cookies in one of two ways.
- Freeze the dough. Roll the cookie dough into balls and place them on a large baking sheet. Transfer to the freezer to flash-freeze. Once frozen, transfer to an airtight container to freeze for up to two months. To bake, remove dough from freezer and let it come to room temperature, then roll in sugar, form the wells and bake according to the recipe instructions.
- Freeze baked cookies. Transfer baked and cooled cookies to an airtight container and freeze for up to 1 month. Thaw slowly at room temperature.

Chocolate Thumbprints Recipe FAQs
Do not over-bake the cookies and they won’t crack.
Dough that is too warm (usually caused by butter that is too warm), could result in flat cookies. If your butter was too warm, you can chill the dough for 1 hour to ensure it won’t spread or go flat while baking.

If you make and love my recipes, it would mean so much to me if you would leave a comment and rating! And don’t forget to follow along on Instagram, Pinterest, Facebook, TikTok and Youtube – be sure to tag @joyfoodsunshine and use the hashtag #joyfoodsunshine so I can see your creations!
Chocolate Thumbprint Cookies
Video
Equipment
Ingredients
- 1 ½ cups all-purpose flour
- ½ cup cocoa powder
- ¼ teaspoon sea salt
- 1 cup salted butter
- 1 cup powdered sugar
- 2 teaspoons vanilla extract
- ½ cup granulated sugar for coating
Chocolate filling
- 1 cup semisweet chocolate
- ½ cup heavy cream
- ½ teaspoon vanilla extract
Instructions
Make the Cookies
- Preheat oven to 375 degrees F. Line 2 large baking sheets with parchment paper, set aside.
- In a small bowl, combine flour, cocoa powder and sea salt, set aside.
- In the bowl of a standing mixer, or in a large bowl with a handheld mixer, beat butter, and powdered sugar until fluffy (about 1 minute). Add vanilla and beat to combine.
- Add the dry ingredient mixture and beat on low speed, then increase to medium-high and beat until the mixture forms large crumbs and easily sticks together when pinched (about 1 minute).
- Measure out 1 Tablespoon portions of dough and roll each one into a ball, then roll it in granulated sugar.
- Press the center down gently with a round, 1 teaspoon measuring spoon, if the dough cracks around the spoon, gently form it back together with your fingers.
- Evenly space the cookies on the prepared baking sheets.
- Bake in preheated oven for 8-9 minutes. If the wells puff up, gently press them back down with the teaspoon when you remove them from the oven.
- Let cool on the baking sheet for 5 minutes before transferring to a wire rack to cool completely.
Make the Chocolate Filling
- Heat ½ cup heavy cream in a small saucepan until it just begins to boil around the edges.
- Remove from heat and whisk in chocolate chips until smooth and glossy.
- Whisk in vanilla, then let cool slightly until it’s thickened.
Assemble
- Use a 1 tsp measuring spoon to add the slightly cooled filling to the well in each thumbprint cookie.
- Let sit at room temperature to harden completely, or chill them in the refrigerator.
- Serve at room temperature.
Notes
- All-purpose flour. I suspect using an all-purpose gluten-free baking flour would work well, but I have not tried it (report back if you do).
- Salted butter. Unsalted butter works well in this recipe.
- Powdered sugar. white granulated sugar also works in this recipe, however I prefer the texture with powdered sugar!
- Pure vanilla extract. You can substitute up to 1 tsp of the vanilla extract with another extract, if preferred (peppermint, almond, etc.)
- Semisweet chocolate. I usually use chocolate chips (easy) but you can use discs, chopped bars, etc.
- Freeze the dough. Roll the cookie dough into balls and place them on a large baking sheet. Transfer to the freezer to flash-freeze. Once frozen, transfer to an airtight container to freeze for up to two months. To bake, remove dough from freezer and let it come to room temperature, then roll in sugar, form the wells and bake according to the recipe instructions.
- Freeze baked cookies. Transfer baked and cooled cookies to an airtight container and freeze for up to 1 month. Thaw slowly at room temperature.
Nutrition
Nutrition information is automatically calculated, so should only be used as an approximation.


There is no leavening in these cookies. Are they more like a shortbread cookie? And is this correct?
Yes they are.