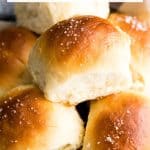
Best Dinner Rolls Recipe
Updated Jul 06, 2026
This post may contain affiliate links. Please read our disclosure policy.
The best Homemade Dinner Rolls recipe! These easy, soft & fluffy dinner rolls are, slightly sweet and salty, irresistibly buttery & moist and made from scratch. They turn out perfectly every single time and are a must-make holiday side dish.

No holiday is complete in my house without these homemade dinner rolls – I make them for every special occasion – Christmas, Thanksgiving, Easter, etc.
These fluffy dinner rolls are easy to make and turn out perfectly every single time. Every bite is the perfect combination of sweet, buttery & salty, and they are soft and fluffy but still substantial and so moist.
It took me years of testing and tasting to finally land on this recipe for the best dinner rolls ever. I promise you will love them as much as we do! Kim says:
Perfection. As others have mentioned, I tried many recipes before this one. But my search for the best dinner roll has ended. These are it!
– Kim

Dinner Rolls Recipe Ingredients & Substitutions
An important note is that all the ingredients (especially the butter, milk and egg) need to be room temperature.
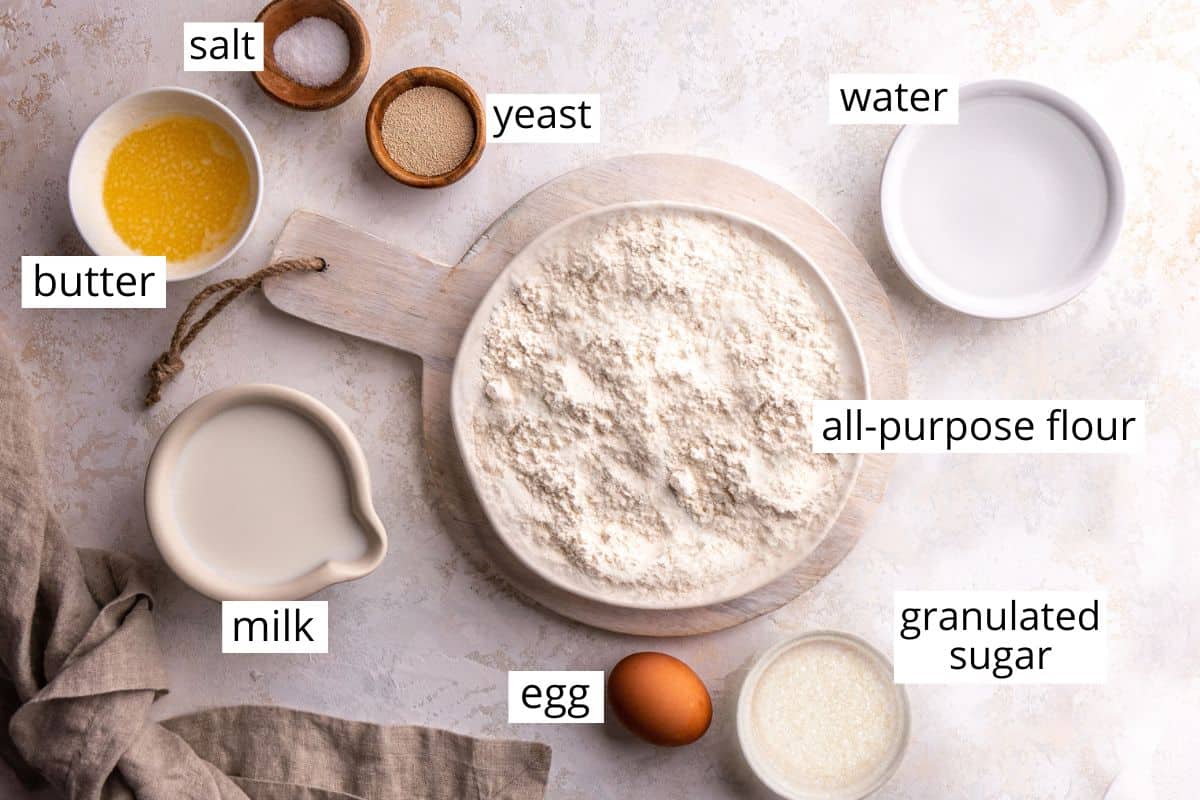
- Whole Milk. I suggest whole, 2% or half and half for the best rolls.
- All-purpose flour. I don’t recommend substitutions. Try these whole wheat dinner rolls if you’d like to use whole wheat flour..
- Granulated sugar. white or organic cane sugar are the best choices. You could replace the sugar with honey, if desired.
- Salted Butter. unsalted butter is a great choice.

How to Make Dinner Rolls
Let’s walk through this dinner rolls recipe step-by-step, and don’t forget to watch the video.
Make the Dough
A common question when it comes to making dinner rolls is, “how do you make dinner roll dough?” Well, we will walk through the process together. And trust me, this recipe yields the softest, smoothest dough that’s very easy to work with!
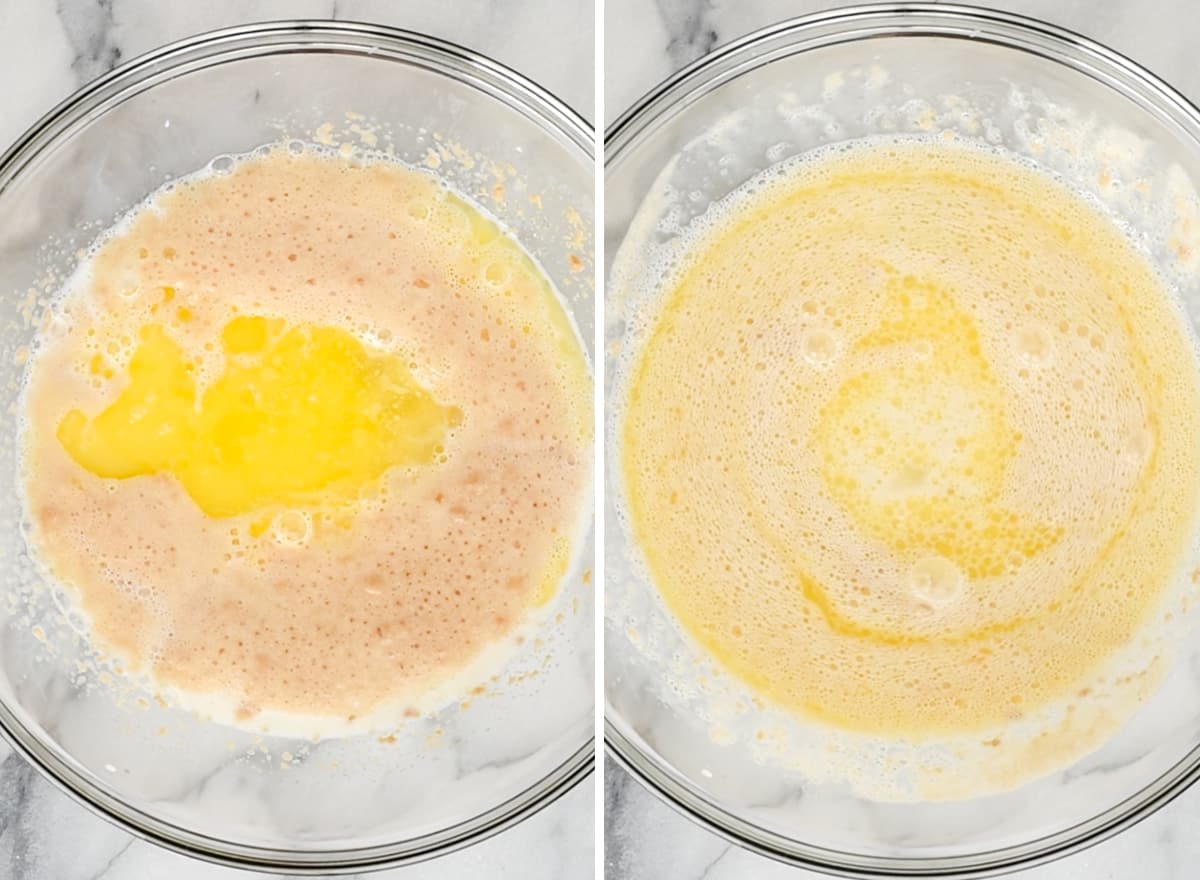
Begin by proofing the yeast. Mix water, sugar and yeast together and then let it sit for 5-10 minutes until foamy.

Then, add the milk, butter and egg and stir to combine.
Important note
Make sure to completely cool the butter/milk mixture so you do not kill the yeast. If the ingredients are too warm (over 105 degrees F), the yeast won’t proof and then the rolls won’t rise.
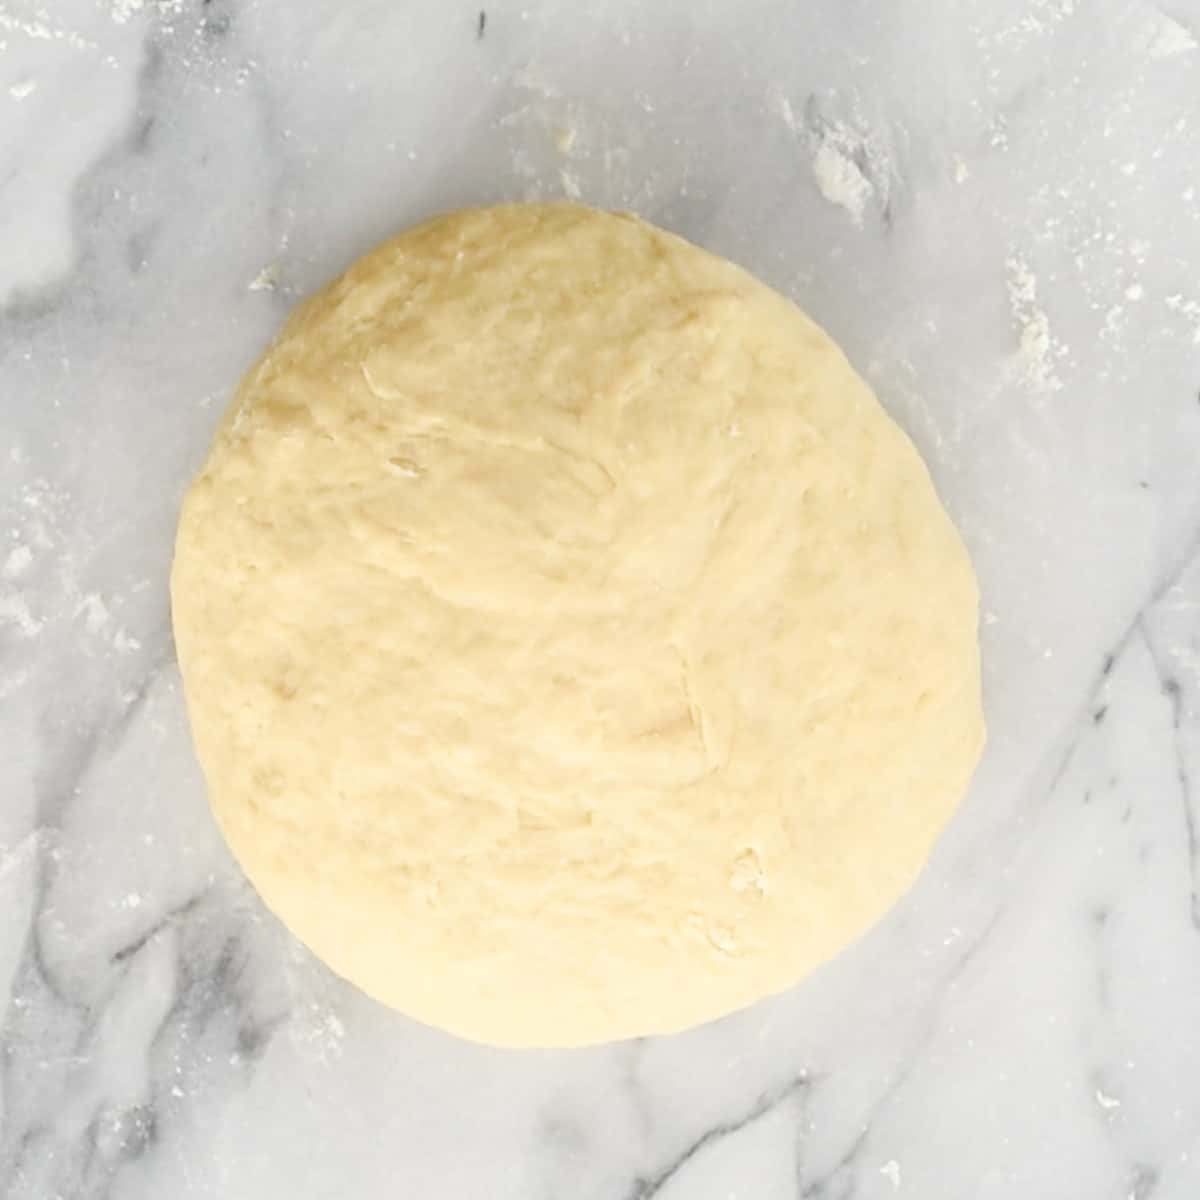
Next, add 3 cups of the flour and the salt and mix until the dough forms a loose ball.
It’s important to being with 3 cups of flour so you don’t add too much. So start with 3 cups and gradually knead in more as needed.
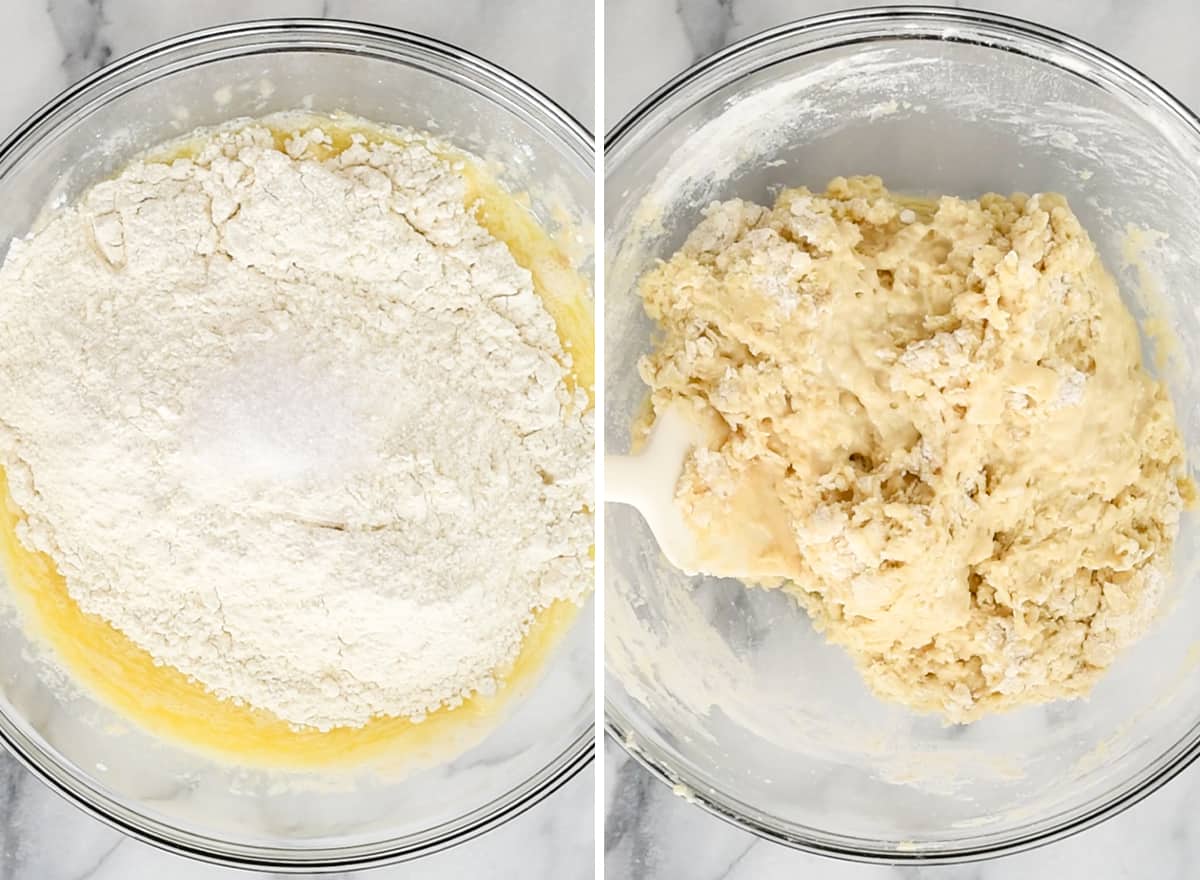
Add flour 1 TBS at a time until a slightly tacky ball forms. It should easily form into a ball but should not feel too dry.
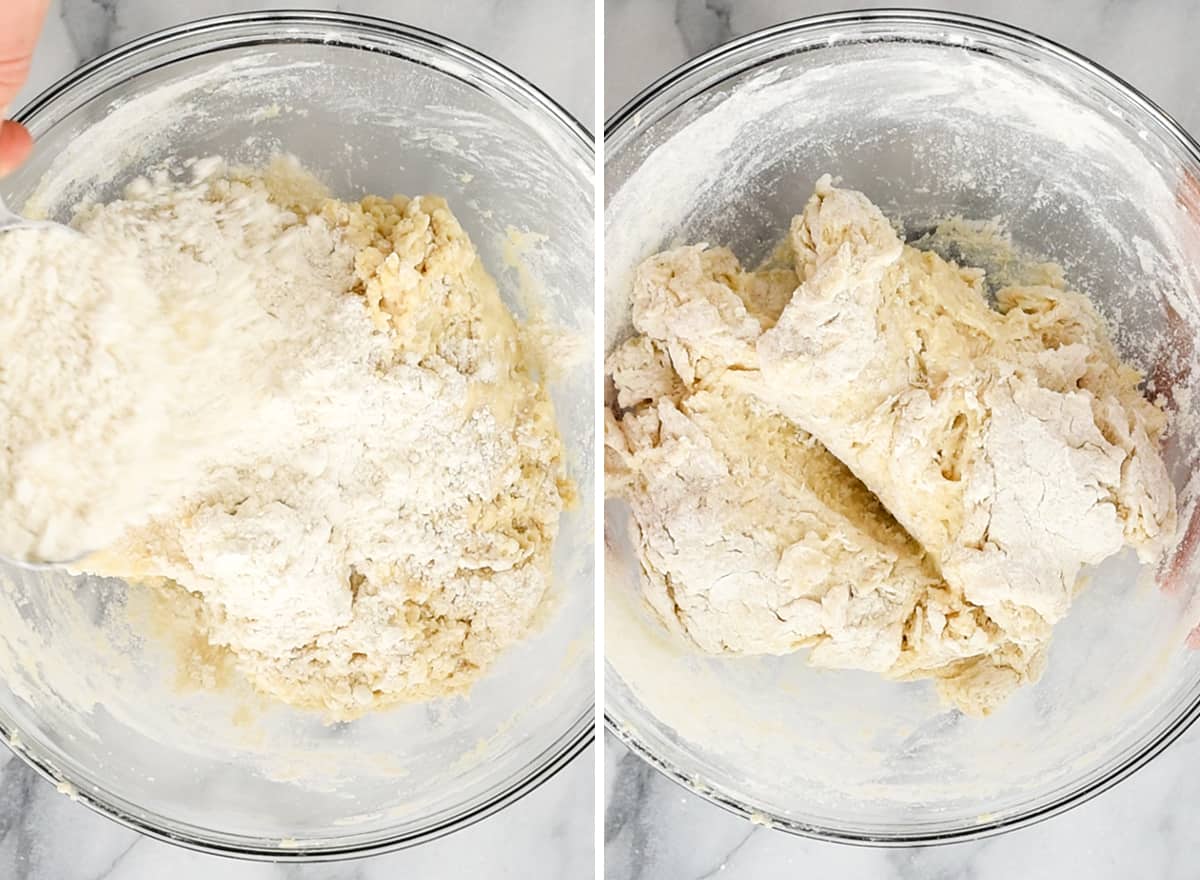
Then, form the dough into a ball.
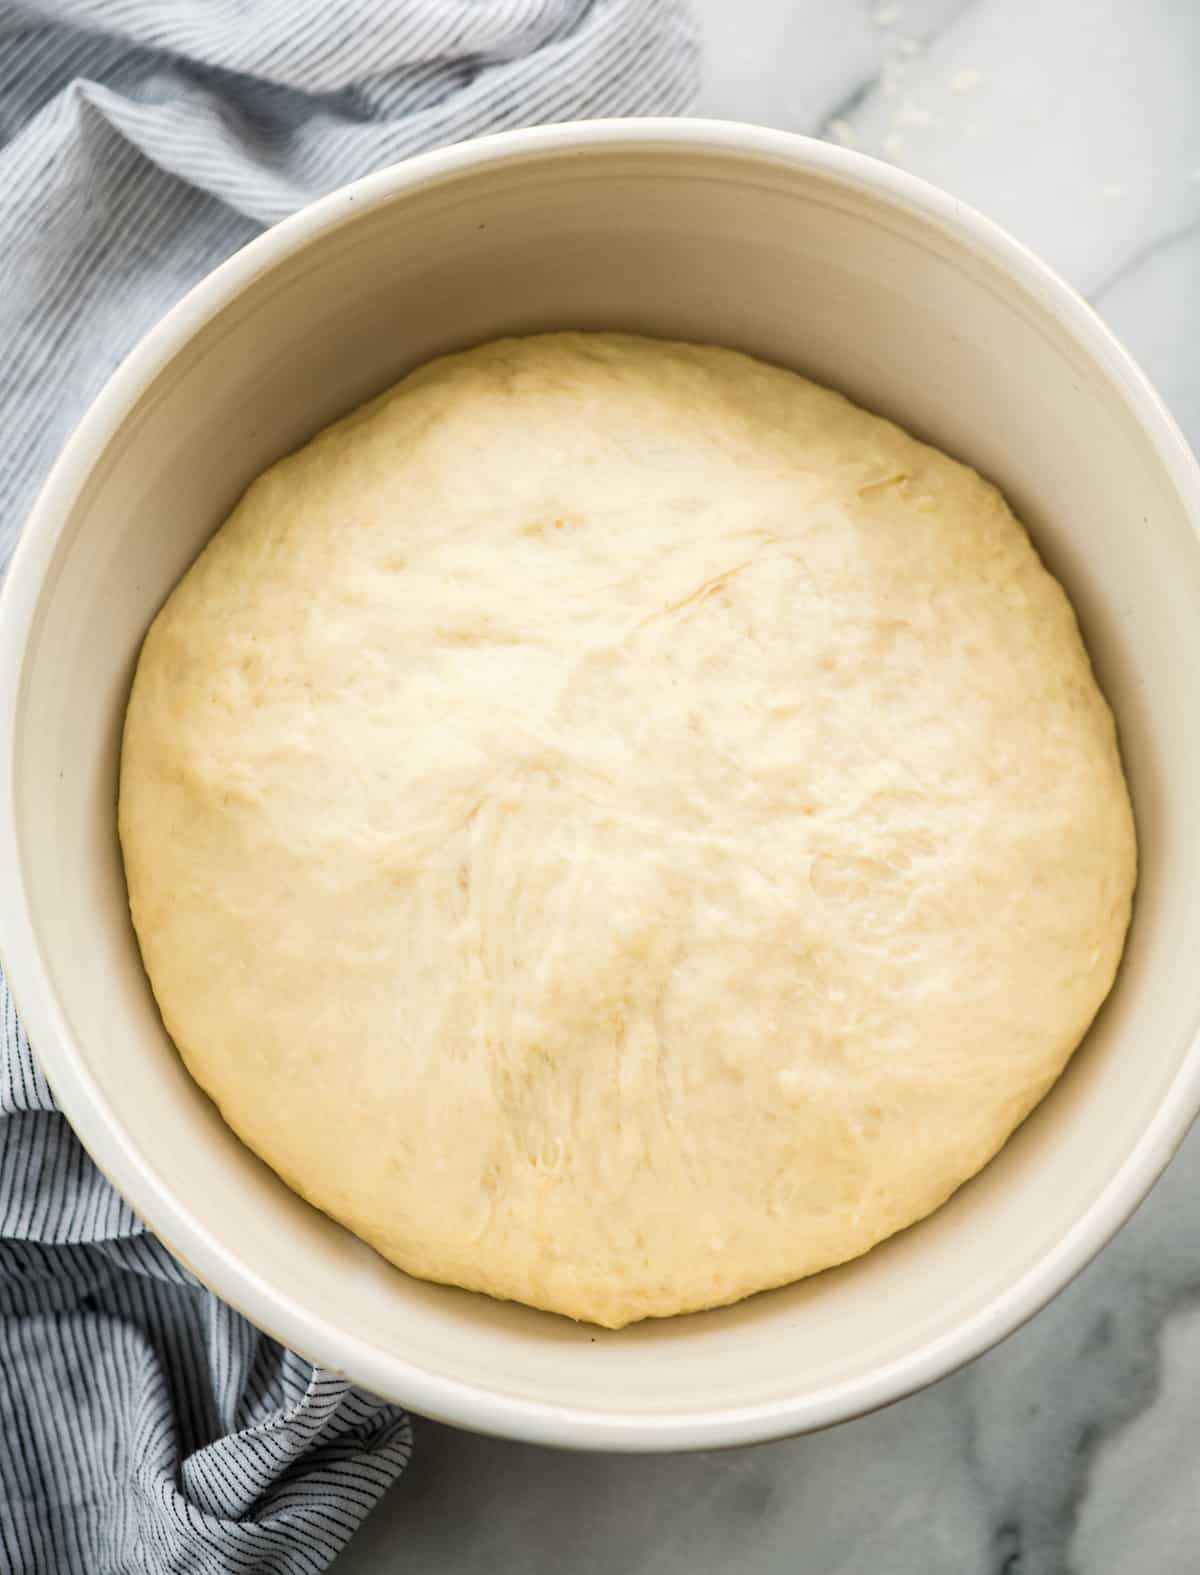
First Rise
This recipe has two rises. One with the dough in a large ball, and another after the dough has been divided into rolls. Put the dough in an oiled bowl and cover the bowl with a damp tea towel. Let it rise until it has doubled in size.
How to make dough rise faster:
To help the dinner roll dough rise faster simply boil some water and put it in a bowl or measuring dish next to the bread that’s rising. Cover the bread and the vessel containing the boiling water with a damp towel and let the magic happen. This creates a warm, moist environment that yeast loves.
I also recommend putting the dough/boiling water/damp cloth apparatus in your oven with the lights turned on. This creates a warm moist environment that the yeast loves, which speeds up the rising process.
Once the dough has doubled in size, flour your hands and punch the dough down to remove the gas.
In order to ensure that all your rolls are exactly the same size, so they baked evenly, I highly recommend weighing the dough.
Start by weighing the entire batch of dough, then divide its weight divide by 12. Remember that answer (write it down) and make sure it is the weight of each dough ball. This particular batch of dough weighed 35 oz, so each dough ball weighed approximately 2.9 oz.
If you don’t have a food scale (I recommend getting one) you will have to use your own judgement/feeling to make the rolls as close to equal in size as possible.

Once you have all your math done (phew), weigh out the dough and make each portion into a smooth ball. It’s helpful to do this step on a well floured surface with floured hands.

Second Rise
As you form the rolls, place them in a 9×13″ baking pan, spaced evenly apart. I suggest using parchment paper to line the baking dish to ensure that the rolls are easy to remove from the pan to serve.

Once the homemade dinner rolls are formed and placed in the baking sheet, let them rise again until they are doubled in size (30-60 minutes).
Be sure not to let the damp towel touch the tops of the rolls, otherwise the dough might stick to the towel, resulting a quite a mess.
The unbaked dinner rolls will touch. As you see in the photo below (and the video), the rolls will touch each other after they have risen. That is good and results in extraordinarily moist dinner rolls.

Bake the Dinner Rolls
While the dough is rising a second time, preheat your oven. After the dough is risen fully, bake in the preheated oven until the tops are golden brown and the rolls sound hollow when you gently hit them with a wooden spoon. Or, until the internal temperature is 190 degrees F in an instant read thermometer.
Baking Time variation
Please note, every oven bakes a little differently. Please watch your dinner rolls carefully and check them at the beginning of the recommended baking window to avoid over-baked rolls.

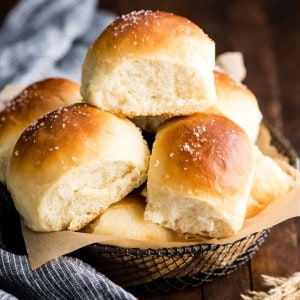
Butter & Salt the Tops
As soon as the dinner rolls are removed from the oven, brush them with melted butter and add a sprinkle of coarse or flaky sea salt. This is the final touch that makes the rolls extra special.

Serve
I recommend serving these homemade dinner rolls fresh from the oven. In order to do this, I will often prepare the rolls in advance and “slow” the rise by storing them in the fridge until I’m ready to bake.
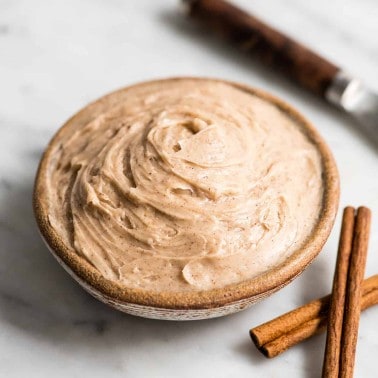
They stand alone perfectly because they are just that good. Or you can make a batch of cinnamon honey butter to spread on top – we almost always do this.
They also make amazing leftover turkey & cranberry sandwiches after Thanksgiving or ham and cheese sliders using leftover ham!
Store
Store leftover homemade dinner rolls in an airtight container at room temperature for up to 3 days. Or, you can freeze baked rolls in an airtight container or ziplock bag for up to 2 months.

Dinner Rolls Recipe FAQs
You can make these homemade dinner rolls ahead and freeze them for up to one month. Simply cover them tightly with plastic wrap and aluminum foil or a lid after you have placed the divided rolls onto a prepared baking dish (before they have risen the second time).
To bake: Remove the dinner rolls from the freezer, cover and let them come to room temperature and rise fully before baking.
If you don’t have time to let them come to room temperature and rise, you can bake these dinner rolls from frozen by baking at 325 degrees F for 25 minutes, then increasing the baking temperature to 375 and baking for 10 minutes more.
Fat in in the dough. Both the fat from the whole milk and butter preserve the freshness of these soft dinner rolls and keeps them soft for a days. The fat keeps the rolls from drying out!
Butter brushed tops. The butter on the top of the dinner rolls also helps seal the rolls and keep them nice and soft.
Baking close together. This lowers the amount of browned “crust” on the rolls, which yields an overall softer texture!
These light and fluffy dinner rolls are that way because they rise twice. They rise a tad more in the oven after the second rise, but you don’t want to risk them being too dense by being hasty and not letting them rise.
If you need to reheat these dinner rolls to serve to company, just cover the baking pan with tin foil and place them in your oven turned on to warm (about 200 degrees F).

If you make and love my recipes, it would mean so much to me if you would leave a comment and rating! And don’t forget to follow along on Instagram, Pinterest, Facebook, TikTok and Youtube – be sure to tag @joyfoodsunshine and use the hashtag #joyfoodsunshine so I can see your creations!
Best Homemade Dinner Rolls Recipe
Video
Equipment
Ingredients
- ½ cup warm water (about 105 degrees F)
- ¼ cup granulated sugar
- 1 Tablespoon active dry yeast
- 6 Tablespoons salted butter (melted and cooled)
- 1 cup whole milk (room temperature)
- 1 egg (room temperature, lightly beaten)
- ½ Tablespoon sea salt
- 3-4 cups all-purpose flour
Topping
- 2 Tablespoons salted butter (melted)
- Coarse Sea Salt (for sprinkling)
Instructions
- Line a 9×13” baking pan with parchment paper, set aside.
Proof the Yeast
- Add sugar, water and yeast to the bowl of your standing mixer fitted with the dough hook. Let the mixture sit for 5-10 minutes until foamy.
Make the Dough
- Once yeast is foamy, and the butter, milk and egg and stir to combine.
- Add 3 cups of flour and ½ tablespoon salt and knead with dough hook. Add more flour gradually, as needed until a slightly-tacky ball forms.
- Grease a large bowl and transfer the dough to the bowl. Cover with a damp cloth and set in a warm place to rise for about 1 hour, or until doubled in size.
- Once dough has doubled, flour your hands and squeeze it to remove the gas.
- With floured hands, form 12, equally-sized dough balls. (use a food scale to weight full batch of dough, then divide that number by 12 and make sure every dough ball is the same weight).
- Roll them until they’re smooth balls.
- Place the dough balls into the prepared baking sheet evenly spaced into 4 rows of 3.
- Cover with a damp towel and let rise in a warm place until doubled in size (about 30-60 minutes) – do not let the towel touch the top of the rolls.
Bake
- When the rolls have risen about halfway, preheat your oven to 375 degrees F.
- Bake the risen rolls in the preheated oven for 25-30 minutes, until the rolls are golden-brown on the top and sound hollow when tapped with a wooden spoon, or reach an internal temperature of 185-190 degrees F when measured with an instant read thermometer.
- Remove the dinner rolls from the oven and immediately brush them with melted butter and sprinkle with sea salt.
- Let cool slightly, then serve warm.
Notes
- Whole Milk. I suggest whole, 2% or half and half for the best rolls.
- All-purpose flour. I don’t recommend substitutions. Try these whole wheat dinner rolls if you’d like to use whole wheat flour..
- Granulated sugar. white or organic cane sugar are the best choices. You could replace the sugar with honey, if desired.
- Salted Butter. unsalted butter is a great choice.
Nutrition
Nutrition information is automatically calculated, so should only be used as an approximation.


Made your dinner rolls and my family loved them!! Thank you!! Will definitely be a family favourite!!
Teresa
Thank you Teresa!
This is the third different dinner roll recipe I’ve found and tried and will 10000% be the only dinner roll recipe I’ll ever use again. So perfect. Family LOVED it. Wouldn’t change a thing.
Yay! I’m so glad you love this recipe! It’s one of my top favorites of all time so it always makes me so happy when other people enjoy it too!
I’m not a baker and someone these still turned out amazing!! Definitely the best recipe I’ve found.
I’m SO happy you love them! I’m about to put a double batch in the oven, our faves!
I make these every year for thanksgiving dinner. Everybody, myself included, looks forward to them! Thank you for the fool proof recipe!
I’m about to portion out a double batch of these beauties myself! 🙂
Question: please let me know if the dough can be made the evening before baking and stored in the fridge overnight.
Thank you!
Yes absolutely. Form the dough into rolls and cover it with plastic wrap (sprayed with nonstick spray) and a damp tea towel in the fridge overnight.
I DID IT! I MADE DINNER ROLLS! I failed two times previously using different recipes, but I followed yours to a tee (halved the recipe) and it came out GREAT! I LOVE IT! Next time I might add a bit more sugar or salt, I think the flavor was a teeeeeeny bit bland. But I am so proud of myself and so grateful for your awesome recipe! Thank you so much Laura and HAPPY BAKING!!!
Yay!! I’m so so happy you love it!
Tried this recipe yesterday. It was absolutely great. The best one I tried. This recipe is a keeper. Thanks for sharing.
Yay! I’m so glad you love them Roberta. This is in my top 3 favorite recipes of all time so it always makes me so happy when other people love it too.