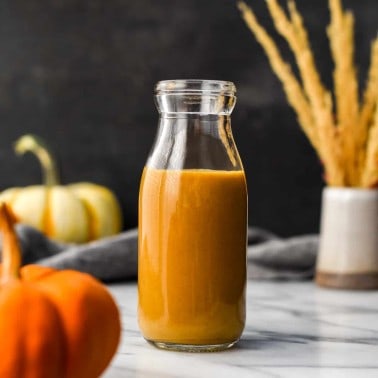
Healthy Homemade Coffee Creamer
Updated Jun 20, 2025
This post may contain affiliate links. Please read our disclosure policy.
This Healthy Homemade Coffee Creamer Recipe is easy to make with 4 ingredients, and it’s even more delicious than store-bought creamers!

A good friend once said to me, “drinking tea is like getting a friendly handshake, but drinking coffee is like getting a warm hug.” It’s so so true.
I look forward to the warm embrace of a good cup ‘o joe every morning with my breakfast. I do like a touch of sweetness and creaminess in my coffee, which is why I created this homemade coffee creamer recipe.
It tastes amazing but has no artificial ingredients, preservatives, etc.
If you’re a creamer user like me, you will love that this Paleo Vanilla Coffee Creamer is just slightly sweet but adds a wonderful, deep, complex, vanilla flavor to your coffee!

Healthy Coffee Creamer: Ingredients & Substitutions
As always, I recommend making this recipe exactly as written! But here are a few substitutions that are possible.
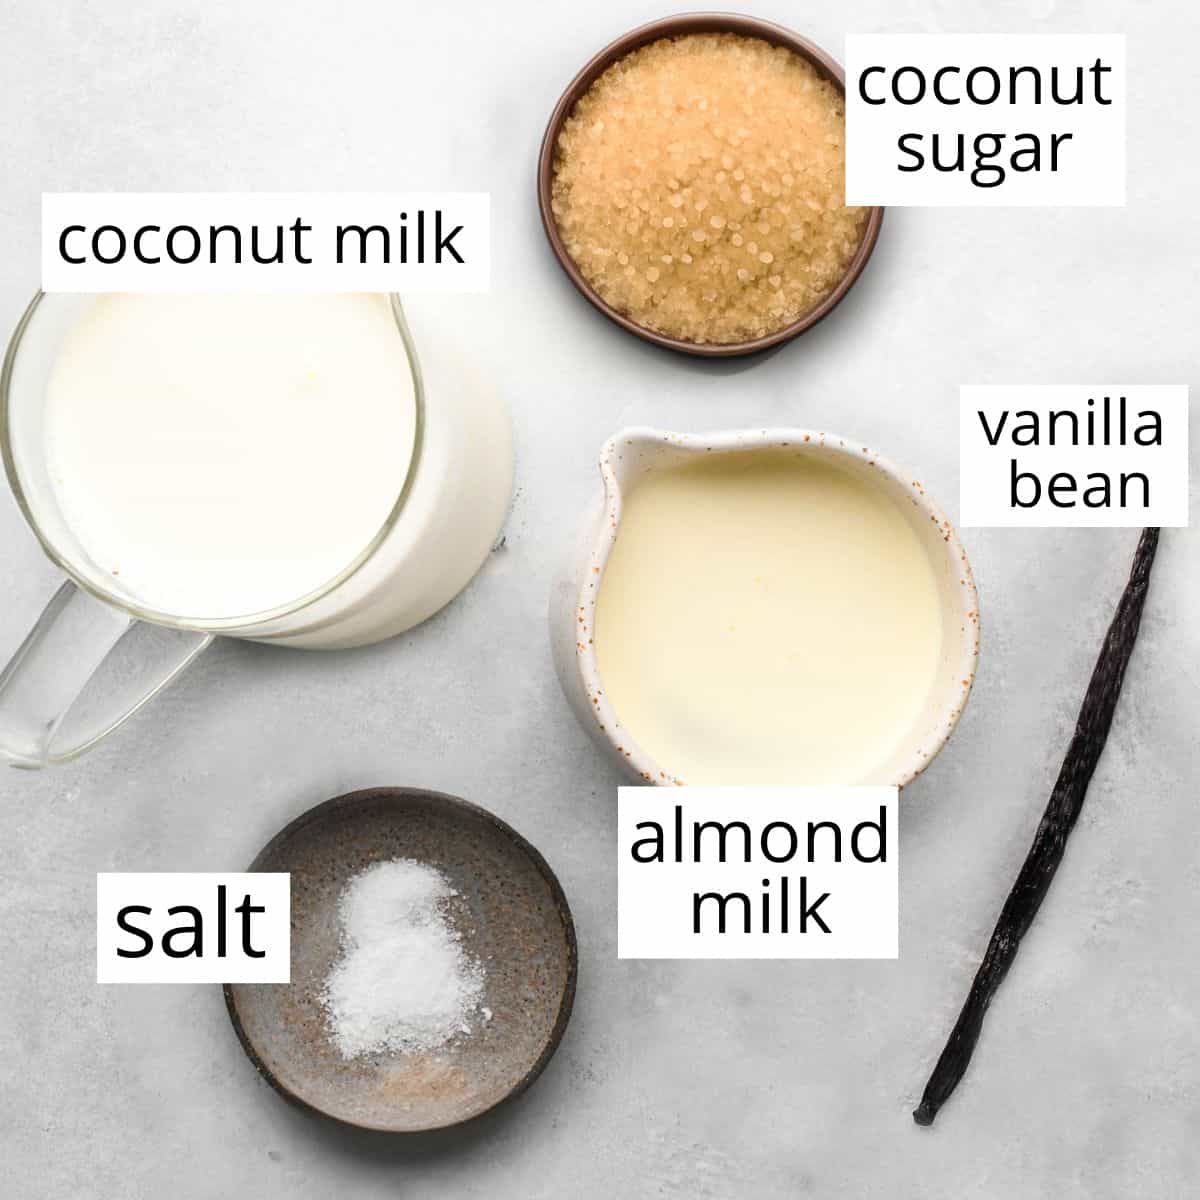
- Coconut milk: lite works well, but full-fat is best.
- Almond milk. The almond milk is added to this recipe to ensure that it doesn’t solidify when stored. In this case, any other nondairy milk can be used in place of almond milk.
- Coconut sugar: Maple syrup or honey may be used in place of some (or all) of the coconut sugar.
- Vanilla beans: If you want to make this quicker and easier, substitute 1 teaspoon vanilla extract for the vanilla bean. Add the extract once the sugar is dissolved and you remove the mixture from the heat.
How to Make Coffee Creamer
Let’s walk through the steps in making this healthy vanilla coffee creamer and don’t forget to watch the video.
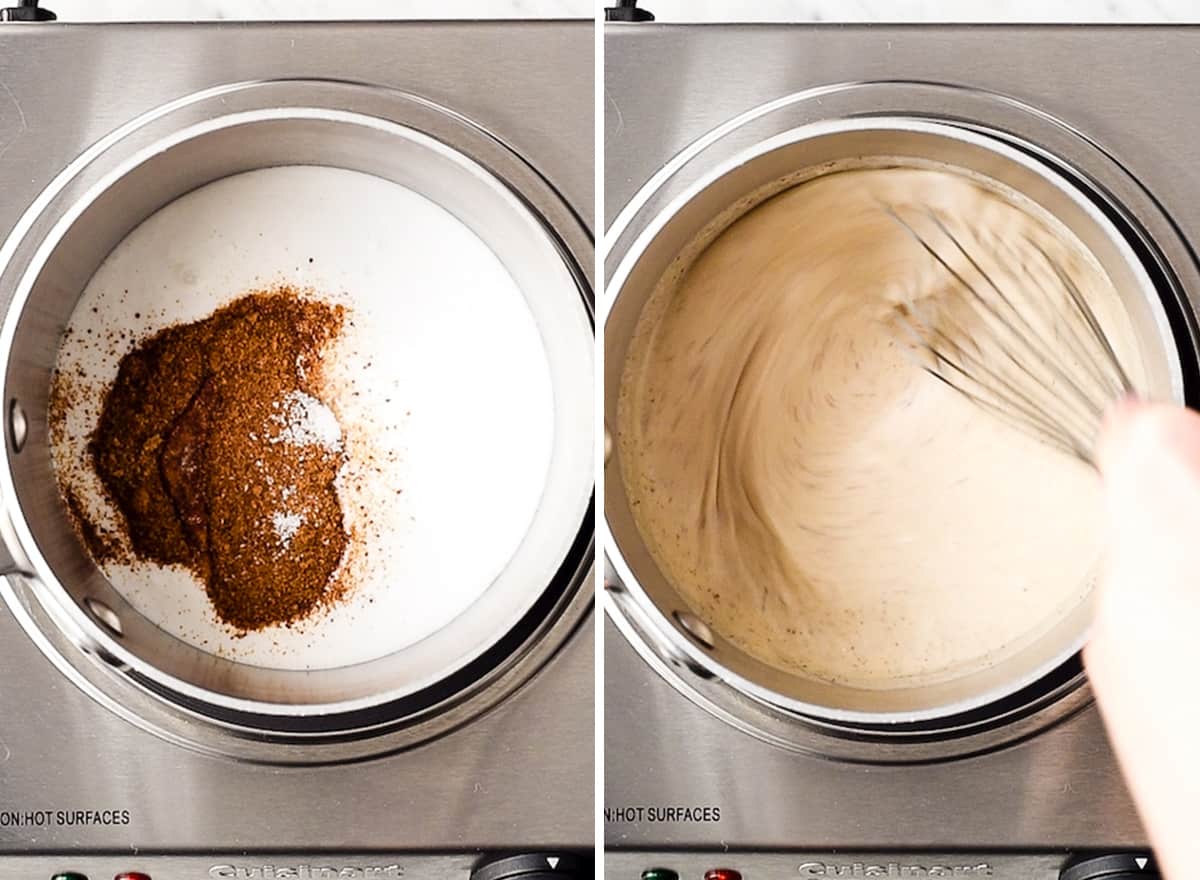
Begin by putting the ingredients (except for vanilla beans) into a small saucepan and whisking to combine.
Next, warm the mixture until it just begins to boil then remove the pan from the heat. Be very careful not to actually let it boil, because it will result in a big mess!
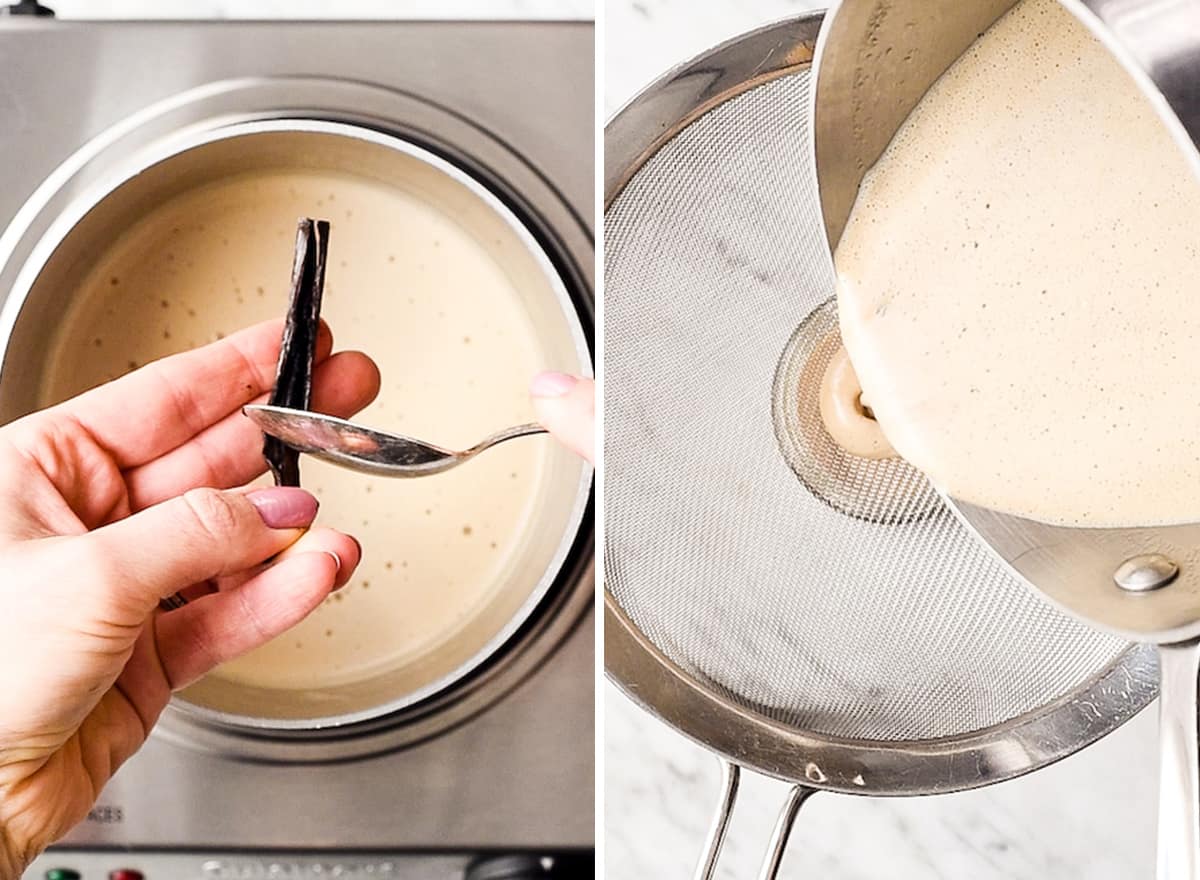
Next, scrape the seeds from the vanilla bean and stir them into the warm paleo coffee creamer mixture. Then add the whole vanilla bean pods.
After the vanilla beans and pods are added, cover the pot, and let it sit for 30 minutes for the vanilla bean flavor to really infuse into the healthy coffee creamer.
Choose a large glass jar and place a fine mesh metal sieve over it. Strain the vanilla coffee creamer into the jar and discard the vanilla bean pods.
How to Deseed a Vanilla Bean
To remove the seeds from a vanilla bean, follow these instructions:
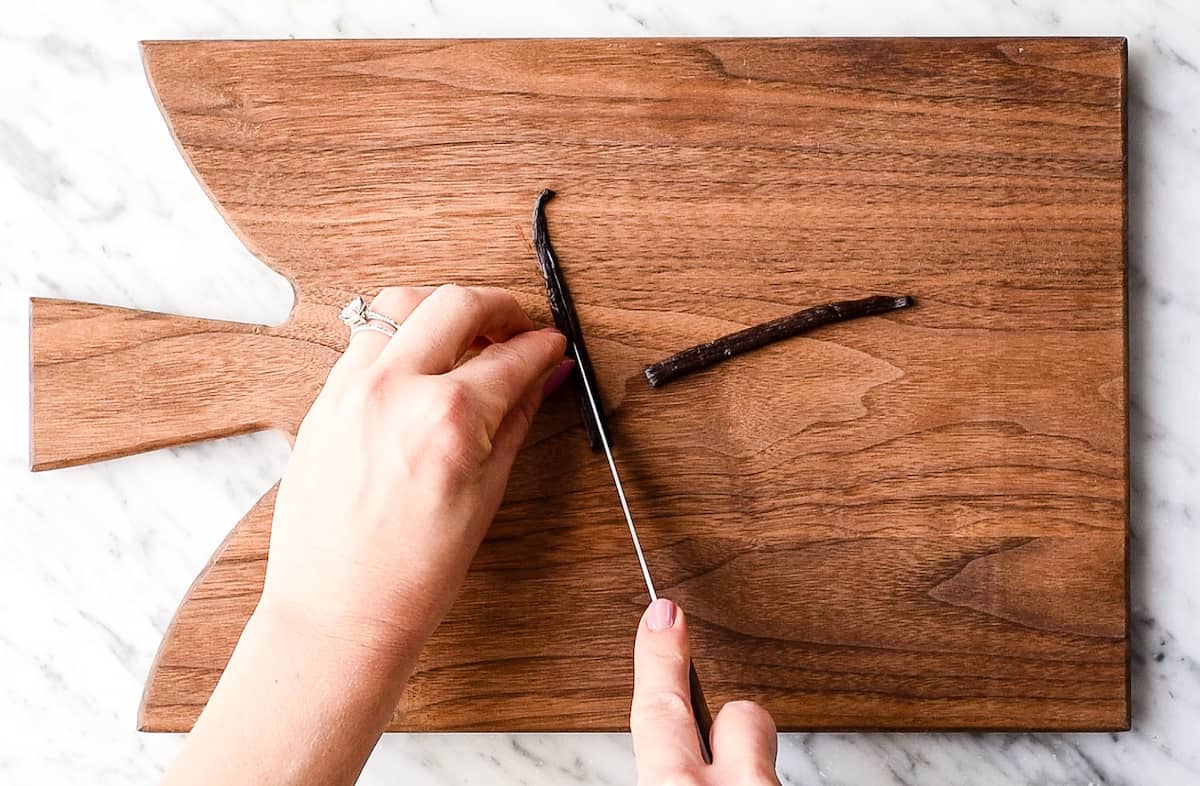
- Cut the bean in half (as pictured below).
2. Carefully slice each piece of the vanilla bean lengthwise with a very sharp knife. Make shallow cuts that do not go all the way through the pod.
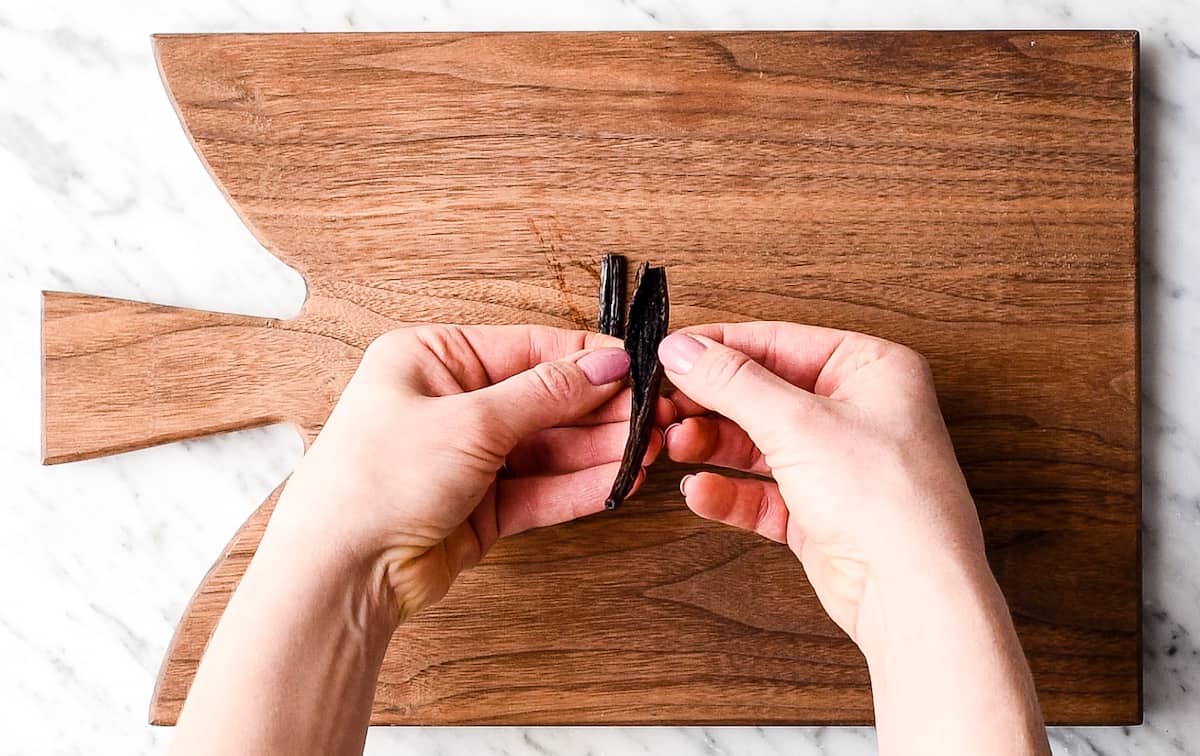
3. Use a small spoon and scrape out the seeds on the inside of the bean.
4. Stir the spoon with the vanilla seeds into the coffee creamer mixture and repeat with the remaining pod pieces!
Using Vanilla Extract
If you use vanilla extract instead of vanilla beans, I still recommend gently warming the ingredients on the stovetop and whisking them until the mixture is smooth.
However, if you use vanilla extract you do not need to use a strainer or let the mixture sit on the stovetop for 30 minutes to infuse! Simply whisk it in!
Serve
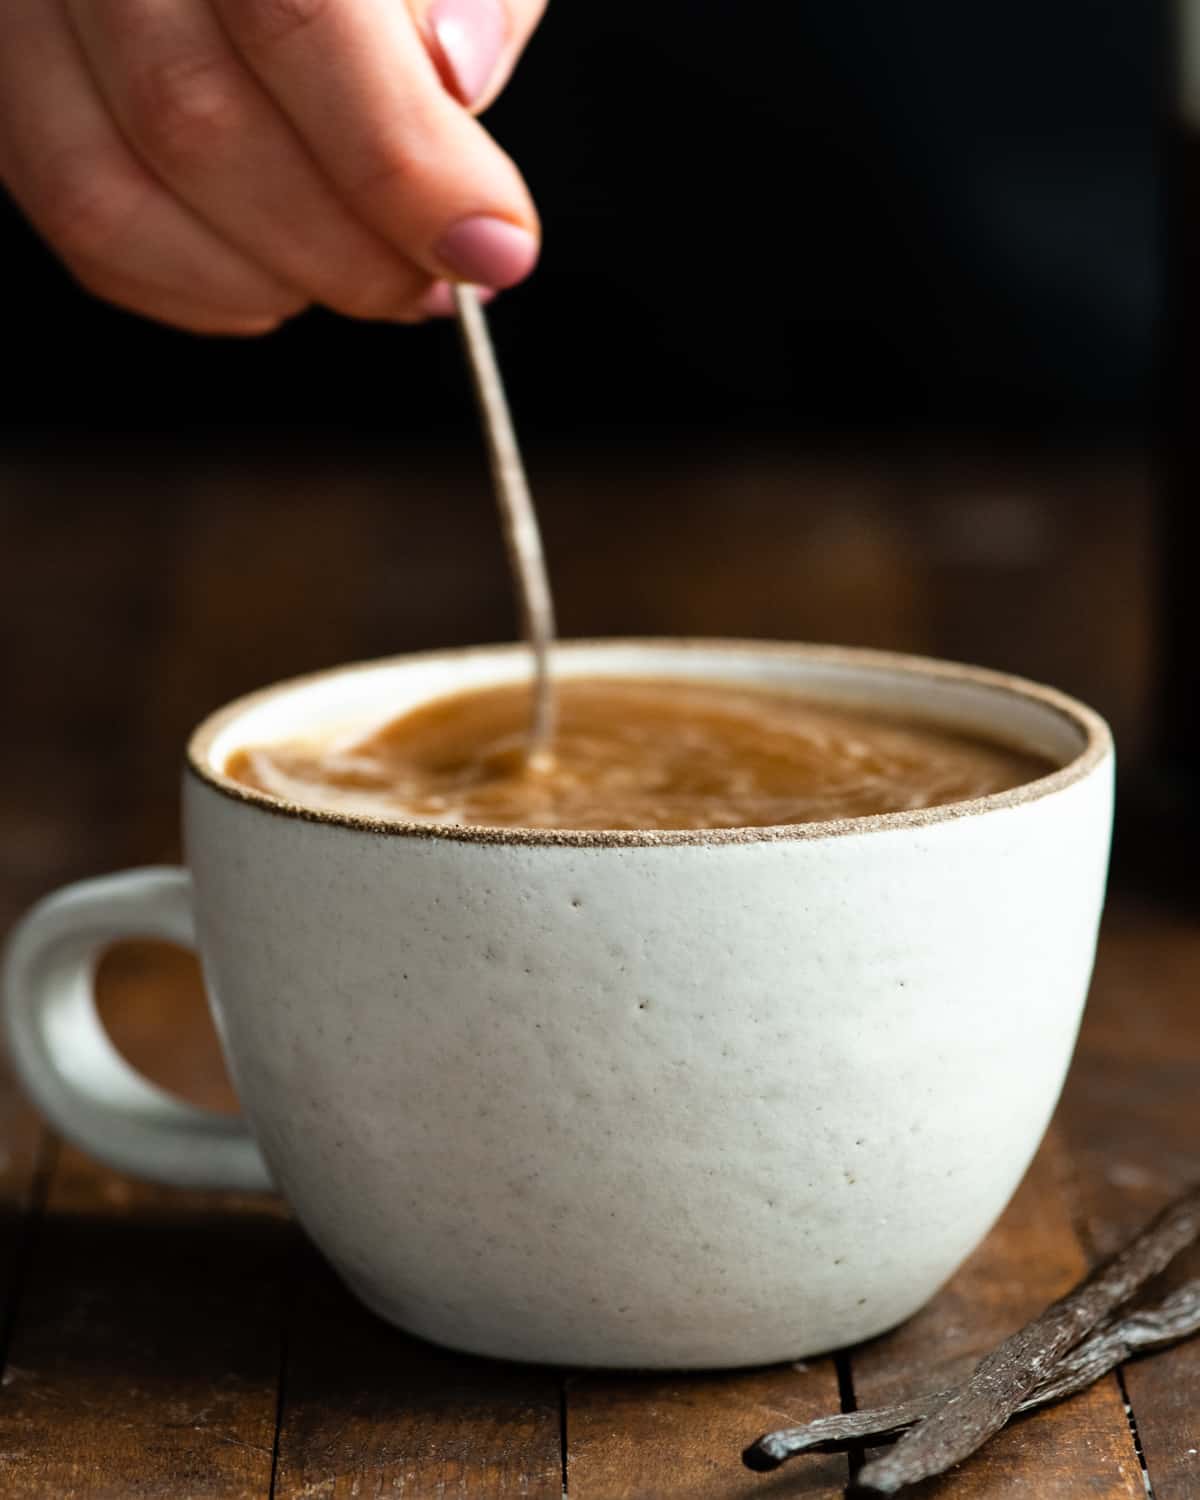
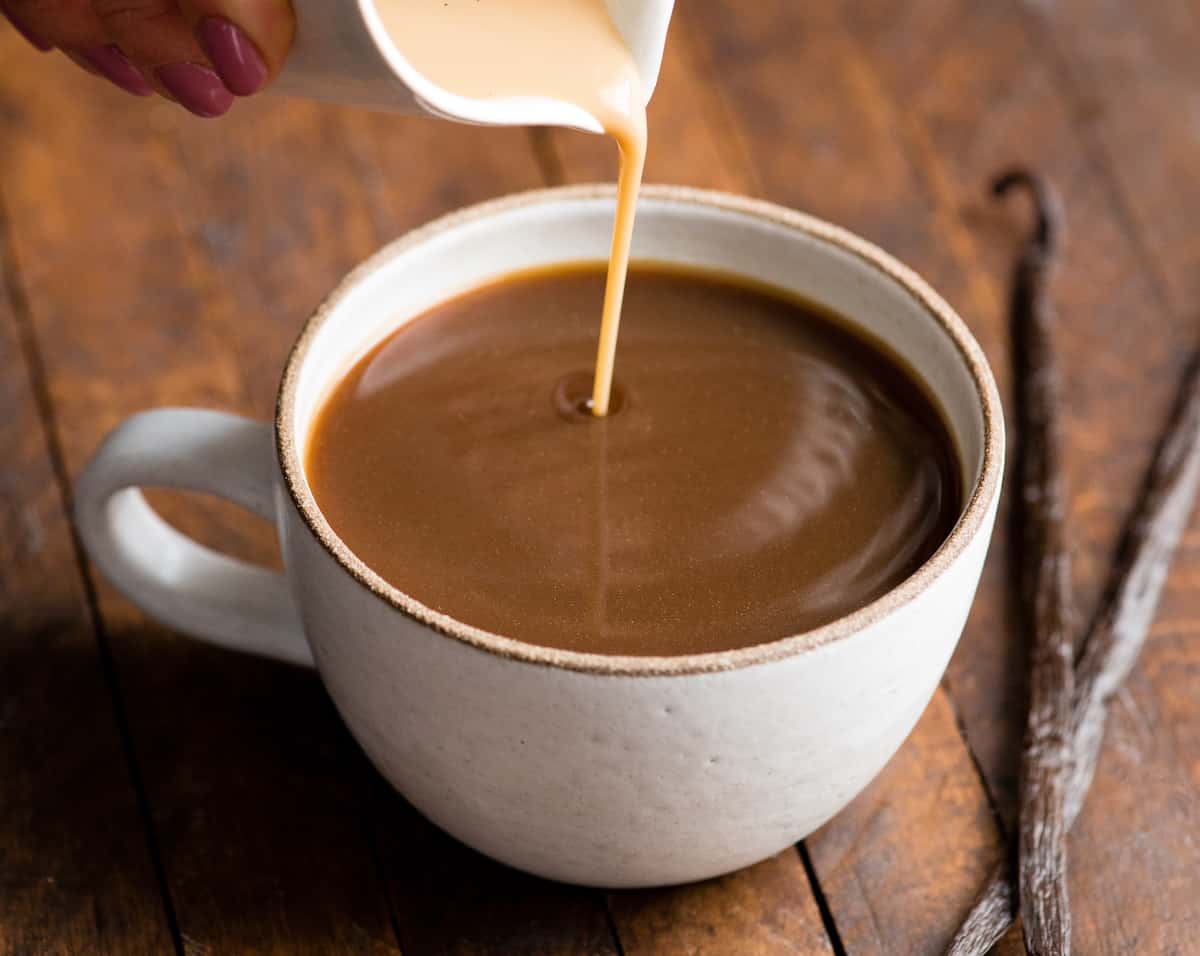
Serve this coffee creamer in your favorite coffee drinks like iced coffee, cold brew coffee, etc.
Store
Store the homemade creamer in a glass jar with a lid in the refrigerator for up to 1 week.
Freeze
Pour the healthy coffee creamer into an ice cube tray and freeze until hardened.
Transfer the frozen cubes of creamer to an airtight container or bag. Remove one or two cubes at a time to use in your morning coffee. I do recommend warming the frozen homemade coffee creamer in the microwave in your coffee mug before adding the coffee so that it doesn’t cool it off.

Homemade Coffee Creamer Recipe FAQs
If you’re curious about the benefits of making your own coffee creamer, check out this article from Prevention Magazine, where this very recipe was featured, “5 Worst Things in your Coffee Creamer – And What You Should Use Instead.”
While some store bought varieties are not good (at all), this homemade paleo coffee creamer IS totally healthy! It’s dairy-free, refined-sugar free, vegan and paleo! It adds the perfect flavor and creaminess to your coffee without sacrificing health or taste! PLUS it is only 4 ingredients and is crazy easy!
Absolutely! We use coconut milk or coconut cream in this recipe and it turns out amazingly creamy and ultra delicious! Coconut milk is my favorite base for coffee creamer!

If you make and love my recipes, it would mean so much to me if you would leave a comment and rating! And don’t forget to follow along on Instagram, Pinterest, Facebook, TikTok and Youtube – be sure to tag @joyfoodsunshine and use the hashtag #joyfoodsunshine so I can see your creations!

Homemade Healthy Coffee Creamer Recipe
Video
Ingredients
- 13.5 ounces coconut milk
- 2 Tablespoons Almond Milk (unsweetened, vanilla)
- 3 Tablespoons coconut sugar
- ⅛ teaspoon fine sea salt
- ½ vanilla bean
Instructions
- Shake up a can of coconut milk then pour it into a small saucepan.
- Add almond milk and stir to combine.
- Add the coconut sugar & a pinch of salt, whisk to combine.
- Cook over medium-low heat until the mixture just starts bubbling and sugar is dissolved (don’t let it boil or you’ll have a coconutty mess all over your stove)!
- Cut the vanilla bean in half lengthwise and scrape out the seeds. Add seeds to the milk mixture and stir.
- Put the whole vanilla bean into the pot and cover with a lid.
- Let the mixture sit for at least 30 minutes, or until cooled to room temperature.
- Using a fine mesh strainer, strain your creamer as you pour it into a glass jar. Discard beans.
- Store in a glass jar with a lid in the refrigerator! Give it a shake before adding it to your favorite coffee!
Notes
- Coconut milk: lite works well, but full-fat is best.
- Almond milk. The almond milk is added to this recipe to ensure that it doesn’t solidify when stored. In this case, any other nondairy milk can be used in place of almond milk.
- Coconut sugar: Maple syrup or honey may be used in place of some (or all) of the coconut sugar.
- Vanilla beans: If you want to make this quicker and easier, substitute 1 teaspoon vanilla extract for the vanilla bean. Add the extract once the sugar is dissolved and you remove the mixture from the heat.
Nutrition
Nutrition information is automatically calculated, so should only be used as an approximation.


I use a frother too, however I have a problem with splashing. I froth from my coffee mug with coffee and creamer in it, and I got a big mess, coffee and cream all over my counter and the coffee maker. What am I doing wrong?
What are you frothing? If you want to froth the cream, I suggest doing it in your mug without the coffee, then add the coffee once it’s frothy!
What other sugars will work? Can I use raw sugar?
You can use organic cane sugar!
Help! I am using Trader Joe’s organic coconut milk and I am getting a solidified layer on the top after I heat everything together and put in the fridge. What am I doing wrong?
Hmm…that should not happen. Did you make any other changes? What are the ingredients in the coconut milk? Are there any stabilizers/gums?
No other changes. I checked the ingredients and it’s just organic coconut milk.
Does this work in a frother?
I haven’t tried it in a frother – that is a great question! I will have to experiment. If you try it, report back and let me know how it goes!
I made the creamer last night. I used maple sugar. It worked great in the frother!
This is my new coffee creamer. I am so glad I found your site in my search fir a good creamer. Thanks!
I’m SO happy to know it works well in a frother, Susan! Thank you so much!!
I have been wanting to make this but my kroger doesn’t seem to stock vanilla beans. How would I replace with vanilla bean paste? I know you state that you can use extract but I really want the beans for added flavor. Can’t wait to try this.
You can use 1 teaspoon vanilla bean paste!
I really want to try this recipe but I cant have almonds. Should I leave it out or what can I use to substitute the almond milk?
Coconut milk!
Hi Colleen!
I used Oat milk to sub for the almond milk. You could realistically use any milk(aside from coconut) to get the same effect as almond milk. It is added to the recipe to help keep the coconut milk from hardening. Hope that helps!
Can you use coconut milk out of a carton (refrigerated) instead of the canned variety or is there some difference in the two of them that makes it not work as well?
Refrigerated should work well!
I have to get my cholesterol numbers down. What is the cholesterol content of this recipe?
Can you increase the amount of almond milk? Or could I use almond extract to increase the almond flavor?would that work?
Has anyone tried to can this coffee creamer for a longer shelf life? Can it be done?
RubyRed