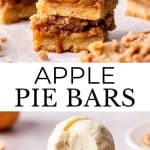
Apple Pie Bars
Updated May 21, 2026
This post may contain affiliate links. Please read our disclosure policy.
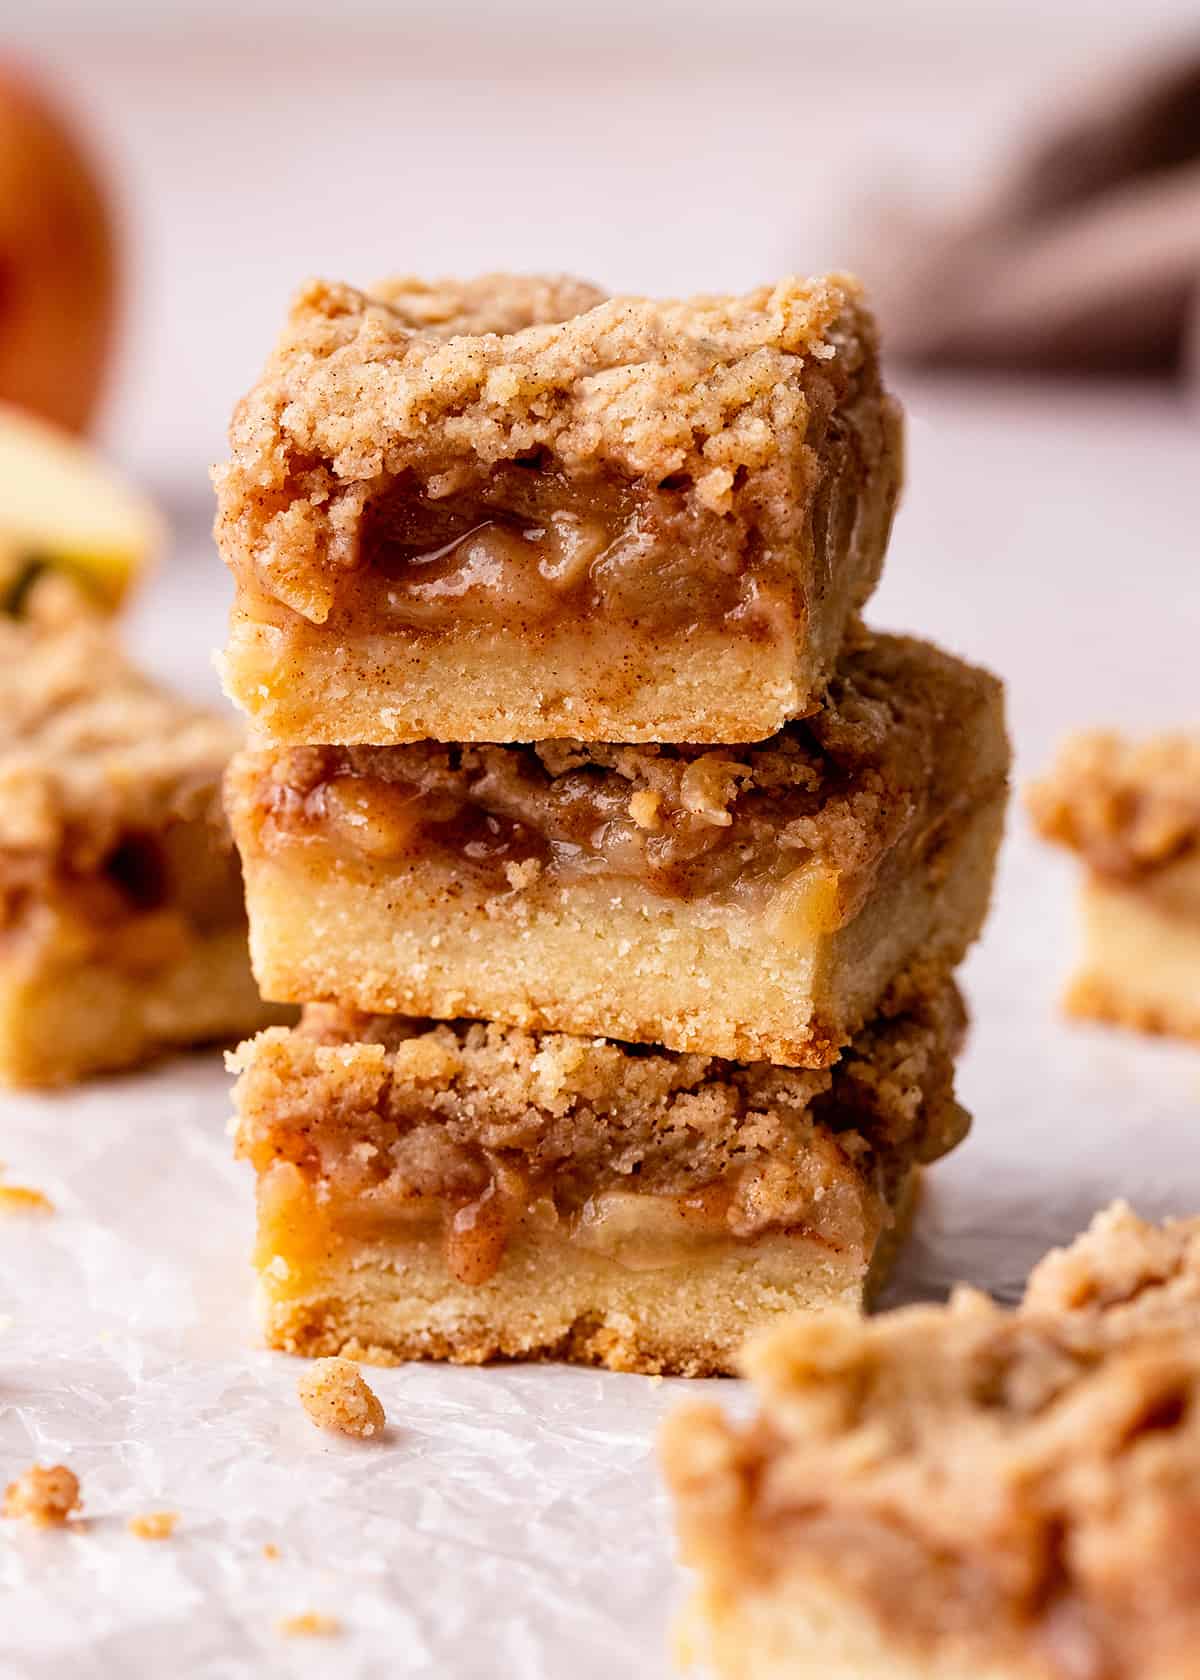
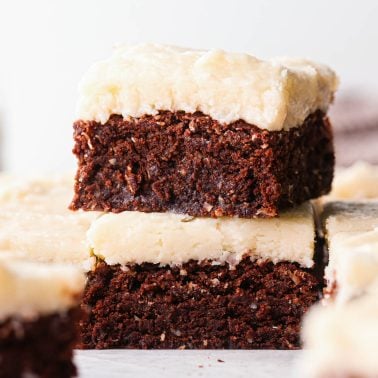
These apple pie bars taste just like apple pie but are even easier to make. A from-scratch apple filling sits between a buttery shortbread crust and a delicious crumb topping for an irresistible fall dessert.

Apple pie is a true dessert classic, but can be a bit intimidating. Enter: these apple pie bars!
They taste just like apple crumble pie or dutch apple pie but are easier to make! There’s no chilling or pie dough required to make this delicious fall treat. And they are cut neatly into squares for easy serving!
The apple filling is made from scratch with simple ingredients. Sandwiched between the buttery shortbread crust and sweet crumble topping – this bakery-quality dessert will become a family favorite!
Apple Pie Bars: Ingredients & Substitutions
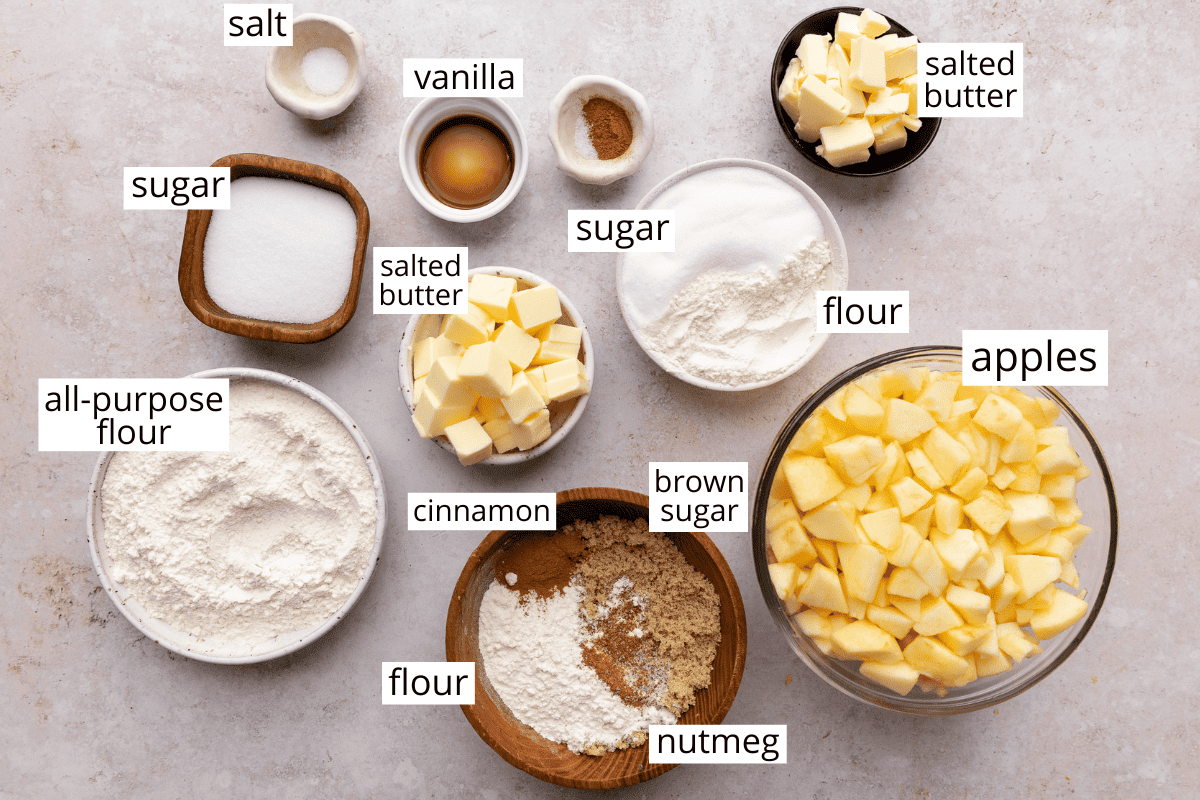
- Apples. Choose your favorite apple variety! I recommend pink lady, honey crisp, gala, jazz, granny smith, McIntosh, etc. A sweet/tart mixture is my favorite. Also try raspberry bars & cherry bars for different varieties!
- Light brown sugar. dark brown sugar works well, it imparts are bolder molasses taste.
- All-purpose flour. to make these gluten-free, use all-purpose gluten-free baking flour.
- Salted butter. Unsalted butter works well in this recipe.
- Granulated Sugar. Use white granulated sugar or organic cane sugar for the best results.
- Pure Vanilla Extract. If you’d like, you can use a combination of vanilla and another extract such as almond, lemon, etc.
How to Make Apple Pie Bars
There are three layers to make in this recipe. I suggest laying out the dry ingredients for each separately (label them to avoid confusion). They all use similar ingredients just in different amounts.
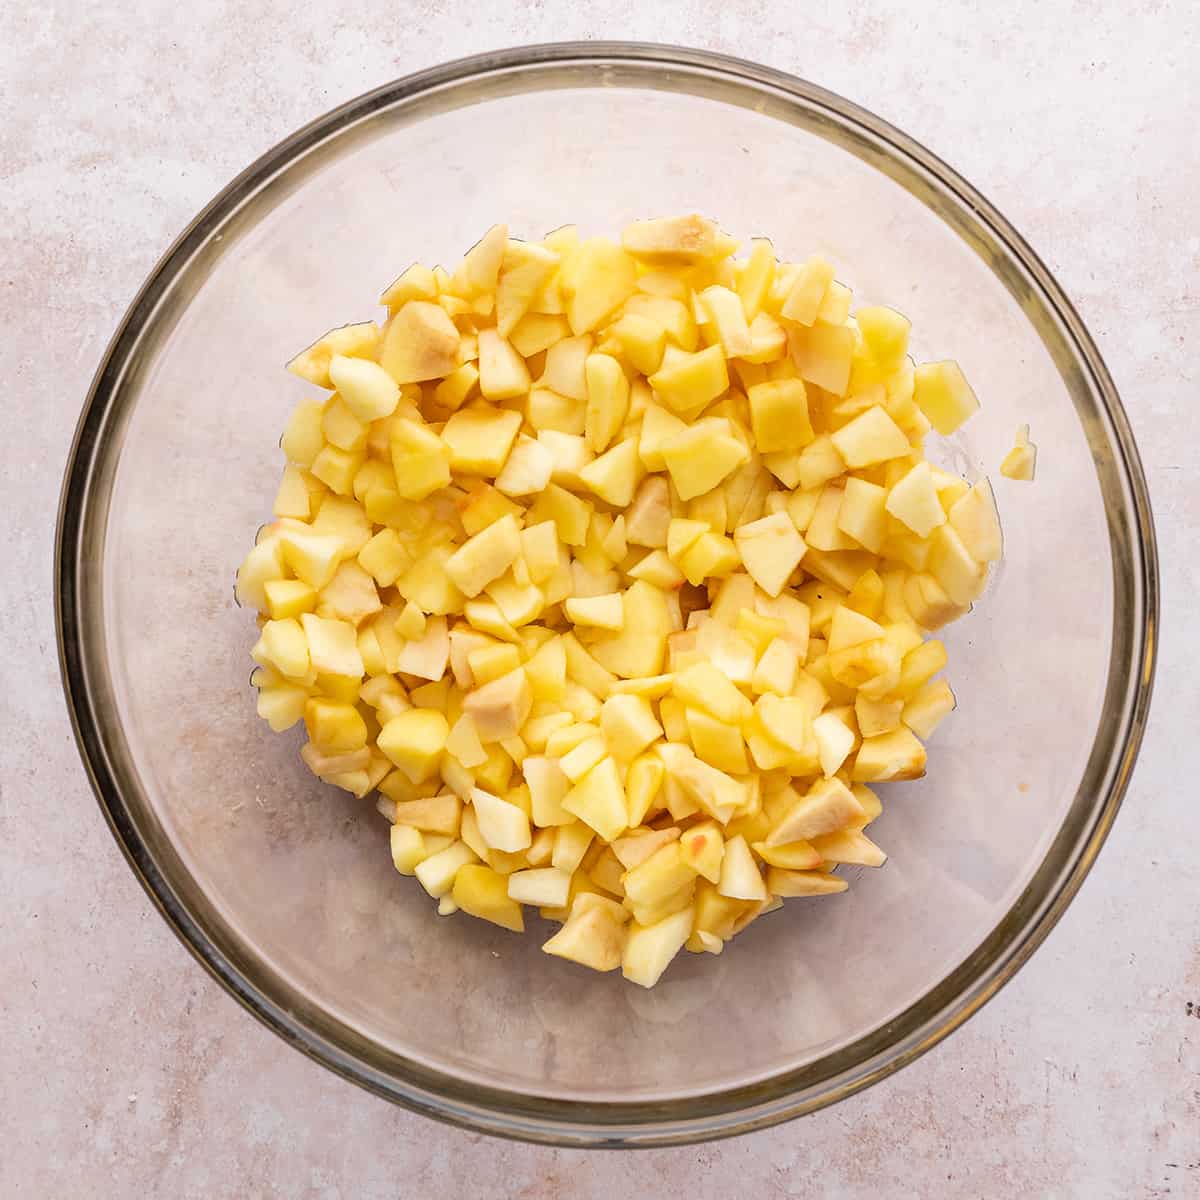
Make the Apple filling
Since we precook the apples and they need to cool, we start by making the apple filling.
So, begin by placing the peeled, cored and sliced apples in a microwave safe dish. Cover and cook for 6 minutes, until apples are slightly soft.
Once apples are finished cooking in the microwave, put them in a colander to drain excess water. Let them cool in the colander for at least 10 minutes.
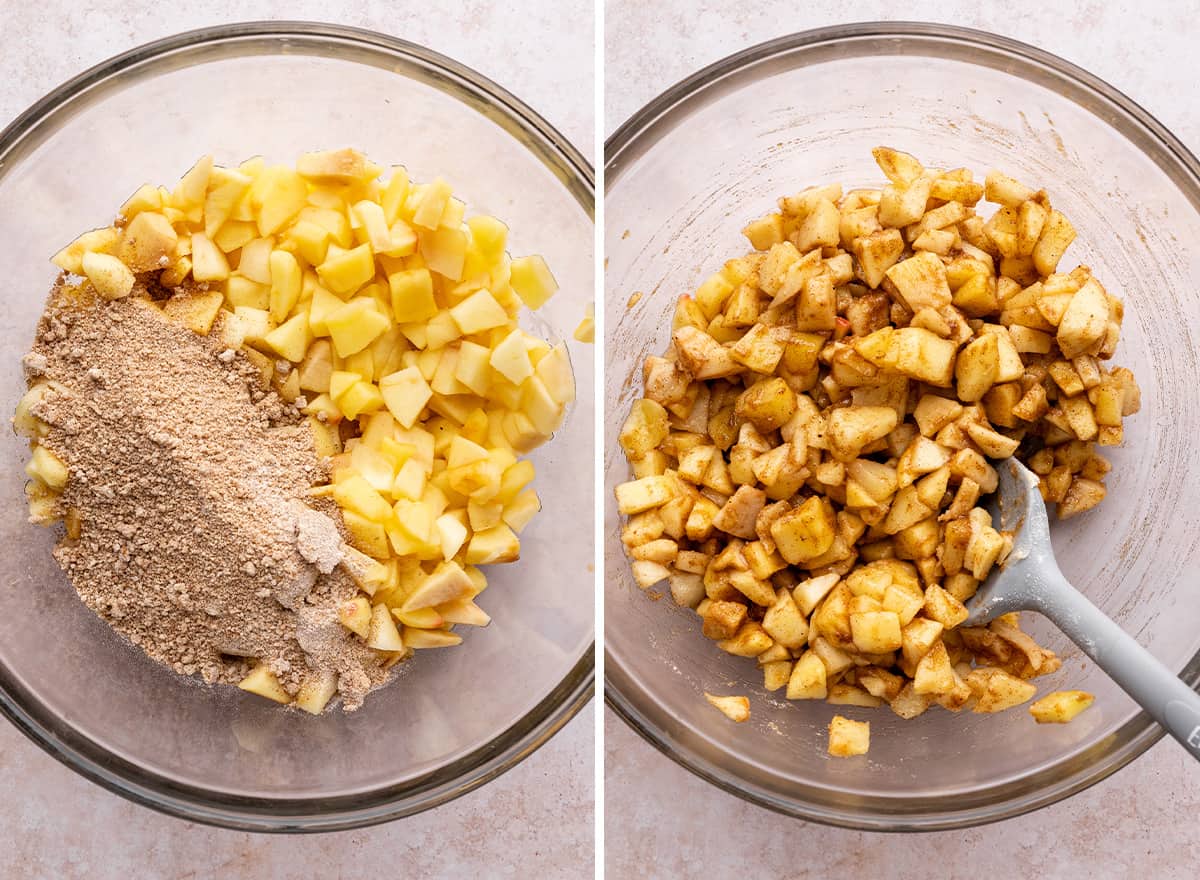
While apples are in the microwave, mix together the sugar, flour cinnamon and nutmeg in a small bowl.
Then, transfer the cooled & drained apples to a bowl and stir in dry ingredient mixture until evenly distributed.
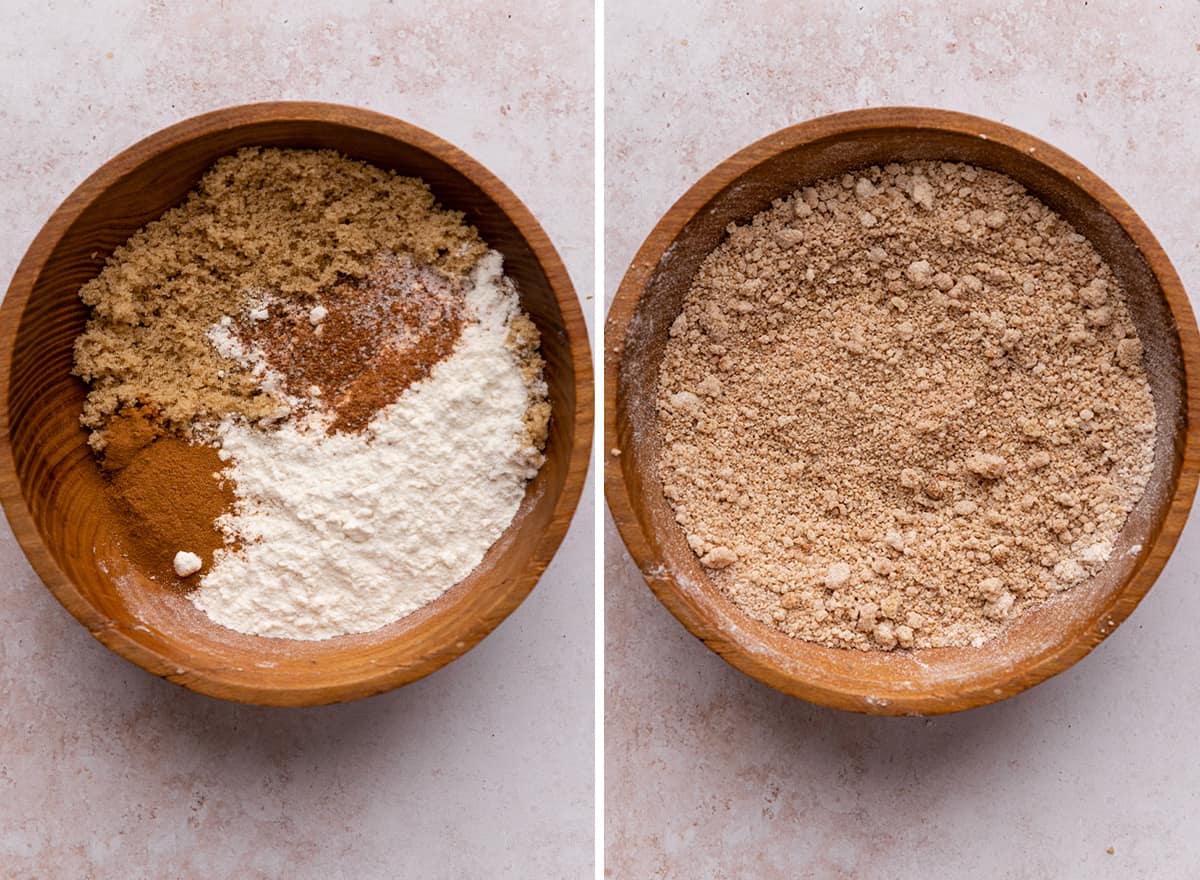
Make the Crumb Topping
Next, prepare the crumb topping by mixing together sugar, flour, cinnamon and salt in a small bowl.
Then cut in butter with a fork, a pastry cutter, or your hands until large crumbs form. Set it aside.
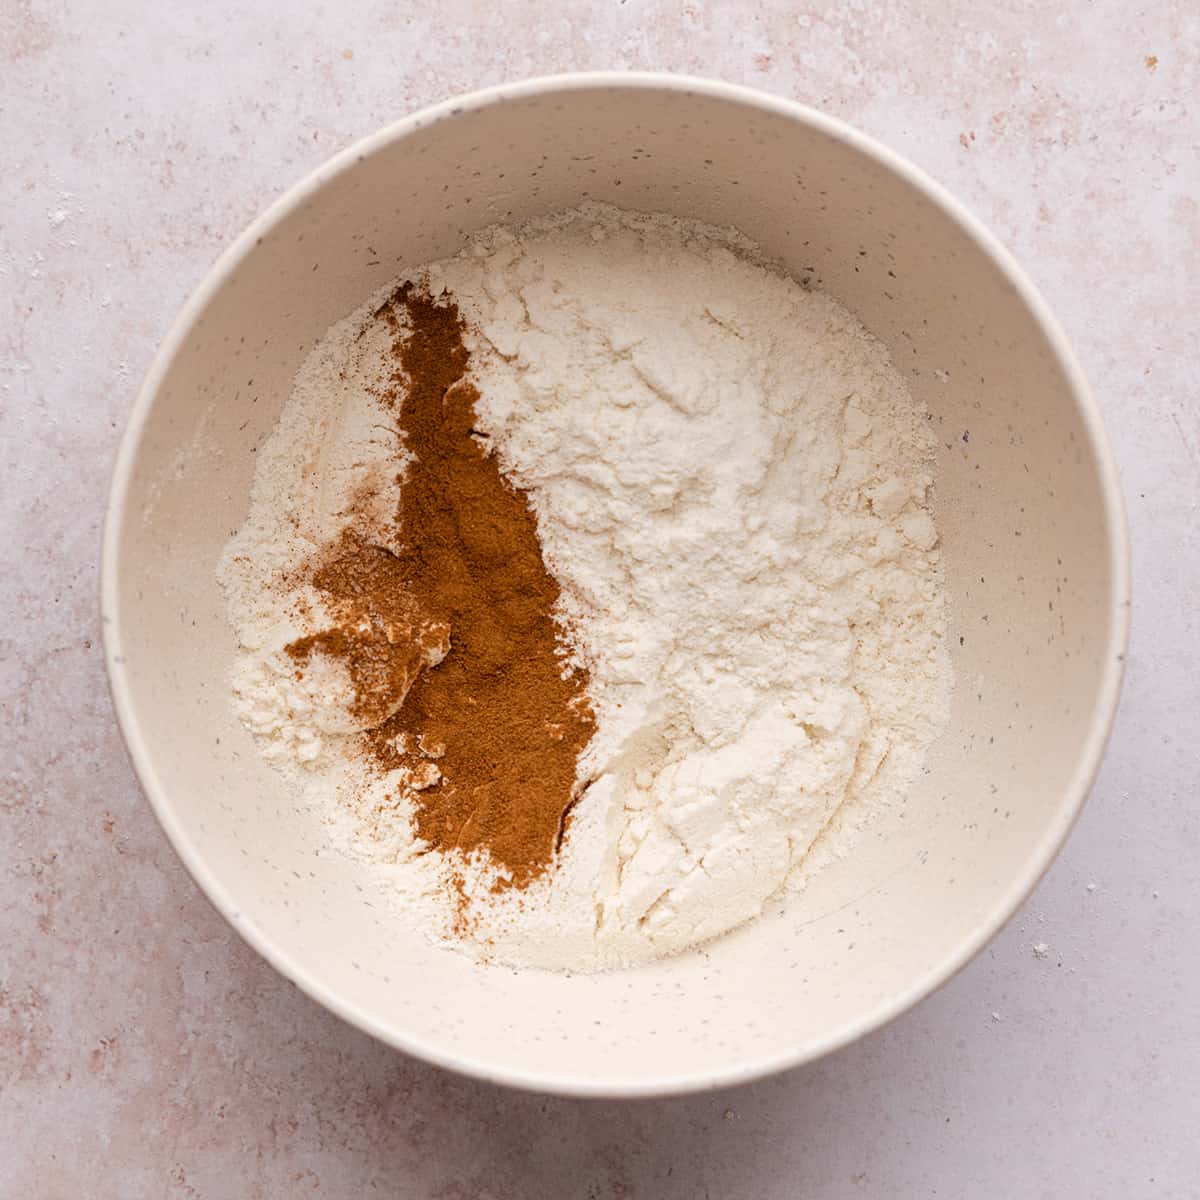
Make the Shortbread Crust
I suggest making the shortbread crust last because it’s very simple. Plus, once it’s done you can assemble and bake the apple pie bars right away.
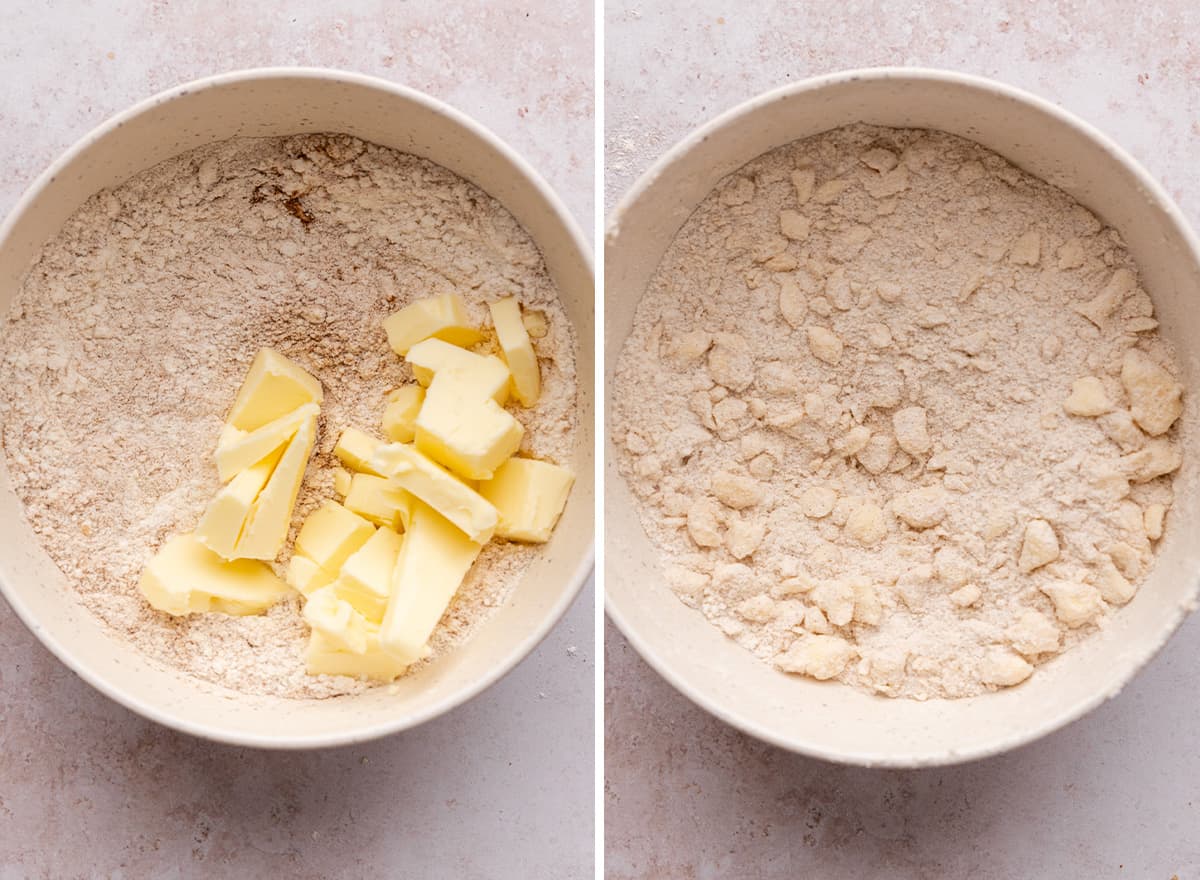
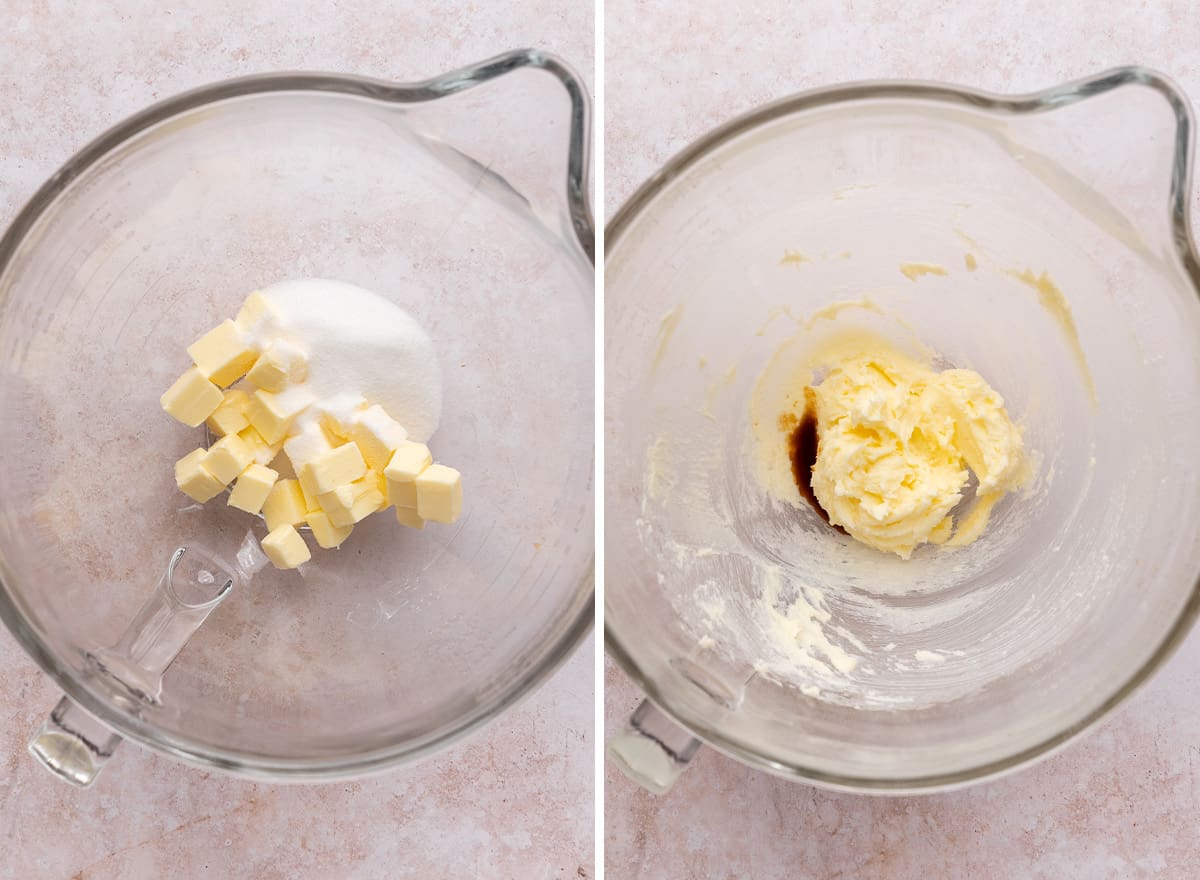
Begin by beating the butter and sugar together for 60 seconds either in a standing mixer fitted with the paddle attachment, or in a large bowl with a handheld mixer.
Then add the vanilla and beat until incorporated.
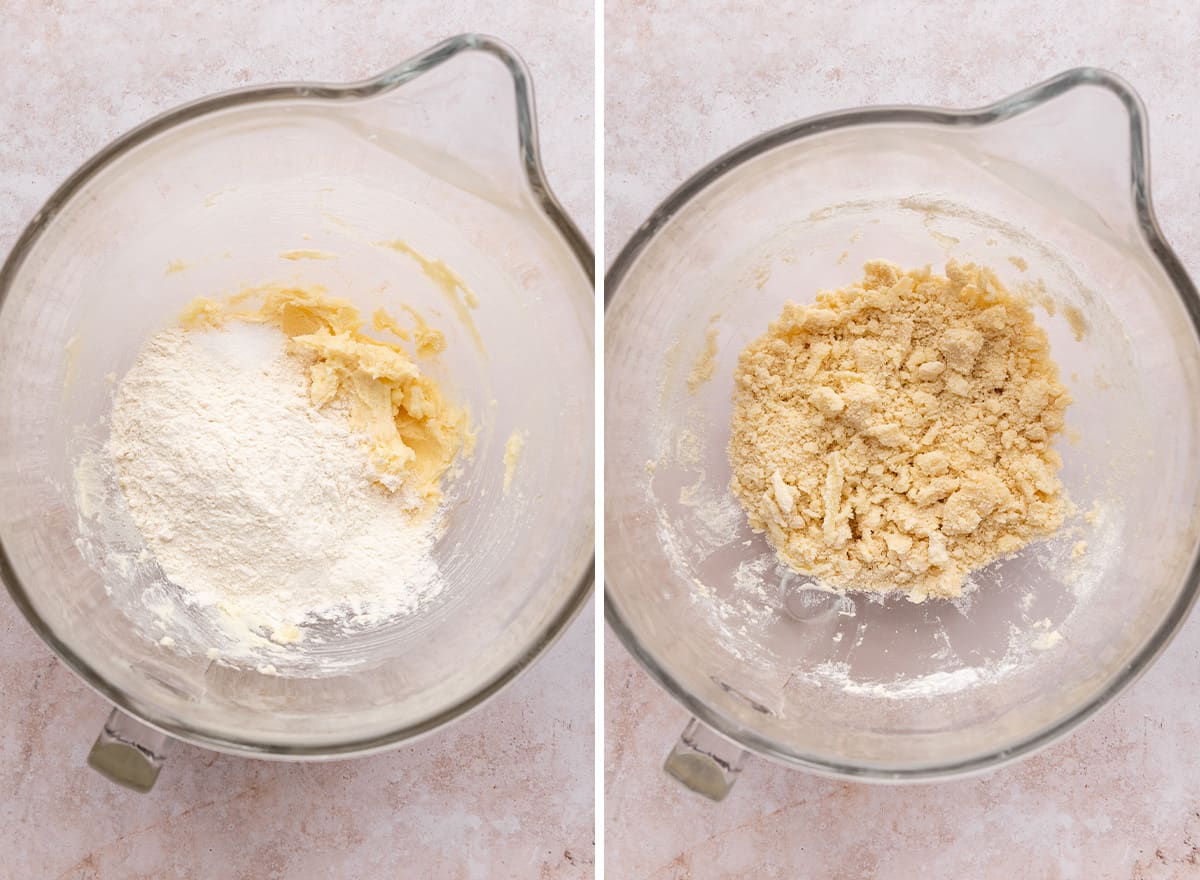
Next, add the flour and salt and beat until coarse, large crumbs form (about 60-90 seconds).
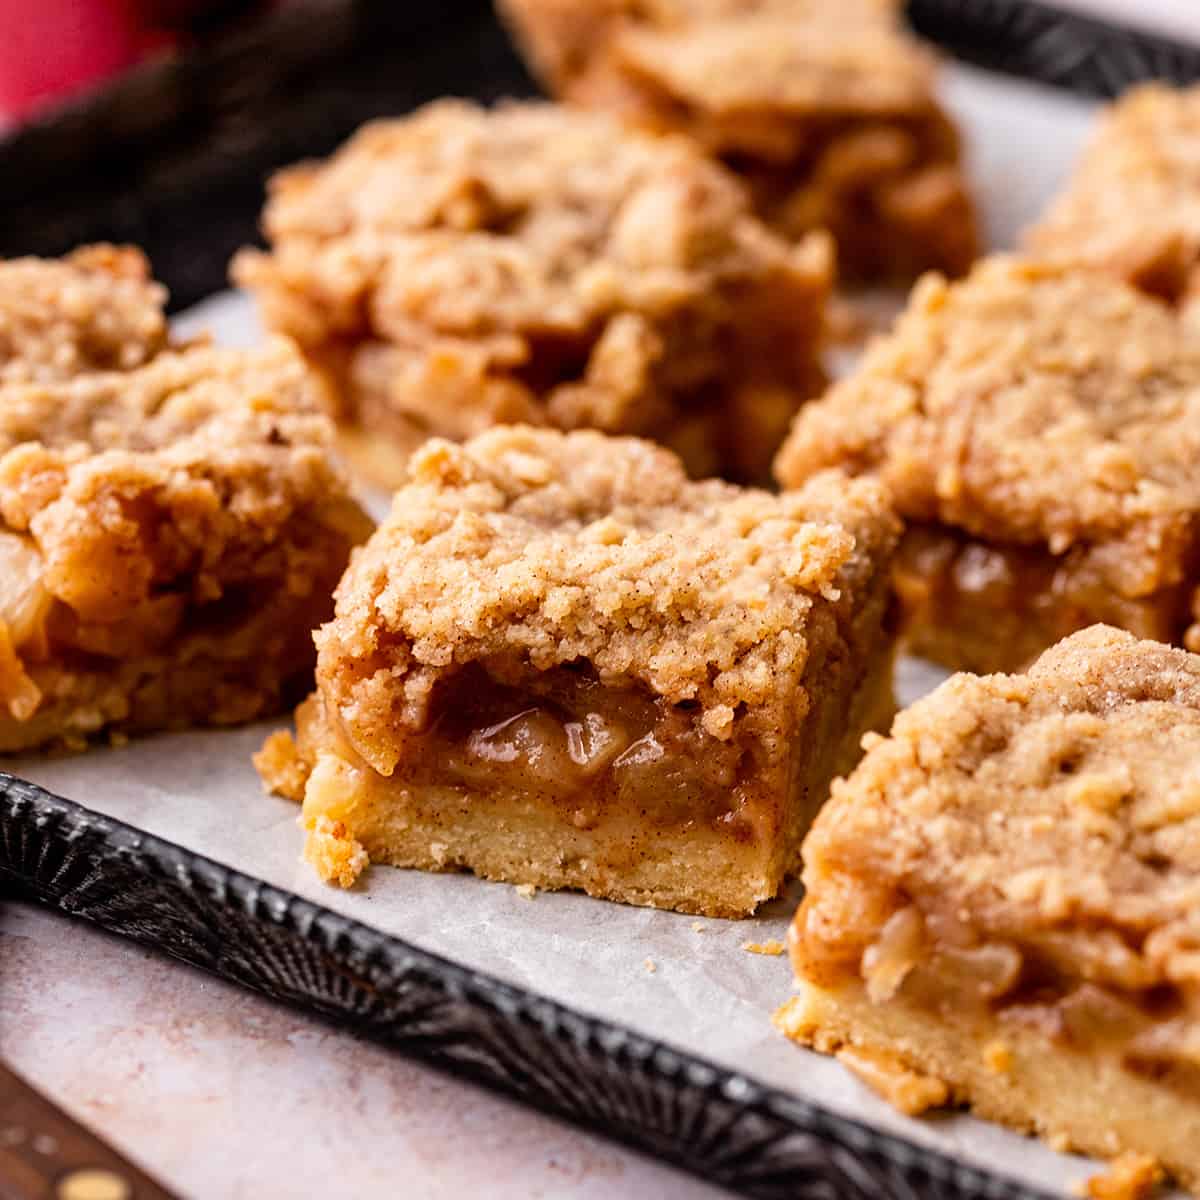
Assemble & Bake
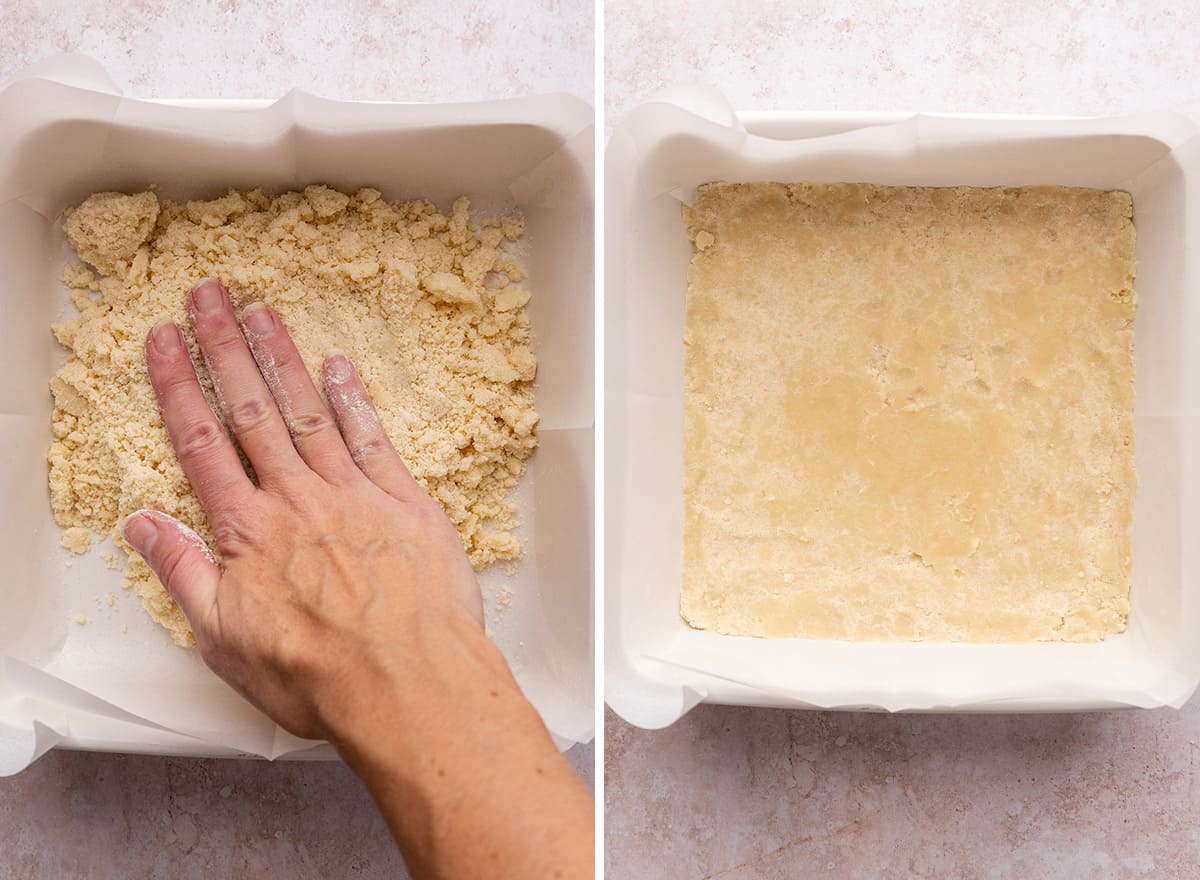
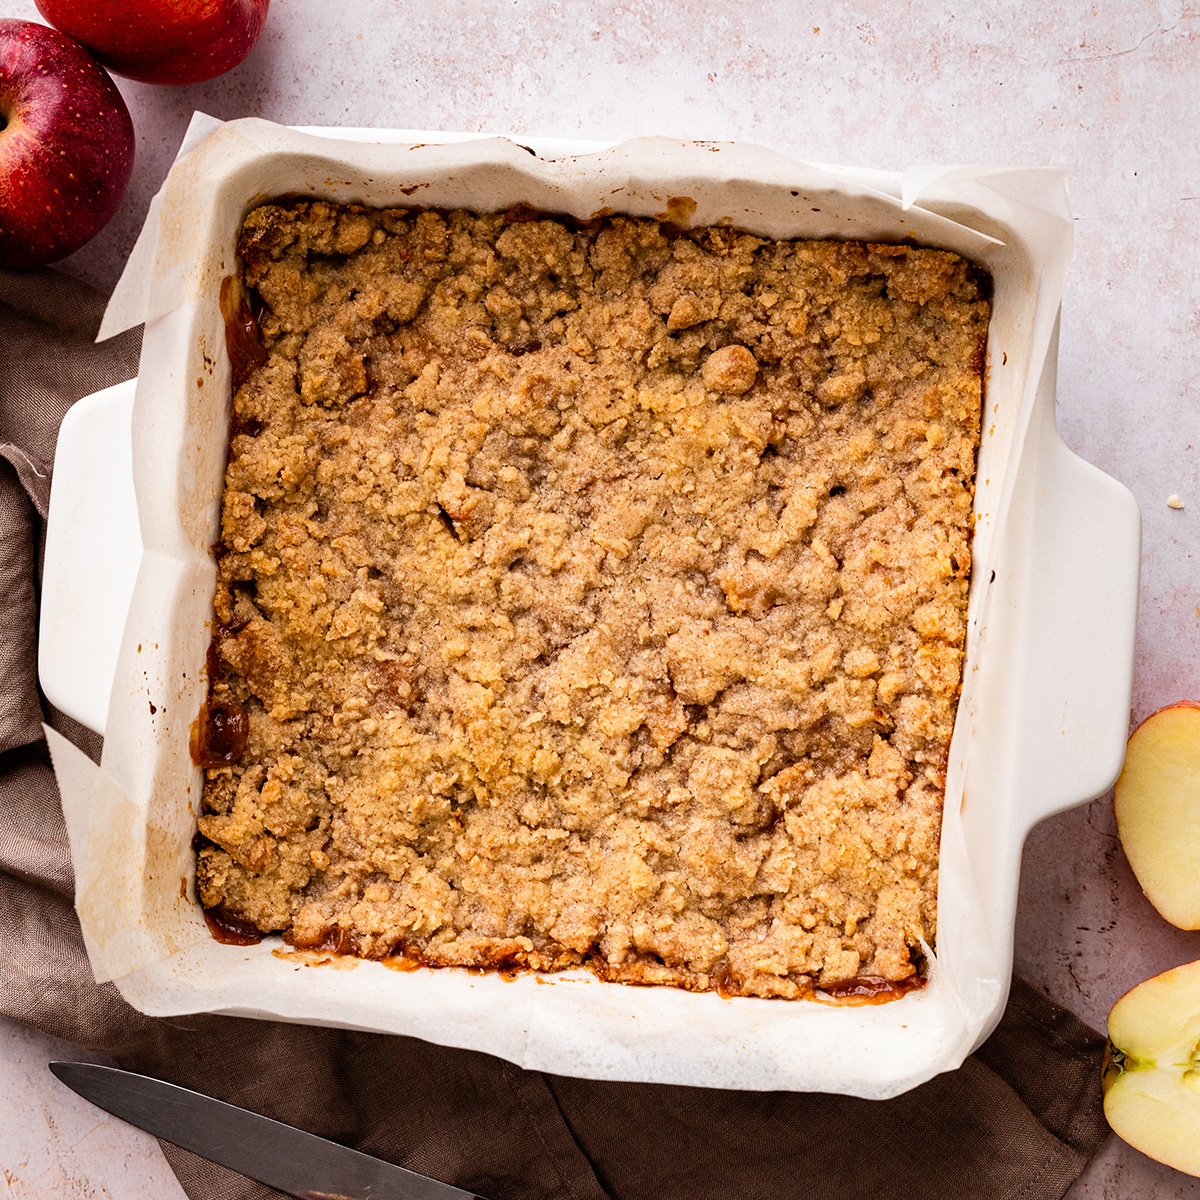
Spread the dough into the bottom of a 9×9″ baking dish, and use floured hands to press it into an even layer.
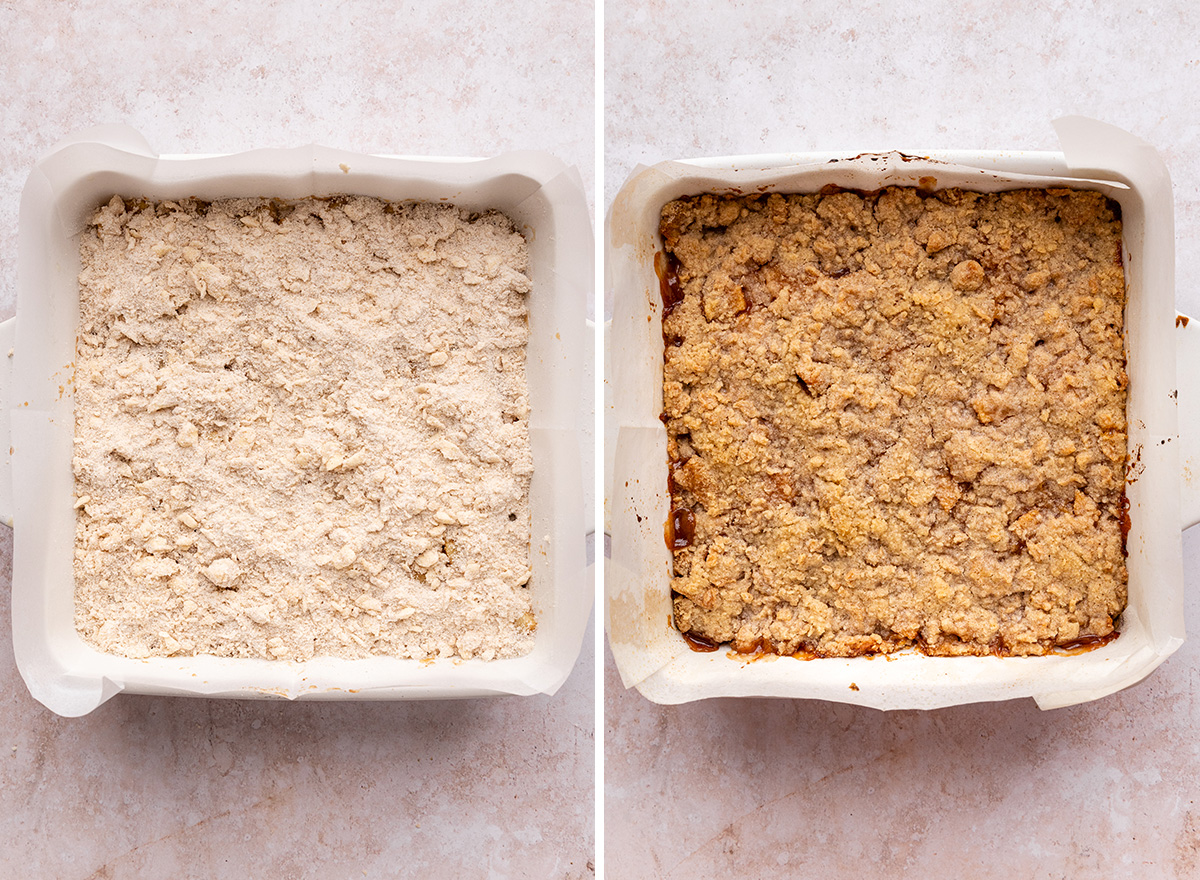
Then, spread the apple filling evenly over the crust, then sprinkle the crumb topping over the apples.

Bake the apple pie bars at 350 degrees for 50-55 minutes or until the stop is set and the filling is bubbly.
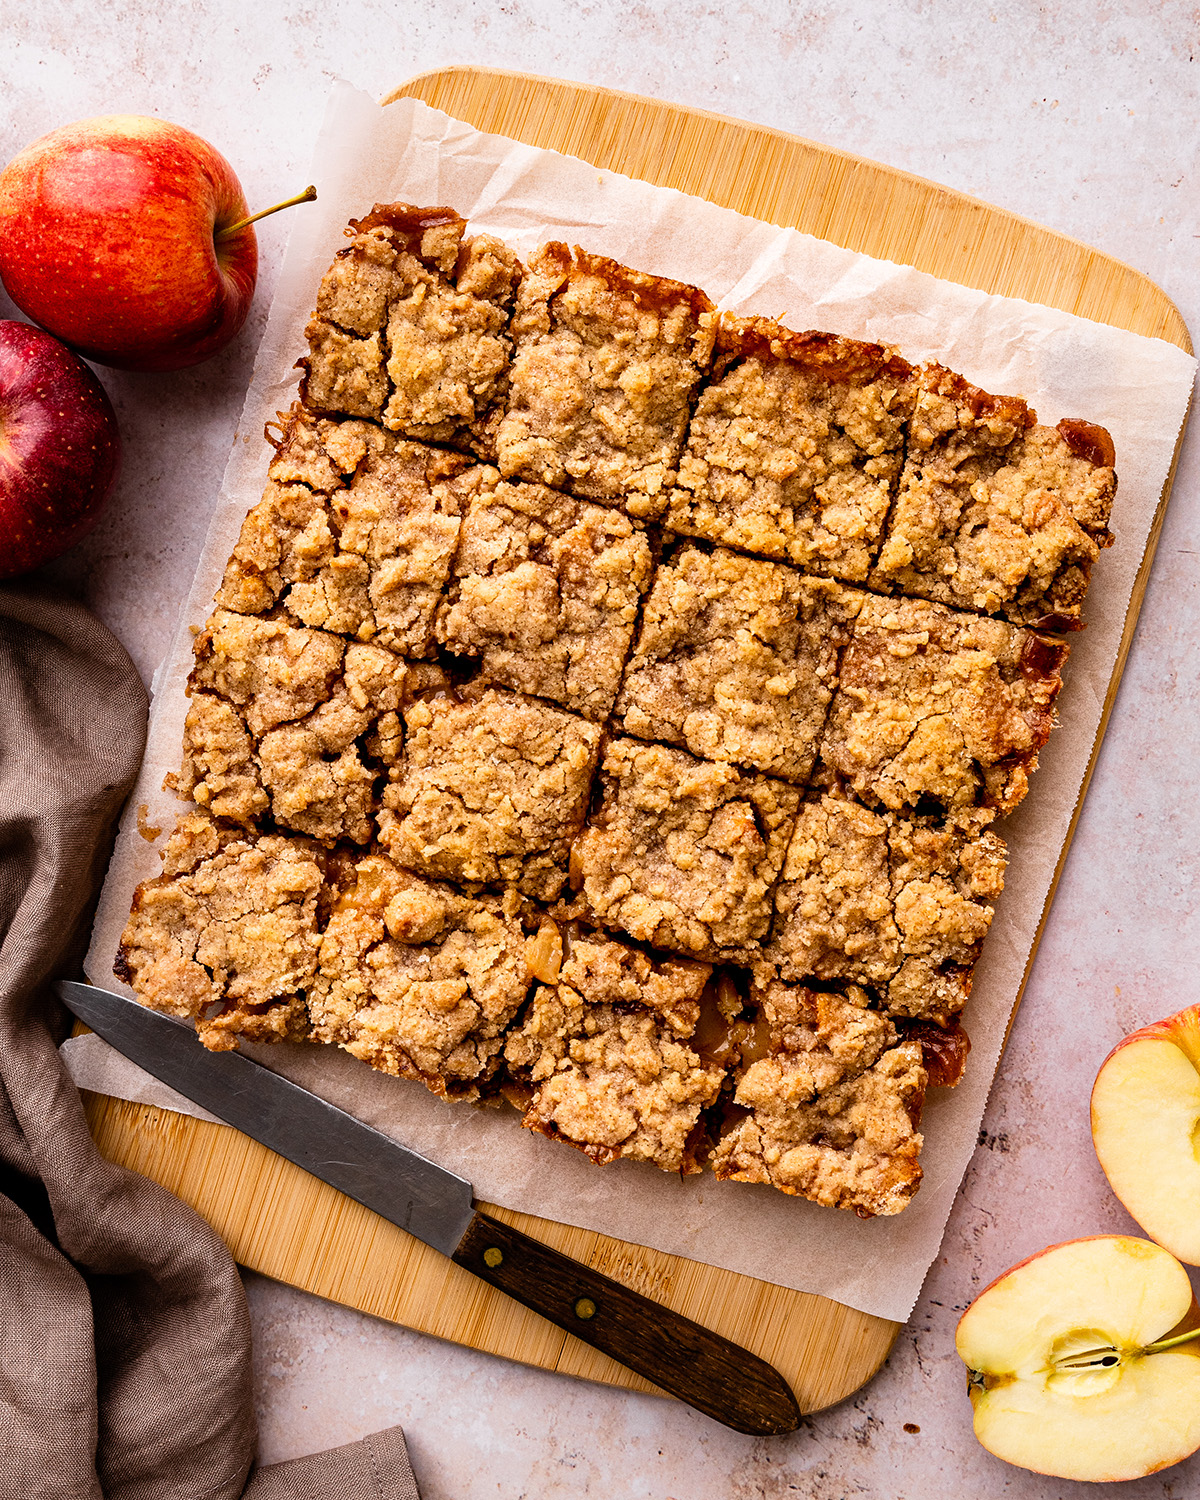
Let the bars cool to room temperature before serving. The bars are best served once they are completely cool for easy cutting and serving.
Serve
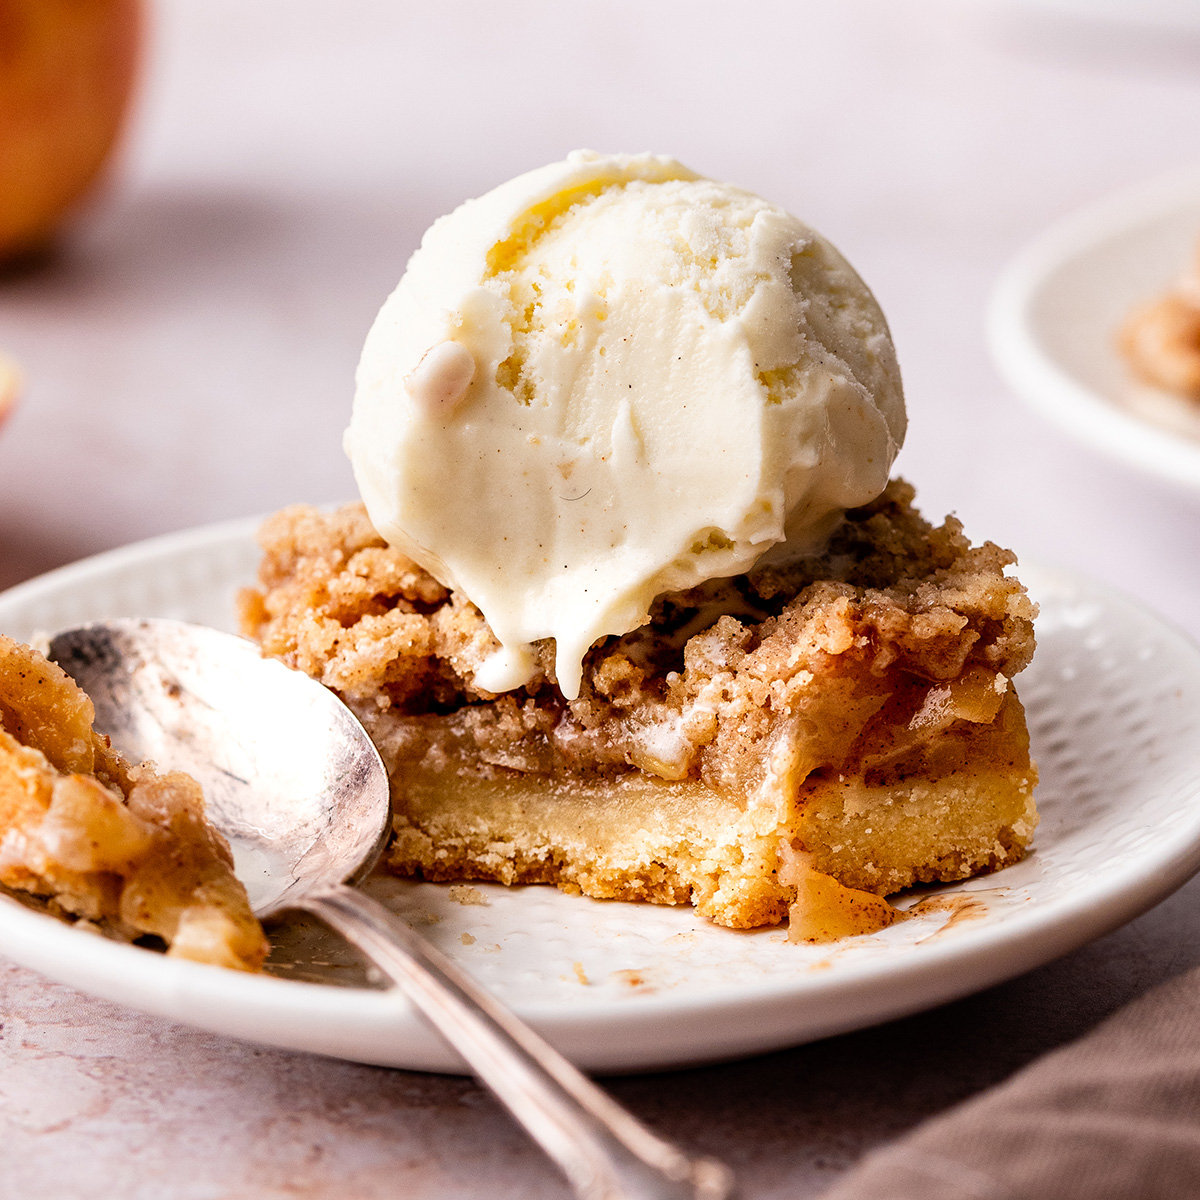
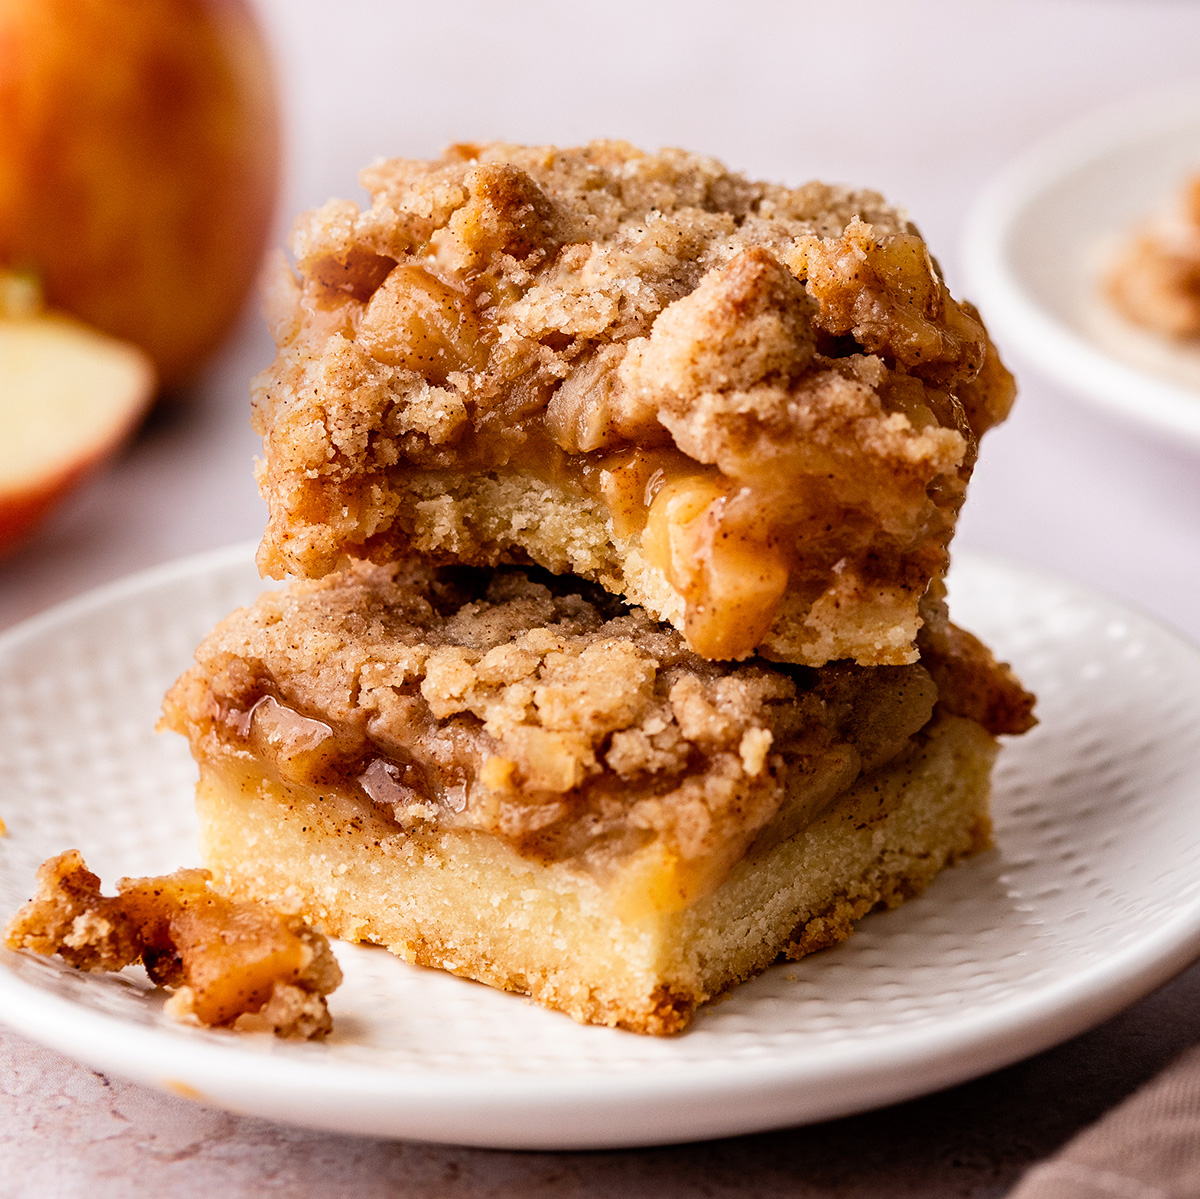
Cut into squares and serve with a dollop of homemade whipped cream or vanilla ice cream or caramel sauce! Also, try more delicious apple recipes like apple crisp, apple cobbler and apple pie!
More Delicious Bar Recipes
If you love pie in bar form, try these recipes:
Store
Store leftover apple pie bars in an airtight container in the refrigerator for up to 5 days.
Freeze
If you have leftover apple pie bars you want to freeze, place them on a baking sheet and put them in the freezer to flash-freeze them.
Then, once the bars are frozen, wrap them in plastic wrap and store in an airtight container for up to 2 months. Thaw in the refrigerator for about 6 hours.
Apple Pie Bars Recipe FAQs
Yes, double the ingredients and bake in a 9×13″ pan.
Yes, I suggest storing them in the refrigerator so they last longer.
Yes, if you prefer to cook the apples on the stovetop instead of in the microwave, that’s a great choice. Put the peel and sliced apples in a large nonstick skillet or cast iron pan, cover and cook until soft. You may need to add a splash of water or pat of butter, but the apples should release juices and cook without it.
If you make and love my recipes, it would mean so much to me if you would leave a comment and rating! And don’t forget to follow along on Instagram, Pinterest, Facebook, TikTok and Youtube – be sure to tag @joyfoodsunshine and use the hashtag #joyfoodsunshine so I can see your creations!

Apple Pie Bars Recipe
Video
Equipment
Ingredients
Apple Filling
- 3 pounds apples peeled and sliced (8 cups sliced apples)
- ⅓ cup light brown sugar
- 2 Tablespoons all-purpose flour
- 1 teaspoon ground cinnamon
- ¼ teaspoon ground nutmeg
- ⅛ teaspoon sea salt
Shortbread Crust:
- ½ cup salted butter softened
- ¼ cup granulated sugar
- ½ teaspoon pure vanilla extract
- 1 cup all-purpose flour
- ¼ teaspoon fine sea salt
Crumble topping
- ¼ cup granulated sugar
- ½ cup all-purpose flour
- ¼ cup salted butter
- ½ teaspoon ground cinnamon
- Pinch sea salt
Instructions
- Preheat the oven to 350 degrees F.
- Line a 9×9” baking dish with parchment paper and lightly grease, set aside.
Make the Apple filling:
- Place the peeled, cored and sliced apples in a microwave safe dish and cook for 6 minutes, until apples are slightly soft.
- While apples are in the microwave, in a small bowl, mix together sugar, flour cinnamon and nutmeg.
- Once apples are finished cooking in the microwave, put them in a colander to drain excess water. Let them cool in the colander for at least 10 minutes.
- Transfer cooled & drained apples to a bowl, add dry ingredient mixture and stir until it’s evenly distributed.
Make the Crumb Topping:
- In a small bowl, mix together sugar, flour, cinnamon and salt until combined.
- Cut in butter with a fork, a pastry cutter, or your hands until crumbly.
- Set aside.
Make the crust:
- In the bowl of a standing mixer fitted with the paddle attachment, or in a large bowl using a hand-held mixer, beat butter and sugar for 60 seconds.
- Add vanilla and beat until incorporated.
- Add flour and salt and beat until coarse, large crumbs form (about 60-90 seconds).
- Pour the dough into the bottom of the prepared baking dish, using lightly floured hands, press it into an even layer.
Assemble & Bake
- Spread the apple filling evenly over the crust.
- Then, sprinkle the crumb topping over the apples
- Bake at 350 degrees for 50-55 minutes or until the stop is set and the filling is bubbly.
- Let cool to room temperature before serving.
Serve
- Cut into squares and serve with a dollop of homemade whipped cream or vanilla ice cream or caramel sauce
Notes
- Apples. Choose your favorite apple variety! I recommend pink lady, honey crisp, gala, jazz, granny smith, McIntosh, etc. A sweet/tart mixture is my favorite.
- Light brown sugar. dark brown sugar works well, it imparts are bolder molasses taste.
- All-purpose flour. to make these gluten-free, use all-purpose gluten-free baking flour.
- Salted butter. Unsalted butter works well in this recipe.
- Granulated Sugar. Use white granulated sugar or organic cane sugar for the best results.
- Pure Vanilla Extract. If you’d like, you can use a combination of vanilla and another extract such as almond, lemon, etc.
Nutrition
Nutrition information is automatically calculated, so should only be used as an approximation.


These apple pie bars were so yummy!! My mom gave me a big box of apples from her sister’s backyard, and I had no idea what to make with them. Since I enjoyed your pumpkin pie recipe so much, I figured you’d have an equally delicious apple dessert recipe. Tried these out tonight and, wow, they are really good! So simple and great with vanilla cream. Thank you for always sharing your goodies with us!!
Thank you Hazel, I’m so happy you love this recipe as much as the pumpkin pie!
Along with your chili, I made these this weekend also…goodness so so delicious also..Again this is another easy simple recipe comes together very quickly…I will definitely be making these again very soon.
I’m SO happy you love this recipe! And what a delicious combination!!!
Made these apple pie bars for thanksgiving dessert. They were delicious. Everybody that ate them said they want the recipe. The kids especially enjoyed them with vanilla ice cream on top. Will definitely make these again😃😃
Thank you Holly!!
Hello Laura,
I made this bars over the weekend to share with co-workers. They are delicious everyone at the office gave them 5 stars and so did my husband. First time for me using Honey Crisps since my favorite is granny Smith but I am fan now of these apples.
Great recipe, thank you!
I’m so glad you discovered honey crisp apples – they’re my absolute favorite! And What a treat to share with coworkers!
Super good! I will definitely do a lot more apples than the recipe says next time, though.
Made this the week before thanksgiving to try out as option for Thanksgiving and it was a total hit! So a week later we just made another batch of these! Making some homemade whipped cream to go with it this time but was great on its own too!
Delicious!!! Your recipe is top notch!
Hi there! I see egg listed in the photo of the ingredients, but not in the actual recipe or the instructions. Should one be included?
Thank you!
Hey Joni! That was an accident that happened when I created the graphic with the labeled ingredients – there is no egg in this recipe. I fixed it!
Great! Thanks Laura! Looking forward to making this!! 🙂