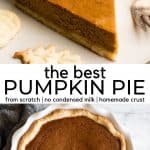
Best Pumpkin Pie Recipe
Posted Sep 05, 2019, Updated May 07, 2024
This post may contain affiliate links. Please read our disclosure policy.
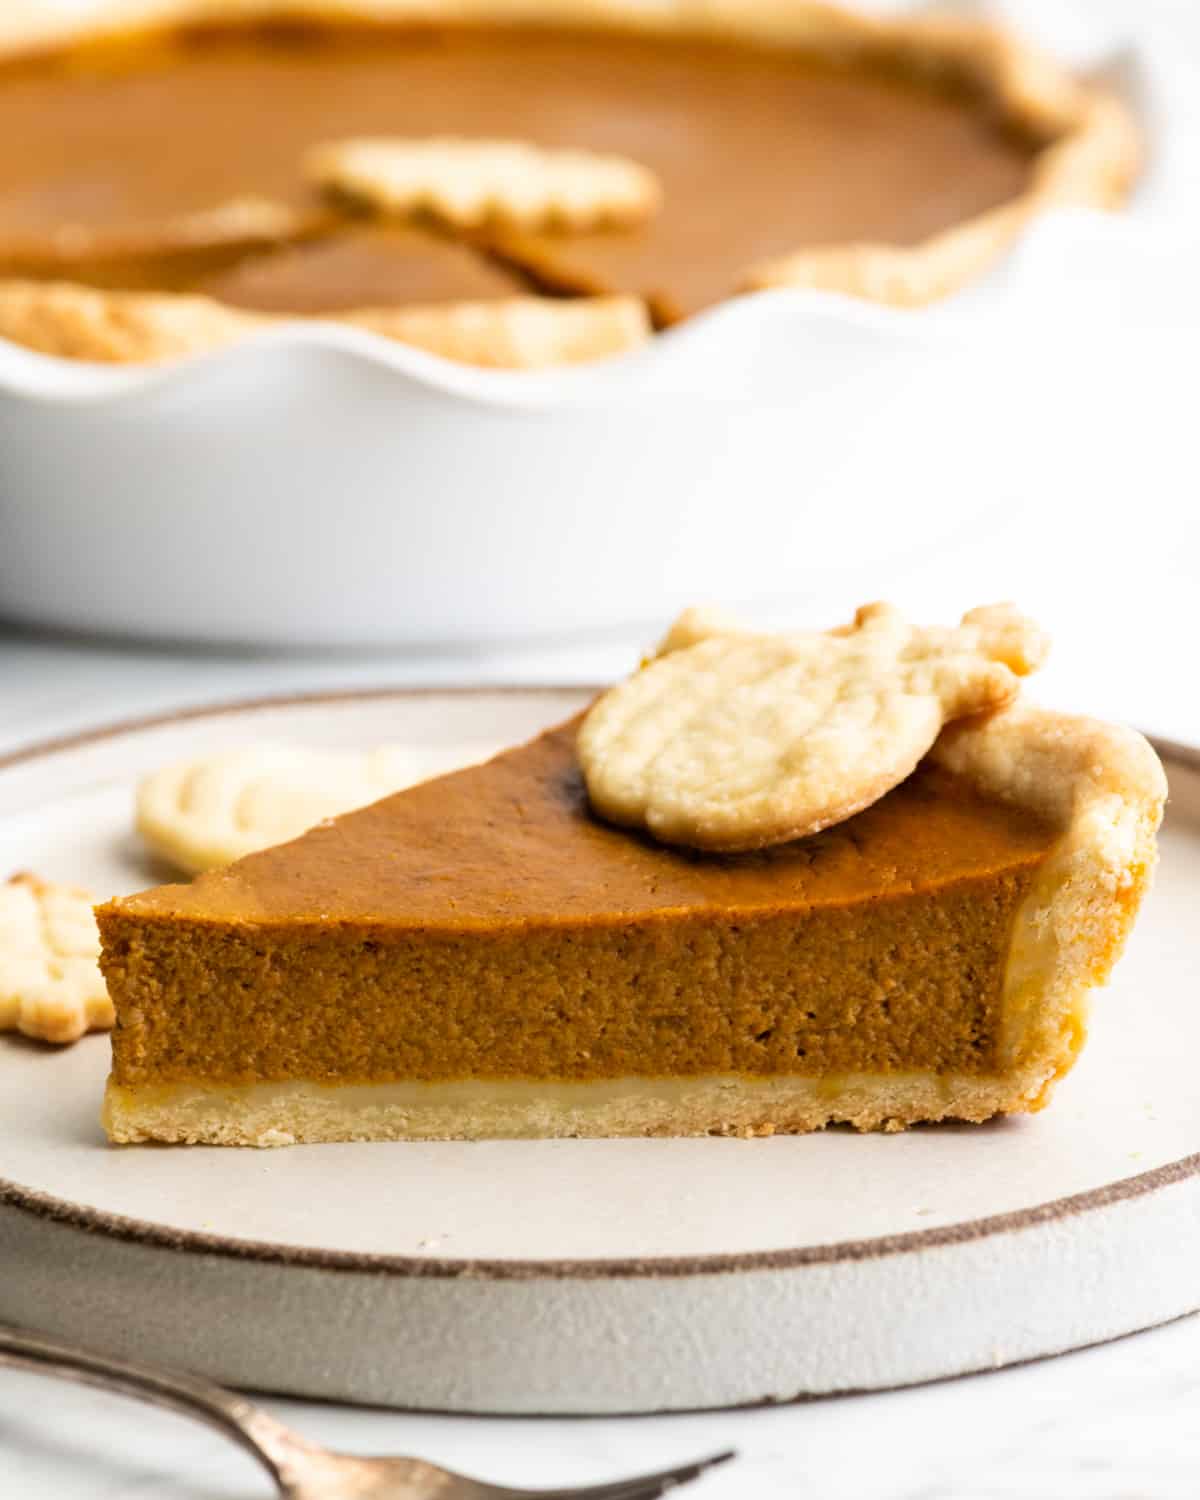
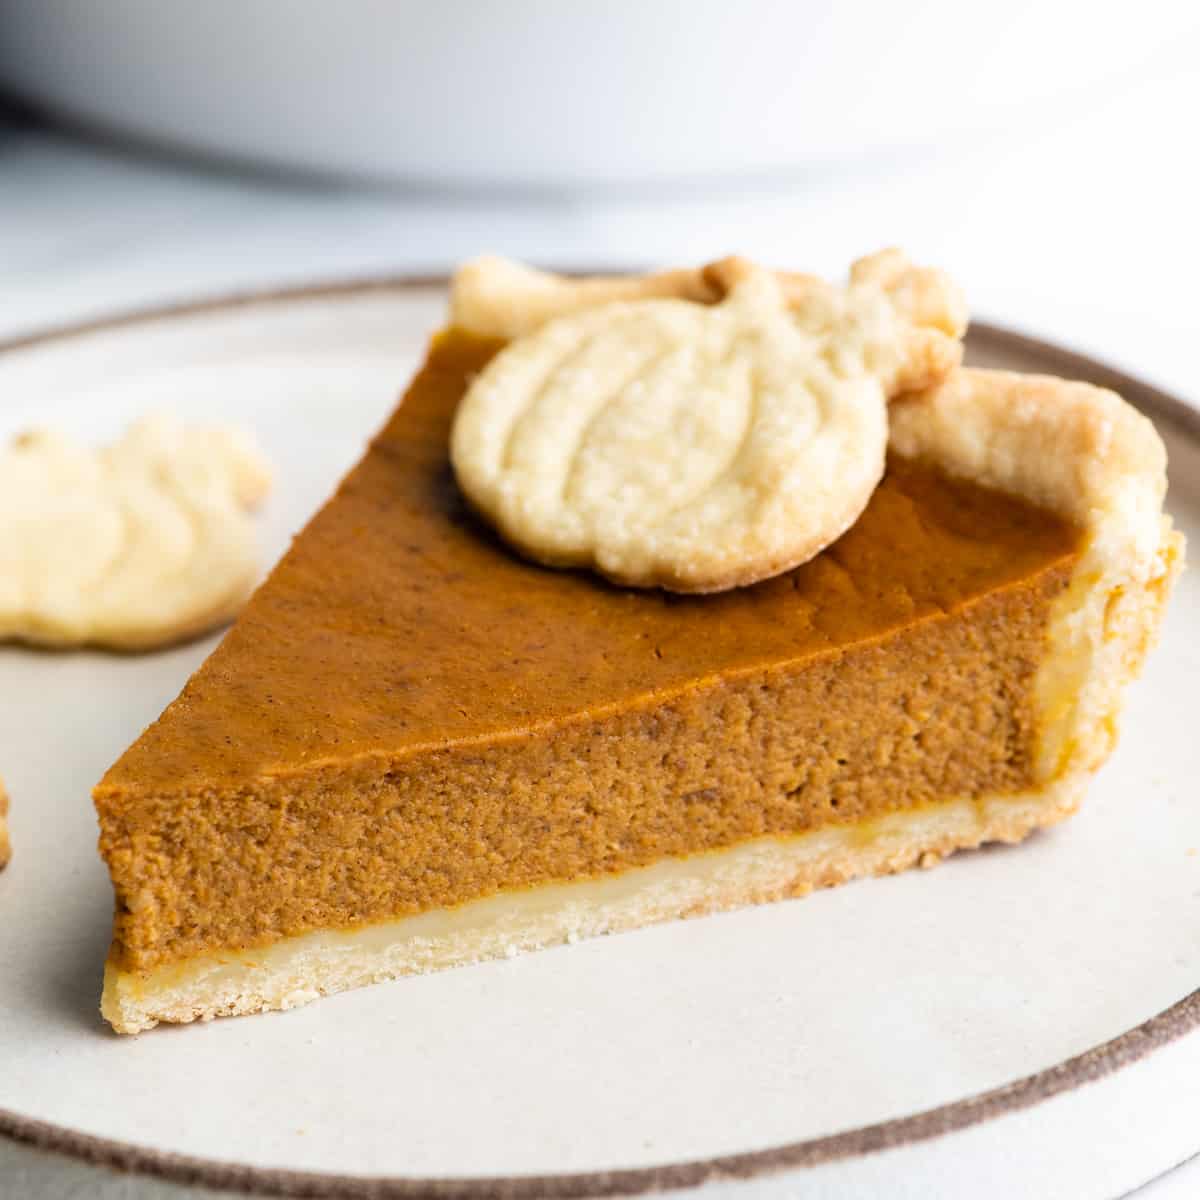
This is the best Pumpkin Pie Recipe ever! It’s easy to make and contains no sweetened condensed milk. It is the only pumpkin pie recipe you’ll ever need – perfect for Thanksgiving.

I know that I’m making a bold clam when I say that this is the Best Pumpkin Pie recipe ever. But I wouldn’t say such a thing if I didn’t believe it was 100% true.
Literally everyone who tries this Pumpkin Pie Recipe falls in love with it. It’s a beautiful blend of creamy, spicy sweet flavors that encompass all that is wonderful about fall.
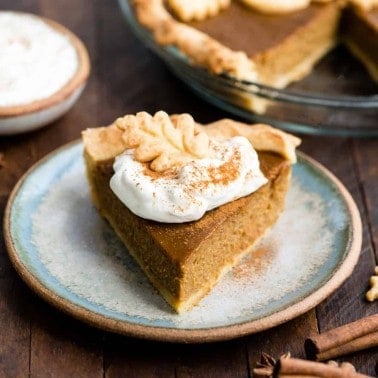
Plus it’s easy to make with only 10 ingredients and no condensed milk! Serve with a dollop of homemade whipped cream for fall dessert perfection!

Pumpkin Pie Recipe: Ingredients & Substitutions
The great thing about this pie is that it is actually fairly versatile (for a pie)! You can tweak a few ingredients to make this pie suitable for all sorts of dietary needs!
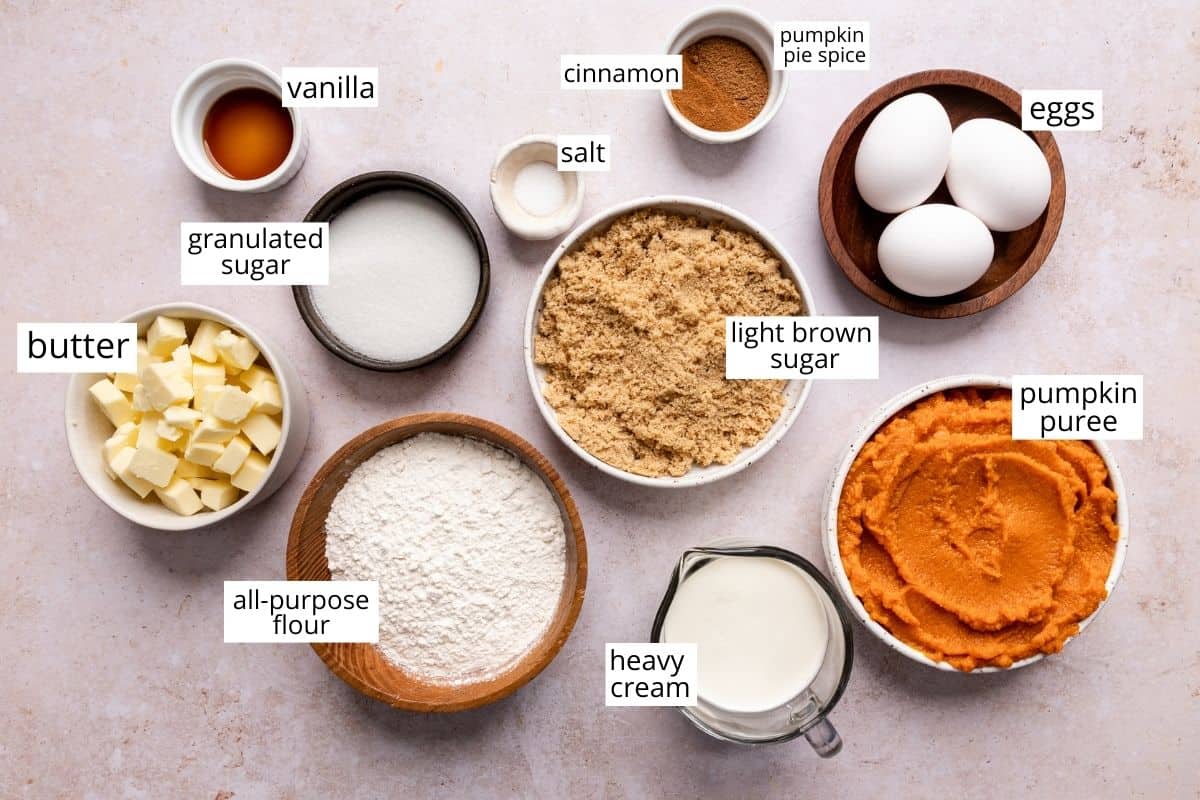
- All-purpose flour: Gluten-free purpose flour can be used in a 1:1 ratio to make this pie! You can also substitute your favorite gluten-free crust if desired!
- Butter. Vegan butter (such as Earth Balance) can be used for a dairy-free version!
- Heavy Cream. Half and half is a great substitute. For dairy-free options choose full-fat coconut milk or coconut cream. Dairy-free creamer can also be used, just watch out for the added sugars!
- Light Brown Sugar: dark brown sugar is a good substitute, but note that it will impart a bolder molasses taste. Coconut sugar also works well.
- Pumpkin puree. Use a 15 oz can of pure pumpkin puree, or make your own from a fresh pie pumpkin (instructions in the recipe card). Can’t find pumpkin? Make this sweet potato pie instead!
- Pumpkin pie spice. Use store-bought or make your own with this homemade pumpkin pie spice recipe!
Pumpkin Pie Making Tools
- I used these Fall Pie Crust Cutters to make the pretty shapes around the crust (and made 1.5x the recipe in order to do so)!
- I have had this Marble Rolling Pin for 10 years and use it all the time!
- A pastry cloth is an absolute must to make transferring the pie into your pie plate a breeze!
- I have used my food processor for so many things over the years I can’t even count. It’s the only way I will make pie crusts because it’s so so easy!
- And obviously a pie plate is a must-have! I love this one as a simple yet elegant, and affordable option!

How to Make Pumpkin Pie
Many people think homemade pies (like apple pie, French Silk Pie and sweet potato pie) are intimidating but they really aren’t!
You absolutely will not regret making this pumpkin pie from scratch. Don’t forget to watch the video for extra help!
Make the Crust
I have an entire tutorial on how to make an all-butter pie crust. It’s the best pie crust ever!
Just be sure to remember that you need to make the crust and chill it in the refrigerator for at least 1 hour before rolling it out. so plan accordingly.

Make the Pumpkin Pie Filling
This pumpkin pie filling is easy to make in one bowl.
Begin by whisking together the pumpkin puree and eggs.
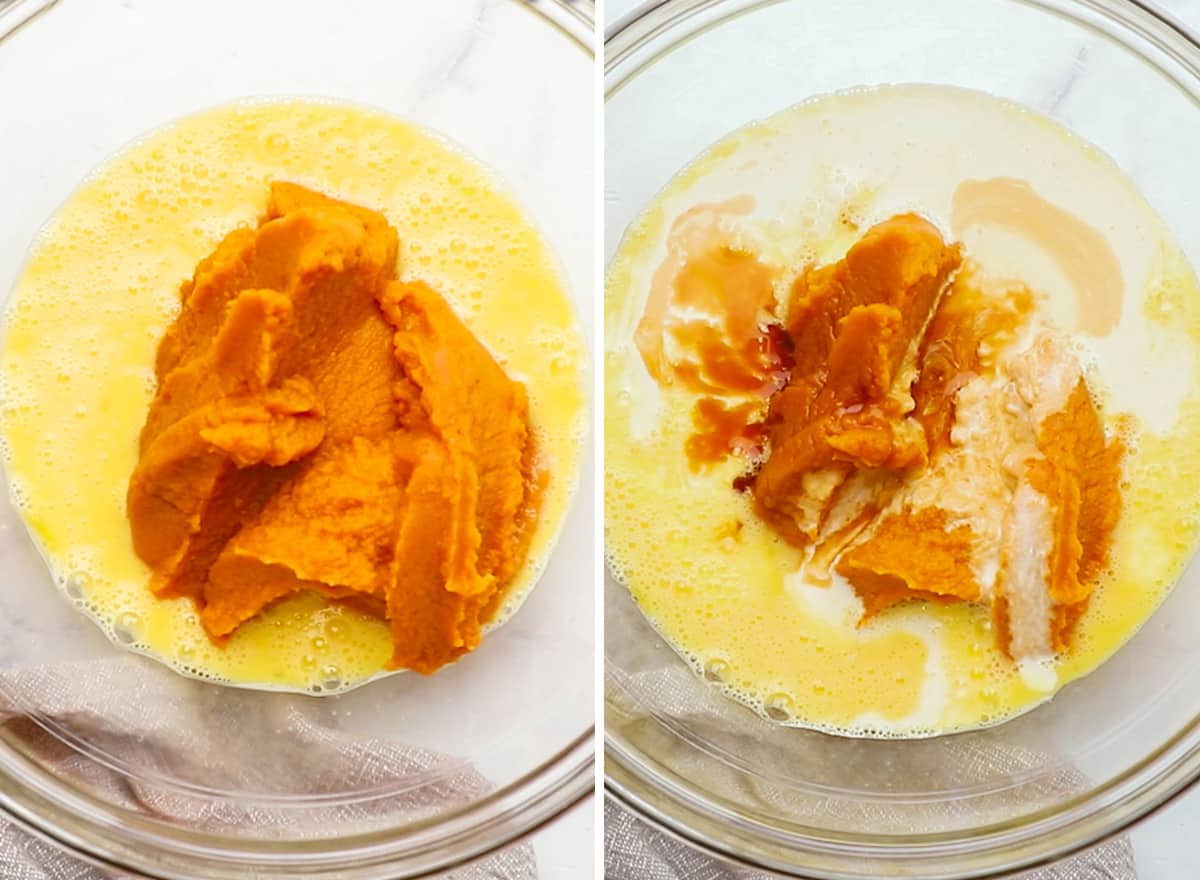
Then, add the rest of the filling ingredients and whisk to combine.
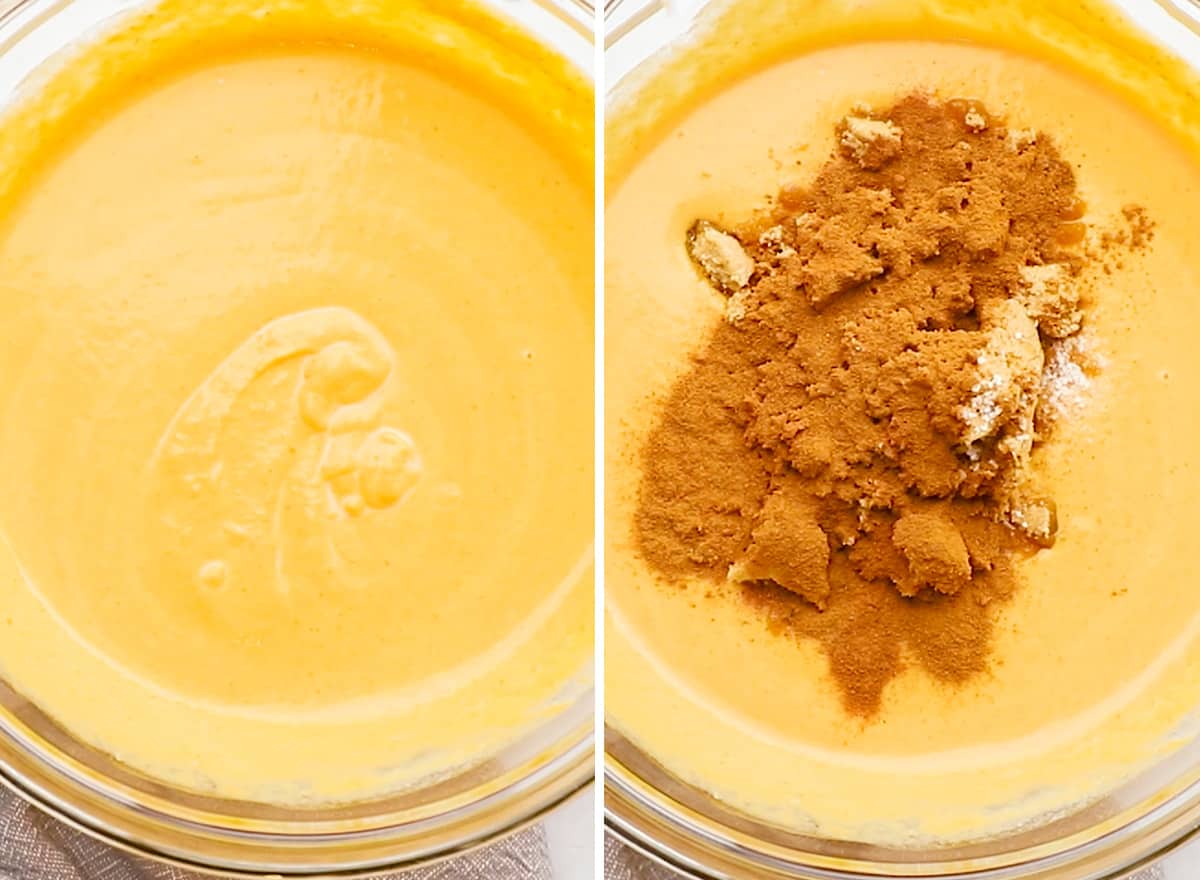
Make sure the filling is silky smooth and there are no lumps before proceeding.

Shape the pie crust
After chilling and rolling, shape the pumpkin pie crust to fit in your favorite pie dish. I like to use these fall pie crust cutters to cut fun shapes into any extra dough! Then bake them in the preheated oven separately from your pie for 5-8 minutes, and decorate the top of the pie once it’s cooled!

Fill the crust
Fill the crust with the pumpkin pie filling quickly. You do not want the crust to get warm before baking!

Bake
Place your pumpkin pie into the oven to bake. I recommend using a pie crust shield or aluminum foil to cover the crust, otherwise it will brown before the filling is done.
Remove the pie crust shield int he last 10 minutes of baking to be sure the crust gets golden-brown! You know the pie is done when:
- The top will be set and slightly puffed.
- It will be set on the edge and have a very slight jiggle in the middle!
- A cake tester inserted in the middle of the pie will come out clean. But a word of warning, I don’t like to do this because it leaves a hole in the center of the pie and might cause it to crack as it cools. You could cover up the hole with a pretty pie crust design, but I’d be careful!

Let it cool
After it’s baked this pie needs to cool for at least 2 hours on a wire rack. You can put it in the fridge (or outside on your cold porch) to speed up the process.
Store in the refrigerator
After it has cooled for 2 hours at room temperature, pumpkin pie needs to be stored in the refrigerator until serving.

To Freeze
This pie freezes very well! There are 2 ways to freeze this recipe:
- Freeze the entire pie. Bake and chill the pie, then wrap it tightly with plastic wrap and foil and freeze for up to 2 months. Thaw in the refrigerator overnight before cutting and serving.
- Freeze individual slices. Place pie slices on a baking sheet and put them in the freezer to flash-freeze them. Then, once they’re frozen, wrap them in plastic wrap and store in an airtight container for up to 2 months. Thaw in the refrigerator for about 6 hours.
Pumpkin Pie Recipe FAQs
Here are some commonly asked questions about making this pumpkin pie recipe!
If your pumpkin pie develops droplets of water on top (or “weeps”) that likely means that it was over baked. It will still taste delicious, just adjust the baking time the next time you make it!
Yes. Since this pumpkin pie recipe is more like a custard, it will continue to bake after it’s removed from the oven. It will also set up as it cools.
Pumpkin pie filling separates from the crust after baking because it shrinks. This happens more dramatically if the pie is over baked, so watch your baking time carefully!
There are a few ways to tell that your pumpkin pie is baked!
The top will be set and slightly puffed.
It will be set on the edge and have a very slight jiggle in the middle!
A cake tester inserted in the middle of the pie will come out clean. But a word of warning, I don’t like to do this because it leaves a hole in the center of the pie and might cause it to crack as it cools. You could cover up the hole with a pretty pie crust design, but I’d be careful!
Try one of our many Pumpkin Recipes like, pumpkin pie or try this dairy-free pumpkin pie, pumpkin smoothie, pumpkin chocolate chip cookies. pumpkin pancakes, pumpkin scones, and pumpkin cinnamon rolls.

If you make and love our recipes, it would mean so much to me if you would leave a comment and rating! And don’t forget to follow along with us on Instagram, Pinterest, Facebook, and Youtube – be sure to tag @joyfoodsunshine and use the hashtag #joyfoodsunshine so we can see your creations!

The Best Pumpkin Pie Recipe
Equipment
Ingredients
Filling:
- 3 large eggs
- 15 ounces pumpkin puree (2 cups)
- 1 cup heavy cream or half & half
- 1 tsp vanilla extract
- ¾ cup light brown sugar
- ½ teaspoon sea salt
- 2 teaspoons ground cinnamon
- 2 teaspoons pumpkin pie spice
Pie Crust:
- 1 ¼ cups all-purpose flour
- ½ teaspoon sea salt
- 1 Tablespoon granulated sugar
- ½ cup salted butter chilled, and cut into 1 inch pieces**
- ¼ cup cold water
Instructions
Make the Pie Crust:
- Place the flour, salt, and sugar in a food processor fitted with an “S” blade and pulse to combine.
- Add the butter and cold water and process until the mixture resembles a coarse meal, begins to stick together, and holds together when pinched.
- Remove dough from processor (will be crumbly) and form into a ball.
- Wrap in plastic wrap and refrigerate for at least 1 hour, or overnight.
Make the filling
- In a large bowl whisk together the egg and pumpkin.
- Then, whisk in the heavy cream, vanilla, brown sugar, salt cinnamon and pumpkin pie mix until the mixture is smooth.
Assemble
- Preheat your oven to 425 degrees F.
- Lightly grease a pie plate and set aside.
- Roll out the pie dough on a well-floured surface (or pastry cloth) to fit the size of your pie plate.
- Carefully transfer the dough to the pie plate and shape the crust as desired (pinch the edges).
- Pour the pumpkin pie filling into the unbaked pie crust and cover the crust with a pastry shield.
Bake, Cool & Serve
- Bake for 15 minutes at 425 degrees F.
- Reduce the temperature to 350 degrees F and continue to bake for 50 to 60 minutes, or until a knife inserted comes out clean. It may be a bit wobbly still, but it will firm-up as it cools.
- Allow the pie to cool on a wire rack for 2 hours. Serve or refrigerate until ready to serve.
Video
Notes
- Pumpkin puree. You can use a 15 oz can of pumpkin puree, or 2 cups of fresh homemade pumpkin puree.
- All-purpose flour: Gluten-free purpose flour can be used in a 1:1 ratio to make this pie! You can also use a store bought crust.
- Heavy Cream. There are many possible substitutions for heavy cream! I have used half & half for a dairy-full variation.
- Brown Sugar: Light or dark brown sugar can be used in this recipe! Coconut sugar is a great refined-sugar free alternative!
- Preheat oven to 450 degrees F
- Cut pumpkins in half and remove the pulp and seeds.
- Place pumpkins facedown in a baking dish, dutch oven or on a sheet pan with edges.
- Pour water into the bottom of the baking dish to cover about 1/4″ of the bottom of the pumpkins.
- Cover, either with a lid (as in a dutch oven) or with aluminum foil.
- Roast for 60 minutes, or until the shell of the pumpkin depresses downward when pushed.
- Let pumpkins cool, then peel the shell off of the pumpkin.
- Blend the pumpkin flesh in a blender or process in a food processor until smooth. Then use in your baking!
- 1 ½ tsp cinnamon
- ½ tsp nutmeg
- ½ tsp cloves
- ½ tsp allspice
Nutrition
Nutrition information is automatically calculated, so should only be used as an approximation.
Made this for thanksgiving and it was a total hit! The only thing is that the pie crust was less flaky than I would have liked…can you share tips on par-baking to help it set just a bit more before the filling is in, please? Thank you!
This is by far the best Pumpkin Pie recipe I have ever tried and I have made many over the years! I made my own pumpkin puree with a Sugar Pie Pumpkin, using 2 cups (only slightly below rim of my measuring cup) as specified in your recipe and then followed the recipe exactly. I used a ceramic pie pan; the crust turned out evenly browned after baking even without pre-baking it. The use of heavy whipped cream and brown sugar instead of the sweetened condensed milk resulted in a much more flavorful pumpkin custard filling. I especially found making the crust using my food processor to be surprisingly easy with great results! Thank you for the delightfully delicious recipe, Laura!
I have made this recipe a couple of years running now…. BUT this year I absolutely nailed it using fresh pumpkin purée. My brother is my biggest critic and he was blown away by the perfect taste and texture. I used your buttery crust recipe and whipped cream to boot and I have never felt more satisfied getting compliments on my Thanksgiving pies 😂 I almost felt guilty taking credit since you are technically the mastermind behind my efforts.
Take ALL the credit! YOU made it and everyone loved it! As far as I’m concerned, it’s your recipe now! 😉 Happy Thanksgiving!
Absolutely fantastic pumpkin pie! Oh my goodness. I made the pie yesterday and followed the recipe to a T. Also made the pie crust as listed. Our family ate it in one sitting. I definitely plan on making another pie from this recipe for sure, I have a lot of leftover pumpkin puree. Anyway, thank you very much for this delicious homemade dessert!
I made the pie yesterday 11/23/23, it was delicious! I did notice that the pie itself was a bit darker in color, but delicious! 5 star for sure. Now, here’s the kicker..I didn’t make my crust, had to settle for store brand, not name brand because name brand crust was gone. The crust was horrible, I was so sad…but not a total loss because I ate the pie itself and was delicious! Thank you!
Amazing pie recipe, my first time making it and it tastes great. My pie, however, is VERY soft once I cut into it. Looks perfectly baked and golden on the outside, but I’m used to pumpkin pies that are pretty firm on the inside. Is this meant to be so soft, or is it a bit undercooked? I did the full 50 mins at 350 degrees. Wondering if it may also be because I used a frozen pie crust and it affected the cook time/temperature.
Did you let it cool/chill completely before serving?
Don’t leave the pie crust overnight, left the pie crust in the fridge overnight as instructed and it is now rock hard and can’t roll it out
You have to let it sit on the counter for 5 minutes before rolling. That is specified in the directions. Don’t worry, you will be able to roll it.
This really is the best pumpkin pie recipe. Way better than the standard one with evaporated milk. I added 1 tsp of cardamom. Cardamom is so under used and underrated in fall baking. It brightens the flavor just a little, not that is isn’t good without it. But it is even better with it. I love cardamom!